Raspberry pie camera debugging
Cable connection
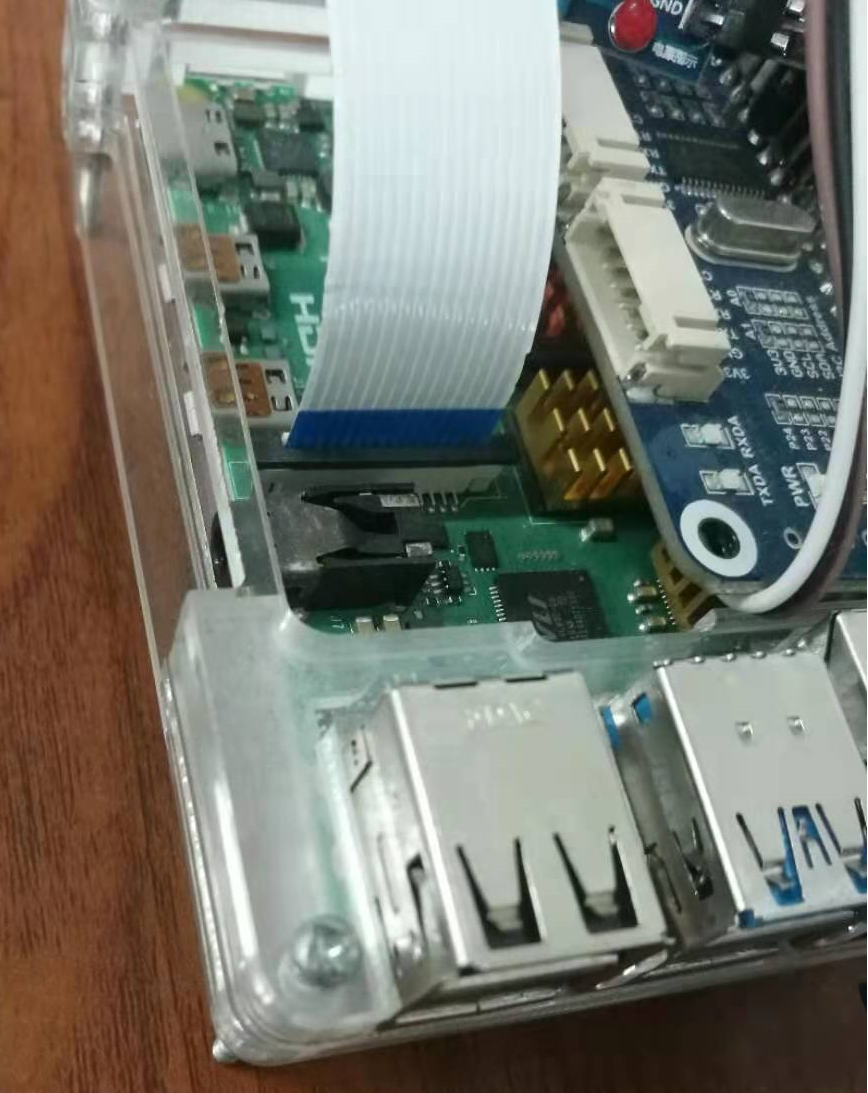
When connecting the hardware, we first need to use the raspberry pie camera FFC cable to connect the raspberry pie camera with the raspberry pie development board. The interface connected by the cable is called CSI (Camera Serial Interface).
The CSI interface of raspberry pie development board is located next to USB and Ethernet interfaces. We first unplug the black baffle of the CSI interface, then insert the blue end of the cable in the direction of the Ethernet interface, and then press the black baffle to fix it.
Connect one end of the camera in the same way, and the blue end of the cable shall keep the same direction with the back of the camera; Be sure to keep the power off when wiring.
Camera permission activation
Update the raspberry pie first:
sudo apt-get update
sudo apt-get upgrade
To modify a profile:
sudo vim /etc/modules

...
bcm2835-v4l2
....
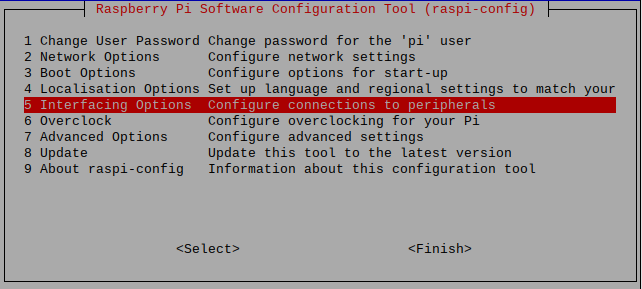
Enter the command to open the configuration interface of raspberry Pie:
sudo raspi-config
Find the camera option and turn on the camera function of raspberry pie.
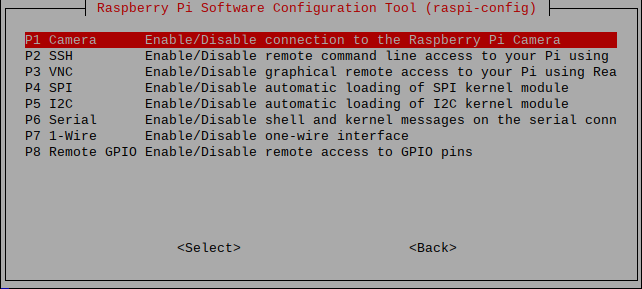
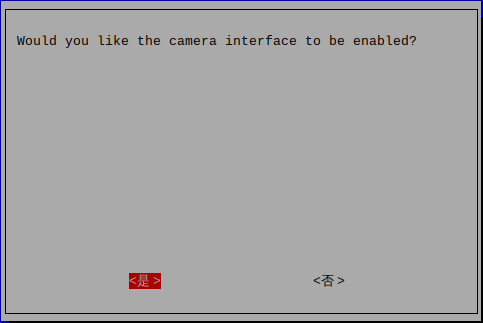
After opening, restart the raspberry pie with the reboot command.
Execute the command to check whether the camera is connected. detected=0 indicates that the camera is not connected successfully. Check whether the cable is laid first or the camera is normal:
vcgencmd get_camera

...
supported=1 detected=1
...
Test camera function
Execute the command, wait a few seconds, and then save a picture to the current directory:
raspistill -o new.jpg
Get h264 file:
raspivid -o mykeychain.h264 -t 10000 -w 1280 -h 720
In case of the following abnormalities, please check according to the activation process and check whether the cable or camera is normal:
mmal mmal_vc_component_create failed to create component 'vc ril camera' (1:ENOMEM)
mmal mmal_component_create_core could not create component 'vc ril camera' (1) mmal Failed to create camera component
mmal main Failed to create camera component
mmal Camera is not detected. Please check carefully the camera module is installed correctly
Raspberry pie native stream
Execute the instruction to push the stream data to the http stream:
sudo raspivid -o - -rot 180 -t 0 -w 640 -h 480 -fps 30|cvlc -vvv stream:///dev/stdin --sout '#standard{access=http,mux=ts,dst=:8090}' :demux=h264
- -rot: rotate the image 180 (I added this, and I'll see if I add it);
- -t: Delay
- -w: Output video width
- -h: Output video height
- -fps: output video frames
- access: http protocol transmission
- dst: target port (output port)
- demux: encoding format
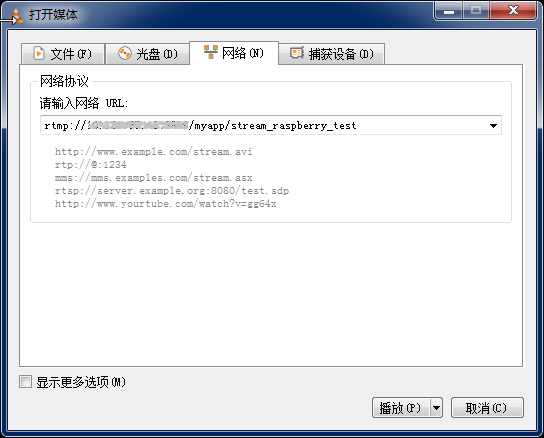
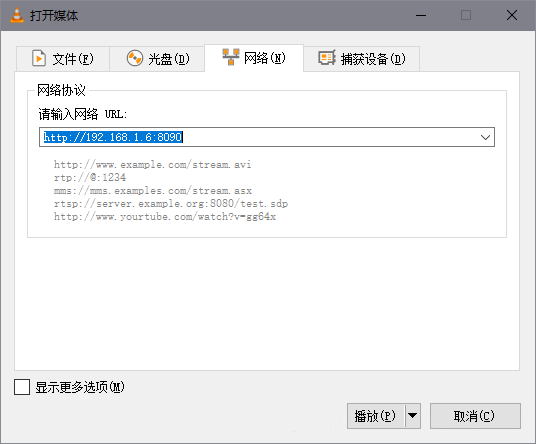
Open network streaming with vlc
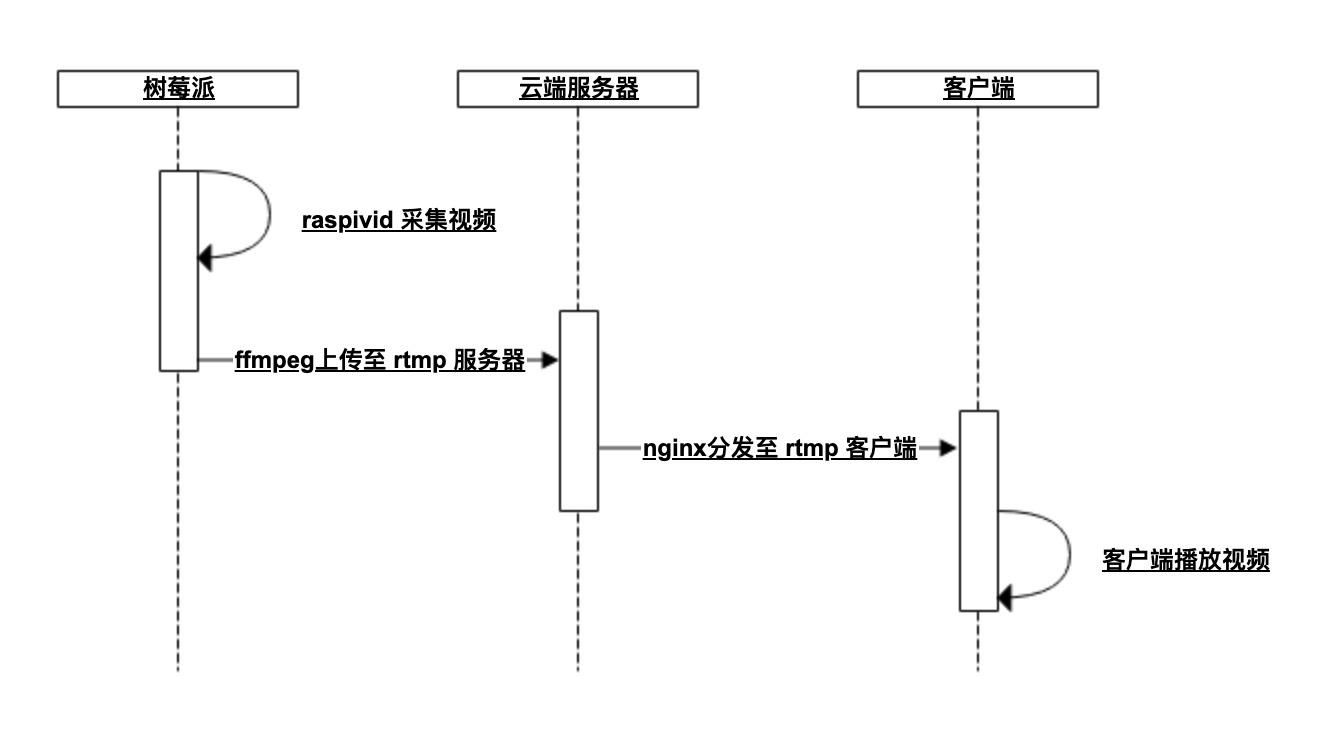
ffmpeg push rtmp stream
The process is to convert the video data collected by raspberry pie into rtmp stream data through ffmpeg and push it to nginx rtmp server.
Install ffmpeg
Execute the following commands in sequence (the specific download directory and installation directory are modified according to their actual needs, and sudo make takes a long time):
cd <Your software download directory>
sudo apt-get update
sudo apt-get install libx264-dev

wget http://ffmpeg.org/releases/ffmpeg-4.1.tar.bz2
sudo tar jxvf ffmpeg-4.1.tar.bz2

cd ffmpeg-4.1/

sudo ./configure --prefix=/opt/ffmpeg --enable-shared --enable-pthreads --enable-gpl  --enable-avresample --enable-libx264 --disable-yasm
sudo make
sudo install
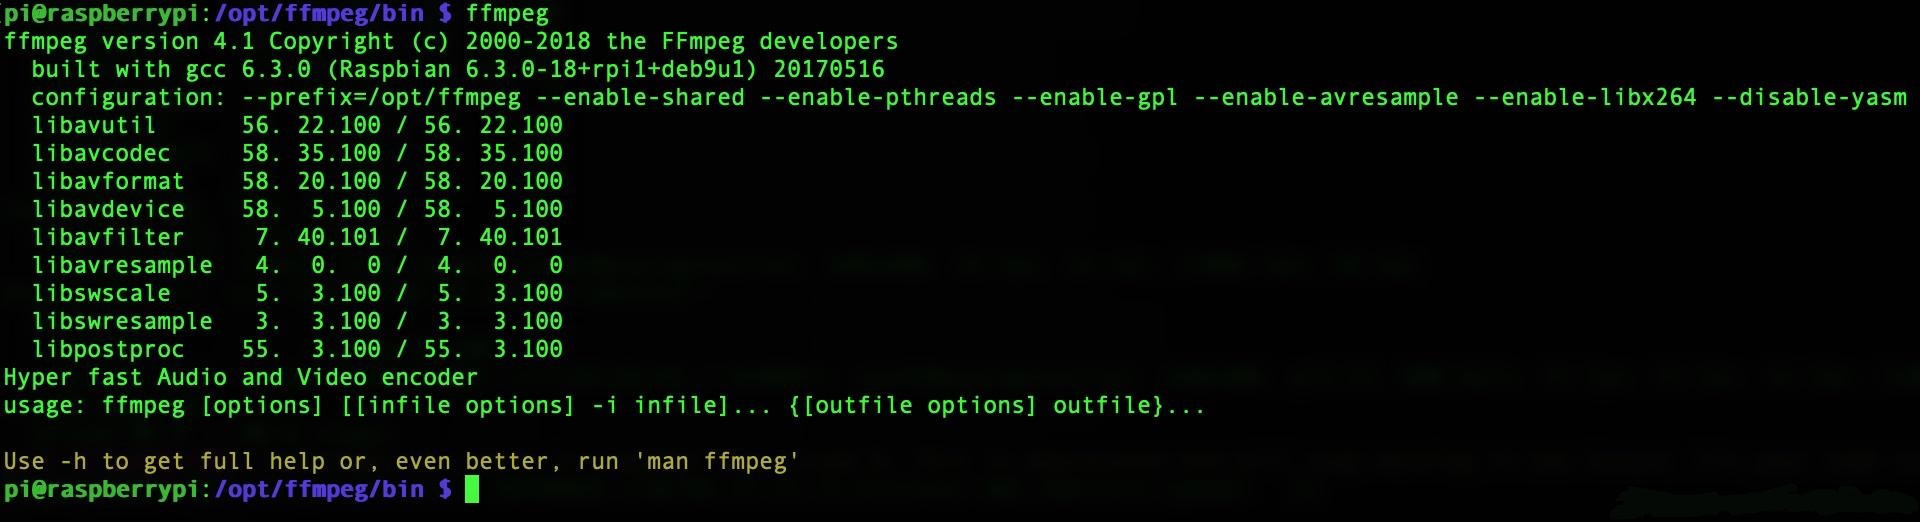
After the final completion, execute the ffmpeg command, and the following prompt will appear:
Exception resolution
-
Problem 1: execute ffmpeg and report that the command is invalid
Solution: copy the / opt/ffmpeg/bin/ffmpeg file in the installation directory to / usr/bin. See for the actual installation directory/ configure -- prefix configuration item
-
Problem 2: error: ffmpeg: error while loading shared libraries: libavdevice so. 58: cannot open shared object file: No such file or directory
terms of settlement:
sudo vim ~/.bashrc
Copy and paste the contents of MPEG to the following ffu#
export FFMPEG_HOME=/opt/ffmpeg
export PATH=$FFMPEG_HOME/bin:$PATH
export 	LD_LIBRARY_PATH=$LD_LIBRARY_PATH:$FFMPEG_HOME/lib:/usr/local/lib
Then execute the command:
source ~/.bashrc
Raspberry pie streaming to rtmp server
Execute the following instructions to push the stream data to the rtmp server:
raspivid -w 640 -h 480 -b 15000000 -t 0 -a 12 -a 1024 -a "CAM-1 %Y-%m-%d %X" -ae 18,0xff,0x808000 -o - | ffmpeg -re -i - -s 640x480 -vcodec copy -acodec copy -b:v 800k -b:a 32k -f flv rtmp://< public IP address of your own ECS > / videotest
Open network streaming with vlc