In this issue, we will review the state and life cycle. This section mainly focuses on the state and life cycle of class components. The implementation of hook functions will be studied in hooks.
Through the study of this chapter, you should be able to learn:
- How to set status
- How to this Setstate() update state
- Several common life cycle methods
Previously reviewed contents include:
Learning case download address:
[React basic series] status & status update & life cycle method - Case
state
State can be used to store variables that control data changes in components. For example, values in forms can be stored in state for management. Take the common form logic in business as an example, the input values in the form are very suitable to be managed in the state.
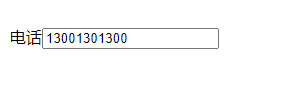
The following simulates a component with a telephone number of 1301300:
class Input extends Component {
  state = {
    input: '13001301300',
  };

  render() {
    return (
      <div>
        <label>{this.props.label}</label>
        <input type="text" value={this.state.input} />
      </div>
    );
  }
}

ReactDOM.render(
  <div className="inputs">
    <Input label="Telephone" />
  </div>,
  document.getElementById('root')
);
The rendering of the page looks like this:
Review the relevant knowledge of props, this props. The value of label comes from the label in < input label = "phone" / > and is a parameter passed from the parent component to the child component during call. The value is immutable.
Now the most basic form component has been written, but in this case, because the corresponding event listening function is not implemented, the value in state cannot be changed:
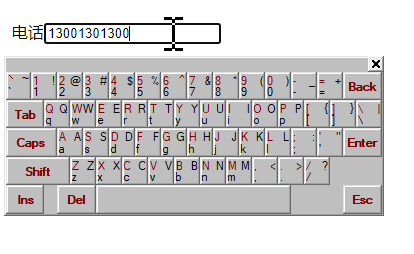
At the same time, the following error messages will appear when you open the browser console, prompting you to either add event management, change the value in input to defaultValue, or set the value to read-only attribute:

Next, you can modify the state by adding events, and then briefly talk about the life cycle mechanism.
Status update - onChange
Here, the status will be updated by binding the time. The implementation of updating the status is through the built-in function of React: this Setstate(). Here is just a simple call to the event, and more complex contents will be pulled out separately.
The implementation of event mechanism is as follows:
class Input extends Component {
  // The state part remains unchanged

  // Add event handler
  updateInputHandler = (e) => {
    this.setState({
      input: e.target.value,
    });
  };

  // Update render, mainly adding onChange to input
  render() {
    return (
      <div>
        <label>{this.props.label}</label>
        <input
          type="text"
          value={this.state.input}
          // New code
          onChange={(e) => this.updateInputHandler(e)}
        />
      </div>
    );
  }
}
The status can be updated after the handler is implemented:

Onchange = {(E) = > this. Updateinputhandler (E)} takes advantage of the shortness of the arrow function and does not override the point pointed by this. At the same time, the event object is passed into the function, and there will be no immediate execution problem.
After the status update is implemented, you can contact a lifecycle method related to status update - componentDidUpdate.
Note *: the design concept of React is that the state is immutable, so all state changes, including capturing state changes, are made through this Setstate to achieve. If you modify the state directly, it will not trigger calls to other lifecycle functions, including render. If render is not called, the page will not be re rendered.
Life cycle approach
The life cycle methods listed below are relatively frequently used life cycle functions. In addition, you cannot use arrow functions for calls to lifecycle functions.
constructor
That is, constructor, which is usually used to initialize state and trigger some side effects (call other functions). If you do not need to trigger side effects in the constructor and only need to initialize the state, you can also implement it directly through the declared method, such as:
state = {
  input: '13001301300',
};
The above code is implemented in the constructor as follows:
class Input extends Component {
  // The props parameter must be passed in
  constructor(props) {
    // You must also call super(props)
    super(props);
    this.state = { input: '13001301300' };
  }
}
Note: super(props) is not called; An error will be reported:

render
render is also a lifecycle function, which is responsible for rendering the entire page.
The page is hung in the process, and after calling constructor to initialize the state, it will call render to render the page.
componentDidUpdate
When the function update is a call, the previous props, state and snapshot can be displayed through the parameters, and the current props and state can also be obtained through the this keyword.
This function is often used to trigger side effects. For example, when the status is changed from never logged in to logged in, you can call other API s in componentDidUpdate: such as obtaining user information, obtaining information that can only be accessed by logged in users, etc.
Here, the usage of componentDidUpdate is shown in the command line output. The code is as follows:
class Input extends Component {
  componentDidUpdate(prevProps, prevState, snapshot) {
    console.log('prevProps', prevProps, 'curr props', this.props);
    console.log('prevState', prevState, 'curr state', this.state);
  }
}
The triggering effect is as follows:
You can see that the values of prevProps and curr props are the same, but after each value change, the values of prevState and curr state are different. This difference is caused by the state update. The value of prevState is the state before the update, and curr state is the state after the update.
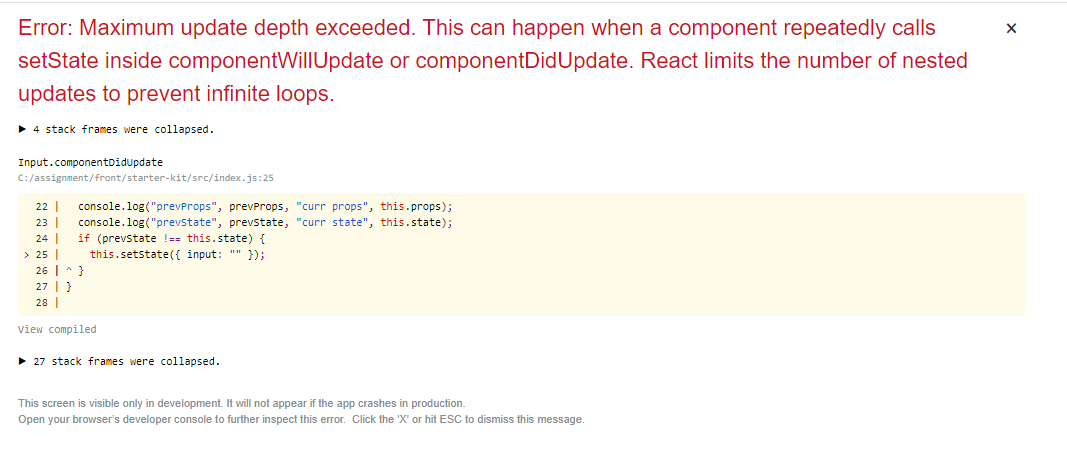
In componentDidUpdate, you can also call this Setstate() to trigger other state changes, but it should be noted that you must pay attention to judgment when triggering state changes in componentDidUpdate, otherwise infinite updates may occur, resulting in program crash, such as:
class Input extends Component {
  componentDidUpdate(prevProps, prevState, snapshot) {
    console.log('prevProps', prevProps, 'curr props', this.props);
    console.log('prevState', prevState, 'curr state', this.state);
    // Each state update will form a new object, so prevState and this State never wants to wait
    if (prevState !== this.state) {
      this.setState({ input: '' });
    }
  }
}
This will lead to the problem of unlimited updates:
componentDidMount
componentDidMount is a frequently used function. It will be called immediately after the page is mounted. It can trigger side effects in the componentDidMount function, that is, call the API to update the status.
Here we call setTimeout in componentDidMount to simulate the delayed state of API calls, and then update the state in setTimeout.
class Input extends Component {
  componentDidMount() {
    setTimeout(() => {
      this.setState({
        input: '1357924680',
      });
    }, 3000);
  }
}
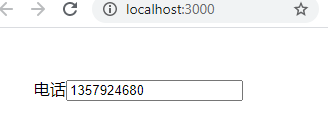
After the page is rendered (here, the page is refreshed, simulating the situation of just opening the page), componentDidMount will be called immediately, and then the phone number will change from 13001301300 to 1357924680 in about 3 seconds.
summary
This chapter mainly talks about how to initialize and update the state in different situations. At the same time, it briefly talks about several common life cycle methods and the use scenarios of life cycle methods.
By completing this part of the study, you can already realize simple business functions.