All Tips are my notes in OneNote. The copied ones are pictures. I'm too lazy to turn to text
Chapter 5: React routing
1, Relevant understanding
1.1 understanding of Spa
- single page web application (SPA)
- The whole application has only one complete page
- Clicking the link in the page will not refresh the page, but only make a partial update of the page
- All data needs to be obtained through ajax requests and presented asynchronously at the front end
- Single page, multi-component
1.2 understanding of routing
- What is routing?
(1) A route is a mapping relationship (key:value)
(2) key is the path, and value may be function or component - Routing classification
(1) Back end routing
a. Understanding: value is a function used to process requests submitted by clients
b. Registered route: router get(path, function(req, res))
c. Working process: when a node receives a request, it finds a matching route according to the request path, calls the functions in the route to process the request and return the response data
(2) Front end routing
a. Browser side routing. value is the component, which is used to display the page content
b. Register route: < route path = "/ test" component = {test} >
c. Working process: when the path of the browser changes to / Test, the current routing component will change to Test component
Tips: Routing
- Click the navigation bar to display the corresponding components after path change is detected by route monitoring
- The change of route monitoring path is the browser history, which is a stack structure
- In addition to push ing into the stack, you can also replace the history through replace
- The front-end routing is realized through the history on the BOM
1.3 understanding of react router DOM
- A plug-in library of react
- Designed to implement a SPA application
- react based projects will basically use this library
2, React router DOM related API s
2.1 built in components
- <BrowserRouter>
- <HashRouter>
- <Route>
- <Redirect>
- <Link>
- <NavLink>
- <Switch>
2.2 others
- history object
- match object
- withRouter function
3, Basic routing usage
3.1 preparation
- Download react router DOM: NPM install -- save react router DOM
- Introduce bootstrap css: <link rel="stylesheet" href="/css/bootstrap.css">
3.2 for example
import React, { Component } from 'react'
import {Link,Route} from 'react-router-dom'
import Home from './components/Home'
import About from './components/About'

export default class App extends Component {
	render() {
		return (
			<div>
				<div className="row">
					<div className="col-xs-offset-2 col-xs-8">
						<div className="page-header"><h2>React Router Demo</h2></div>
					</div>
				</div>
				<div className="row">
					<div className="col-xs-2 col-xs-offset-2">
						<div className="list-group">

							{/* In native html, jump to different pages by < a > */}
							{/* <a className="list-group-item" href="./about.html">About</a>
							<a className="list-group-item active" href="./home.html">Home</a> */}
							{/* Switch components by routing links in React -- write routing links */}
							<Link className="list-group-item" to="/about">About</Link>
							<Link className="list-group-item" to="/home">Home</Link>
						</div>
					</div>
					<div className="col-xs-6">
						<div className="panel">
							<div className="panel-body">
								{/* Register routing */}
								<Route path="/about" component={About}/>
								<Route path="/home" component={Home}/>
							</div>
						</div>
					</div>
				</div>
			</div>
		)
	}
}
3.3 summary
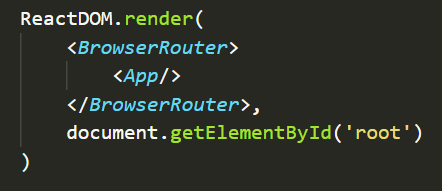
- Pay attention to the writing method. Wrap the App component with BrowserRouter to form a router and send requests in the same router
- Make clear the navigation area and display area in the interface
- The a tag in the navigation area is changed to the Link tag (the Link tag is compiled and converted into a tag, and some routing codes are added)
<Link to="/xxxxx">Demo</Link> - Write the Route label in the display area for path matching
<Route path='/xxxx' component={Demo}/>
The outermost side of < app > is wrapped with a < browserouter > or < hashrouter >
4, Routing components and general components
- Different writing methods:
General components: < demo / >
Routing component: < route path = "/ demo" component = {demo} / > - Different storage locations:
General components: components
Routing component: pages - Different props received:
General components: when writing component labels, you can receive what is passed
Routing component: received three fixed attributes- history:
go: ƒ go(n)
goBack: ƒ goBack()
goForward: ƒ goForward()
push: ƒ push(path, state)
replace: ƒ replace(path, state) - location:
pathname: "/about"
search: ""
state: undefined - match:
params: {}
path: "/about"
url: "/about"
- history:
5, Use of NavLink
5.1 use
<NavLink activeClassName="atguigu" className="list-group-item" to="/about">About</NavLink>
<NavLink activeClassName="atguigu" className="list-group-item" to="/home">Home</NavLink>
5.2 packaging
The package code is as follows:
import React, { Component } from 'react'
import {NavLink} from 'react-router-dom'

export default class MyNavLink extends Component {
	render() {
		// console.log(this.props);
		return (
			<NavLink activeClassName="atguigu" className="list-group-item" {...this.props}/>
		)
	}
}
The calling code is as follows:
<MyNavLink to="/about">About</MyNavLink>
<MyNavLink to="/home">Home</MyNavLink>
Print this Props, the results are as follows:

"About" is the content of the label body, and the key in props is children
So you can use... This Props passes all tag values
5.3 summary
- NavLink can highlight routing links and specify the style name through activeClassName
- Tag body content is a special attribute tag
- Through this props. Children can get the label body content
- Changing to NavLink will automatically activate the bootstrap style. The selected area will be highlighted, which may conflict with the style you set later
- You can add after the custom style! important, set the level of the style to the highest
6, Use of switches
{/* Register routing */}
<Switch>
	<Route path="/about" component={About}/>
	<Route path="/home" component={Home}/>
	<Route path="/home" component={Test}/>
</Switch>
- Usually, path and component are one-to-one correspondence
- When registering more than one route, use the Switch under the outer packet to stop matching when the route is matched to the corresponding route, so as to improve efficiency
7, Solve the problem that the page style of multi-level path refresh is lost
-
Causes of problems
localhost:3000 is the built-in server of react scaffold
Enabled by devServer in webpack
The bottom layer of devServer is express
public is the root path of the built-in server
If you request a path that does not exist
Then the index. In the root path will be returned html
When the routing path is a multi-level form
For example, / ccnu/home
The bootstrap style is lost on refresh -
solve the problem
- public/index. Do not write when introducing styles into HTML/ Write / (common)
- public/index. Do not write when introducing styles into HTML/ Write% PUBLIC_URL% (common)
- Using HashRouter
8, Strict matching and fuzzy matching of routing
Fuzzy matching:
// home a b matches home
<MyNavLink to="/home/a/b">Home</MyNavLink>
<Route path="/home" component={Home}/>

// a home b cannot match home
<MyNavLink to="/a/home/b">Home</MyNavLink>
<Route path="/home" component={Home}/>
Strict match:
<MyNavLink to="/home/a/b">Home</MyNavLink>
<Route exact path="/home" component={Home}/>
Summary:
- Fuzzy matching is used by default (simply remember: the [entered path] must contain the [paths to be matched] in the same order)
- Enable strict matching: < route exact = {true} path = "/ about" component = {about} / >
- Strict matching should not be started casually. It needs to be started again. Sometimes, it will make it impossible to continue matching secondary routes
9, Use of Redirect
- It is usually written at the bottom of all route registrations. When all routes cannot be matched, jump to the route specified by Redirect
- Specific code:
<Switch>
	<Route path="/about" component={About}/>
	<Route path="/home" component={Home}/>
	<Redirect to="/about"/>
</Switch>
10, Use of nested routes
- When registering a child route, write the path value of the parent route
- Route matching is performed in the order of registering routes
11, Pass parameter data to routing component
Go in three steps
- Transfer parameters
- Declare receive parameters
- Receive parameters
- params parameter
Routing link (with parameters): < link to = '/ demo / test / Tom / 18'} > details < / link >
Register route (claim receipt): < route path = "/ demo / test /: name /: age" component = {test} / >
Receiving parameter: this props. match. params - search parameter
Routing link (with parameters): < link to = '/ demo / test? Name = Tom & age = 18 '} > details < / link >
Register route (you can register normally without declaration): < route path = "/ demo / test" component = {test} / >
Receiving parameter: this props. location. search
Note: the obtained search is a urlencoded encoded string, which needs to be parsed with the help of querystring - state parameter
Routing link (with parameters): < link to = {{pathname: '/ demo / test', state: {Name: 'Tom', age: 18}} > details < / link >
Register route (you can register normally without declaration): < route path = "/ demo / test" component = {test} / >
Receiving parameter: this props. location. state
Note: refresh can also retain parameters
12, push and replace
In terms of routing principle, the default route switching operation is a stack pressing push operation, which operates the history
Therefore, if we click message 1, message 2 and message 3 in turn, and then click back, we will return to message 2 and message 1 in turn
If the replace mode is enabled in the routing link, the operation on the history record will change from pressing the stack to replacing, and will not fall back to message 2 and message 1
use:
<MyNavLink replace to="/about">About</MyNavLink>
13, Programmed route navigation
With this prosp. The API on the history object controls the operation route jump, forward and backward
(1)this.prosp.history.push()
(2)this.prosp.history.replace()
(3)this.prosp.history.goBack()
(4)this.prosp.history.goForward()
(5)this.prosp.history.go()
push and replace methods can be called to change the view mode when passing the route view mode. The specific path is written in three ways
(params, search, state), one-to-one correspondence
The goBack and goForward methods mean forward and backward
The go method should carry parameters, such as 1, 2, and - 1, which respectively represent one step forward, two steps forward, and one step backward
14, Use of withRouter
- function
Receive the general component and add three props parameters unique to the routing component, namely history, match and locaton - Writing method
import React, { Component } from 'react'
import {withRouter} from 'react-router-dom'
class Header extends Component {
back = ()=>{
this.props.history.goBack()
}
forward = ()=>{
this.props.history.goForward()
}
go = ()=>{
this.props.history.go(-2)
}
render() {
console.log('Header Received by component props yes',this.props);
return (
<div className="page-header">
<h2>React Router Demo</h2>
<button onClick={this.back}>Back off</button>
<button onClick={this.forward}>forward</button>
<button onClick={this.go}>go</button>
</div>
)
}
}
//withRouter can process general components and insert code chips here. General components have the API unique to routing components
//The return value of withRouter is a new component
export default withRouter(Header)
15, Difference between BrowserRouter and HashRouter
- The underlying principle is different:
(1) BrowserRouter uses the history API of H5 and is not compatible with IE9 and below
(2) HashRouter uses the hash value of the URL - path takes different forms
(1) There is no #, such as localhost:3000/demo/test, in the path of BrowserRouter
(2) The path of HashRouter contains #, for example: localhost:3000/#/demo/test - Impact on route state parameters after refresh
(1) BrowserRouter has no effect because the state is saved in the history object.
(2) HashRouter (history API is not borrowed, so there is no place to save the state parameter). After refreshing, the route state parameter will be lost!!! - Note: HashRouter can be used to solve some problems related to path errors.
Chapter 6: React UI component library
1, Popular open source React UI component library
1.1 material UI (abroad)
- Official website: material-ui
- github: material-ui
1.2 Ant Design
2, On demand introduction of antd + custom theme
- Installation dependency: yarn add react app rewired customize CRA Babel plugin import less loader
- Modify package json
....
	"scripts": {
		 	"start": "react-app-rewired start",
			"build": "react-app-rewired build",
			"test": "react-app-rewired test",
			"eject": "react-scripts eject"
	},
....
- Create config overrides under the root directory js
//Configure specific modification rules
const { override, fixBabelImports,addLessLoader} = require('customize-cra');
	module.exports = override(
		fixBabelImports('import', {
				libraryName: 'antd',
			    libraryDirectory: 'es',
				style: true,
		}),
		addLessLoader({
			lessOptions:{
				javascriptEnabled: true,
				modifyVars: { '@primary-color': 'green' },
			}
		}),
	);
- Note: there is no need to introduce styles in the component, that is, import 'antd / dist / antd CSS' should be deleted
Tips
- After importing, you can query the code on the official website
- Similarly, there are elementUI (mainly used for Vue) and vant (mainly used for mobile terminal)
- It is applicable to some mature background management systems (the style is relatively fixed)
- Import on demand: you can import any style you want, and you don't need to import antd CSS. See the official document for the specific configuration
- Custom themes: changing default styles as needed
Summary of React series:
Summary of React learning (I)
Summary of React learning (2)
React learning summary (III)