Recently, many netizens have asked RN how to integrate Baidu Map. I used react-native-baidu-map in both previous projects. I feel that the steps are slightly complicated. If there is a slight omission in one step, it is easy to make a mistake. Next, I will build a new project from scratch and record the process of my installation step by step. I hope I can help you.~
react-native-baidu-map github address
1. Create a new RN project: (BaiDuMapTest)
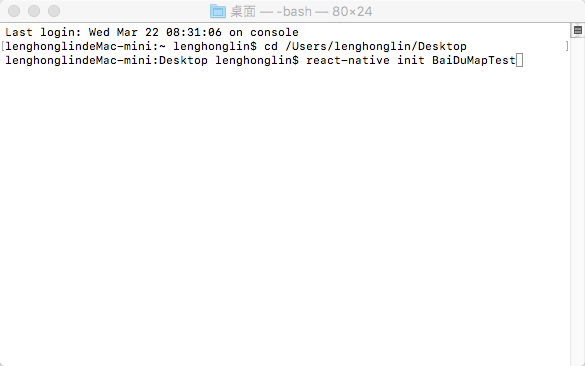
The following interface appears to indicate that the new project has succeeded

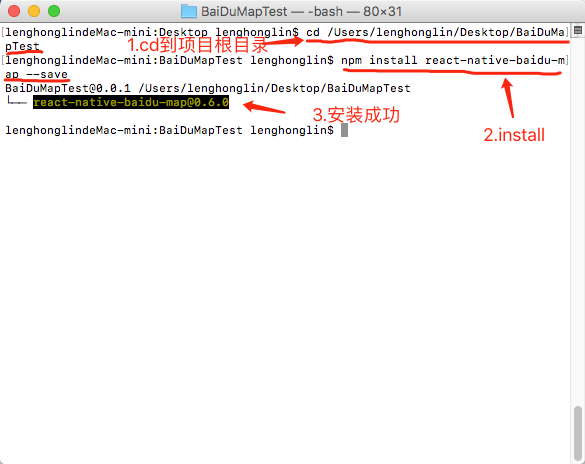
2. Install react-native-baidu-map (Note: Be sure to install it in the project root directory):
In the terminal input:
npm install react-native-baidu-map --save
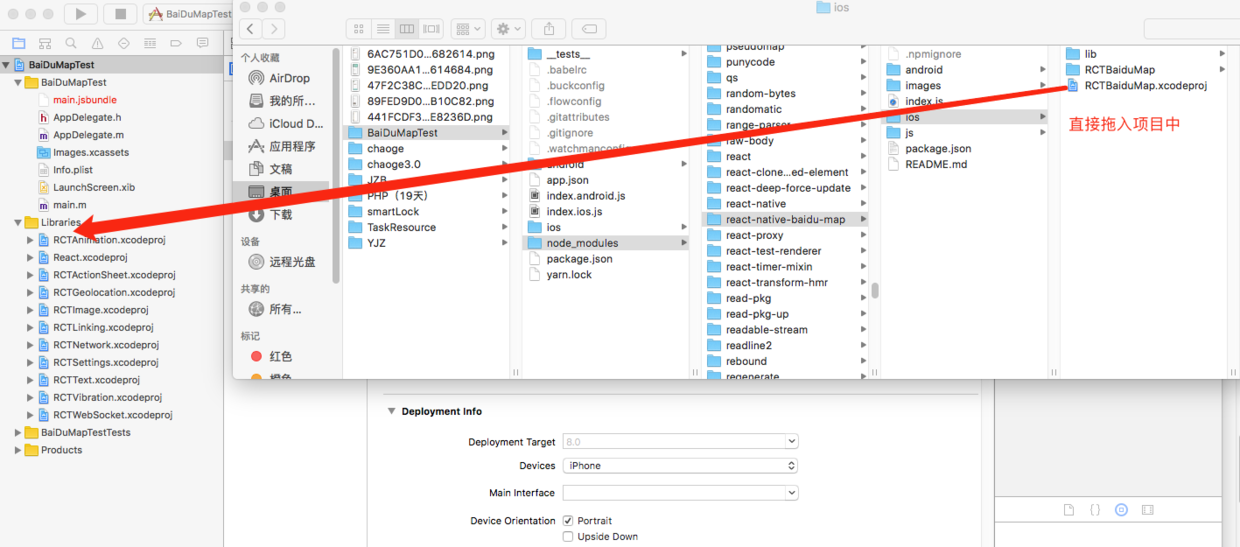
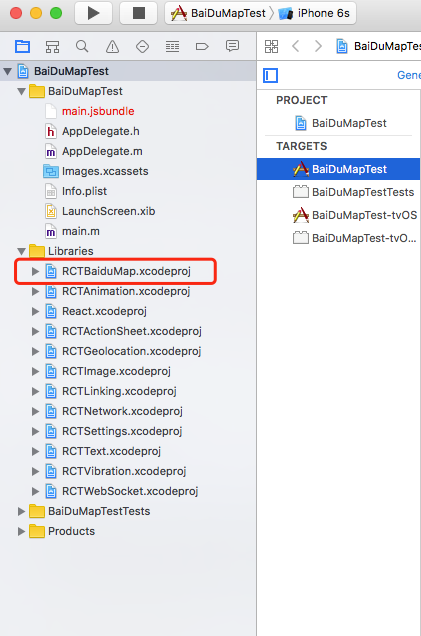
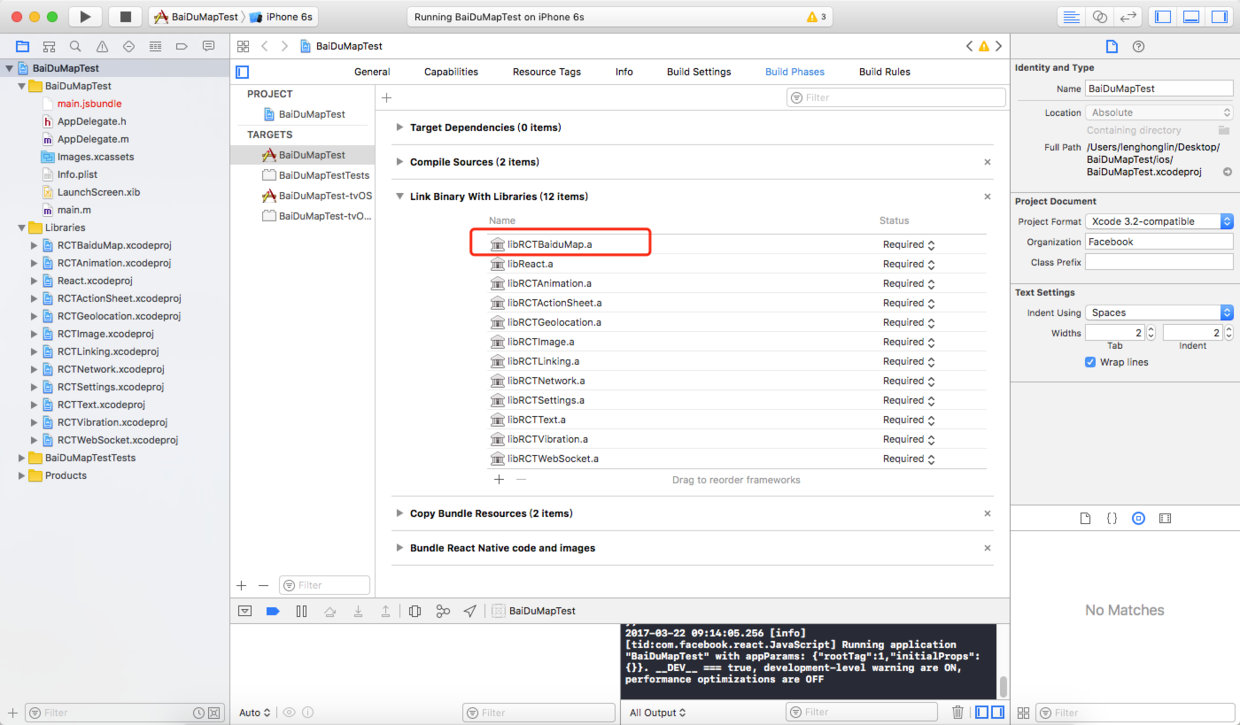
3.Xcode configuration:
Build Phases - > Link Binary With Libraries join libRCT BaiduMap.a
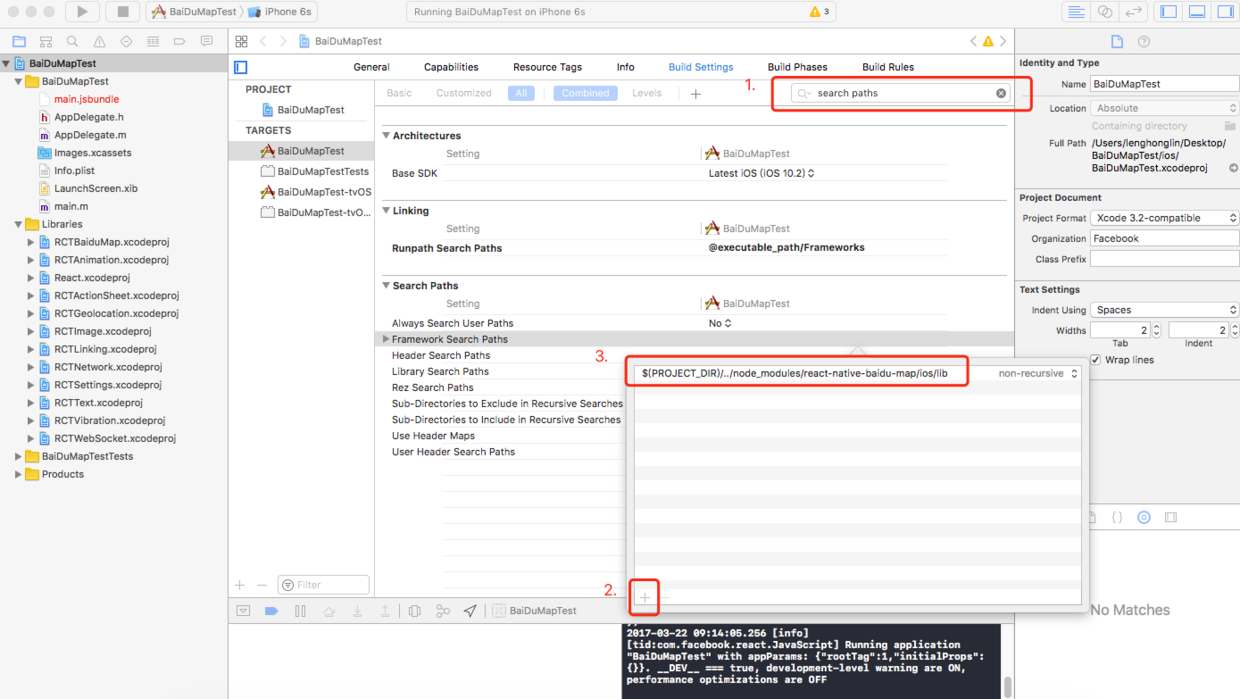
Build Settings - > Search Paths, Framework search paths add $(PROJECT_DIR)/. / node_modules/react-native-baidu-map/ios/lib, Header search paths add $(SRCROOT)/. / node_modules/react-native-baidu-map/ios/RCTduMap

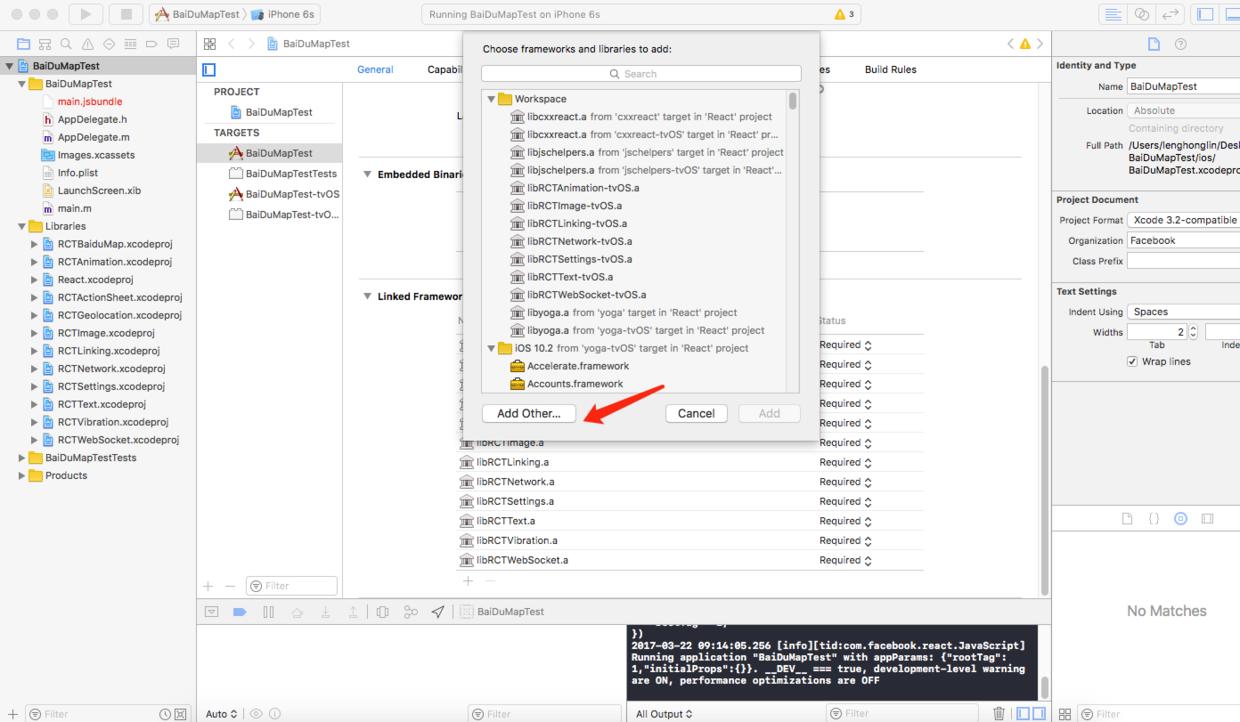
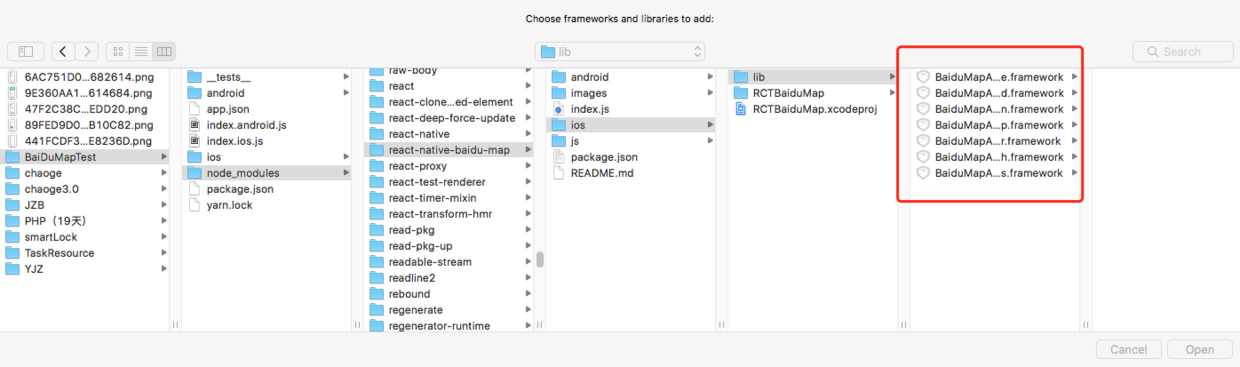
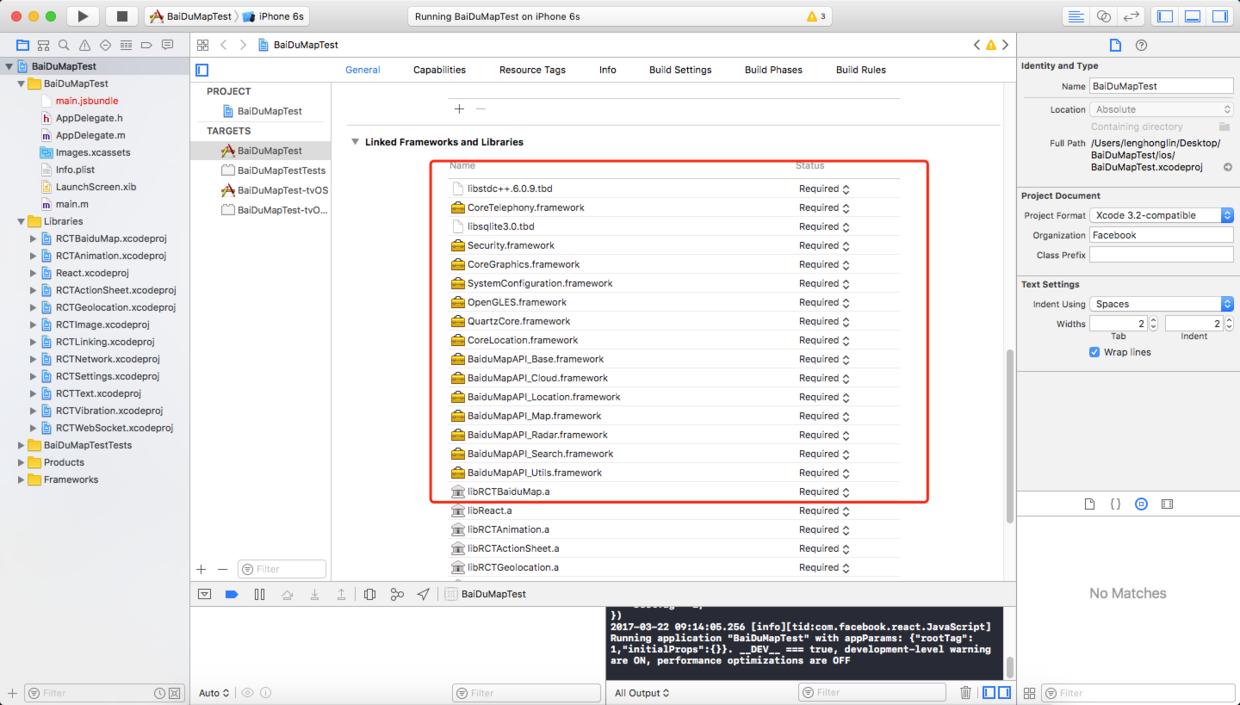
Adding dependencies, all framwordk under react-native-baidu-map/ios/lib:
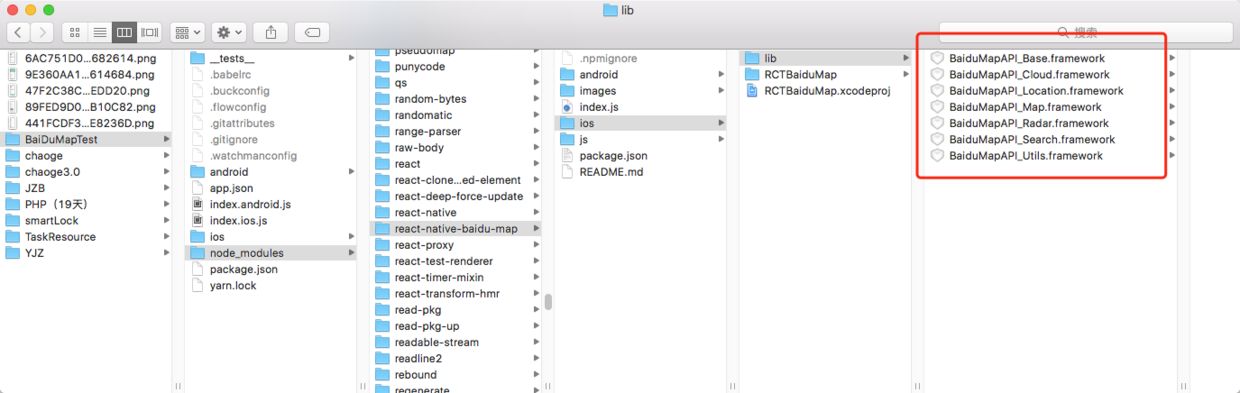
Method:
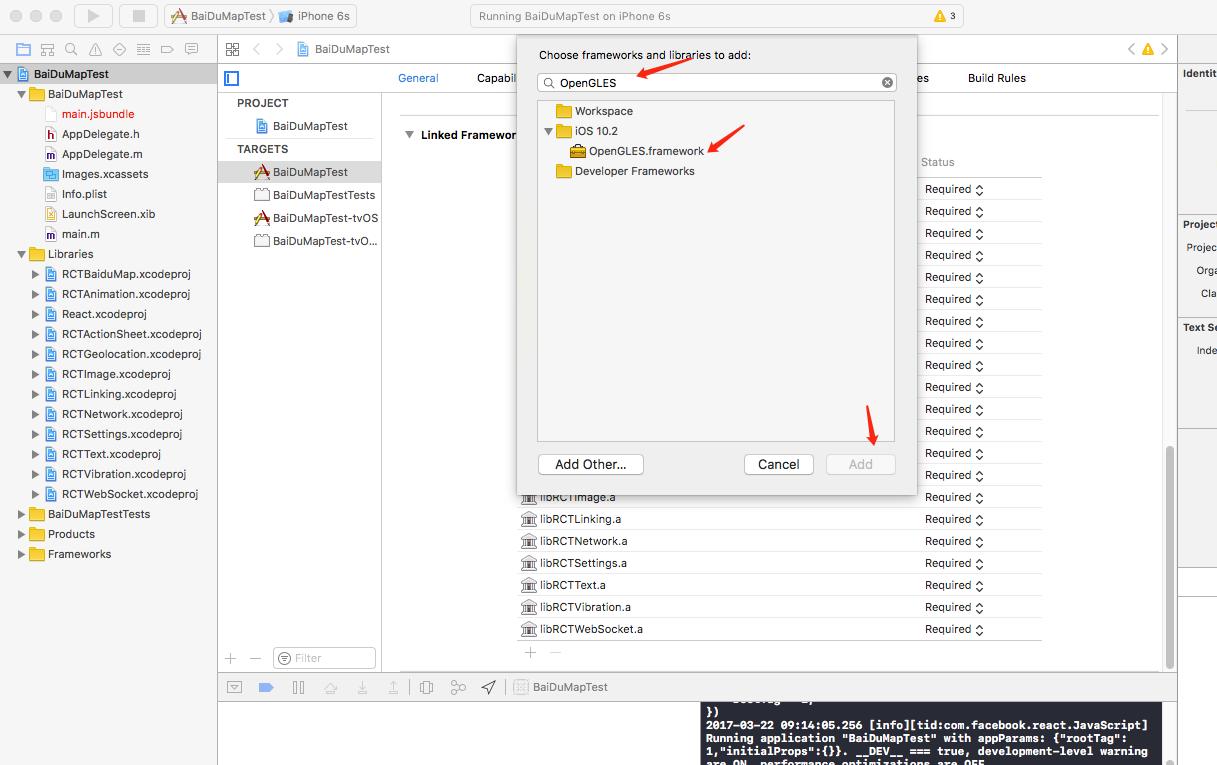
Then continue adding: CoreLocation.framework and Quartz Core. framework, OpenGLES.framework, SystemConfiguration.framework, CoreGraphics.framework, Security.framework, libsqlite3.0.tbd (libsqlite3.0.dylib before Xcode 7), CoreTelephony.framework, libstdc+.6.0.9.tbd (libstdc+.9.tbd before Xcode 7).+ + 6.0.9. dylib)
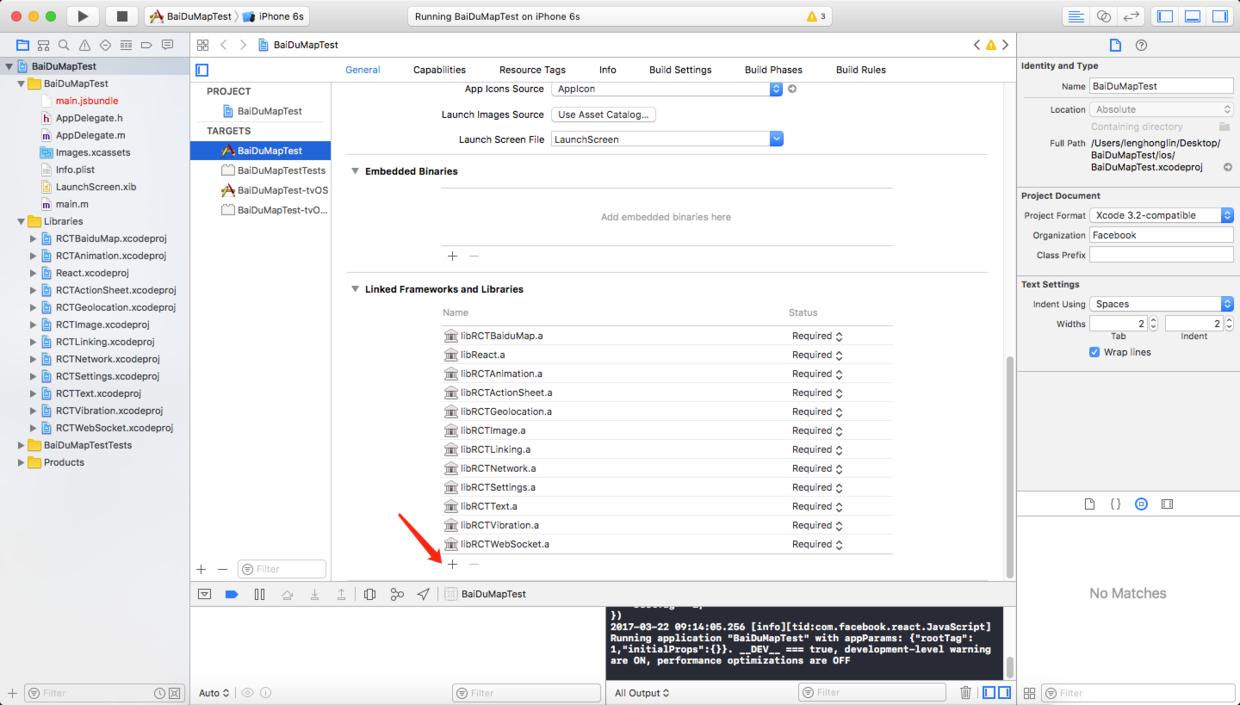
For example:
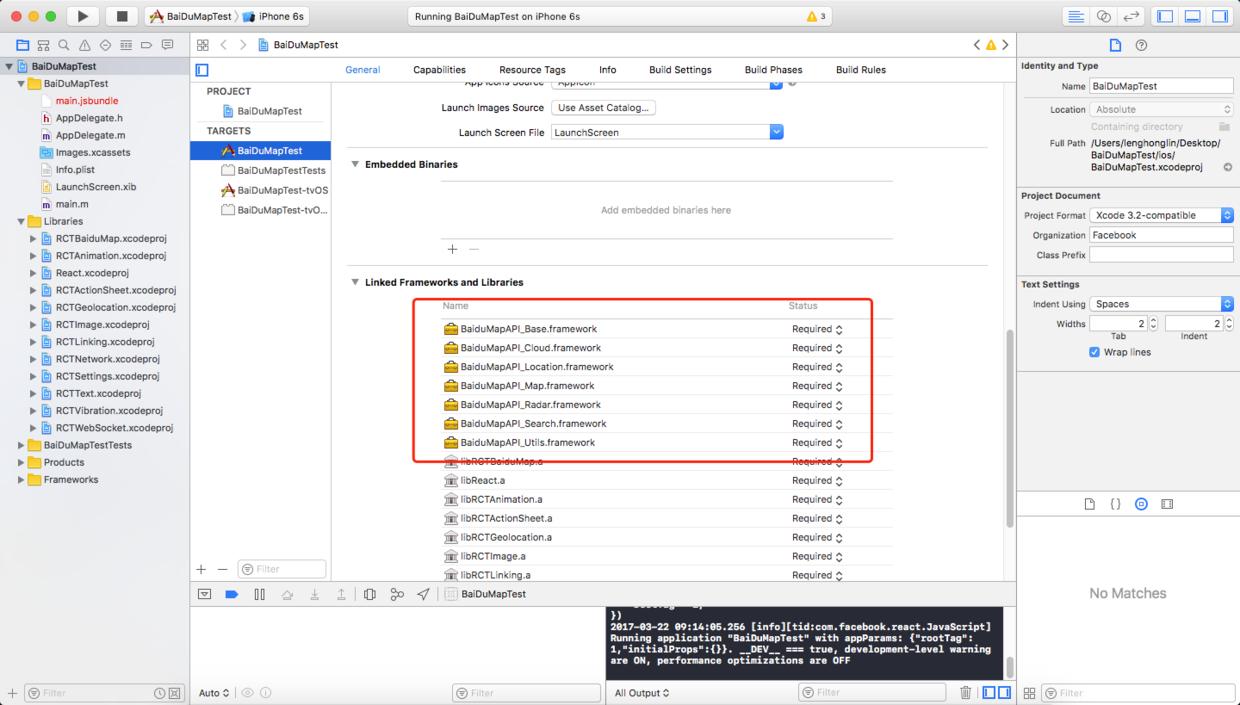
After adding all:
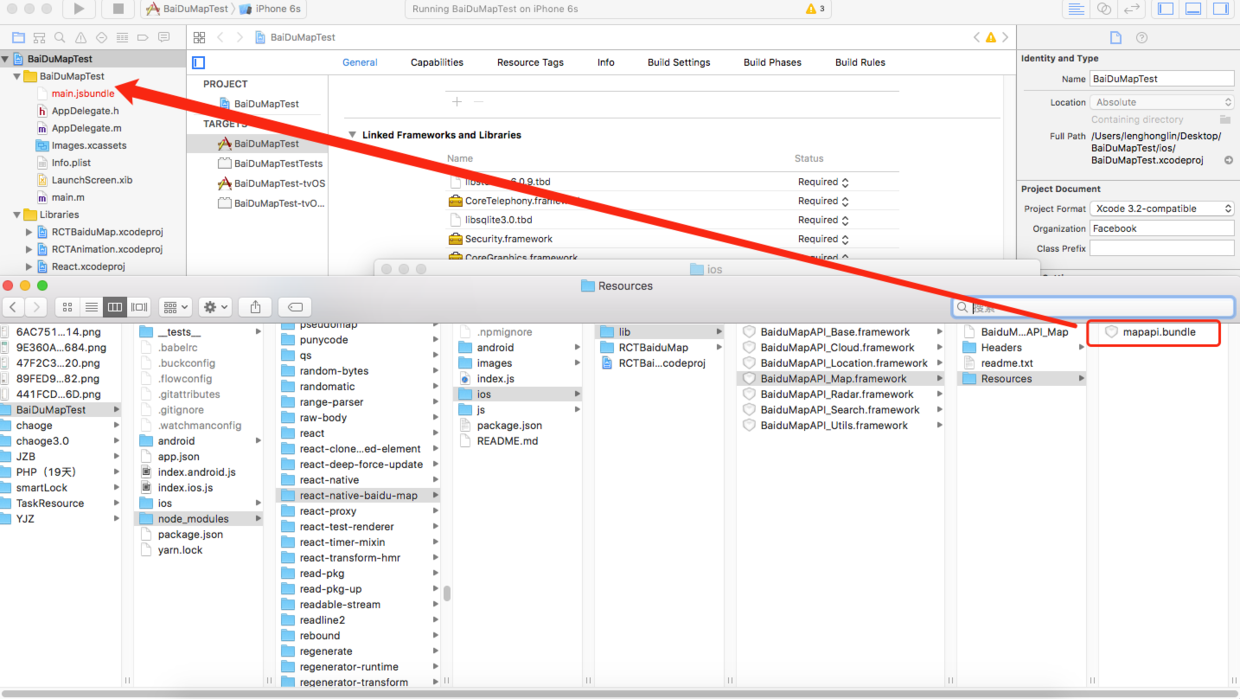
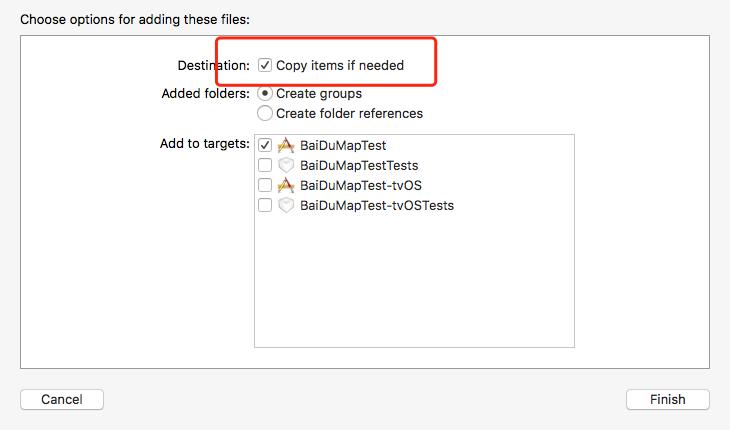
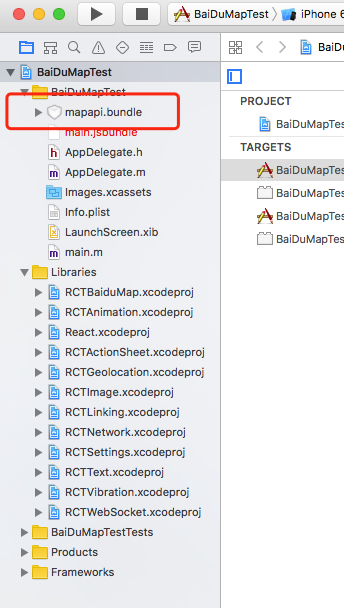
Next add BaiduMap API_Map.framework/Resources/mapapi.bundle
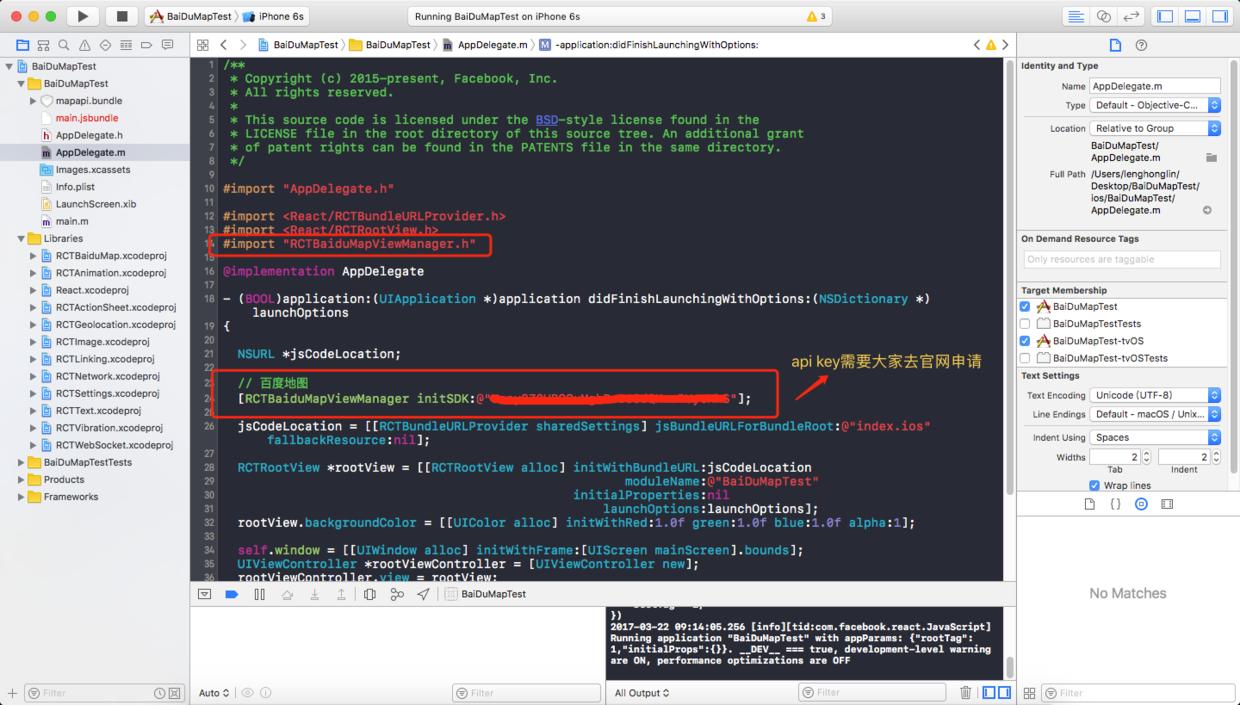
4.AppDelegate.m init initialization
#import "RCTBaiduMapViewManager.h"
- (BOOL)application:(UIApplication *)application didFinishLaunchingWithOptions:(NSDictionary *)launchOptions
{
    ...
    [RCTBaiduMapViewManager initSDK:@"api key"];//The api key here must correspond to the Bundle identifier of APP on the official website, otherwise the map will fail.
    ...
}
5.build to see if the configuration is successful
This error may be reported at this time:
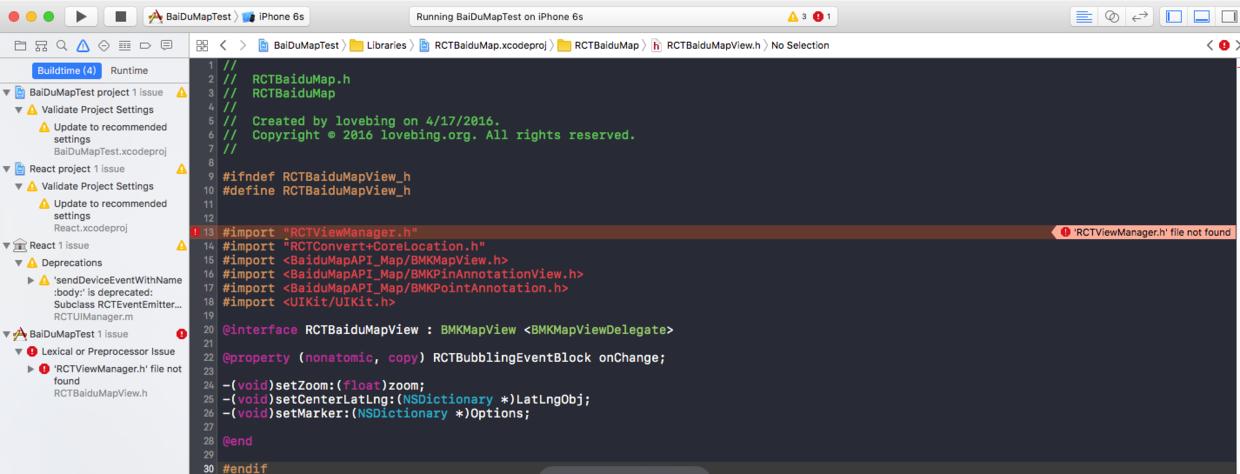
Solution:
#import "RCTViewManager.h"
#import "RCTConvert+CoreLocation.h"
Change to
#import <React/RCTViewManager.h>
#import <React/RCTConvert+CoreLocation.h>
As shown in the figure:
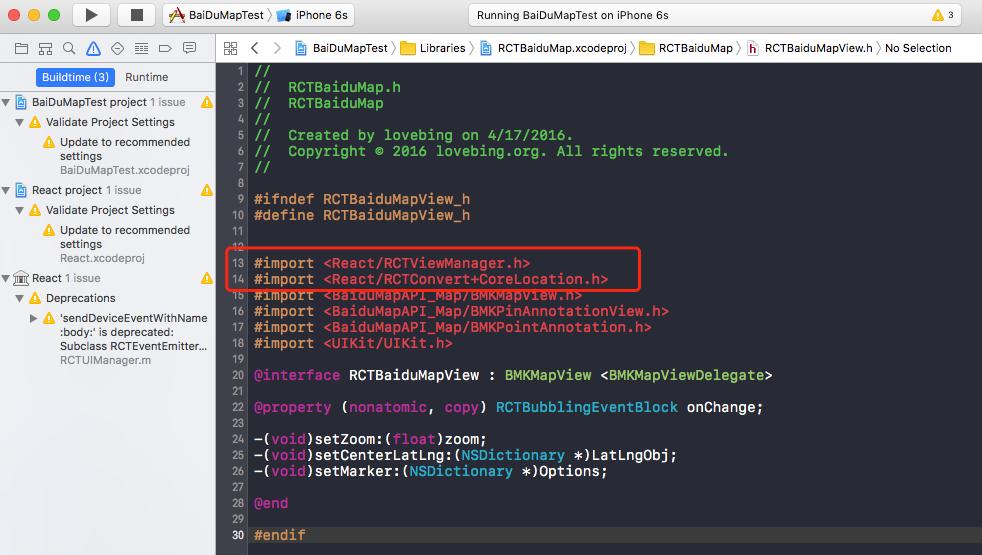
Then build success.~
6. So far, the configuration has been completed, we can play Baidu Map in RN.~
Here we will refer to Demo on the official website to show you:
index.ios.js:
/**
 * Sample React Native App
 * https://github.com/facebook/react-native
 * @flow
 */

import React, { Component } from 'react';
import {
  AppRegistry,
  StyleSheet,
  Text,
  View
} from 'react-native';

import BaiduMapDemo from './BaiduMapDemo';

export default class BaiDuMapTest extends Component {
  render() {
    return (
      <BaiduMapDemo />
    );
  }
}

const styles = StyleSheet.create({
  container: {
    flex: 1,
    justifyContent: 'center',
    alignItems: 'center',
    backgroundColor: '#F5FCFF',
  },
  welcome: {
    fontSize: 20,
    textAlign: 'center',
    margin: 10,
  },
  instructions: {
    textAlign: 'center',
    color: '#333333',
    marginBottom: 5,
  },
});

AppRegistry.registerComponent('BaiDuMapTest', () => BaiDuMapTest);
BaiduMapDemo.js
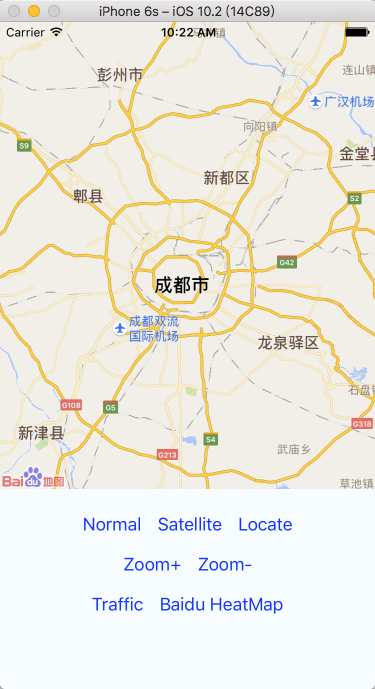
/**
 * @author lovebing
 */

import React, {
  Component,
  PropTypes
} from 'react';

import {
  MapView,
  MapTypes,
  Geolocation
} from 'react-native-baidu-map';

import {
  Button,
  AppRegistry,
  StyleSheet,
  Text,
  View,
  TouchableHighlight
} from 'react-native';

import Dimensions from 'Dimensions';

export default class BaiduMapDemo extends Component {

  constructor() {
    super();

    this.state = {
      mayType: MapTypes.NORMAL,
      zoom: 15,
      center: {
        longitude: 113.981718,
        latitude: 22.542449
      },
      trafficEnabled: false,
      baiduHeatMapEnabled: false,
      markers: [{
        longitude: 113.981718,
        latitude: 22.542449,
        title: "Window of the world"
      },{
        longitude: 113.995516,
        latitude: 22.537642,
        title: ""
      }]
    };
  }

  componentDidMount() {
  }

  render() {
    return (
      <View style={styles.container}>
        <MapView
          trafficEnabled={this.state.trafficEnabled}
          baiduHeatMapEnabled={this.state.baiduHeatMapEnabled}
          zoom={this.state.zoom}
          mapType={this.state.mapType}
          center={this.state.center}
          marker={this.state.marker}
          markers={this.state.markers}
          style={styles.map}
          onMarkerClick={(e) => {
            console.warn(JSON.stringify(e));
          }}
          onMapClick={(e) => {
          }}
        >
        </MapView>

        <View style={styles.row}>
          <Button title="Normal" onPress={() => {
            this.setState({
              mapType: MapTypes.NORMAL
            });
          }} />
          <Button style={styles.btn} title="Satellite" onPress={() => {
            this.setState({
              mapType: MapTypes.SATELLITE
            });
          }} />

          <Button style={styles.btn} title="Locate" onPress={() => {
            console.warn('center', this.state.center);
            Geolocation.getCurrentPosition()
              .then(data => {
                console.warn(JSON.stringify(data));
                this.setState({
                  zoom: 15,
                  marker: {
                    latitude: data.latitude,
                    longitude: data.longitude,
                    title: 'Your location'
                  },
                  center: {
                    latitude: data.latitude,
                    longitude: data.longitude,
                    rand: Math.random()
                  }
                });
              })
              .catch(e =>{
                console.warn(e, 'error');
              })
          }} />
        </View>

        <View style={styles.row}>
          <Button title="Zoom+" onPress={() => {
            this.setState({
              zoom: this.state.zoom + 1
            });
          }} />
          <Button title="Zoom-" onPress={() => {
            if(this.state.zoom > 0) {
              this.setState({
                zoom: this.state.zoom - 1
              });
            }

          }} />
        </View>

        <View style={styles.row}>
          <Button title="Traffic" onPress={() => {
            this.setState({
              trafficEnabled: !this.state.trafficEnabled
            });
          }} />

          <Button title="Baidu HeatMap" onPress={() => {
            this.setState({
              baiduHeatMapEnabled: !this.state.baiduHeatMapEnabled
            });
          }} />
        </View>
      </View>
    );
  }
}

const styles = StyleSheet.create({
  row: {
    flexDirection: 'row',
    height: 40
  },
  container: {
    flex: 1,
    justifyContent: 'flex-start',
    alignItems: 'center',
    backgroundColor: '#F5FCFF',
  },
  map: {
    width: Dimensions.get('window').width,
    height: Dimensions.get('window').height - 200,
    marginBottom: 16
  }
});
Design sketch:
I hope this article can help you. Thank you.~