Original link: http://www.juzicode.com/archives/5395
Return to opencv Python tutorial
This document describes how to use opencv Python to obtain images from still image files, display images, and how to save still image files. stay Opencv Python tutorial: get images from video files or cameras and write video files This article introduces how to read and save video files.
1. Read picture imread()
The imread() method passes in the path of the image file in the first position parameter. If the file is successfully read, it returns a numpy array. If the file is failed, it returns None.
It should be noted here that the failure to obtain the image will not throw an exception, but get a None. If the following methods such as imshow(), imwrite(), etc. are used directly, they will cause an exception.
The following three imread() examples are wrong path, non picture file and picture file with correct path:
import cv2

print('cv2.__version__:',cv2.__version__)
img = cv2.imread('..\\lena2.jpg')  #Wrong path
print('img:',img)
print('type(img):',type(img))

img = cv2.imread('..\\1.txt')  #Non picture file
print('img:',img)
print('type(img):',type(img))

img = cv2.imread('..\\lena.jpg') #Picture file, correct path
print('img:',img)
print('type(img):',type(img))
Operation results:
cv2.__version__: 4.5.2
img: None
type(img): <class 'NoneType'>  #Wrong path
img: None
type(img): <class 'NoneType'>  #Non picture file
img: [[[128 138 225]
  [127 137 224]
  [126 136 224]
  ...
  ...
  [ 81  68 176]
  [ 81  72 183]
  [ 84  74 188]]]
type(img): <class 'numpy.ndarray'> #Picture file, correct path
In addition, the read image can also be written into the following three modes in the second position parameter:
| cv2.IMREAD_COLOR | By default, the read image is in BGR 8-bit format |
| cv2.IMREAD_UNCHANGED | The image format is unchanged and can be used to read pictures with alpha channel |
| cv2.IMREAD_GRAYSCALE | Convert the read image to grayscale image |
The following example is based on imread from three pictures_ Read in unchanged mode. You can see the difference in the number of channels of three different pictures by returning the shape attribute of numpy array:
import cv2
print('VX official account: Orange code / juzicode.com')
print('cv2.__version__:',cv2.__version__)

img = cv2.imread('..\\lena.jpg',cv2.IMREAD_UNCHANGED)
print('img.shape:',img.shape)
img2 = cv2.imread('..\\opencv-logo.png',cv2.IMREAD_UNCHANGED )
print('img2.shape:',img2.shape)
img3 = cv2.imread('..\\left05.jpg',cv2.IMREAD_UNCHANGED )
print('img3.shape:',img3.shape)
Operation results:
VX official account: Orange code / juzicode.com
cv2.__version__: 3.4.1
img.shape: (512, 512, 3)  #3-channel image
img2.shape: (739, 600, 4) #4-channel image
img3.shape: (480, 640)    #Grayscale image
Note that the width of the image is width = cols = img Shape [1], height = rows = img shape[0].
2. Display image imshow()
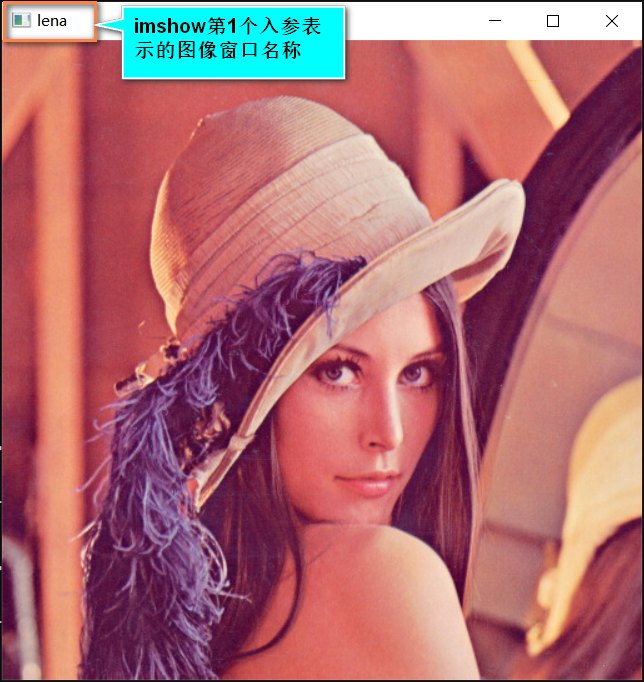
imshow() can be used to display pictures. The first parameter is the name of the display window, and the second parameter is the image instance generated by imread() and other methods.
In order to observe the display effect, it is generally used in conjunction with waitKey(). If the parameter passed in by waitKey() is 0, it will wait indefinitely until any key is pressed, or pass in other numerical parameters to indicate the waiting time, in ms. after the time, the display image window will be closed.
In the following example, the judgment of reading out the image is added. If the acquired image is None, it will exit. If the acquired image is successful, it will be displayed.
In this example, the waitKey() input parameter uses 0 and 5000. The first time 0 indicates infinite waiting until the key is pressed, and the second time indicates that the display window will close automatically after waiting for 5000ms.
import sys
import cv2
print('VX official account: Orange code / juzicode.com')
print('cv2.__version__:',cv2.__version__)

img = cv2.imread('..\\lena.jpg')
#print('img:',img)
print('type(img):',type(img))

if img is None:
    print('The read image is empty')
    sys.exit(-1)

cv2.imshow('lena',img)
cv2.waitKey(0)

cv2.imshow('lena2',img)
cv2.waitKey(5000)
Operation results:
VX official account: Orange code / juzicode.com
cv2.__version__: 4.5.2
type(img): <class 'numpy.ndarray'>
In addition to using imshow() to display images, you can also resize the window and display images through functions such as resizeWindow(). If too many images are displayed, you can also use destroyWindow() to destroy the display window.
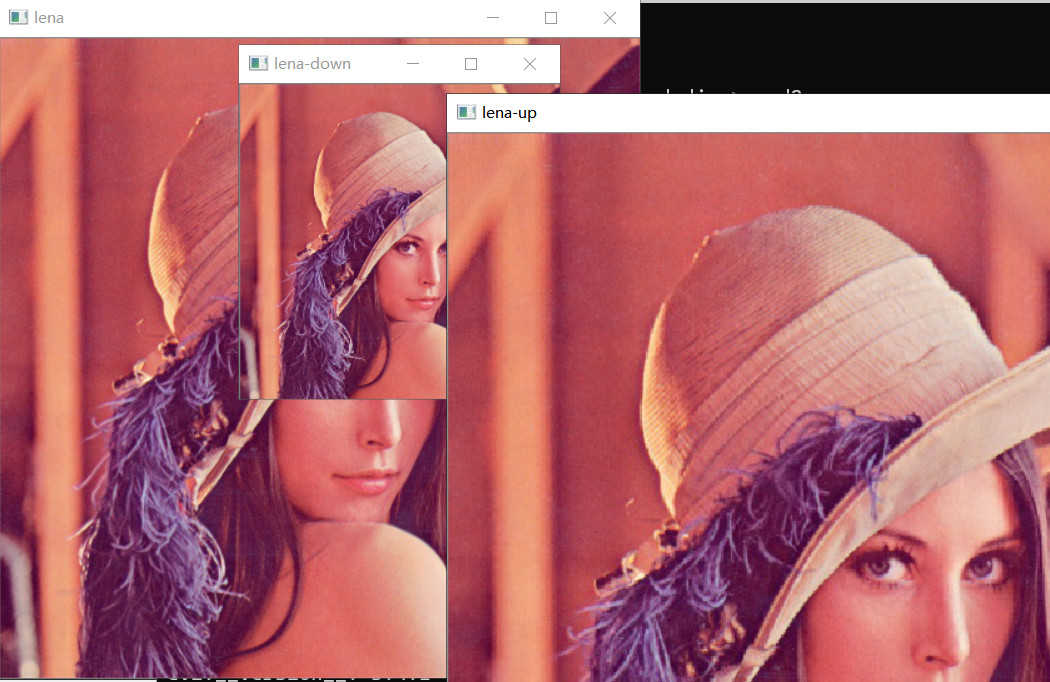
2.1. Adjust window nameWindow(), resize window()
When using imshow() method to display an image, it is displayed by the pixel size of the image by default. You can name the window through namewindow (window name, cv2.WINDOW_NORMAL), then use resize window (window name, window width, window height) to zoom the window, and finally use imshow() to display the image. Note that the three operate on the same window name.
import sys
import cv2
print('VX official account: Orange code / juzicode.com')
print('cv2.__version__:',cv2.__version__)

img = cv2.imread('..\\lena.jpg')
#print('img:',img)
print('type(img):',type(img))

if img is None:
    print('The read image is empty')
    sys.exit(-1)

#Original size display
cv2.imshow('lena',img)
#Zoom out
rows,cols = img.shape[0],img.shape[1]
cv2.namedWindow('lena-down', cv2.WINDOW_NORMAL )#cv2.WINDOW_AUTOSIZE)
cv2.resizeWindow('lena-down',(int(cols*0.5),int(rows*0.5)))
cv2.imshow('lena-down',img)
#Zoom in
cv2.namedWindow('lena-up', cv2.WINDOW_NORMAL )
cv2.resizeWindow('lena-up',(int(cols*1.3),int(rows*1.3)))
cv2.imshow('lena-up',img)
cv2.waitKey(0)
Operation results:
2.2. Destroy windows (destroywindow), destrylalwindows ()
During debugging, if too many windows are displayed, you can use destroywindow (window name) to close a single display window, or you can use destroyAllWindows() to close all display windows.
In the following example, first use destroyWindow() to close the window named Lena up, and then use destroyAllWindows() to close all other windows:
import sys
import cv2
print('VX official account: Orange code / juzicode.com')
print('cv2.__version__:',cv2.__version__)

img = cv2.imread('..\\lena.jpg')
#print('img:',img)
print('type(img):',type(img))

if img is None:
    print('The read image is empty')
    sys.exit(-1)

#Original size display
cv2.imshow('lena',img)
#Zoom out
rows,cols = img.shape[0],img.shape[1]
cv2.namedWindow('lena-down', cv2.WINDOW_NORMAL )#cv2.WINDOW_AUTOSIZE)
cv2.resizeWindow('lena-down',(int(cols*0.5),int(rows*0.5)))
cv2.imshow('lena-down',img)
#Zoom in
cv2.namedWindow('lena-up', cv2.WINDOW_NORMAL )
cv2.resizeWindow('lena-up',(int(cols*1.3),int(rows*1.3)))
cv2.imshow('lena-up',img)
cv2.waitKey(0)
cv2.destroyWindow('lena-up') #Close the Lena up window
cv2.waitKey(0)
cv2.destroyAllWindows()      #Close all display windows
2.3 display encapsulation routine
This routine encapsulates multiple operation steps of the display image in one function:
dbg_is_show = False
def show_img(win_name,img,wait_time=0,img_ratio=0.15,is_show=True):
    if is_show is not True:
        return
    rows = img.shape[0]
    cols = img.shape[1]
    cv2.namedWindow(win_name, cv2.WINDOW_NORMAL )#cv2.WINDOW_AUTOSIZE)
    cv2.resizeWindow(win_name,(int(cols*img_ratio),int(rows*img_ratio)))
    cv2.imshow(win_name,img)
    cv2.waitKey(wait_time)
3. Write picture imwrite()
The first location parameter of imwrite() is the name of the file to be written. The suffix of the file name determines the format of the image file. The second parameter is the image instance.
In the following example, the images are saved in bmp and jpg formats respectively:
import sys
import cv2
print('VX official account: Orange code / juzicode.com')
print('cv2.__version__:',cv2.__version__)

img = cv2.imread('..\\lena.jpg')
#print('img:',img)
print('type(img):',type(img))

if img is None:
    print('The read image is empty')
    sys.exit(-1)

cv2.imwrite('lena.bmp',img)
cv2.imwrite('lena.png',img)
cv2.imwrite('lena.txt',img)
In this example, the image instances read out by imread() in the penultimate line and the penultimate line are written into bmp and jpg files respectively. You will see that two new files have been generated in the current working path. The last line intentionally writes a txt file, which is not the format of the image file. An exception will be thrown:
error: (-2:Unspecified error) could not find a writer for the specified extension in function 'cv::imwrite_'
Summary: This article introduces how to obtain, display and write images from image files. The method of displaying images is like Python's print() function, which can display the intermediate process of image processing process, observe the effect of transformation, and achieve the purpose of debugging.