Recently, there is a need to record the screen, which is similar to the operation tutorial of recording software to demonstrate to others. After searching the recording screen on the Internet, most of the results need to be downloaded and installed, and there are charges or advertisements. Inadvertently found a website using a browser to record the screen online. Out of curiosity, I studied the implementation method, completed a small work that can be used to share with you, and put the link at the end of the article.
The website address of the online recording screen found is SOOGIF It requires you to register and log in to use the screen recording function, and after the recording is completed, you can only get Limited Download opportunities at no cost. Therefore, I intend to make a similar application myself.
Web API interface
To realize this function, two interfaces are mainly used:
The details of the implementation are recorded below.
Populate basic page elements
If you are familiar with some knowledge of Web front-end, you can't be more familiar with the following contents:
<p>This example shows you the contents of the selected part of your display. Click the Start Capture button to begin.</p> <q>Click the start capture button to select the window you want to capture.</q> <p> <button id="start">Start capture</button> <button id="stop">Stop capture</button> <button id="recordBtn">start recording </button> <button id="downloadBtn">download</button> </p> <video id="video" autoplay></video> <br> <strong>Log:</strong> <br> <pre id="log"></pre>
Add a simple style:
#video {
      border: 1px solid #999;
      width: 98%;
      max-width: 860px;
}
.error {
      color: red;
}
 .warn {
      color: orange;
}
.info {
      color: darkgreen;
}
General appearance of the page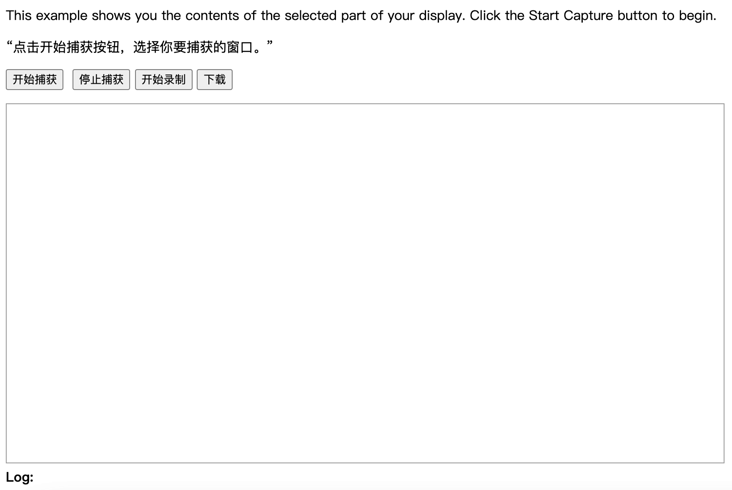
JavaScript handles click button logic
First, get the elements on the page and declare the relevant variables:
const startElem = document.getElementById("start");
const stopElem = document.getElementById("stop");
const videoElem = document.getElementById("video");
const logElem = document.getElementById("log");
const recordBtn = document.getElementById("recordBtn");
const downloadBtn = document.getElementById("downloadBtn");
let captureStream = null;
let mediaRecorder = null;
let isRecording = false;
let recordedBlobs = [];
Process the logic of clicking the start capture button:
// Options for getDisplayMedia()
const displayMediaOptions = {
  video: {
    cursor: "always"
  },
  audio: {
    echoCancellation: true,
    noiseSuppression: true,
    sampleRate: 44100
  }
};

async function startCapture(displayMediaOptions) {
  try {
    videoElem.srcObject = await navigator.mediaDevices.getDisplayMedia(displayMediaOptions);
    captureStream = videoElem.srcObject
    dumpOptionsInfo();
  } catch(err) {
    console.error("Error: " + err);
  }
}

function dumpOptionsInfo() {
  const videoTrack = videoElem.srcObject.getVideoTracks()[0];
  console.info("Track settings:");
  console.info(JSON.stringify(videoTrack.getSettings(), null, 2));
  console.info("Track constraints:");
  console.info(JSON.stringify(videoTrack.getConstraints(), null, 2));
}

function stopCapture(evt) {
  let tracks = videoElem.srcObject.getTracks();
  tracks.forEach(track => track.stop());
  videoElem.srcObject = null;
  showMsg('User stopped sharing screen');
}

// Set event listeners for the start and stop buttons
startElem.addEventListener("click", function(evt) {
  startCapture();
}, false);

stopElem.addEventListener("click", function(evt) {
  stopCapture();
}, false);
When you click the start capture button, the browser will pop up the following similar page: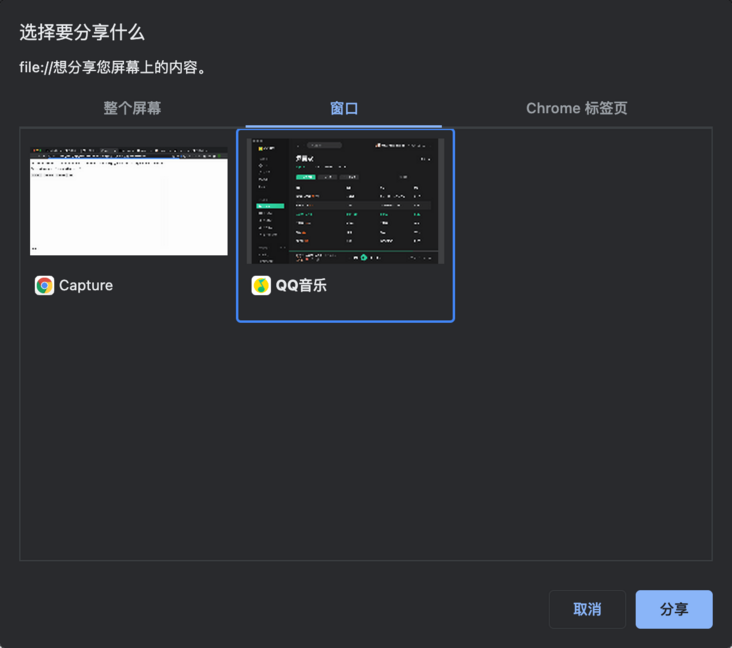
Select the browser page or window you want to record, and even the whole screen can be recorded.
When you select a window and click the share button, the data stream of the captured window will be synchronized to the video tag of our page for real-time sampling: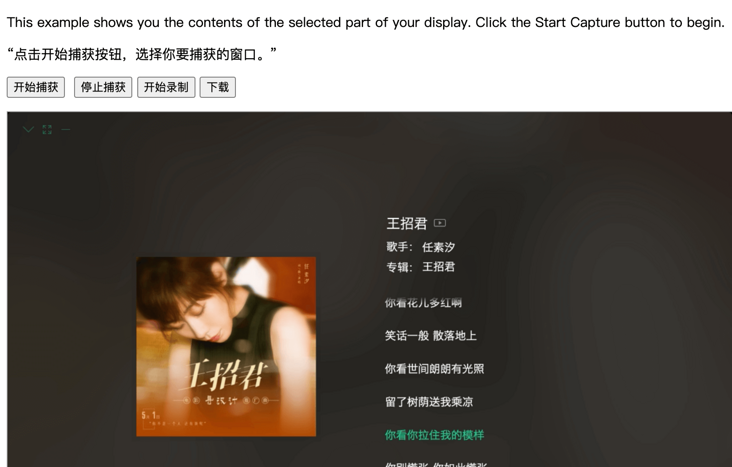
At this time, we can record. The following is the logic of the start recording button:
function startRecording() {

  const mimeType = getSupportedMimeTypes()[0];
  const options = { mimeType };

  try {
    mediaRecorder = new MediaRecorder(captureStream, options);
  } catch (e) {
    showMsg(`establish MediaRecorder error: ${JSON.stringify(e)}`);
    return;
  }
  recordBtn.textContent = 'Stop recording';
  isRecording = true;
  downloadBtn.disabled = true;
  mediaRecorder.onstop = (event) => {
    showMsg('Recording stopped: ' + event);
  };
  mediaRecorder.ondataavailable = handleDataAvailable;
  mediaRecorder.start();
  showMsg('Recording starts mediaRecorder: ' + mediaRecorder);
}

function handleDataAvailable(event) {
  console.log('handleDataAvailable', event);
  if (event.data && event.data.size > 0) {
    recordedBlobs.push(event.data);
  }
}

function stopRecord() {
  isRecording = false;
  mediaRecorder.stop();
  downloadBtn.disabled = false;
  recordBtn.textContent = "start recording ";
  recordedBlobs = []
}
Process download button logic:
downloadBtn.addEventListener('click', () => {
  const blob = new Blob(recordedBlobs, { type: 'video/webm' });
  const url = window.URL.createObjectURL(blob);
  const a = document.createElement('a');
  a.style.display = 'none';
  a.href = url;
  a.download = 'Recording screen_' + new Date().getTime() + '.webm';
  document.body.appendChild(a);
  a.click();
  setTimeout(() => {
    document.body.removeChild(a);
    window.URL.revokeObjectURL(url);
  }, 100);
});
At this point, the Demo of the recording screen is completed. The recorded file format is webm, which you can open in your browser.
If you need to use it immediately, you can also directly use the version I made, with a better UI. Portal