environment
Linux system version: Ubuntu kylin-20.04-pro
Redis version: redis-6.2.5
Redis introduction
Redis is one of the popular NOSQL systems. It is an open source key value storage system written in ANSI c language (different from MySQL in the form of two-dimensional tables). It is similar to Memcache, but it largely compensates for the shortcomings of Memcache. Like Memcache, Redis data is cached in the computer memory. The difference is that Memcache can only cache the data in the memory and cannot automatically write it to the hard disk regularly. This means that the memory will be emptied and data will be lost once power is off or restarted. Therefore, the application scenario of Memcache is suitable for caching data that does not need persistence. The difference of Redis is that it will periodically write the updated data to the disk or write the modification operation to the additional record file to realize data persistence.
Redis features:
1. Redis reads 110000 times / s and writes 81000 times / S;
2. Atoms. All Redis operations are atomic, and Redis also supports atomic execution after full consolidation of several operations.
3. Support multiple data structures: string; list; hash, set; Zset (ordered set)
4. Persistence, cluster deployment
5. Support expiration time, transaction and message subscription
Redis introduces relevant knowledge
Redis is a single thread + multiple IO multiplexing technology
multiplexing refers to using a thread to check the readiness status of multiple file descriptors (sockets), such as calling select and poll functions to pass in multiple file descriptors. If one file descriptor is ready, it will return. Otherwise, it will be blocked until timeout. After the ready state is obtained, the real operation can be performed in the same thread, or the thread execution can be started (such as using thread pool)
Serial vs multithreading + memcached vs single thread + IO multiplexing (Redis)
(different from Memcache in three aspects: supporting multiple data types, supporting persistence, and single thread + multiplex IO multiplexing)
download
| Redis official website | Redis Chinese official website |
|---|---|
| http://redis.io | http://redis.cn/ |


Installation steps
preparation
Install the compiling environment of C language
yum install centos-release-scl scl-utils-build
yum install -y devtoolset-8-toolchain
scl enable devtoolset-8 bash
Test gcc version
gcc --version

Download redis-6.2.1.tar.gz to Linux system

decompression
 # Unzip into / usr/local
sudo tar -zxvf ./redis-6.2.5.tar.gz -C /usr/local

# Switch to the / usr/local directory
cd /usr/local/

 # Change the folder name to hadoop
sudo mv ./redis-6.2.5/ ./redis

# Modify file permissions
sudo chown -R redis  ./redis
After decompression, enter the directory:
cd /usr/local/redis
Execute the make command in the redis directory (only compiled)
make
If the C language compilation environment is not ready, make will report an error - Jemalloc/jemalloc.h: there is no such file
Solution: run make distclean
Execute the make command again in the redis directory (only compiled)
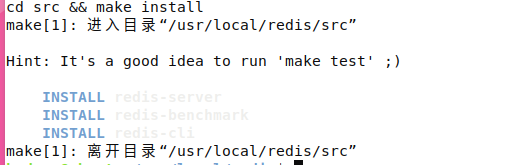
Skip make test and continue: make install
make install
Installation directory
The default installation is: / usr/local/bin
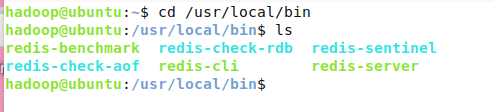
View the default installation directory:
Redis benchmark: a performance testing tool. You can run it in your own notebook to see how your notebook performs
Redis check AOF: fix the problem AOF file. rdb and AOF will be described later
Redis check dump: repair the dump.rdb file with problems
Redis sentinel: redis cluster usage
Redis server: redis server startup command
Redis cli: client, operation portal
Foreground start (not recommended)
When the foreground starts, the command line window cannot be closed, otherwise the server stops
redis-server

Background start
Backup redis.conf
Copy a copy of redis.conf to another directory

cp redis.conf /etc/redis.conf
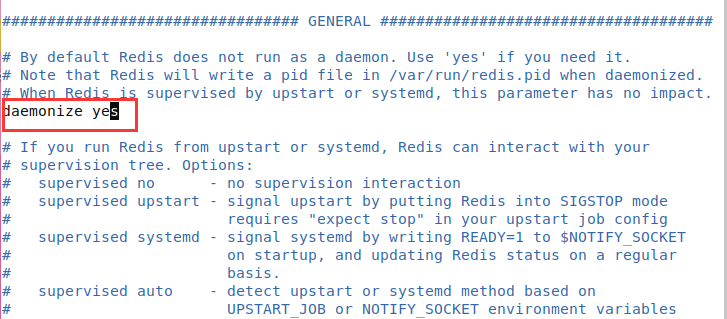
Modify the / etc/redis.conf file
Modify the redis.conf file (line 128), change the daemon no to yes, and let the service start in the background
vi redis.conf
Redis startup
#Switch to bin directory
cd /usr/local/bin

#start-up
redis-server /etc/redis.conf
View redis process
ps -ef | grep redis

Client access: redis cli
Multiple ports can be: redis cli - p6379
Test verification: ping

Redis shutdown
Single instance shutdown: redis cli shutdown
You can also enter the terminal and then close it

Multi instance shutdown, specified port shutdown: redis cli - P 6379 shutdown
Project integration Redis
Add dependency
<!-- redis -->
<dependency>
    <groupId>org.springframework.boot</groupId>
    <artifactId>spring-boot-starter-data-redis</artifactId>
</dependency>

<!-- spring2.X integrate redis what is needed common-pool2-->
<dependency>
    <groupId>org.apache.commons</groupId>
    <artifactId>commons-pool2</artifactId>
    <version>2.6.0</version>
</dependency>
Add redis configuration class
@EnableCaching
@Configuration
public class RedisConfig extends CachingConfigurerSupport {

    @Bean
    public RedisTemplate<String, Object> redisTemplate(RedisConnectionFactory factory) {
        RedisTemplate<String, Object> template = new RedisTemplate<>();
        RedisSerializer<String> redisSerializer = new StringRedisSerializer();
        Jackson2JsonRedisSerializer jackson2JsonRedisSerializer = new Jackson2JsonRedisSerializer(Object.class);
        ObjectMapper om = new ObjectMapper();
        om.setVisibility(PropertyAccessor.ALL, JsonAutoDetect.Visibility.ANY);
        om.enableDefaultTyping(ObjectMapper.DefaultTyping.NON_FINAL);
        jackson2JsonRedisSerializer.setObjectMapper(om);
        template.setConnectionFactory(factory);
        //key serialization method
        template.setKeySerializer(redisSerializer);
        //value serialization
        template.setValueSerializer(jackson2JsonRedisSerializer);
        //value hashmap serialization
        template.setHashValueSerializer(jackson2JsonRedisSerializer);
        return template;
    }

    @Bean
    public CacheManager cacheManager(RedisConnectionFactory factory) {
        RedisSerializer<String> redisSerializer = new StringRedisSerializer();
        Jackson2JsonRedisSerializer jackson2JsonRedisSerializer = new Jackson2JsonRedisSerializer(Object.class);
        //Solve the problem of query cache conversion exception
        ObjectMapper om = new ObjectMapper();
        om.setVisibility(PropertyAccessor.ALL, JsonAutoDetect.Visibility.ANY);
        om.enableDefaultTyping(ObjectMapper.DefaultTyping.NON_FINAL);
        jackson2JsonRedisSerializer.setObjectMapper(om);
        // Configure serialization (solve the problem of garbled code), and the expiration time is 600 seconds
        RedisCacheConfiguration config = RedisCacheConfiguration.defaultCacheConfig()
                .entryTtl(Duration.ofSeconds(600))
              .serializeKeysWith(RedisSerializationContext.SerializationPair.fromSerializer(redisSerializer))
                .serializeValuesWith(RedisSerializationContext.SerializationPair.fromSerializer(jackson2JsonRedisSerializer))
                .disableCachingNullValues();
        RedisCacheManager cacheManager = RedisCacheManager.builder(factory)
                .cacheDefaults(config)
                .build();
        return cacheManager;
    }
}
Add redis configuration to the configuration file
# Redis server connection port
spring.redis.host=192.168.44.132
# Redis server connection port
spring.redis.port=6379
# Redis database index (0 by default)
spring.redis.database= 0
# Connection timeout (MS)
spring.redis.timeout=1800000

spring.redis.lettuce.pool.max-active=20
spring.redis.lettuce.pool.max-wait=-1
#Maximum blocking waiting time (negative number indicates no limit)
spring.redis.lettuce.pool.max-idle=5
spring.redis.lettuce.pool.min-idle=0
Spring Boot cache annotation
(1) Cache @ Cacheable
Cache the returned results according to the method. If the cache exists in the next request, directly read the cached data and return; If the cache does not exist, the method is executed and the returned result is stored in the cache. Generally used in query methods.
View the source code. The attribute values are as follows:
| Property / method name | explain |
|---|---|
| value | Cache name, required. It specifies the namespace in which your cache is stored |
| cacheNames | Similar to value, just choose one from two |
| key | Optional attribute. You can customize the cached key using the spiel tag |
(2) Cache @ CachePut
The method using this annotation flag is executed each time and the result is stored in the specified cache. Other methods can directly read the cached data from the response cache without querying the database. Generally used in new methods.
View the source code. The attribute values are as follows:
| Property / method name | explain |
|---|---|
| value | Cache name, required. It specifies the namespace in which your cache is stored |
| cacheNames | Similar to value, just choose one from two |
| key | Optional attribute. You can customize the cached key using the spiel tag |
(3) Cache @ CacheEvict
Using this annotation flag will empty the specified cache. It is generally used for updating or deleting methods
View the source code. The attribute values are as follows:
| Property / method name | explain |
|---|---|
| value | Cache name, required. It specifies the namespace in which your cache is stored |
| cacheNames | Similar to value, just choose one from two |
| key | Optional attribute. You can customize the cached key using the spiel tag |
| allEntries | Whether to clear all caches. The default value is false. If true is specified, all caches will be emptied immediately after the method call |
| beforeInvocation | Whether to clear the method before execution. The default value is false. If true is specified, the cache will be emptied before the method is executed |
Possible problems in connecting to redis service
(1) Turn off liunx firewall
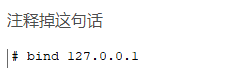
(2) Find the redis configuration file and comment the configuration line
(3) If the following error message appears

Modify protected mode yes
Change to
protected-mode no