background
Many small partners have the idea of building their own chat service application, get rid of wechat, QQ and other third-party applications, pay more attention to their privacy, or better store their own files.
I found an open-source chat application RocketChat, which can realize group chat, direct communication, private chat group, desktop notification, media embedding, link preview, file upload, voice / video chat, screenshots, etc. it also supports real-time translation and automatic real-time message conversion between users. Using RocketChat can fully control communication.
get ready
The function sounds good. Let's build it together. I use the following configuration here:
#  Basic environment,   The student machine I use here can be adjusted higher
1.CentOS 7.6 1CPU/2G/60G
2.Open public network 3000 port
In addition, you need to build a docker running environment. The previous tutorial talked about using one click script. If you are not clear, you can look at the previous tutorial.
[root@mx ~]# docker -v
Docker version 20.10.9, build c2ea9bc
[root@mx ~]#
deploy
Deploy MongoDB
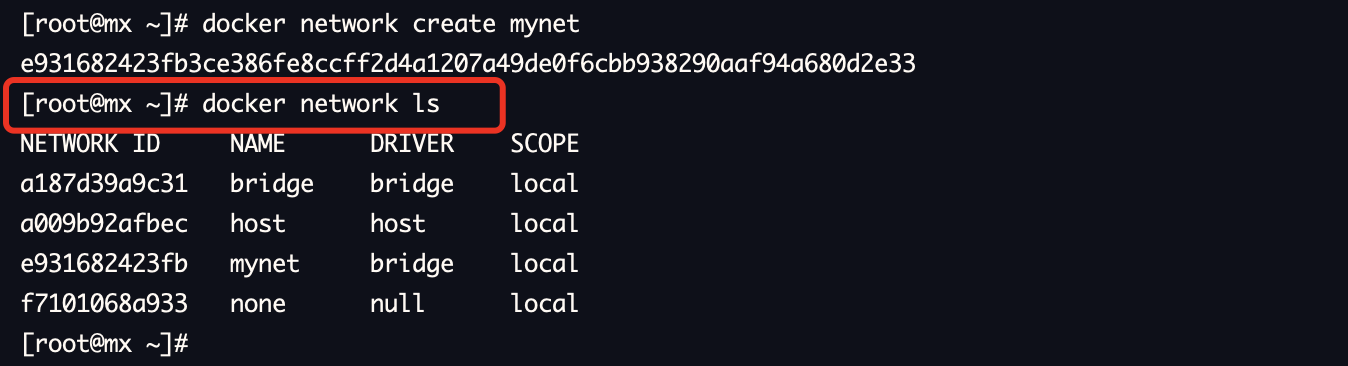
First, create a custom network for isolated access between containers.
#  Here I create a mynet network
[root@mx ~]# docker network create --subnet=172.18.0.0/16 mynet
e931682423fb3ce386fe8ccff2d4a1207a49de0f6cbb938290aaf94a680d2e33
[root@mx ~]# docker network ls
NETWORK ID     NAME      DRIVER    SCOPE
a187d39a9c31   bridge    bridge    local
a009b92afbec   host      host      local
e931682423fb   mynet     bridge    local
f7101068a933   none      null      local
[root@mx ~]#
image
RocketChat depends on MongoDB running environment. First deploy it in Docker mode
mkdir -p /opt/docker/mongodb
#  Create a new profile
vim /opt/docker/mongodb/mongod.conf
The following is the content of mongod.conf. Please paste it into the file, then save and exit with esc and: x.
# mongod.conf

# for documentation of all options, see:
#   http://docs.mongodb.org/manual/reference/configuration-options/

# Where and how to store data.
storage:
  dbPath: /data/db
  journal:
    enabled: true
#  engine:
#  mmapv1:
#  wiredTiger:

# network interfaces
net:
  port: 27017
  bindIp: 127.0.0.1

# how the process runs
processManagement:
  timeZoneInfo: /usr/share/zoneinfo

#security:
#  authorization: "enabled"

#operationProfiling:

replication:
  replSetName: "rs01"

#sharding:

## Enterprise-Only Options:

#auditLog:

#snmp:
Use the following command to create a running image.
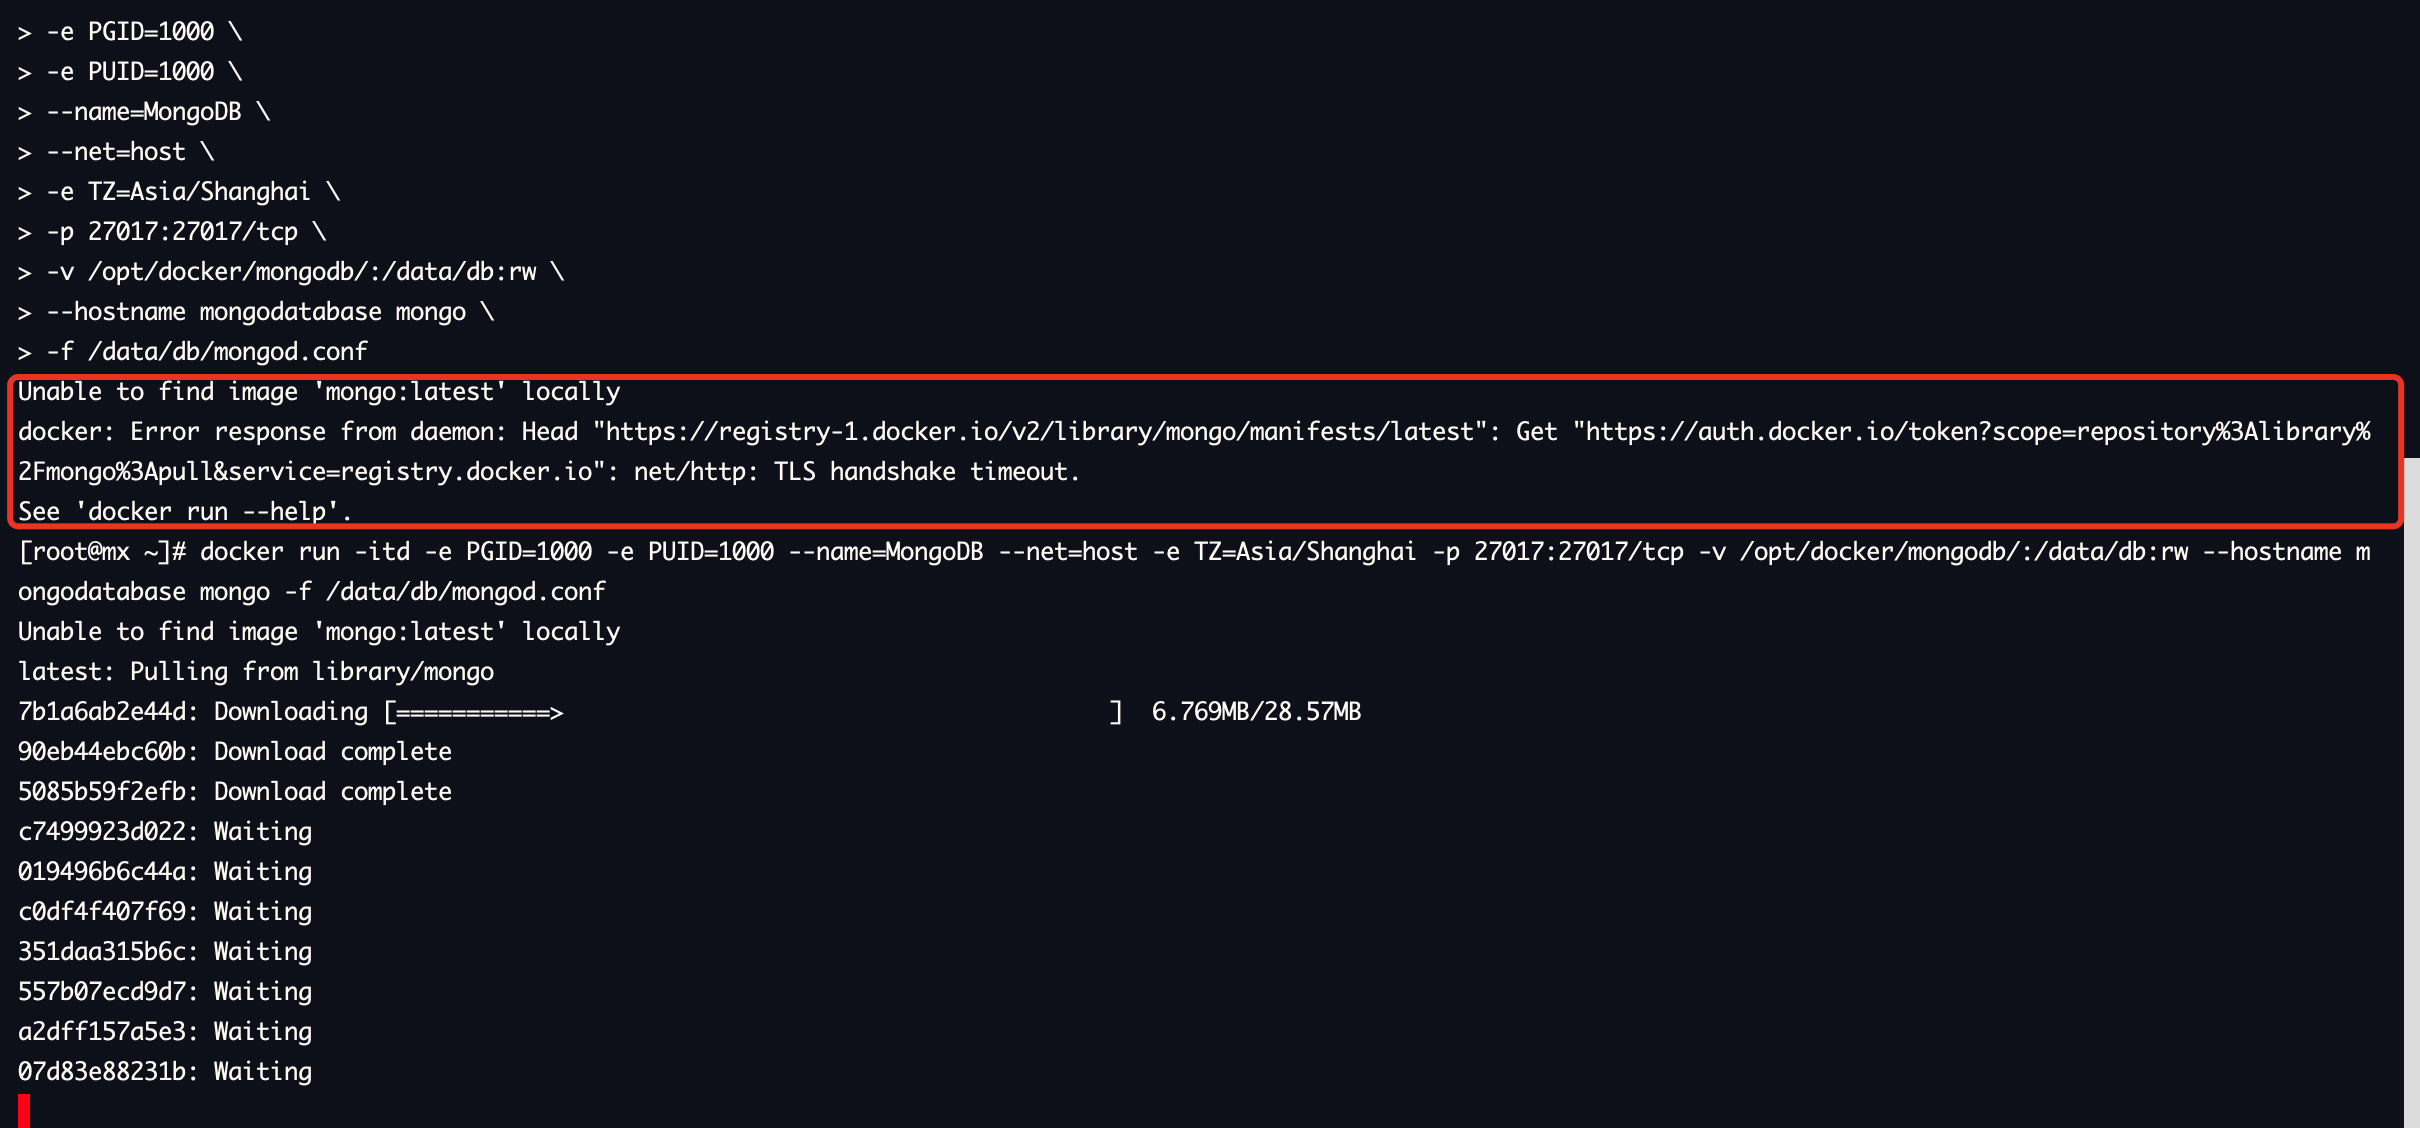
docker run \
-itd \
-e PGID=1000 \
-e PUID=1000 \
--name=MongoDB \
--net=mynet \
--ip=172.18.0.2 \
-e TZ=Asia/Shanghai \
-p 27017:27017/tcp \
-v /opt/docker/mongodb/:/data/db:rw \
--hostname mongodatabase mongo \
-f /data/db/mongod.conf
Because the image server of docker is abroad, the download is slow. If you encounter the following similar errors, please try several times.
Use the command to check the running status. If there are no other errors, the installation is normal.
#  View running containers
docker ps

image
Configure MongoDB
We need to configure MongoDB.
# Enter the inside of the container
[root@mx ~]# docker exec -it MongoDB bash
root@mongodatabase:/#
# Enter mongodb inside the container
root@mongodatabase:/# mongo
# Use the following command and note the parentheses
mongodatabase:SECONDARY> rs.initiate()
{
"ok" : 0,
"errmsg" : "already initialized",
"code" : 23,
"codeName" : "AlreadyInitialized",
"$clusterTime" : {
"clusterTime" : Timestamp(1635072585, 2),
"signature" : {
"hash" : BinData(0,"AAAAAAAAAAAAAAAAAAAAAAAAAAA="),
"keyId" : NumberLong(0)
}
},
"operationTime" : Timestamp(1635072585, 2)
}
# Operating the database with an administrator
mongodatabase:PRIMARY> use admin
switched to db admin
mongodatabase:PRIMARY>
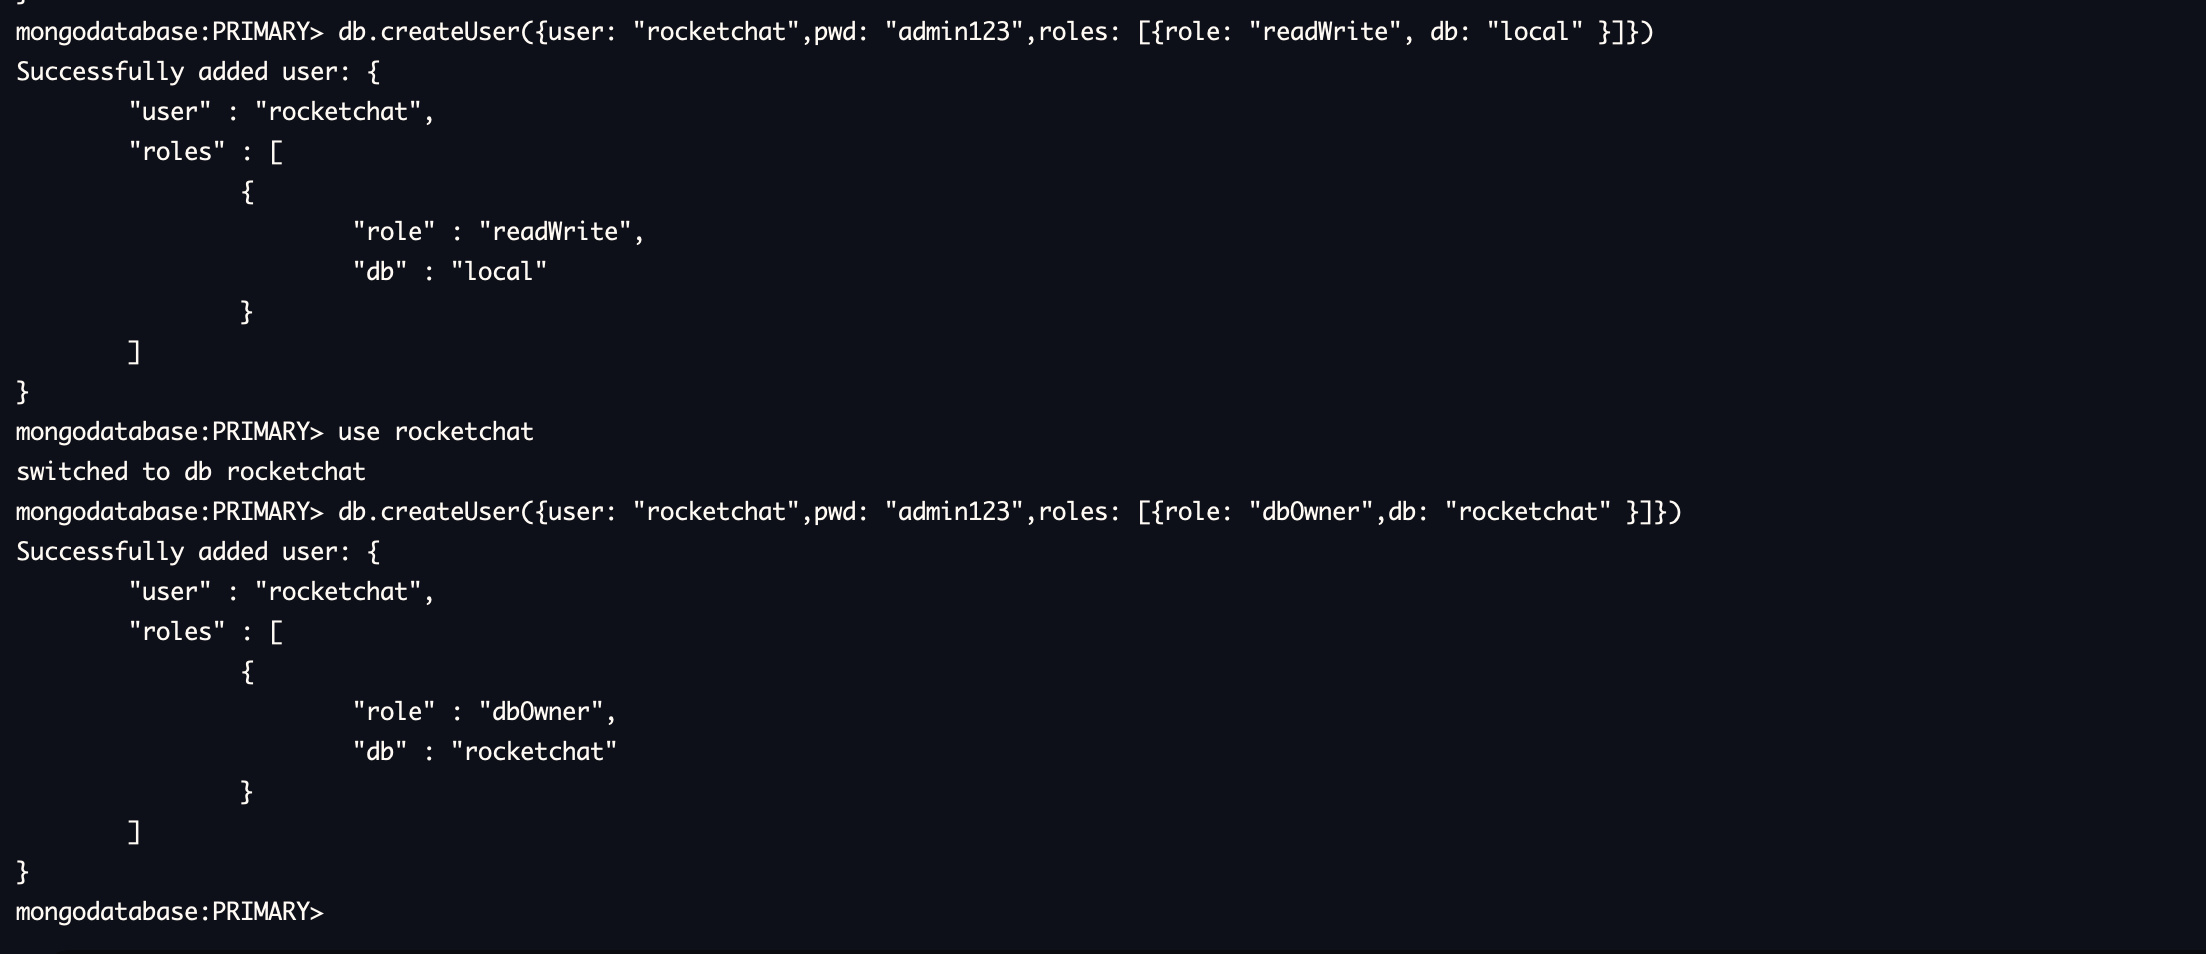
# Create administrator and rocketchat databases, Here I change the password to admin123, you can change it accordingly
db.createUser({user: "root",pwd: "admin123",roles: [{ role: "root", db: "admin"}]})
db.createUser({user: "rocketchat",pwd: "admin123",roles: [{role: "readWrite", db: "local" }]})
# Switch users
use rocketchat
db.createUser({user: "rocketchat",pwd: "admin123",roles: [{role: "dbOwner",db: "rocketchat" }]})
If your operation results are similar to mine, congratulations on your successful creation.
Using exit to exit mongodb and the container, we modify a configuration.
docker stop MongoDB
vim /opt/docker/mongodb/mongod.conf
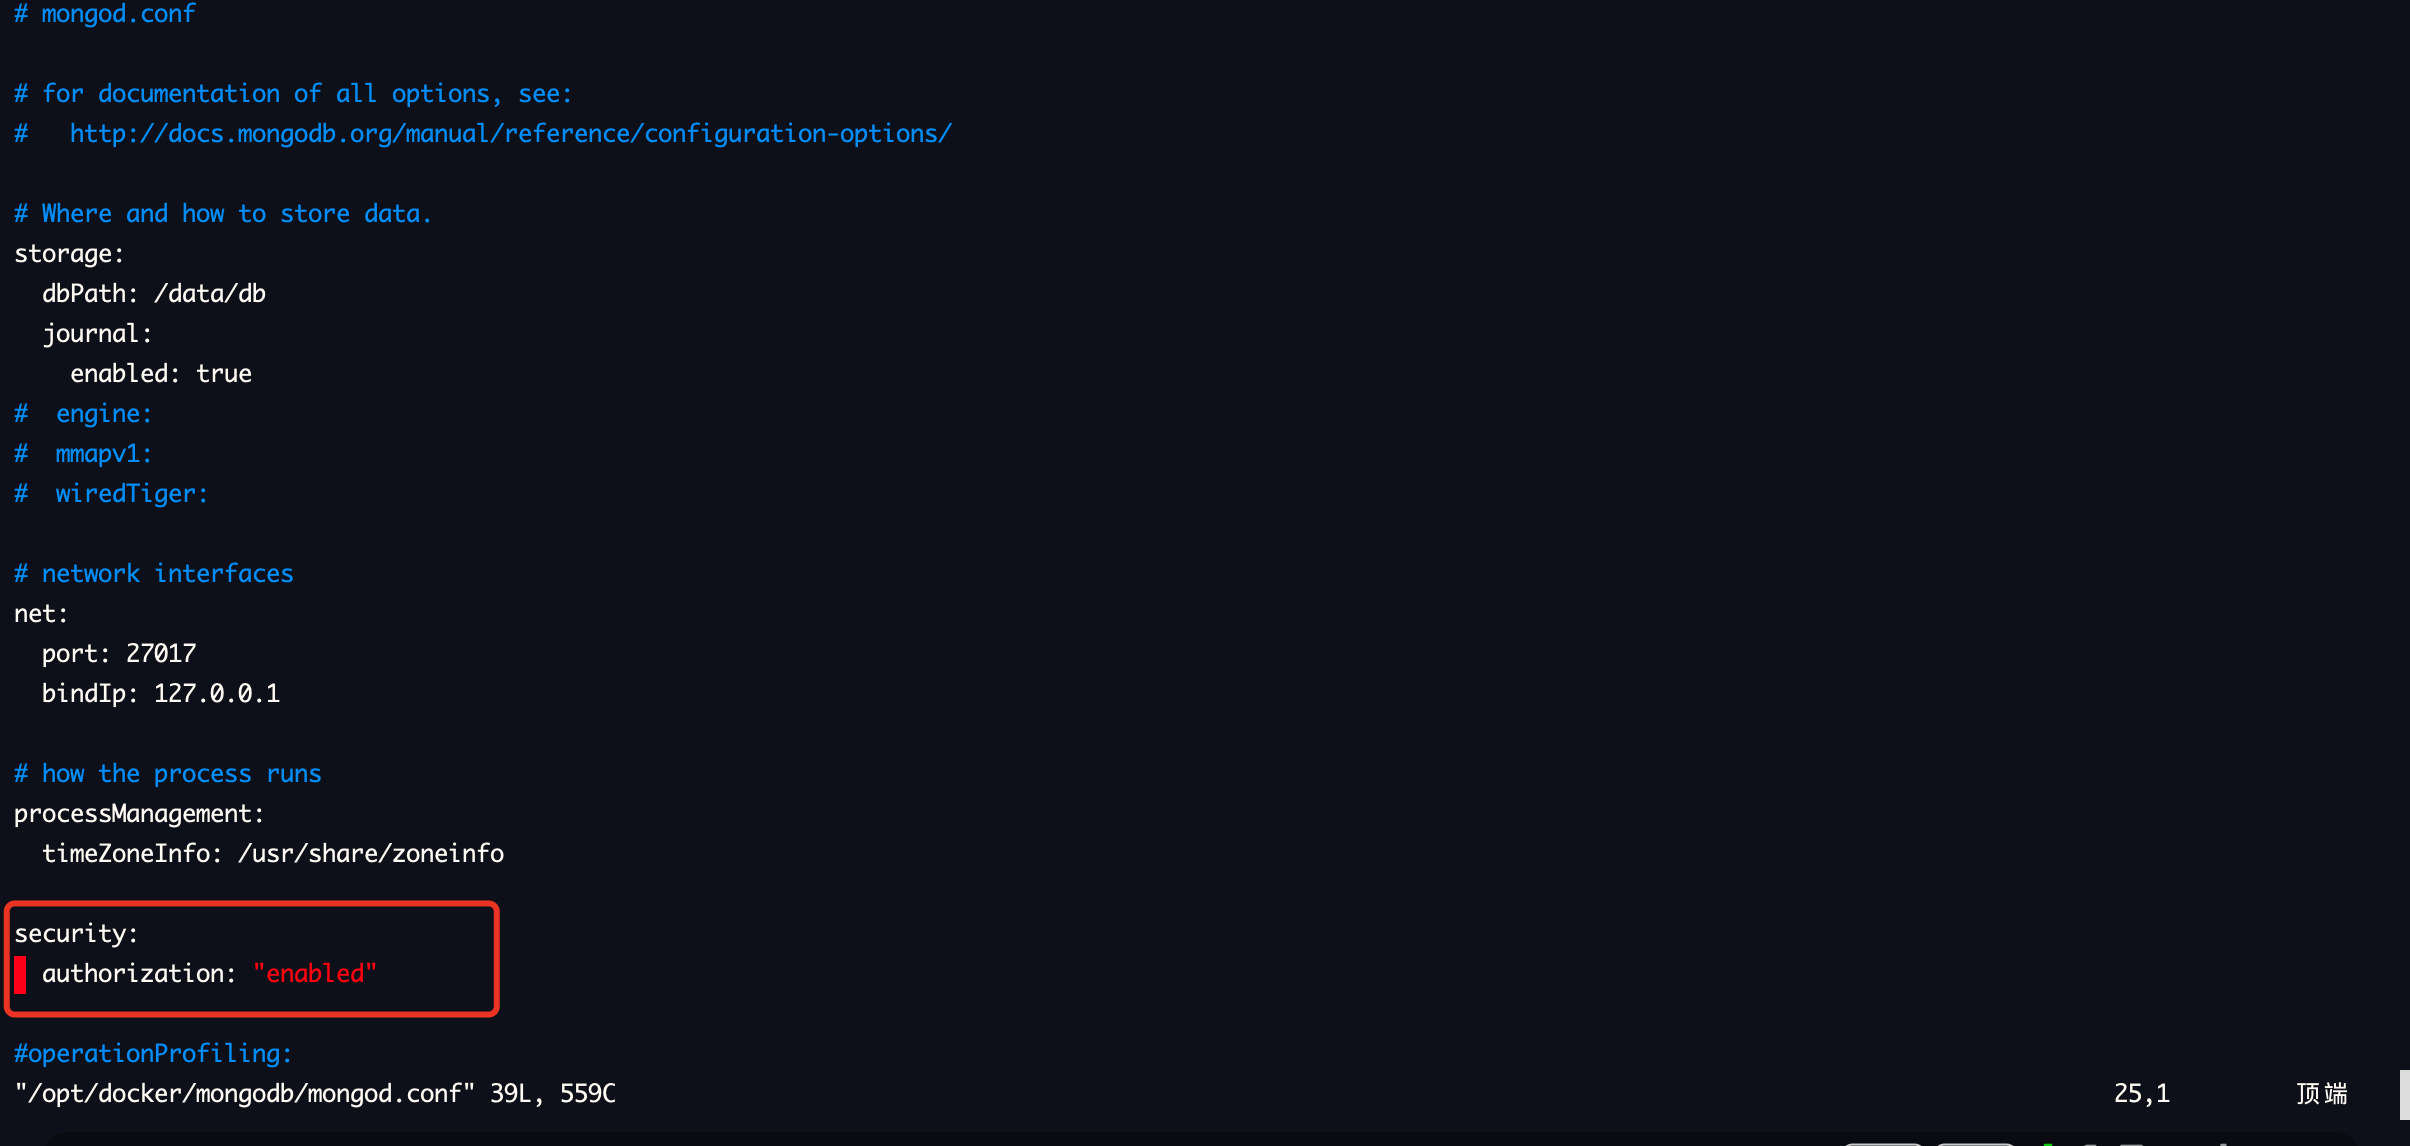
Cancel the comments before lines 24-25, save and restart mongodb.
docker start MongoDB
Deploy RocketChat
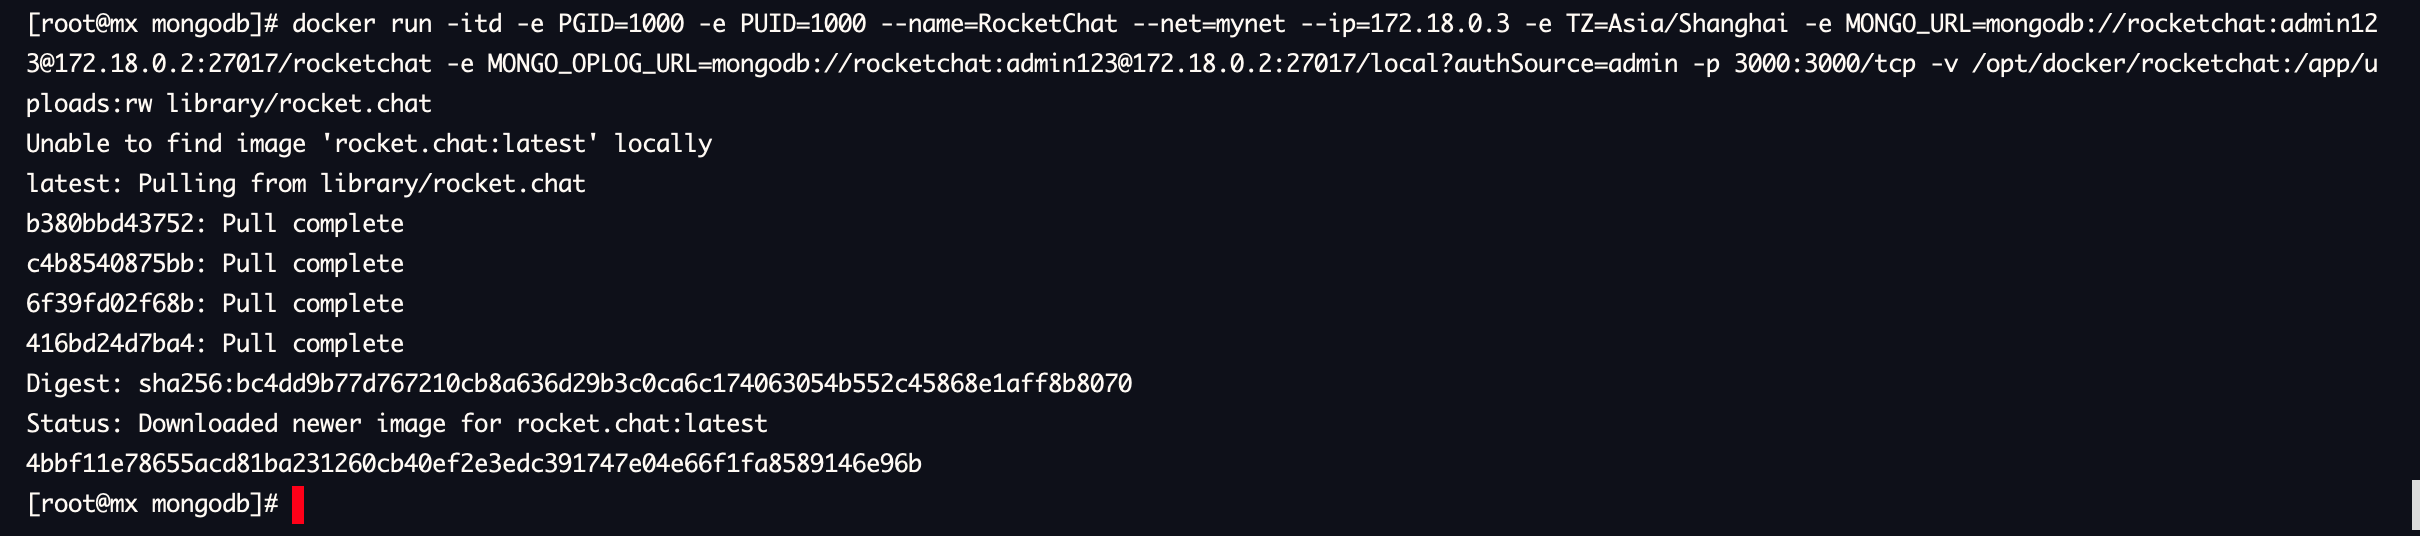
Use the following command to deploy the image. If the download is slow or timeout, you can try several more times.
docker run \
-itd \
-e PGID=1000 \
-e PUID=1000 \
--name=RocketChat \
--net=mynet \
--ip=172.18.0.3 \
-e TZ=Asia/Shanghai \
-e MONGO_URL=mongodb://rocketchat:admin123@172.18.0.2:27017/rocketchat \
-e MONGO_OPLOG_URL=mongodb://rocketchat:admin123@172.18.0.2:27017/local?authSource=admin \
-p 3000:3000/tcp \
-v /opt/docker/rocketchat:/app/uploads:rw library/rocket.chat
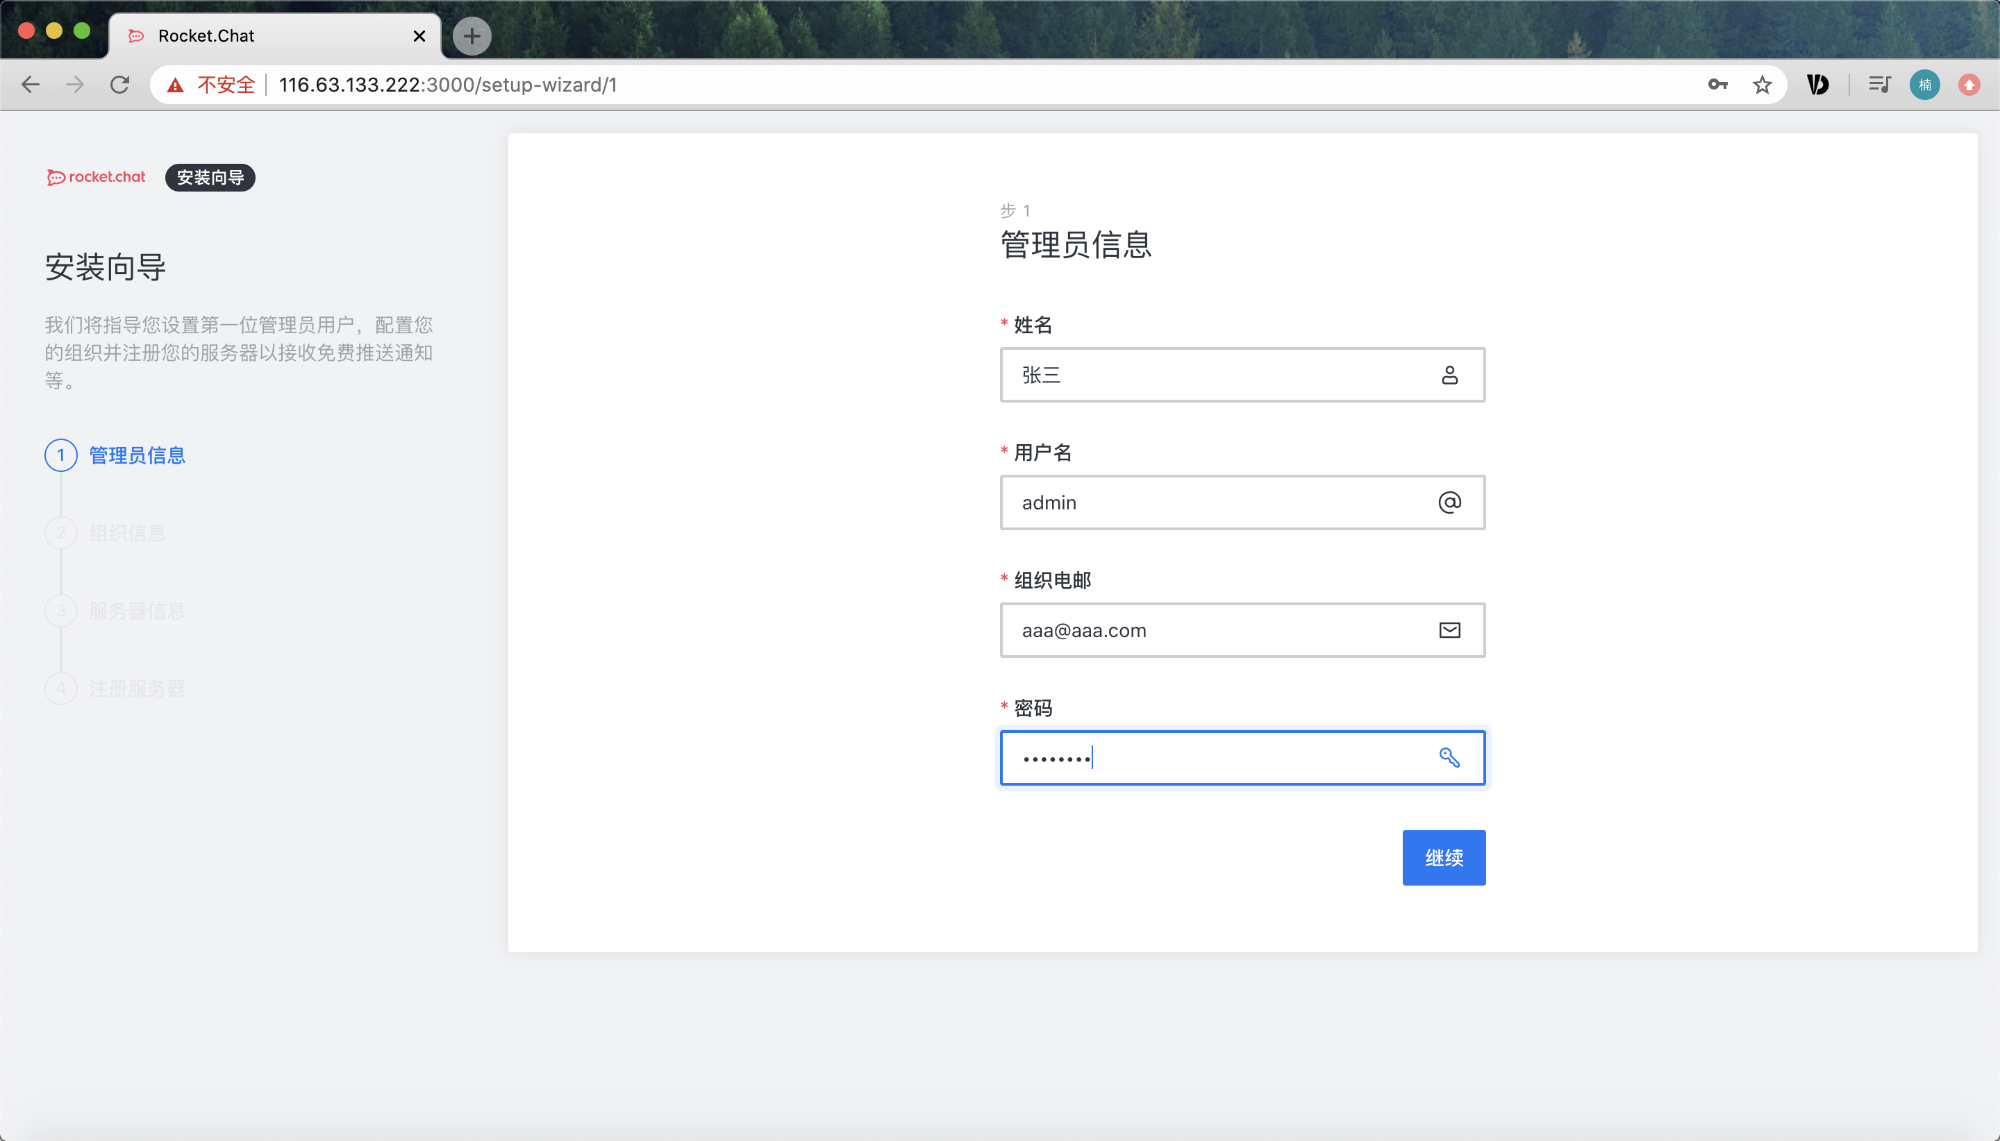
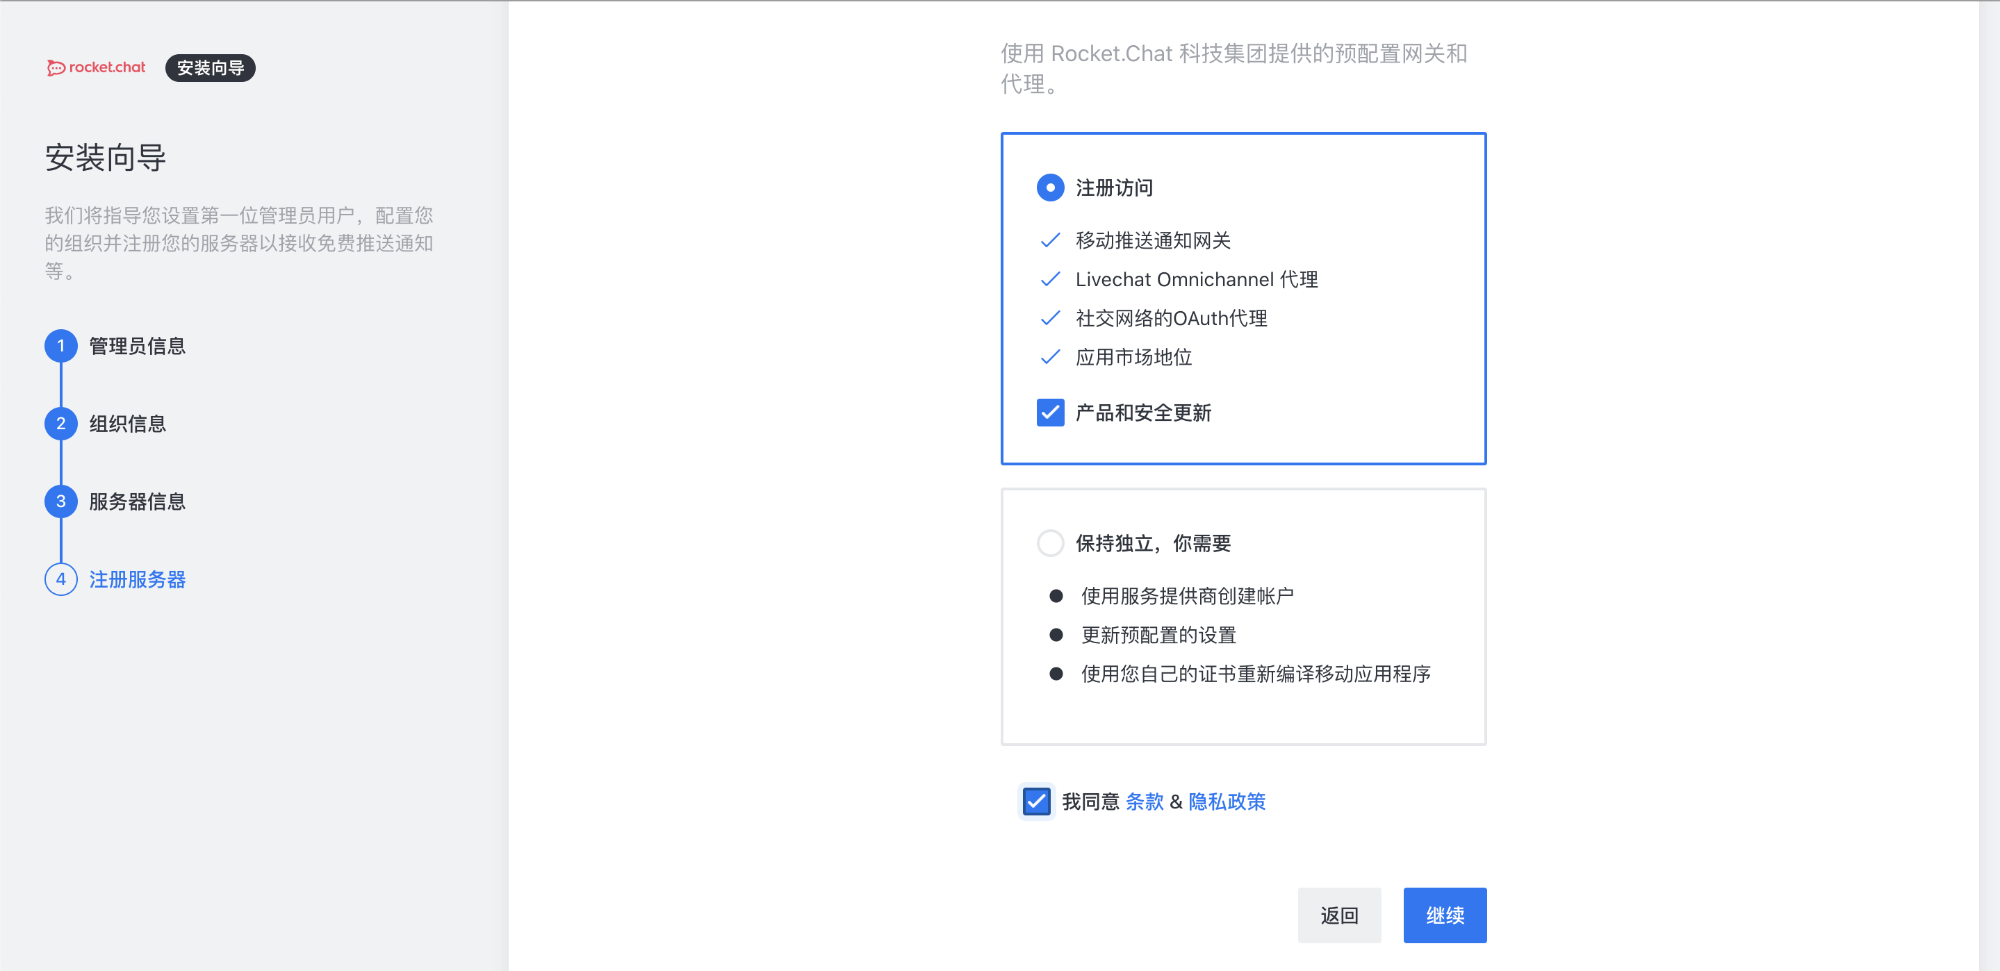
Close the firewall, or release the 3000TCP port, and use the web page to access. The address is IP: 3000 (if you are a public server, please use your public address). Configure the basic information until the configuration is completed.

Finally, you can play happily. Try to make an expression~
epilogue
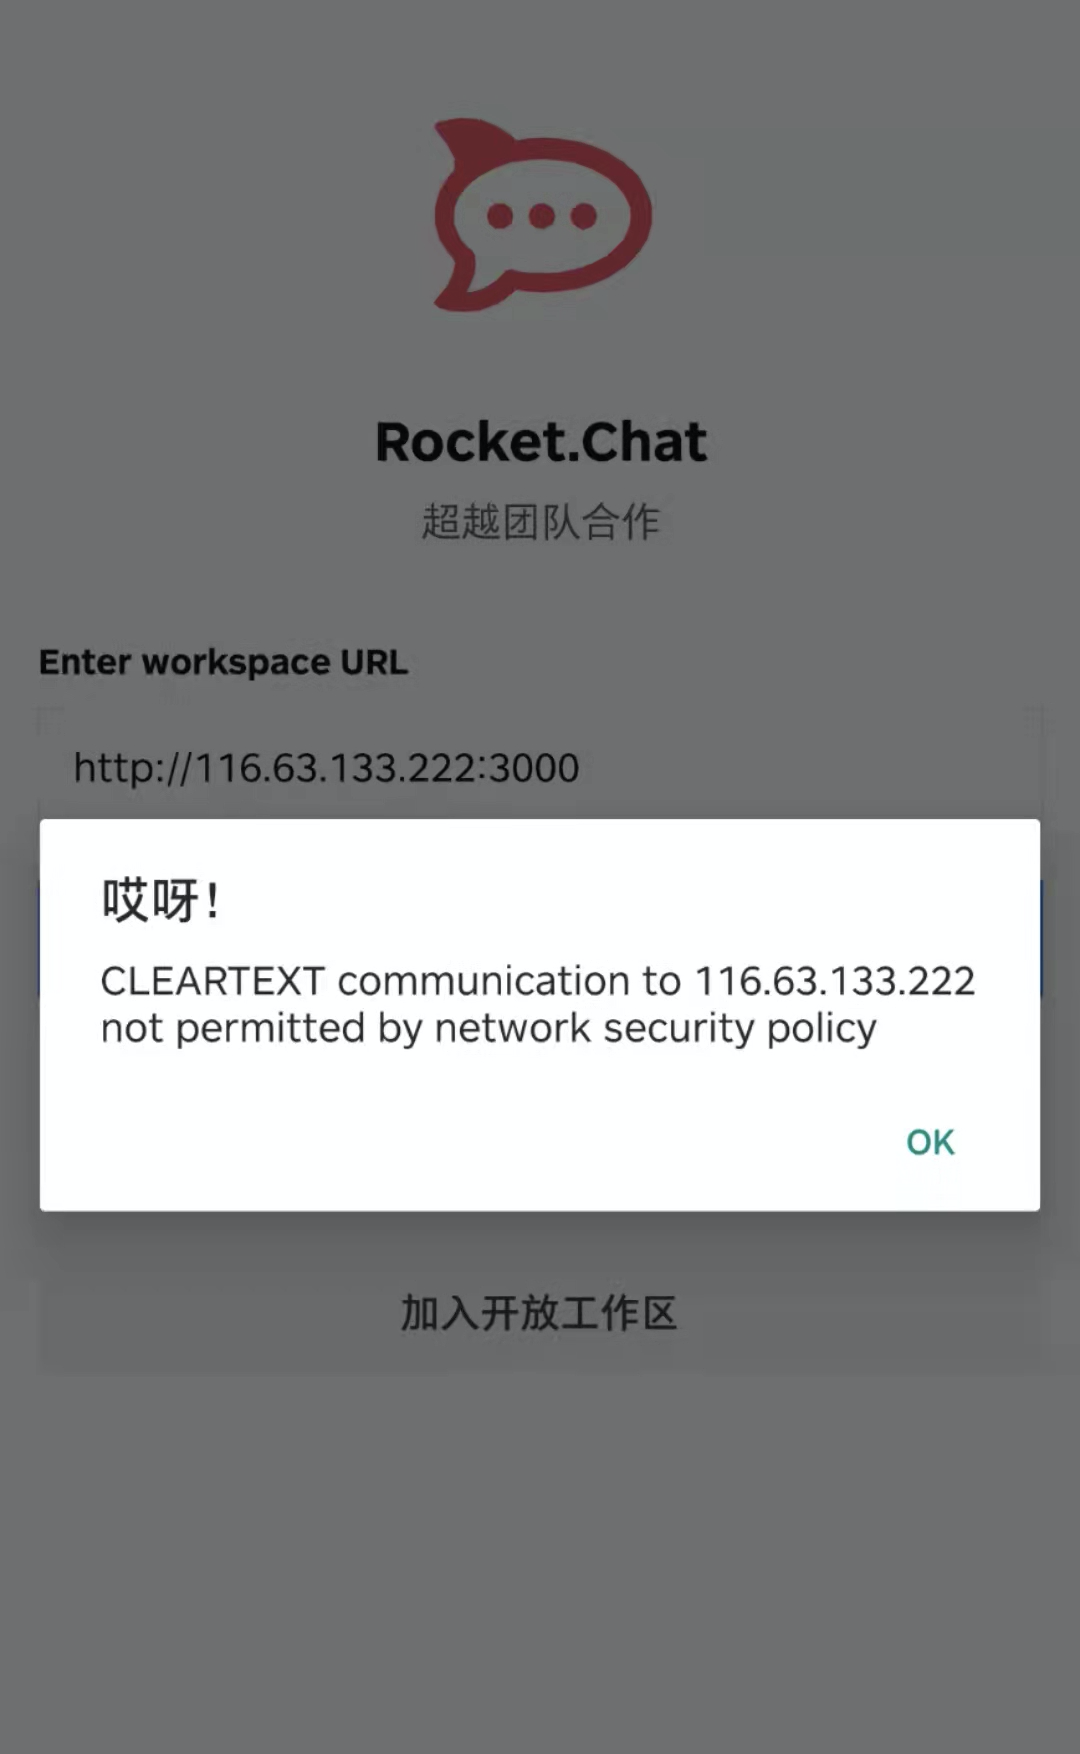
After successful installation, you can use ssl certificate to encrypt the website, which can be more secure. Moreover, when using the client to connect to the private server, the http protocol will not be connected (as shown below).
If you encounter problems during installation and can't continue, you can contact me in a private letter for help (shell one click script can be provided). Client access please reply to keyword 111 in WeChat official account.