Original link: https://www.jianshu.com/p/be290ccea05a
Builder Pattern - the most understandable design pattern analysis
Carson_Ho follow
32016.12.07 14:45:28 words 1667 reading 24383
preface
Today, I'd like to comprehensively summarize the most commonly used design pattern in Android Development - builder pattern.
Introduction to other design modes
1 minute to fully understand the "design pattern"
Singleton - the most understandable design pattern analysis
Simple factory pattern - the most understandable design pattern analysis
Factory Method - the most understandable design pattern analysis
Abstract Factory - the most understandable design pattern analysis
Strategy Pattern - the most understandable design pattern analysis
Adapter Pattern - the most understandable design pattern analysis
Proxy Pattern - the most understandable design pattern analysis
Template Method - the most understandable design pattern analysis
Builder Pattern - the most understandable design pattern analysis
Facade Pattern - the most understandable design pattern analysis
catalogue

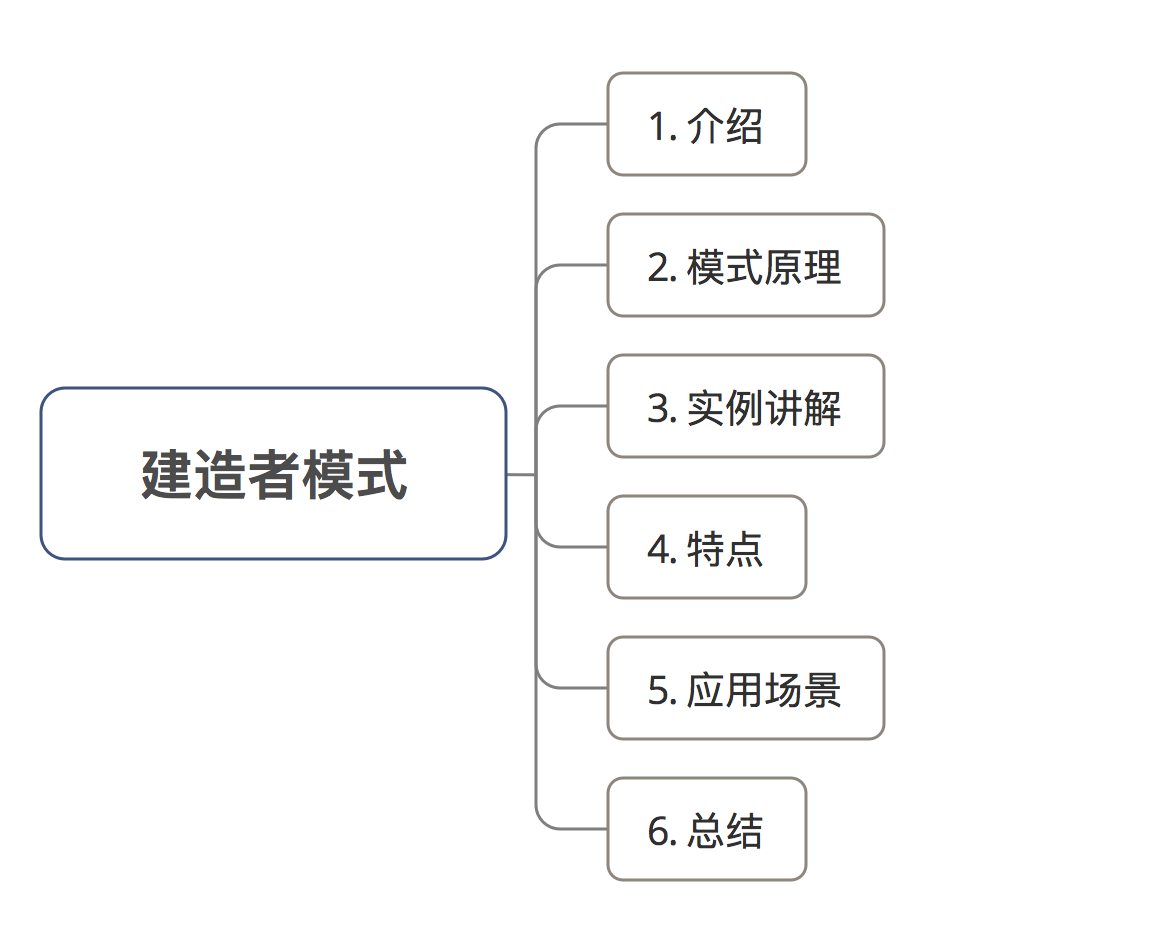
Sketch Map
1. Introduction
1.1 mode description
Hide the construction process & details of creating objects, so that users can directly create complex objects without knowing the construction process & details of objects
- Users only need to specify the type and content of complex objects;
- The builder pattern is responsible for creating complex objects in sequence (hiding the internal construction process and details)
1.2 role (problem solved)
- Reduce the complexity of creating complex objects
- Isolate the build process of creating objects & representation
Thus:
- It is convenient for users to create complex objects (no need to know the implementation process)
- Code reusability & encapsulation (encapsulating & reusing the object construction process and details)
Ex amp le: make a car & buy a car.
- Factory (builder mode): responsible for manufacturing cars (assembly process and details are in the factory)
- Car buyer (user): you just need to say the model you need (object type and content), and then buy it directly
(you don't need to know how the car is assembled (wheels, doors, engine, steering wheel, etc.)
2. Mode principle
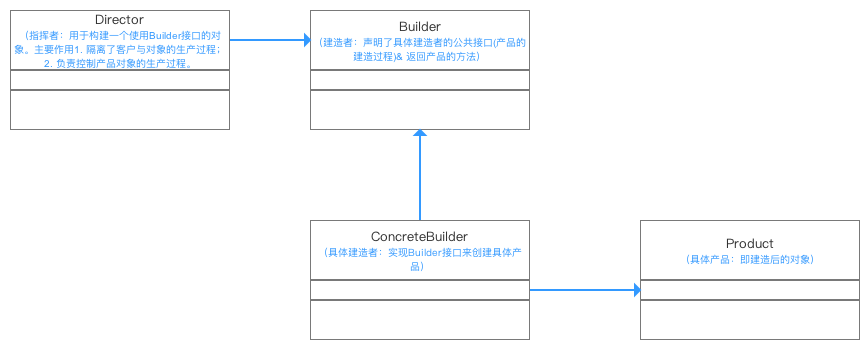
2.1 UML class diagram

UML class diagram
2.2 mode explanation
- The Director directly communicates with the Client on requirements;
- After communication, the commander divides the customer's demand for creating products into the construction request (Builder) of each component;
- Delegate the construction request of each component to a specific builder;
- Each specific builder is responsible for the construction of product parts;
- Finally, it is built into a specific Product.
3. Example explanation
Next, I use an example to further introduce the builder model.
3.1 example overview
- background
Xiaocheng hopes to go to the computer city to buy an assembled desktop host - process
- The computer city owner (Diretor) and Xiaocheng (Client) communicate needs (buy to play games, study, watch movies?)
- After understanding the requirements, the boss of the computer city divides the host required by Xiaocheng into the construction requests of various components (CPU and motherboard BLA)
- Command the installation personnel (ConcreteBuilder) to build components;
- A computer (Product) needed to assemble components into a small assembly
3.2 use steps
Step 1: define the assembly process (Builder): the process of assembling the computer
public  abstract class Builder {

//Step 1: install CPU
//Declared as an abstract method, which is implemented by subclasses
    public abstract void  BuildCPU();

//Step 2: install the motherboard
//Declared as an abstract method, which is implemented by subclasses
    public abstract void BuildMainboard();

//Step 3: install the hard disk
//Declared as an abstract method, which is implemented by subclasses
    public abstract void BuildHD();

//How to return the product: get the assembled computer
    public abstract Computer GetComputer();
}
Step 2: the boss of the computer city assigns tasks to the installation Director
public class Director{
                        //Command the installation personnel to assemble the computer
                        public void Construct(Builder builder){

                                 builder. BuildCPU();
                                 builder.BuildMainboard();
                                 builder. BuildHD();
                              }
 }
Step 3: create concrete Builder: installation personnel
//Installation personnel 1
  public class ConcreteBuilder extend  Builder{
    //Create a product instance
    Computer computer = new Computer();

    //Assembled products
    @Override
    public void  BuildCPU(){
       computer.Add("assemble CPU")
    }

    @Override
    public void  BuildMainboard(){
       computer.Add("Assemble the motherboard")
    }

    @Override
    public void  BuildHD(){
       computer.Add("Assemble the motherboard")
    }

    //Return the computer successfully assembled
     @Override
      public  Computer GetComputer(){
      return computer
    }
}
Step 4: define a specific Product class: computer
public class Computer{

    //Collection of computer components
    private List<String> parts = new ArrayList<String>();

    //Used to assemble components into a computer
    public void Add(String part){
    parts.add(part);
}

    public void Show(){
          for (int i = 0;i<parts.size();i++){
          System.out.println(""Component"+parts.get(i)+""It's ready");
          }
          System.out.println("The computer is assembled, please accept ");


}

}
Step 5: client call - Xiaocheng goes to the computer city to find the boss to buy a computer
public class Builder Pattern{
  public static void main(String[] args){

//After wandering for a long time, I finally found a suitable computer store
//Find the owner and installer of the store
  Director director = new Director();
  Builder builder = new ConcreteBuilder();

//After communicating the demand, the boss asked the installer to install the computer
director.Construct(builder);

//After installation, the assembly personnel moved to the assembled computer
Computer computer = builder.GetComputer();
//The assembler showed the computer to Xiao Cheng
computer.Show();

    }

}
Result output
assembly CUP It's ready
 The component motherboard is installed
 The component hard disk is installed
 The computer is assembled, please check and accept
Through the above common life example, I believe you have fully understood the principle of builder mode!!
4. Features
After a comprehensive analysis, let me analyze its advantages and disadvantages:
4.1 advantages
- Easy decoupling
By decoupling the product itself from the product creation process, you can use the same creation process to get different products. That is, details depend on abstraction. - It is easy to precisely control the creation of objects
The creation steps of complex products are decomposed into different methods to make the creation process clearer - Easy to expand
Adding new specific builders does not need to modify the code of the original class library, which is easy to expand and in line with the "opening and closing principle".
Each specific builder is relatively independent and has nothing to do with other specific builders. Therefore, it is convenient to replace or add new specific builders. Users can get different product objects by using different specific builders.
4.2 disadvantages
- The products created by the builder model generally have more in common, and their components are similar; If there are great differences between products, it is not suitable to use the builder mode, so its scope of use is limited.
- If the internal changes of the product are complex, it may lead to the need to define many specific builder classes to realize this change, resulting in a huge system.
5. Application scenarios
- The product objects to be generated have complex internal structures, and these product objects have commonalities;
- Isolate the creation and use of complex objects, and enable the same creation process to create different products.
6. Summary
This paper mainly introduces the builder mode, and then introduces other design modes