Basic reptile learning notes
urllib Library
The urllib library is one of the most basic network request libraries in Python. It can simulate the behavior of the browser, send a request to the specified server, and save the data returned by the server.
1. urlopen function
In the urllib Library of Python 3, all methods related to network requests are in urllib Under the request module, the basic usage of urlopen() function is as follows:
request.urlopen(url, data=None, [timeout,]*, cafile=None, capath=None, cadefault=False, context=None)
from urllib import request

# A way of writing
resp = request.urlopen('http://www.baidu.com/')
# Another way of writing
url = 'http://www.baidu.com/'
resp = request.urlopen(url=url)

# Read everything
print(resp.read())
# Read 10 characters
print(resp.read(10))
# Read one line
print(resp.readline())
# Read multiple lines
print(resp.readlines())
# Get status code
print(resp.getcode())
The urlopen function is explained in detail below:
(1) url: the url of the request
(2) Data: the requested data. If this value is set, it will become a POST request
(3) Return value: the return value is an HTTP client. Httpresponse object, which is a class file handle object. There are read(size), readline, readlines, getcode and other methods.
2. urlretrieve function
This function can easily save a file on the web page locally. The following code can easily download Baidu home page locally:
from urllib import request
# The syntax of this function must be strictly written like this. Download the file name: Baidu HTML, save to current path
request.urlretrieve('http://www.baidu.com/', 'baidu.html')
# If you write this to the following, you can't
url = 'http://www.baidu.com/'
request.urlretrieve(url=url, 'baidu.html')

# There will be the following error reports
  request.urlretrieve(url=url, 'baidu.html')
                                             ^
SyntaxError: positional argument follows keyword argument
The following example is to save a picture locally:
from urllib import request

# Prevent validation errors
import ssl
ssl._create_default_https_context = ssl._create_unverified_context

request.urlretrieve('https://tenfei03.cfp.cn/creative/vcg/800/new/VCG21a1834bfe5.jpg', '1.jpg')
3. urlencode function
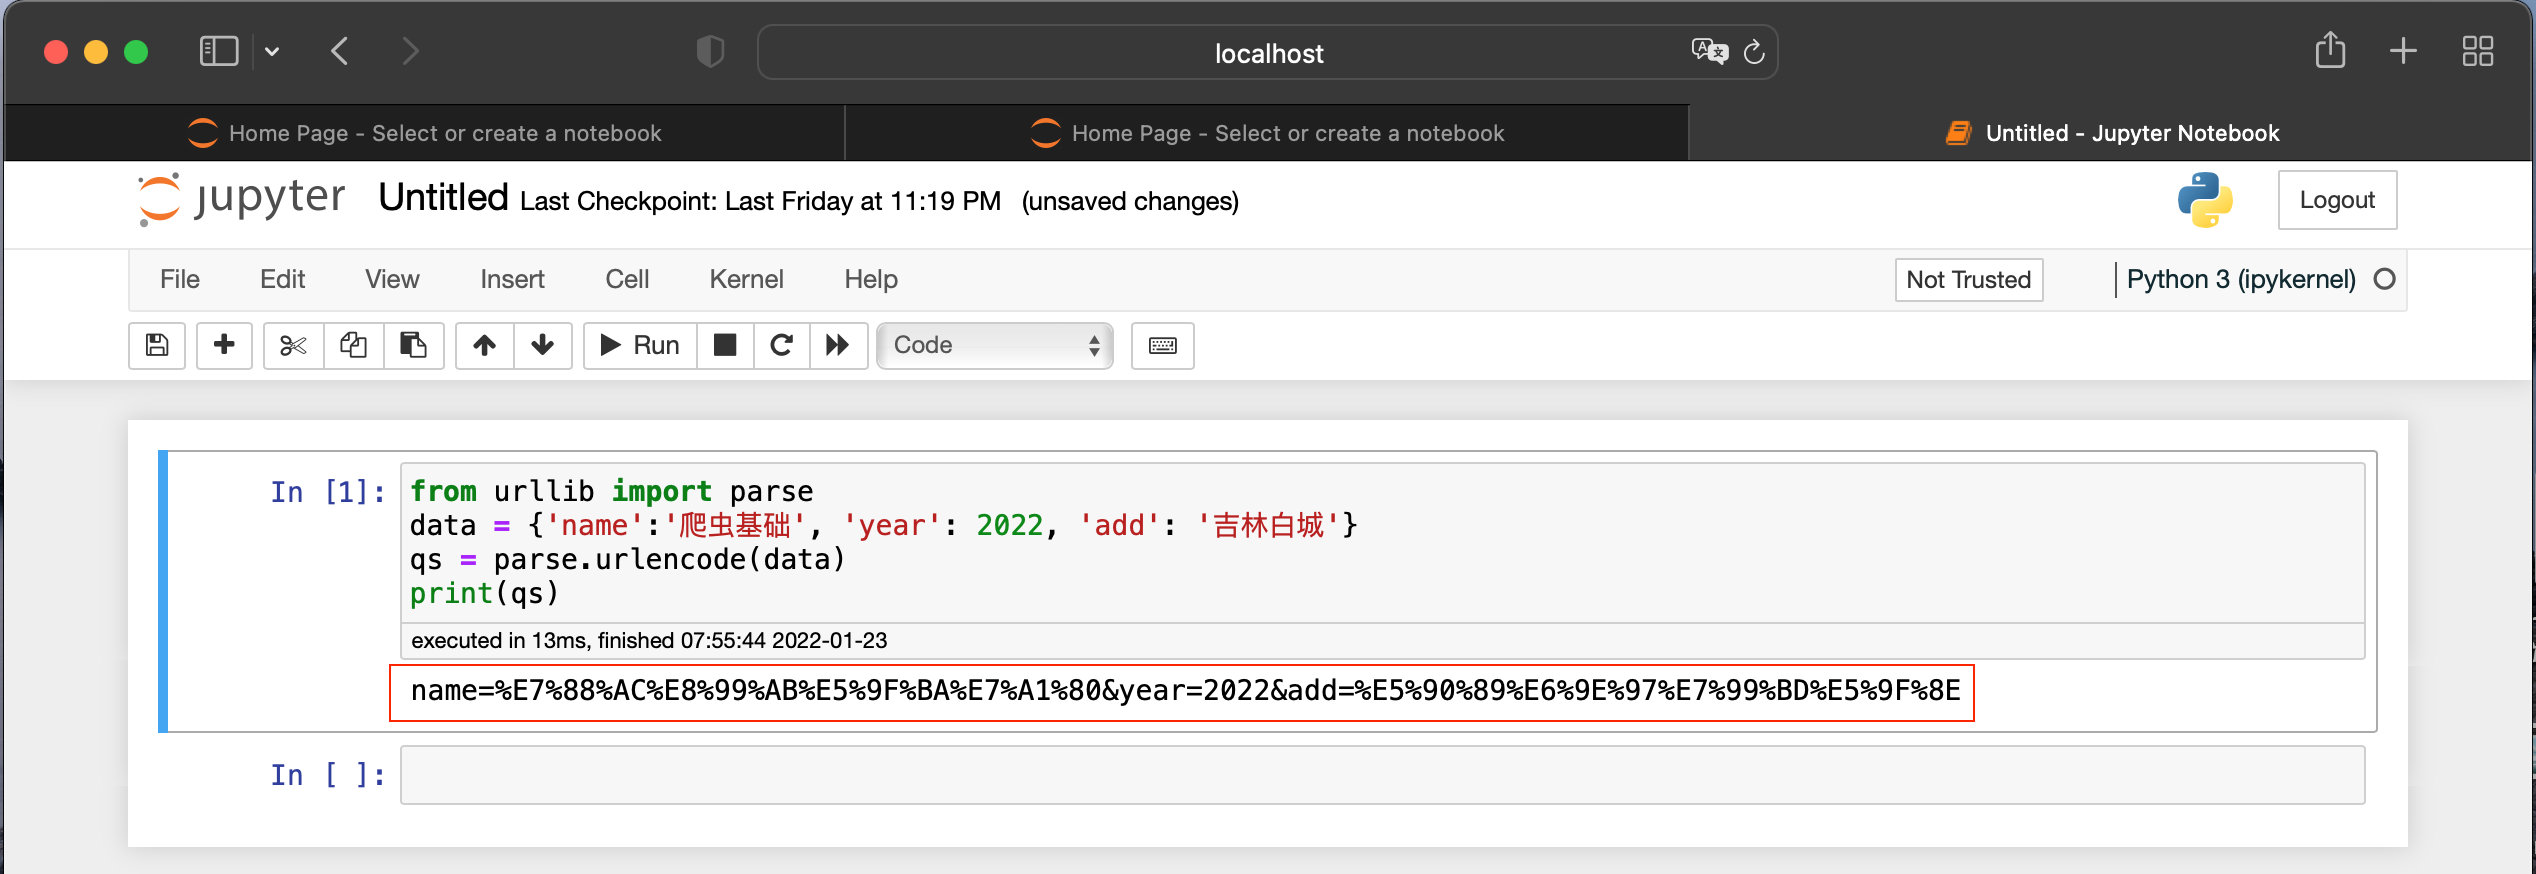
When a real browser sends a request, if the url contains Chinese or other special characters, the browser will automatically decode it for us. However, if you use code to send a request, you need to code it manually, so the urlencode function is used. urlencode can convert dictionary data into url encoded data. The example code is as follows:
# parse is related to parsing
from urllib import parse
data = {'name':'Reptile Foundation', 'year': 2022, 'add': 'Jilin Baicheng'}
qs = parse.urlencode(data)
print(qs)
If we send the request in an uncoded format in the code, the example code is as follows:
from urllib import request
url = 'https://www.baidu.com/s?wd = Bruce Lee '
resp = request.urlopen(url)
print(resp.read())
The error is as follows:
UnicodeEncodeError                        Traceback (most recent call last)
UnicodeEncodeError: 'ascii' codec can't encode characters in position 10-12: ordinal not in range(128)
For comparison, now code "Bruce Lee" with urlencode, and then make a code request. The code is as follows:
from urllib import request
from urllib import parse

url = 'https://www.baidu.com/s?'
data = {'wd':'Bruce Lee'}
params = parse.urlencode(data)
url = url+params
resp = request.urlopen(url)
print(resp.read())
The response is normal, and the return result is shown in the figure below:

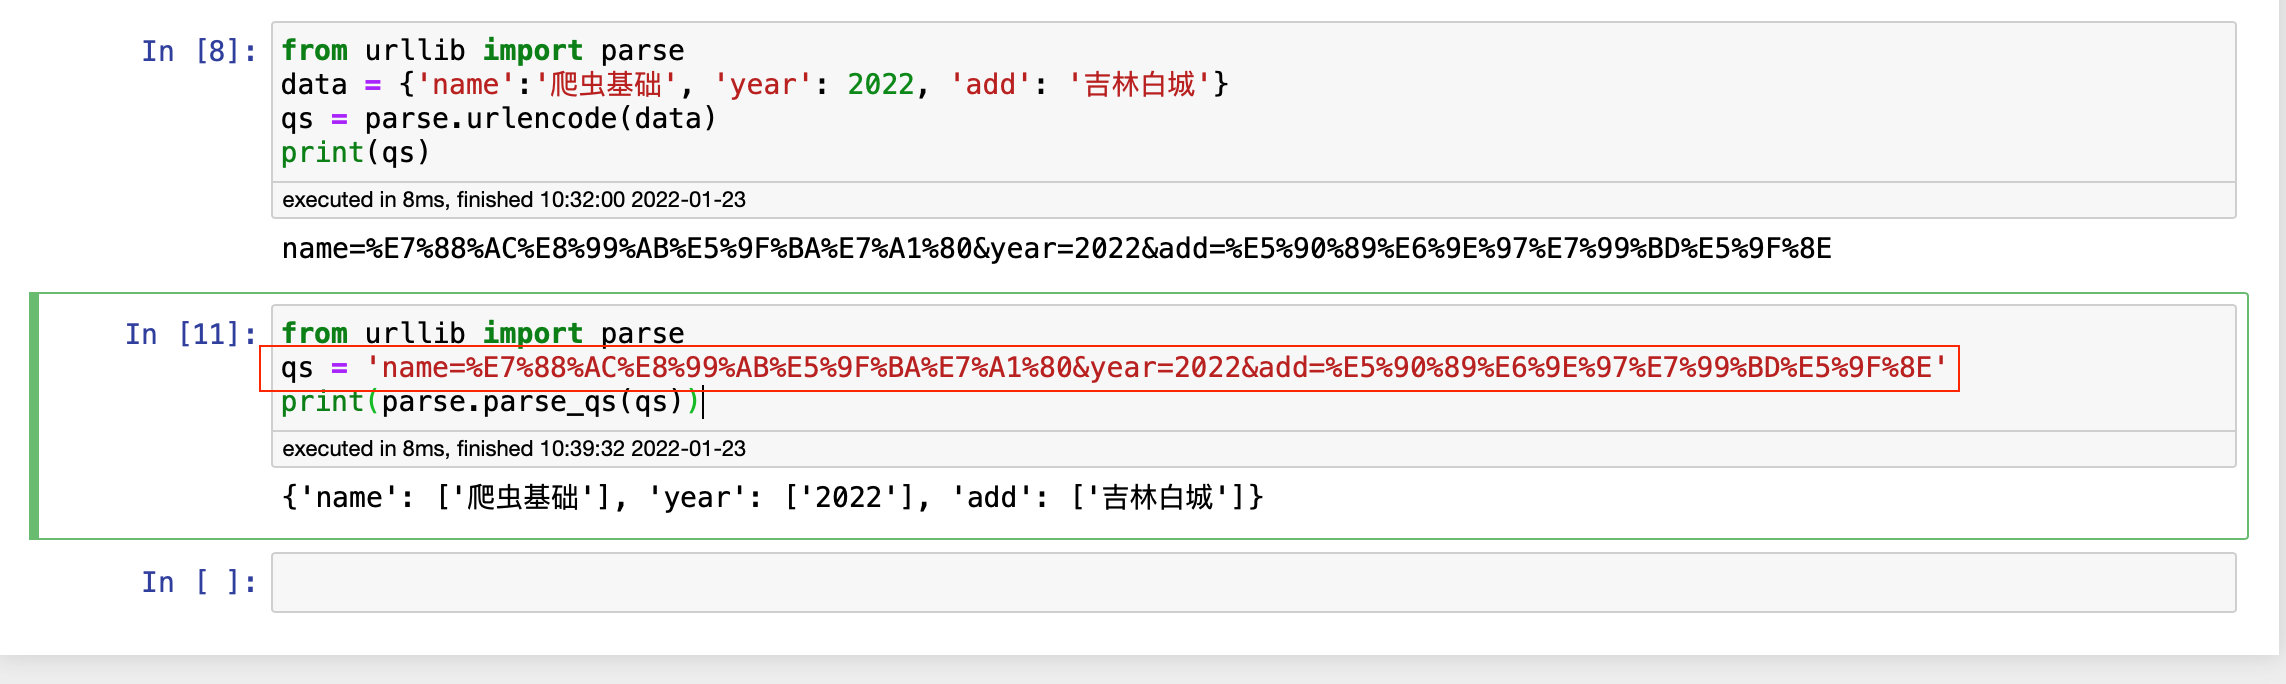
4,parse_qs function
The encoded url parameters can be decoded. The example code is as follows:
from urllib import parse
qs='name=%E7%88%AC%E8%99%AB%E5%9F%BA%E7%A1%80&year=2022&add=%E5%90%89%E6%9E%97%E7%99%BD%E5%9F%8E'
print(parse.parse_qs(qs))
The decoded value is still in dictionary format, but the value becomes a list.
5. urlparse and urlplit
Sometimes the components of a url need to be segmented, which requires urlparse or urlplit. The code is as follows:
from urllib import request, parse
url = 'http://www.baidu.com/s?wd=java&username=123#23'

res = parse.urlparse(url)
print(res)
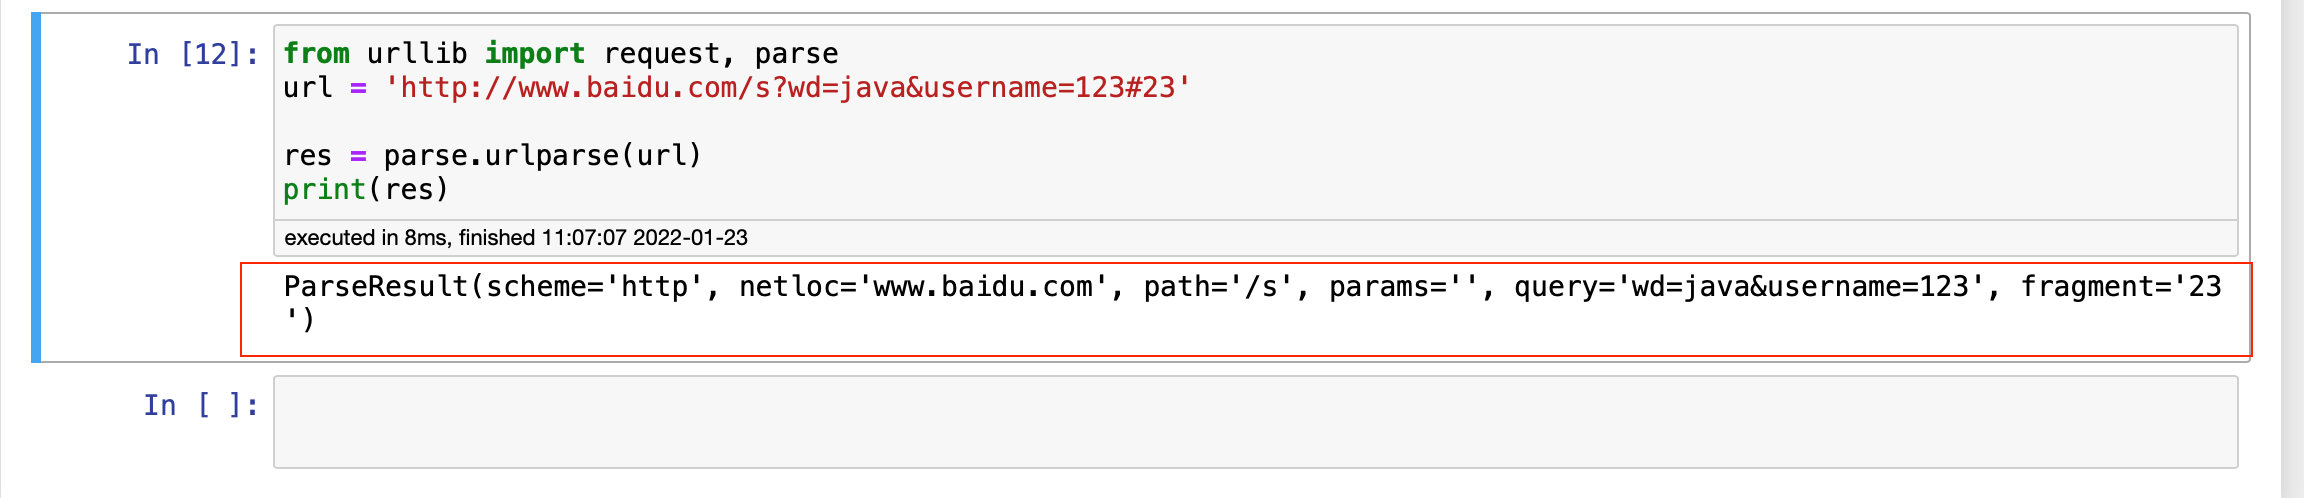
Resolution: scheme corresponds to http and netloc corresponds to www.baidu.com COM, path corresponds to / s,? The query statement corresponds to query =, and the fragment corresponds to#
To obtain an attribute value, the example code is as follows:
from urllib import request, parse
url = 'http://www.baidu.com/s?wd=java&username=123#23'

res = parse.urlparse(url)
print('scheme:', res.scheme)
print('netloc:', res.netloc)
print('path:', res.path)
print('params:', res.params)
print('query: ', res.query)
print('fragment:', res.fragment)
# result
scheme: http
netloc: www.baidu.com
path: /s
params:
query:  wd=java&username=123
fragment: 23
Urlplit application, the example code is as follows:
from urllib import request, parse
url = 'http://www.baidu.com/s?wd=java&username=123#23'

res = parse.urlsplit(url)

print(res)
print('scheme:', res.scheme)
print('netloc:', res.netloc)
print('path:', res.path)
# print('params:', res.params)
print('query: ', res.query)
print('fragment:', res.fragment)
SplitResult(scheme='http', netloc='www.baidu.com', path='/s', query='wd=java&username=123', fragment='23')
scheme: http
netloc: www.baidu.com
path: /s
query:  wd=java&username=123
fragment: 23
The difference between the two: urlplit has no params attribute, and urlparse has params attribute. If it is in's' and '?' of url Add a data between, then the urlparse will have paramas = data value
request.Request class
First, run the access method without headers. The example code is as follows:
from urllib import request
url = 'https://www.lagou.com/wn/jobs?labelWords=&fromSearch=true&suginput=&kd=python'
resp = request.urlopen(url)
print(len(resp.read()))
executed in 707ms, finished 12:47:22 2022-01-23
127034
If you want to add some request headers to the request, you must use request Request class. For example, to add a user agent, the example code is as follows:
from urllib import request
url = 'https://www.lagou.com/wn/jobs?labelWords=&fromSearch=true&suginput=&kd=python'
headers = {'User-Agent':'Mozilla/5.0 (Macintosh; Intel Mac OS X 10_15_7) AppleWebKit/537.36 (KHTML, like Gecko) Chrome/97.0.4692.99 Safari/537.36'}

# Use request The request class instantiates a req request object
req = request.Request(url, headers=headers)

# Then use request Urlopen () opens the request object
resp = request.urlopen(req)
print(len(resp.read()))
executed in 788ms, finished 12:47:42 2022-01-23
124447
ProxyHandler processor (proxy settings)
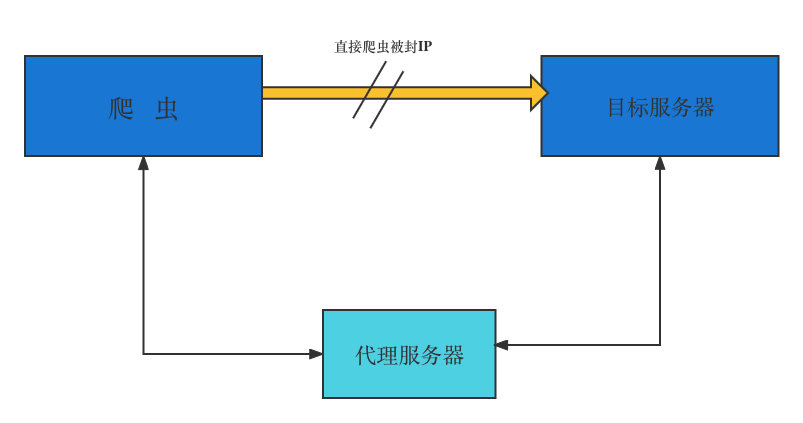
Many websites will detect the access times of an IP in a certain period of time (through traffic statistics, system logs, etc.). If the access times are abnormal, it will prohibit the access of this IP. Therefore, we can set up some agents and change an agent every other period of time. Even if the IP is blocked, we can still change an IP to continue crawling. Use ProxyHandler to set proxy server in urllib. The following code describes how to use custom opener to use proxy server:
from urllib import request

# No agent
resp = request.urlopen('http://httpbin.org/get')
print(resp.read().decode('utf-8'))

# Use the proxy. The format is dictionary. The proxy supports http, the key is http, supports https, the key is https, and the value is the ip of the proxy server
handler = request.ProxyHandler({'http':'218.66.161.88:31769'})

opener = request.build_opener(handler)
req = request.Request('http://httpbin.org/ip')
resp = opener.open(req)
print(resp.read())
The request result of using agent is as follows:
b'<!DOCTYPE html>\r\n<html>\r\n\r\n<head>\r\n <meta charset="UTF-8" />\r\n <meta http-equiv="X-UA-Compatible" content="IE=edge,chrome=1" />\r\n <meta name="viewport" content="width=device-width, initial-scale=1.0,maximum-scale=1.0, user-scalable=no" />\r\n <meta name="apple-mobile-web-app-title" content="\xe4\xba\xac\xe4\xb8\x9c\xe8\xb7\xaf\xe7\x94\xb1" />\r\n <meta http-equiv="pragma" content="no-cache">\r\n <meta http-equiv="cache-control" content="no-cache">\r\n <meta http-equiv="expires" content="0">\r\n <title>JD</title>\r\n <link href="./P_IMG/icon.png" rel="icon" type="image/x-icon" />\r\n <script type="text/Javascript" src="./Public_JS/jquery.min.js"></script>\r\n <script type="text/Javascript" src="./Public_JS/redirect.js"></script>\r\n <script type="text/Javascript" src="./Public_JS/jquery.cookie.js"></script>\r\n</head>\r\n\r\n<body>\r\n <div id="main"></div>\r\n</body>\r\n<script type="text/Javascript">\r\n var errNo = 0;\r\n $(function () {\r\n var DEFAULT_VERSION = 9.0;\r\n var ua = navigator.userAgent.toLowerCase();\r\n var isIE = ua.indexOf("msie") > -1;\r\n var safariVersion;\r\n if (isIE) {\r\n safariVersion = ua.match(/msie ([\\d.]+)/)[1];\r\n }\r\n if (safariVersion <= DEFAULT_VERSION) {\r\n alert(\'\xe7\xb3\xbb\xe7\xbb\x9f\xe6\xa3\x80\xe6\xb5\x8b\xe5\x88\xb0\xe6\x82\xa8\xe6\xad\xa3\xe5\x9c\xa8\xe4\xbd\xbf\xe7\x94\xa8ie9\xe5\x8f\x8a\xe4\xbb\xa5\xe4\xb8\x8b\xe5\x86\x85\xe6\xa0\xb8\xe7\x9a\x84\xe6\xb5\x8f\xe8\xa7\x88\xe5\x99\xa8\xef\xbc\x8c\xe4\xb8\x8d\xe8\x83\xbd\xe5\xae\x9e\xe7\x8e\xb0\xe5\xae\x8c\xe7\xbe\x8e\xe4\xbd\x93\xe9\xaa\x8c\xef\xbc\x8c\xe8\xaf\xb7\xe6\x9b\xb4\xe6\x8d\xa2\xe6\x88\x96\xe5\x8d\x87\xe7\xba\xa7\xe6\xb5\x8f\xe8\xa7\x88\xe5\x99\xa8\xe8\xae\xbf\xe9\x97\xae\xef\xbc\x81\')\r\n };\r\n\r\n var htmlHref = window.location.href;\r\n htmlHref = htmlHref.replace(/^http:\\/\\//, "");\r\n var index = htmlHref.indexOf(\'/\');\r\n htmlHref = htmlHref.substring(0, index);\r\n $.cookie("HostAddrIP", htmlHref, {\r\n expires: 7, path: \'/\'\r\n });\r\n $.ajax({\r\n type: "post",\r\n url: "http://" + htmlHref + "/jdcapi",\r\n data: JSON.stringify({\r\n "jsonrpc": "2.0",\r\n "id": 20,\r\n "method": "call",\r\n "params": [\r\n "00000000000000000000000000000000",\r\n "jdcapi.static",\r\n "get_initialization_info",\r\n {}\r\n ]\r\n }),\r\n dataType: "json",\r\n success: function (data) {\r\n if(data.result[0] == 0 && data.result[1].intialized == \'1\'){\r\n if (browserRedirect()) { \r\n window.location.href = "./M_Guide/html/M_Login.html";\r\n } else \r\n { \r\n window.location.href = "./P_Guide/html/P_Login.html"; \r\n }\r\n }else{\r\n initUserLogin(htmlHref);\r\n if(errNo){\r\n if (browserRedirect()) { window.location.href = "./M_Guide/html/M_Welcome.html";} else { window.location.href = "./P_Guide/html/P_Welcome.html"; }\r\n }else{\r\n alert(\'\xe7\xb3\xbb\xe7\xbb\x9f\xe9\x94\x99\xe8\xaf\xaf\xef\xbc\x8c\xe8\xaf\xb7\xe9\x87\x8d\xe8\xaf\x95\');\r\n }\r\n }\r\n }\r\n });\r\n \r\n });\r\n var initUserLogin = function (htmlHref) {\r\n $.ajax({\r\n type: "post",\r\n url: "http://" + htmlHref + "/jdcapi",\r\n async:false,\r\n data: JSON.stringify({\r\n "jsonrpc":"2.0",\r\n "id":1,\r\n "method":"call",\r\n "params":[\r\n "00000000000000000000000000000000",\r\n "session",\r\n "login",\r\n {\r\n "username": "root",\r\n "password": "admin",\r\n "timeout":0\r\n }\r\n ]\r\n }),\r\n dataType: "json",\r\n success: function (data) {\r\n if(data.result[0] == 0){\r\n errNo = 1;\r\n $.cookie("sessionid", data.result[1].ubus_rpc_session, {\r\n expires: 7, path: \'/\'\r\n });\r\n }else{\r\n errNo = 0;\r\n }\r\n }\r\n });\r\n };\r\n </script>\r\n\r\n</html>'
Common agents are:
• express agent: http://www.kuaidaili.com/
• proxy cloud: http://www.dailiyun.com/
Access without proxy:
from urllib import request

url = 'http://httpbin.org/ip'
resp = request.urlopen(url)
print(resp.read())
executed in 544ms, finished 19:51:12 2022-01-23
b'{\n  "origin": "222.163.139.128"\n}\n'
Use proxy access:
1. Use ProxyHandler to pass in a handler built by the agent
2. Build an opener using the created handler
3. Send a request using opener
 from urllib import request

url = 'http://httpbin.org/ip'
# Use ProxyHandler to pass in a handler built by the agent
handler = request.ProxyHandler({'http':'122.226.57.50:8888'})
# Build an opener using the created handler
opener = request.build_opener(handler)
# Send a request using opener
resp = opener.open(url)
print(resp.read())
The results are as follows:
executed in 698ms, finished 20:04:30 2022-01-23
b'{\n  "origin": "122.226.57.70"\n}\n'
Summary:
1. Principle of proxy: before requesting the destination website, first request the proxy server, and then let the proxy server request the destination website. After the proxy server obtains the data of the destination website, it will forward it to our code.
2, http://httpbin.org: This website can easily view some parameters of HTTP request. The format is as follows:
http://httpbin.org/get
http://httpbin.org/user-agent
http://httpbin.org/ip
3. Using proxies in Code:
• use 'URL lib request. Proxyhandler 'is passed into an agent, which is a dictionary. The key of the dictionary is' http' or 'https'
• key depends on the type that the proxy server can accept. value is' ip:port ', and then use the created' handler 'and request build_ Opener 'create an' opener '.
• use the created 'opener' to call the 'open' function and send the request.
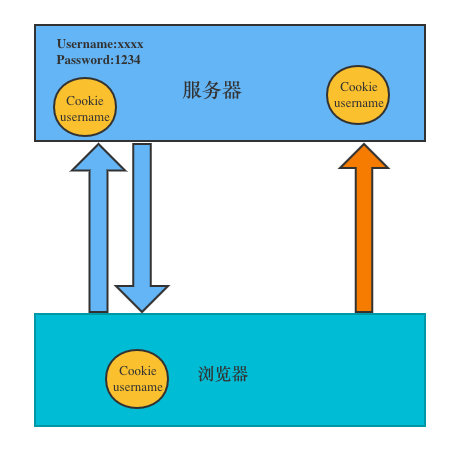
What is a cookie
In the website, the http request is stateless, that is to say, even after the first connection with the server and successful login, the second request server still cannot know who is currently requesting. The emergence of cookies solves this problem. After logging in to the server for the first time, it returns some data (cookies) to the browser, and then the browser saves it locally. When the user sends the second request, it will automatically carry the last stored cookie data to the server. The server can judge which user is the current user through the data carried by the browser. The amount of data stored in cookies is limited. Different browsers have different storage sizes, but generally no more than 4KB. Therefore, using cookies can only store a small amount of data.
cookie format:
Set-Cookie:NAME=VALUE; Expires/Max-age = DATE; Path=PATH;Domain=DOMAIN_NAME;SECURE
Parameter meaning:
• NAME: the NAME of the cookie
• value: the value of the cookie
• expires: the expiration time of the cookie
• path: the path where the cookie works
• domain: the domain name used by cookies
• SECURE: whether it only works under https protocol.
Simulate login using cookielib library and HTTP cookieprocessor
Cookie refers to the text file stored on the user's browser by the website server in order to identify the user's identity and track the Session. The cookie can keep the login information until the user's next Session with the server. Let's take logging in to Renren as an example. To access someone's home page, you must log in first, that is, there must be cookie information when logging in. If we want to access by code, we must have the correct cookie information to access. There are two solutions. The first is to use the browser to access, and then copy the cookie information and put it in the headers. The example code is as follows:
from urllib import request

# Enter in the browser address bar http://httpbin.org/user-agent You can get the user agent in the headers
headers = {
    "User-Agent": "Mozilla/5.0 (Macintosh; Intel Mac OS X 10_15_7) AppleWebKit/537.36 (KHTML, like Gecko) Chrome/97.0.4692.99 Safari/537.36",
 'Cookie':'taihe_bi_sdk_uid=1034eaf8795b3aa571215b0229493246; taihe_bi_sdk_session=74f6c86d2578f7944791f18bc8de8141; Hm_lvt_ad6b0fd84f08dc70750c5ee6ba650172=1642950134,1642950199,1642990773; LOCAL_STORAGE_KEY_RENREN_USER_BASIC_INFO={"userName":"Bruce_liu","userId":2147694583,"headUrl":"http://rrfmn.rrimg.com/","secretKey":"32d3ccb0d3f81e9bfec587d6b2b8074c","sessionKey":"g1c1iAHmWq1VXPxR"}; Hm_lpvt_ad6b0fd84f08dc70750c5ee6ba650172=1642990794' }
# Do not use cookie s to request bruce_liu's personal home page
url = 'http://www.renren.com/personal/2147694583'

req = request.Request(ul=url, headers=headers)
resp = request.urlopen(req)
with open('renren.html', 'w') as fp:
  # The write function must write a str data type
  # resp. What read() reads out is a byte data type
  # bytes -> decode -> str
  # str -> encode ->bytes
  fp.write(resp.read().decode('utf-8'))
http. Cookie jar module
The main classes of this module include CookieJar, FileCookieJar, Mozilla CookieJar and lwpcookeiejar. The functions of the four categories are as follows:
1. Cookie jar: an object that manages HTTP cookie values, stores cookies generated by HTTP requests, and adds cookies to outgoing HTTP requests. The entire cookie is stored in memory. After garbage collection of the cookie jar instance, the cookie will also be lost.
2. Filecookie jar (filename, delayload = none, policy = none): derived from cookie jar, it is used to create an instance of filecookie jar, retrieve cookie information and store cookies in files. Filename is the name of the file where the cookie is stored. When delayload is True, deferred access to files is supported, that is, files are read or data is stored in files only when needed.
3. Mozilla cookiejar (filename, delaylod = none, policy = none): derived from FileCookieJar, it creates cookies with Mozilla browser Txt compatible FileCookieJar instance.
4. Lwpcookeiejar (filename, delayload = none, poly = none): derived from FileCookieJar and created with libwww Perl standard Set-Cookie3 file format compatible FileCookieJar instance.
Using HTTP Cookie jar and request Http cookieprocessor logs into Renren. The example code is as follows:
from urllib import request
from urllib import parse
from http.cookiejar import CookieJar


headers = {
    "user-agent": "Mozilla/5.0 (Macintosh; Intel Mac OS X 10_15_7) AppleWebKit/537.36 (KHTML, like Gecko) Chrome/97.0.4692.99 Safari/537.36"}

# Define a function that returns opener
def get_opener():
    # Sign in
    # Create a cookie jar object
    cookiejar = CookieJar()
    # Create an HTTP cookieprocessor object using cookiejar
    handler = request.HTTPCookieProcessor(cookiejar)

    # Create an opener using the handler created in the previous step
    opener = request.build_opener(handler)

    return opener


# Define a login function of Renren
def login_renren(opener):

    # Use opener to send login request (Renren email and password)


    data = {
        'email': '11343154@qq.com',
        'password': '2008-lxw'
        }
    login_url = 'http://www.renren.com/personal/2147694583'
    req = request.Request(login_url, data=parse.urlencode(data).encode('utf-8'), headers=headers)

    opener.open(req)

# Define a function to access personal homepage
def vist_profile(opener):

    # Visit personal homepage
    bruce_liu_url = 'http://www.renren.com/personal/2147694583'

    # You don't need to create a new opener to get the page of your personal home page
    # Because the previous opener already contains the cookie information required for login
    req = request.Request(bruce_liu_url, headers=headers)
    resp = opener.open(req)
    with open('renren2.html', 'w', encoding='utf-8') as fp:
        fp.write(resp.read().decode('utf-8'))

if __name__=='__main__':
    opener1 = get_opener()
    login_renren(opener1)
    vist_profile(opener1)
Save cookie s locally
To save cookies locally, you can use the save method of cookie jar, and you need to specify a file name.
from urllib import request
from http.cookiejar import MozillaCookieJar

headers = {"user-agent": "Mozilla/5.0 (Macintosh; Intel Mac OS
# Sir, into a cookie jar
cookiejar = MozillaCookieJar('cookie.txt')
# Using cookie jar to generate handle handler
handler = request.HTTPCookieProcessor(cookiejar)
# Using handler to generate opener
opener = request.build_opener(handler)

req = request.Request('http://www.baidu.com/cookies/set/course/spider', headers=headers)

resp = opener.open(req)
# print(resp.read())
cookiejar.save(ignore_discard=True, ignore_expires=True)

Then load the local cookie with the following code:
from urllib import request
from http.cookiejar import MozillaCookieJar
import  ssl
ssl._create_default_https_context=ssl._create_unverified_context
headers = {"user-agent": "Mozilla/5.0 (Macintosh; Intel Mac OS X 10_15_7) AppleWebKit/537.36 (KHTML, like Gecko) Chrome/97.0.4692.99 Safari/537.36"}
# Sir, into a cookie jar
cookiejar = MozillaCookieJar('cookie.txt')
# Using the load() function, set the parameter to ignore_discard=True
cookiejar.load(ignore_discard=True)
# Using cookie jar to generate handle handler
handler = request.HTTPCookieProcessor(cookiejar)
# Using handler to generate opener
opener = request.build_opener(handler)

resp = opener.open('http://httpbin.org/cookies')
for cookie in cookiejar:
    print(cookie)
requests Library
Although the urllib module in Python's standard library already contains most of the functions we usually use, its API feels cumbersome to use, and the publicity of Requests is "HTTP for Humans", which indicates that it is more concise and convenient to use.
Installation and documentation address:
Using pip can be very easy to install
pip install requests
gihut address: https://github.com/requests/requests
Send GET request
1. The simplest way to send a get request is through requests Get to call
import requests
url = 'http://www.baidu.com/'
resp = requests.get(url)
2. Add headers and query parameters. If you want to add headers, you can pass in the headers parameter to increase the headers information in the request header. If you want to pass the parameters in the url, you can use the params parameter. The example code is as follows:
import requests
kw = {'wd': 'python'}
headers = {
  "user-agent": "Mozilla/5.0 (Macintosh; Intel Mac OS X 10_15_7) AppleWebKit/537.36 (KHTML, like Gecko) Chrome/97.0.4692.99 Safari/537.36"
}

# params receives the query parameters of a dictionary or string. The dictionary type is automatically converted to url code without urlencode()
resp = requests.get('http://www.baidu.com/s', params=kw, headers=headers)

# Check the response content, response Text returns data in unicode format
print(resp.text)

# View the response content, resp Byte data returned by content
print(resp.content)

# View full url address
print(resp.url)

# View response header character encoding
print(resp.encoding)

# View response code
print(resp.status_code)

# If the response content is decoded and written into html file
with open('baidu.html', 'w', encoding='utf-8') as fp:
    fp.write(resp.content.decode('utf-8'))
response.text and response Difference of content
- response.content: This is the data captured directly from the network without any coding, so it is a byte type. The strings transmitted on the hard disk and the network are of type bytes.
- response.text: This is requests, which will respond Content to decode the string. Decoding requires specifying an encoding method, and requests will judge the encoding method according to their own guess. Therefore, there may be a guess error when there is time, which will lead to random code in decoding. At this time, "response.content.decode('utf-8 ')" should be used for manual decoding.
Send POST request
1. The most basic post request can use the post method. If json data is returned, you can call 'response json() 'to convert json strings into dictionaries or lists.
response = requests.post('http://www.baidu.com/', data=data)
2. Incoming data
At this time, don't use urlencode to encode. Just pass it into a dictionary. For example, the code of the data requested to pull the hook:
#_*_coding:utf-8_*_
# Author: liuxiaowei
# Created on: 1/24/22 6:06 PM
# File: post py
# IDE      : PyCharm

import requests

url = 'https://www.lagou.com/jobs/position'
headers = {
  "user-agent": "Mozilla/5.0 (Macintosh; Intel Mac OS X 10_15_7) AppleWebKit/537.36 (KHTML, like Gecko) Chrome/97.0.4692.99 Safari/537.36"
}

data = {
    'first':'true',
    'pn':1,
    'kd':'python'
}

resp = requests.post(url, headers=headers, data=data)

# If it is json data, you can call the json method directly
print(resp.json())
Difference between GE T request and POST request
The get request parameter is params =, and the post request parameter is data=
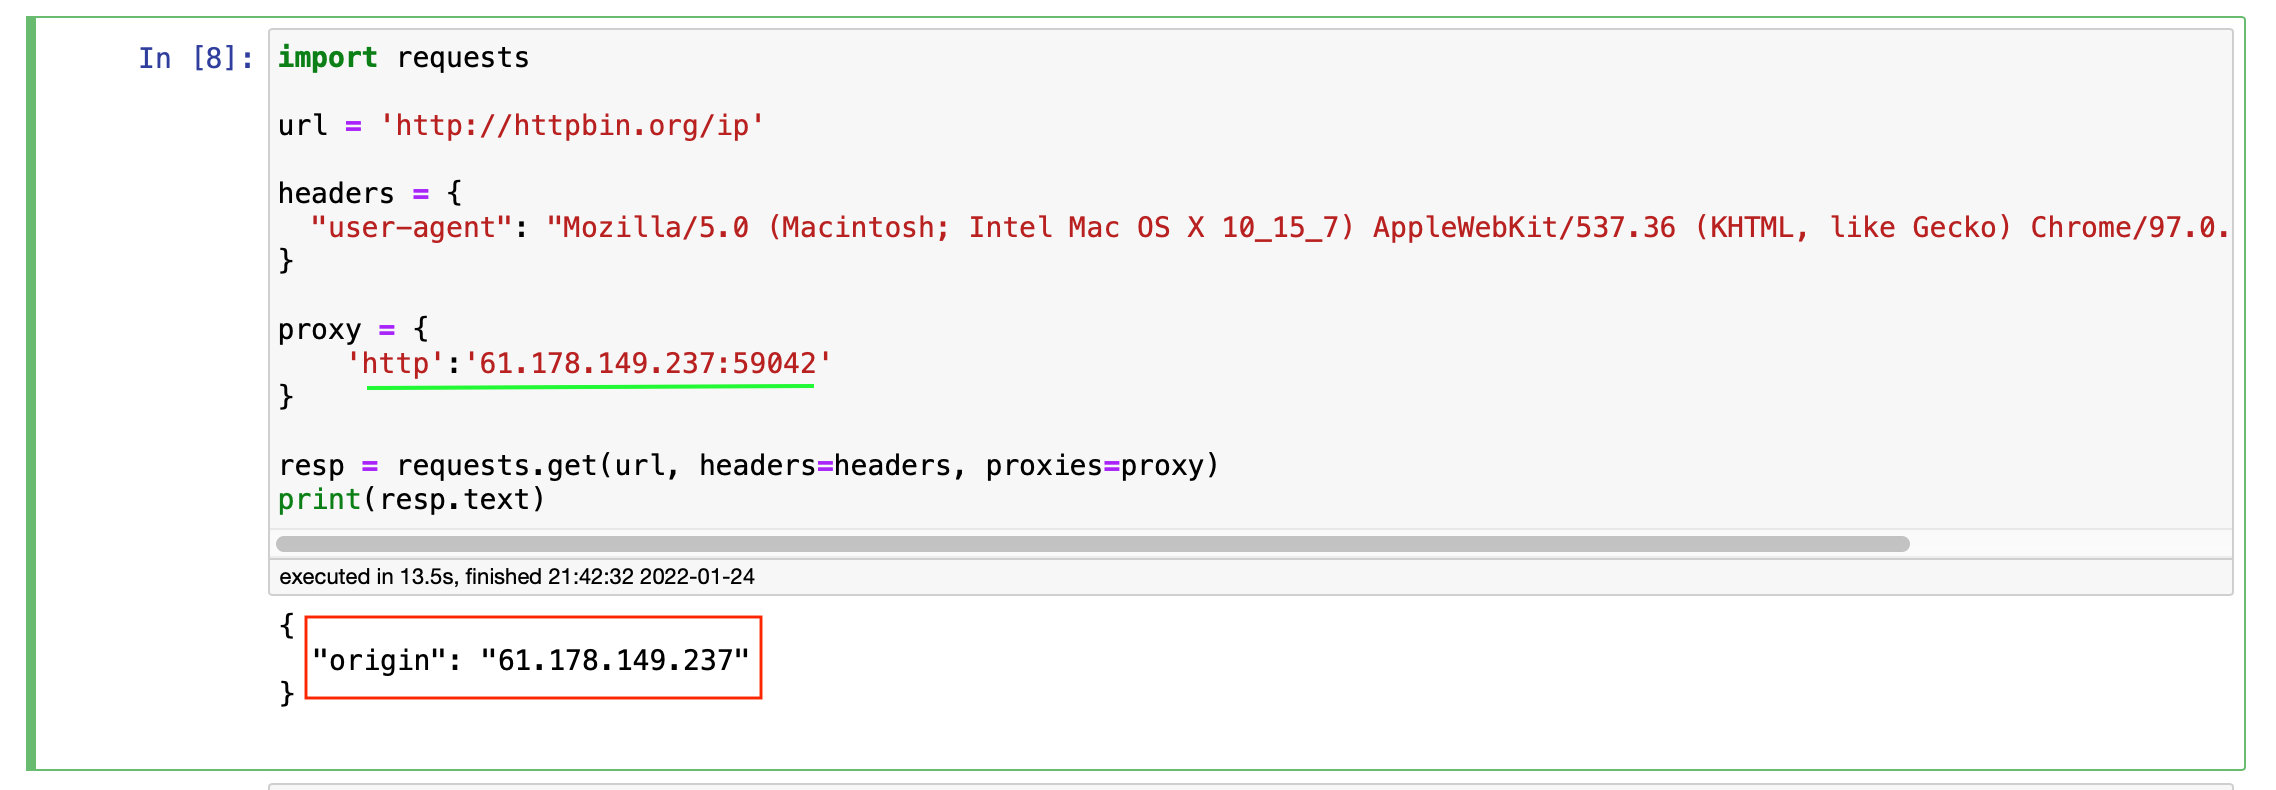
Use agent
It is also very simple to add a proxy using requests. Just pass the proxies parameter in the request method (such as get or post). The example code is as follows:
import requests

url = 'http://httpbin.org/get'

headers = {
  "user-agent": "Mozilla/5.0 (Macintosh; Intel Mac OS X 10_15_7) AppleWebKit/537.36 (KHTML, like Gecko) Chrome/97.0.4692.99 Safari/537.36"
}

proxy = {
    'http':'61.150.96.27:36880'  # https://www.kuaidaili.com/free/inha/3/ Shaanxi Hanzhong Telecom
}

resp = requests.get(url, headers=headers, proxies=proxy)
with open('xx.html', 'w', encoding='utf-8') as fp:
    fp.write(resp.text)


 The results are as follows:
{ "args": {}, "headers": { "Accept": "*/*", "Accept-Encoding": "gzip, deflate", "Host": "httpbin.org", "User-Agent": "Mozilla/5.0 (Macintosh; Intel Mac OS X 10_15_7) AppleWebKit/537.36 (KHTML, like Gecko) Chrome/97.0.4692.99 Safari/537.36", "X-Amzn-Trace-Id": "Root=1-61eea7d1-0f1dae897b843858628d2d7e" }, "origin": "61.150.96.27", "url": "http://httpbin.org/get" }
Test the proxy IP, and the results are as follows:
cookie
If a cookie is included in a response, use the cookie attribute to get the returned cookie value:
import requests

url = 'http://www.renren.com/PLogin.do'
data = {'emai':'970138074@qq.com', 'password':'pythonspider'}
resp = requests.get('http://www.baidu.com/')
print(resp.cookies)
print(resp.cookies.get_dict())
The results are as follows:
executed in 102ms, finished 21:51:15 2022-01-24
<RequestsCookieJar[<Cookie BDORZ=27315 for .baidu.com/>]>
{'BDORZ': '27315'}
session
Previously, using the urllib library, you can use opener to send multiple requests, and cookies can be shared among multiple requests. If we use requests to share cookies, we can use the session object provided by the requests library. Note that the session here is not the session in web development. This place only knows the object of a session. Take Renren as an example and implement it with requests. The example code is as follows:
import requests

url = 'http://www.renren.com/PLogin.do'
headers = {
  "user-agent": "Mozilla/5.0 (Macintosh; Intel Mac OS X 10_15_7) AppleWebKit/537.36 (KHTML, like Gecko) Chrome/97.0.4692.99 Safari/537.36"
}


data = {'emai':'970138074@qq.com', 'password':'pythonspider'}
session = requests.Session()
session.post(url, data=data, headers=headers)

resp = session.get('http://www.renren.com/880151247/profile')

with open('renren.html', 'w', encoding='utf-8') as fp:
    fp.write(resp.text)
Handling untrusted SSL certificates
For websites that do not trust SSL certificates, such as: https://www.baidu.com/ , then the response can be returned directly by using requests. The example code is as follows:
resp = requests.get(url,verify=False) # verify set False