Revisit the EhCache cache, cache problems, session sharing and redis distributed locks of the spring boot series
EhCache cache
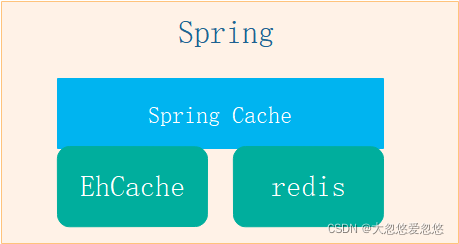
In the Spring framework, we prefer Spring Cache as the facade of the cache framework. The reason why it is a facade is that it only provides the definition of the interface layer and AOP annotations, and does not provide specific access operations of the cache. The specific storage of cache also needs specific cache storage, such as EhCache, Redis, etc. The relationship between Spring Cache and caching framework is a bit like that between SLF4j and logback and log4j.
- EhCache is applicable to the caching of single applications. When applications are deployed in a distributed manner, the caching between copies of each application is not synchronized. EhCache has no independent deployment service, so its cache and application memory are coupled. When the amount of cached data is large, pay attention to whether the system resources can meet the requirements of application memory.
- Redis is an in memory database service that can be deployed independently, so it can meet the requirements of centralized cache storage for distributed applications, that is, distributed applications use a cache, so the cache is naturally synchronized. However, for some small-scale applications, redis service is additionally introduced, which increases the cost of operation and maintenance.
Therefore, for example, we develop a small blog ourselves, and our server does not have many resources to deploy redis services independently. Using EHCache as cache is a better choice. For enterprise users, it is a better choice to use redis independently deployed services as cache.
Integrating Spring Cache and Ehcache
adopt Previous section You can use spring cache to operate the cache through annotation, which reduces the amount of programmer's cache operation code to a certain extent. Annotations are easy to add and remove, not coupled with business code, and easy to maintain. There is no change in this part, so we still use spring cache
Step 1: add Spring cache and Ehcache jar dependencies to pom.xml:
    <dependency>
        <groupId>org.springframework.boot</groupId>
        <artifactId>spring-boot-starter-cache</artifactId>
    </dependency>
    <dependency>
        <groupId>net.sf.ehcache</groupId>
        <artifactId>ehcache</artifactId>
    </dependency>
Step 2: add the entry startup class @ EnableCaching annotation to enable Caching. The example is as follows.
@EnableCaching
In Spring Boot, the @ EnableCaching annotation is used to automatically configure the appropriate cache manager. Spring Boot detects cache providers according to the following order, that is, Spring Cache supports the following caching frameworks:
- Generic
- JCache (JSR-107) (EhCache 3, Hazelcast, Infinispan, and others)
- EhCache 2.x (ehcache is used as cache when ehcache bean s are found)
- Hazelcast
- Infinispan Couchbase
- Redis
- Caffeine
- Simple
Step 3: add ehcache configuration
yml configuration
It should be noted that config:classpath:/ehcache.xml does not need to be written because it is the default path. But ehcache.xml must have.
spring:
  cache:
    type: ehcache
    ehcache:
      config: classpath:/ehcache.xml
In the resources directory, add the ehcache configuration file ehcache.xml. The file contents are as follows:
<ehcache>
    <diskStore path="java.io.tmpdir/cache_dongbb"/>
    <defaultCache
            maxElementsInMemory="10000"
            eternal="false"
            timeToIdleSeconds="120"
            timeToLiveSeconds="120"
            overflowToDisk="false"
            diskPersistent="false"
            diskExpiryThreadIntervalSeconds="120"
    />
    <cache name="user_detail"
            maxElementsInMemory="10000"
            eternal="true"
            overflowToDisk="true"
            diskPersistent="true"
            diskExpiryThreadIntervalSeconds="600"/>
</ehcache>
Configuration meaning:
- Name: cache name, which is the same as the value(cacheNames) attribute value of the cache annotation.
- maxElementsInMemory: maximum number of caches.
- eternal: whether the cache object is permanently valid. Once set, timeout will not work.
- timeToIdleSeconds: sets the allowed idle time (in seconds) of an object before it expires. It is only used when the eternal=false object is not permanently valid. The optional attribute is 0 by default, that is, the idle time is infinite.
- timeToLiveSeconds: sets the allowable survival time of an object before expiration (unit: seconds). The maximum time is between creation time and expiration time. It is only used when the eternal=false object is not permanently valid. The default is 0. That is, the survival time of the object is infinite.
- Overflow to disk: when the number of objects in memory reaches maxElementsInMemory, Ehcache will write the objects to disk.
- diskSpoolBufferSizeMB: this parameter sets the size of the DiskStore Cache. The default is 30MB. Each Cache should have its own buffer.
- maxElementsOnDisk: the maximum number of hard disk caches.
- diskPersistent: whether to cache virtual machine restart data.
- diskExpiryThreadIntervalSeconds: the running time interval of the disk invalidation thread. The default is 120 seconds.
- memoryStoreEvictionPolicy: when the maxElementsInMemory limit is reached, Ehcache will clean up memory according to the specified policy. The default policy is LRU (least recently used). You can set it to FIFO (first in first out) or LFU (less used).
- clearOnFlush: whether to clear when the amount of memory is maximum.
- diskStore represents the hard disk directory of the temporary cache.
The temporary cache directory of "java.io.tmpdir" operating system is different from that of different operating systems. The cache directory in Windows is C:\Users \ \ login user ~ 1 \ \ appdata \ \ local \ \ temp \ \; The Linux directory is / tmp
How to use cache
The use method of cache is still the annotation of Spring Cache. The use method is the same. Refer to Learn from the previous section.
Cache pit in use
Note: @ Cacheable annotation will not take effect when called inside the object. This pit is not for EhCache alone. It will happen as long as Spring Cache is used.
@Component
public class ClassA   {
    @Override
    public void MethodA(String username)  {
        MethodA1(username);  //If the cache fails, the @ Cacheable annotation will not take effect when called inside the object
    }

    @Cacheable(value = USER_DETAIL,key = "#username")
    public void MethodA1(String username) {
       //Execution method body
    }
}
Reason: Spring cache annotation is based on the aspect of Spring AOP, and it must go through the proxy to take effect. When similar calls or subclasses call the method with cache annotation on the parent class, it is an internal call and does not go through the proxy, so the annotation does not take effect.
Solution: put the cache method in a separate class
@Component
public class ClassA   {
    @Resource
    ClassB classB;

    @Override
    public void methodA(String username)  {
        classB.methodA1(username);  //If the cache fails, the @ Cacheable annotation will not take effect when called inside the object
    }
}
@Component
public class ClassB {
@Cacheable(value = USER_DETAIL,key = "#username")
public void methodA1(String username) {
//Execution method body
}
}Cache avalanche penetration and other solutions
Some problems of cache usage
Cache penetration
Under normal circumstances, most of the data we query exist. If you request to query a piece of data that does not exist in the database at all, that is, neither the cache nor the database can query this data, but the request will hit the database every time, resulting in strong pressure on the back-end database. This query does not have data, which is called cache penetration. (it may be the malicious behavior of some criminals. Multithreading is full to query the service for nonexistent data)
terms of settlement
- Do a good job in verifying the data of query requests, and address the symptoms rather than the root causes
- The reason why cache null values will penetrate the cache and put pressure on the database is that the cache layer does not cache null values. The following will explain how to configure in the Spring Boot environment
- Use redis bloomfilter (this is beyond the scope of Spring Boot course. You can learn it or learn it by yourself)
Buffer breakdown
In an ordinary high concurrency system, when a large number of requests query a key at the same time, the key just fails, resulting in a large number of requests hitting the database. This phenomenon is called cache breakdown.
For example, Lu Han announced his love affair, which led to the paralysis of microblog. It may be caused by cache breakdown. Everyone goes to see this hot news. If the cache of hot news expires, the back-end service pressure will increase and the server will be paralyzed. (of course, this is just my guess, for example)
terms of settlement
- Through accurate monitoring of hotspot traffic, it can automatically expand the capacity of hotspot services and cache components in time.
- Through service flow limiting tools such as Hystrix or sentinel, ensure the availability of the system and refuse access to some traffic.
- The third method is locking. Spring cache uses the sync attribute. Only one thread maintains the cache, and other threads will be blocked until the entry is updated in the cache. That is, only one thread is allowed for the first query. Concurrency is supported only after the data is cached.
@Cacheable(value = CACHE_OBJECT,key = "#id",sync=true)
public ArticleVO getArticle(Long id) {
Cache avalanche
At the same time, a large number of caches fail, resulting in all requests in the request set hitting the database. For example, there is a double 11:00 event. In order to support this event, a large amount of data has been cached in advance. If all data is cached for 24 hours, these data caches will fail after 24 hours, and the final result is service crash on November 12.
terms of settlement
Through accurate monitoring of hotspot traffic, it can automatically expand the capacity of hotspot services and cache components in time.
The expiration time of different caches cannot be consistent, and the expiration time of the same cache should be as random as possible (minimum – > maximum)
Read write lock
The middleware Canal is introduced to sense the update of mysql
Read more and write more. Go directly to the database for query
redis cache configuration
Specify spring.cache.type=redis in application.yml.
spring:
  cache:
    type: redis
    redis:
      cache-null-values: true   # Cache null to prevent cache penetration
      use-key-prefix: true  # Use cache prefix
      key-prefix: boot-launch  # Cache prefix, cache by application
      time-to-live:  3600  # Cache expiration time. It is not deleted actively by default and will never expire
It is worth noting that Spring Cache only supports the global effective time of all cache configurations by default, and does not support the classified configuration of cache effective time, which is easy to cause cache avalanche.
Custom cache expiration time
Due to the uniform expiration time of redis cache settings, there is no way to set the cache expiration time separately according to the cache name (value attribute), which is easy to cause cache avalanche. So we make a simple transformation. Before the transformation, let's take a look at the RedisCacheManager source code
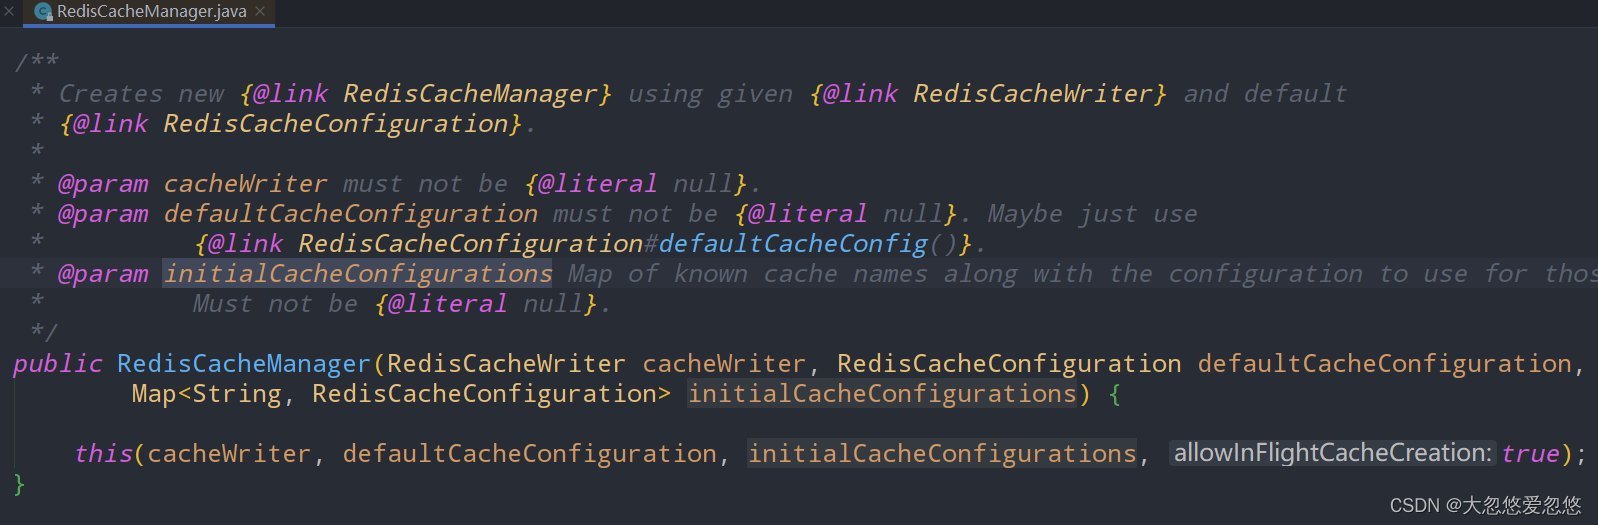
The RedisCacheManager constructor contains three parameters
- RedisCacheWriter was configured in the previous chapter
- RedisCacheConfiguration defaultCacheConfiguration this is the default global configuration for all caches
- Map < String, RedisCacheConfiguration > initialcacheconfigurations this is a personalized configuration for a cache, generic String is the cache name, and generic RedisCacheConfiguration is the personalized configuration of the cache
After understanding the above source code, the following transformation code is not difficult to understand.
@Data
@Configuration
@ConfigurationProperties(prefix = "caching")  //application.yml configuration prefix
public class RedisConfig {


    @Bean
    public RedisTemplate redisTemplate(RedisConnectionFactory redisConnectionFactory) {
        RedisTemplate redisTemplate = new RedisTemplate();
        redisTemplate.setConnectionFactory(redisConnectionFactory);
        Jackson2JsonRedisSerializer jackson2JsonRedisSerializer = new Jackson2JsonRedisSerializer(Object.class);

        ObjectMapper objectMapper = new ObjectMapper();
        objectMapper.setVisibility(PropertyAccessor.ALL, JsonAutoDetect.Visibility.ANY);
        objectMapper.enableDefaultTyping(ObjectMapper.DefaultTyping.NON_FINAL);

        jackson2JsonRedisSerializer.setObjectMapper(objectMapper);

        //Serialization focuses on these four lines of code
        redisTemplate.setKeySerializer(new StringRedisSerializer());
        redisTemplate.setValueSerializer(jackson2JsonRedisSerializer);
        redisTemplate.setHashKeySerializer(new StringRedisSerializer());
        redisTemplate.setHashValueSerializer(jackson2JsonRedisSerializer);

        redisTemplate.afterPropertiesSet();
        return redisTemplate;
    }


     //Start the transformation here
    //Customize redisCacheManager
    @Bean
    public RedisCacheManager redisCacheManager(RedisTemplate redisTemplate) {
        RedisCacheWriter redisCacheWriter = RedisCacheWriter.nonLockingRedisCacheWriter(redisTemplate.getConnectionFactory());

        RedisCacheManager redisCacheManager = new RedisCacheManager(redisCacheWriter,
                this.buildRedisCacheConfigurationWithTTL(redisTemplate,RedisCacheConfiguration.defaultCacheConfig().getTtl().getSeconds()),  //Default redis cache configuration
                this.getRedisCacheConfigurationMap(redisTemplate)); //Personalized cache configuration for each cache

        return  redisCacheManager;
    }

    //Configure injection. key is the cache name and value is the cache validity
    private Map<String,Long> ttlmap;  //lombok provides a getset method

    //Personalize RedisCacheConfiguration according to the attribute assembly result of ttlmap
    private Map<String, RedisCacheConfiguration> getRedisCacheConfigurationMap(RedisTemplate redisTemplate) {
        Map<String, RedisCacheConfiguration> redisCacheConfigurationMap = new HashMap<>();

        for(Map.Entry<String, Long> entry : ttlmap.entrySet()){
            String cacheName = entry.getKey();
            Long ttl = entry.getValue();
            redisCacheConfigurationMap.put(cacheName,this.buildRedisCacheConfigurationWithTTL(redisTemplate,ttl));
        }

        return redisCacheConfigurationMap;
    }

    //Build cache configuration based on parameters passed
    private RedisCacheConfiguration buildRedisCacheConfigurationWithTTL(RedisTemplate redisTemplate,Long ttl){
        return  RedisCacheConfiguration.defaultCacheConfig()
                .serializeValuesWith(RedisSerializationContext.SerializationPair.fromSerializer(redisTemplate.getValueSerializer()))
                .entryTtl(Duration.ofSeconds(ttl));
    }

}
Customized configuration to personalize cache expiration time
Specify the cache effective time corresponding to the cache name in application.yml, in seconds
caching:
  ttlmap:
    article: 10
    xxx: 20
    yyy: 50