In this tutorial, we will learn how to develop a Revit plug-in and use it to automate design. The course code can be downloaded from github.
The first step is to create a new C# Libray project, which is our "DeleteDoors" plug-in project.
1. Visual Studio configuration
A large number of elements need to be configured in the VS interface so that the code can be compiled correctly. Click debug > in the toolbar 🛠 DeleteDors and follow the steps below:
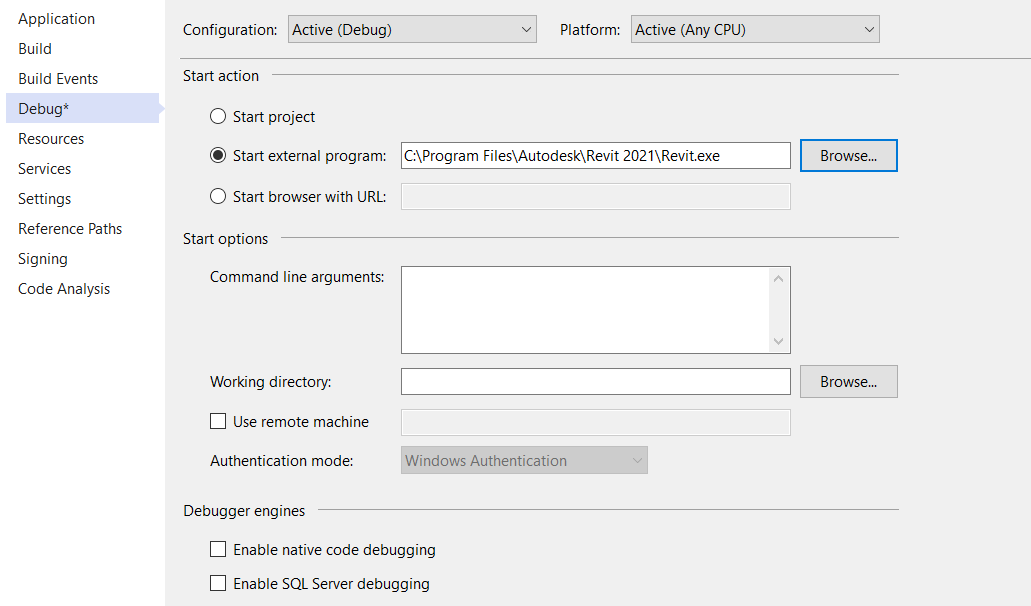
1 - users using Revit v2021 should ensure that the target frame is NET framework 4.8

2 - define the debugger as an external program and point to Revit Exe path:
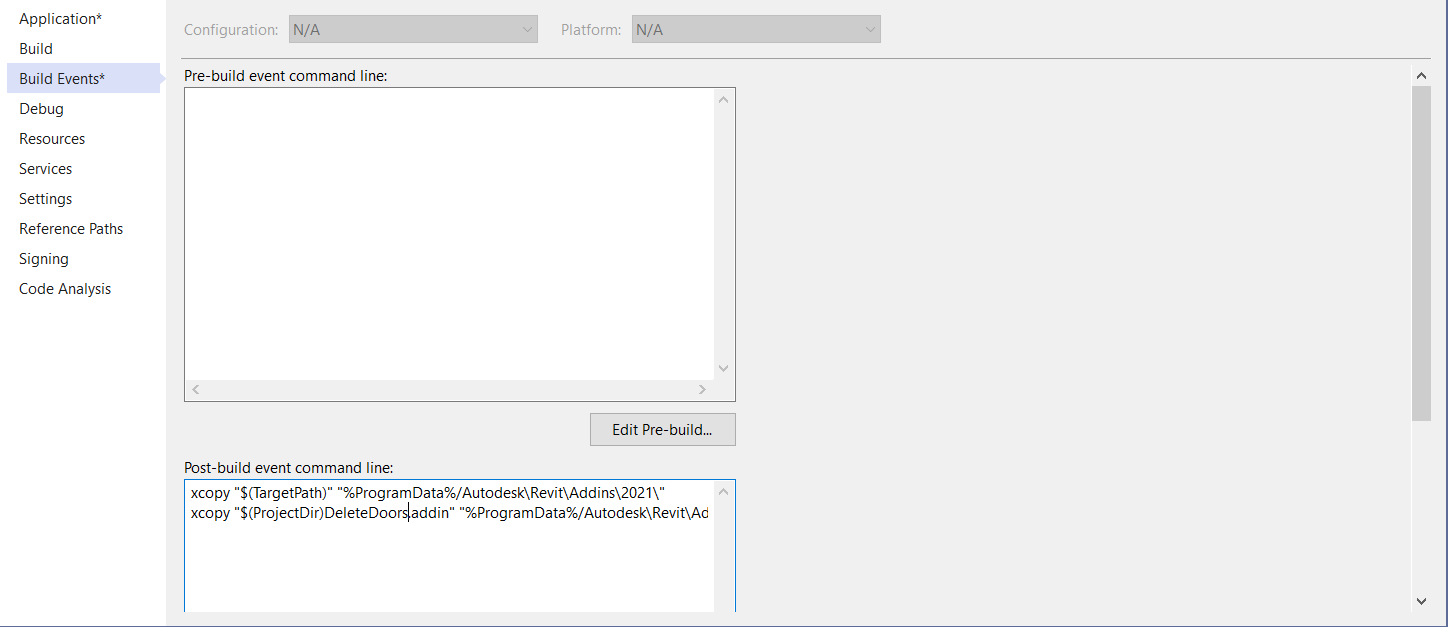
3 - define the path to save the plug-in when building the event:
Since it is on the command line, you can create plug-in events:
xcopy "$(TargetPath)" "%ProgramData%/Autodesk\Revit\Addins\2021\"
xcopy "$(ProjectDir)DeleteDoors.addin" "%ProgramData%/Autodesk\Revit\Addins\2021\"
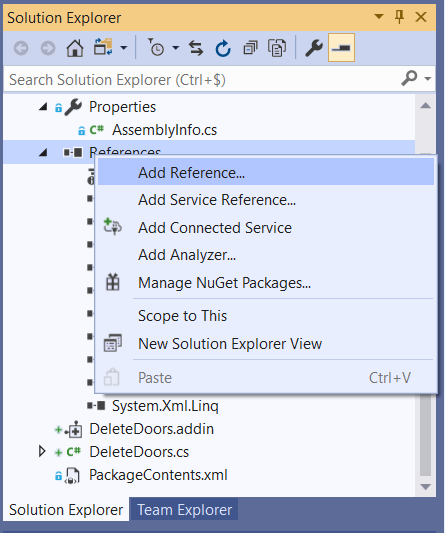
2, Define reference items
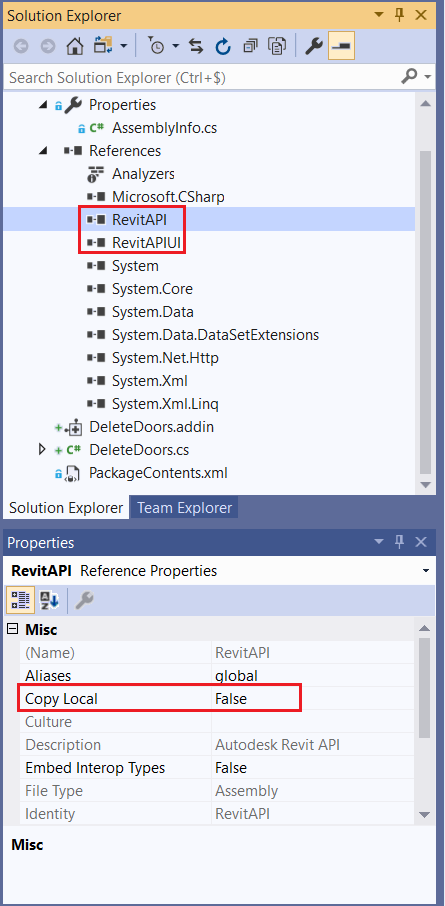
In the solution browser of VS, add two important references (extension. dll): RevitAPI and RevitAPIUI. You can browse C:\Program Files\Autodesk\Revit 2021 to find these references.
Set the Copy Local property of these two references to False.
3, Class definition: delete door function implementation
The goal of this lesson is to create an external command that will be able to delete all doors in the project and issue a prompt message when there are no doors.
The code contains three functions: Execute, DeleteAllDoors and DeleteElement. The former function will call the latter. Therefore, Execute calls DeleteAllDoors to search all doors in the project and delete them. When the DeleteAllDoors function is called, it calls the DeleteElement function. I retrieved it from the RevitAPI documentation.
If you want to know more about each line of code, please refer to my previous course on RevitAPI.
using System;
using System.IO;
using System.Collections.Generic;
using Autodesk.Revit.ApplicationServices;
using Autodesk.Revit.DB;
using Autodesk.Revit.UI;


namespace DeleteDoors
{
    [Autodesk.Revit.Attributes.Regeneration(Autodesk.Revit.Attributes.RegenerationOption.Manual)]
    [Autodesk.Revit.Attributes.Transaction(Autodesk.Revit.Attributes.TransactionMode.Manual)]

    public class DeleteDoorsApp : IExternalCommand
    {


        public Result Execute(ExternalCommandData commandData, ref string message, ElementSet elements)
        {
            var app = commandData.Application.Application;
            var doc = commandData.Application.ActiveUIDocument?.Document;

            DeleteAllDoors(app, doc);
            return Result.Succeeded;
        }

        public static void DeleteElement(Document document, Element element)
        {
            // Delete a selected element
            ICollection<Autodesk.Revit.DB.ElementId> deletedIdSet = document.Delete(element.Id);


            if (0 == deletedIdSet.Count)
            {
                throw new Exception("Deleting the selected element in Revit failed.");
            }


            String prompt = "The selected element has been removed and ";
            prompt += deletedIdSet.Count - 1;
            prompt += " more dependent elements have also been removed.";


            // Give the user some information
            TaskDialog.Show("Revit", prompt);


        }

        public static void DeleteAllDoors(Application rvtApp, Document doc)
        {
            if (rvtApp == null) throw new InvalidDataException(nameof(rvtApp));


            if (doc == null) throw new InvalidOperationException("Could not open document.");


            IList<Element> listOfDoors = new FilteredElementCollector(doc).OfCategory(BuiltInCategory.OST_Doors).WhereElementIsNotElementType().ToElements();
            int taille = listOfDoors.Count;


            if (taille == 0)
            {


                TaskDialog.Show("Dialog", "There isn't any door in the project");
            }

            else
            {
                using (Transaction tr = new Transaction(doc))
                {


                    tr.Start("do");
                    for (int i = 0; i < taille; i++)
                    {

                        DeleteElement(doc, listOfDoors[i]);
                    }


                    tr.Commit();


                }
            }
        }
    }
}
4, Plug in implementation
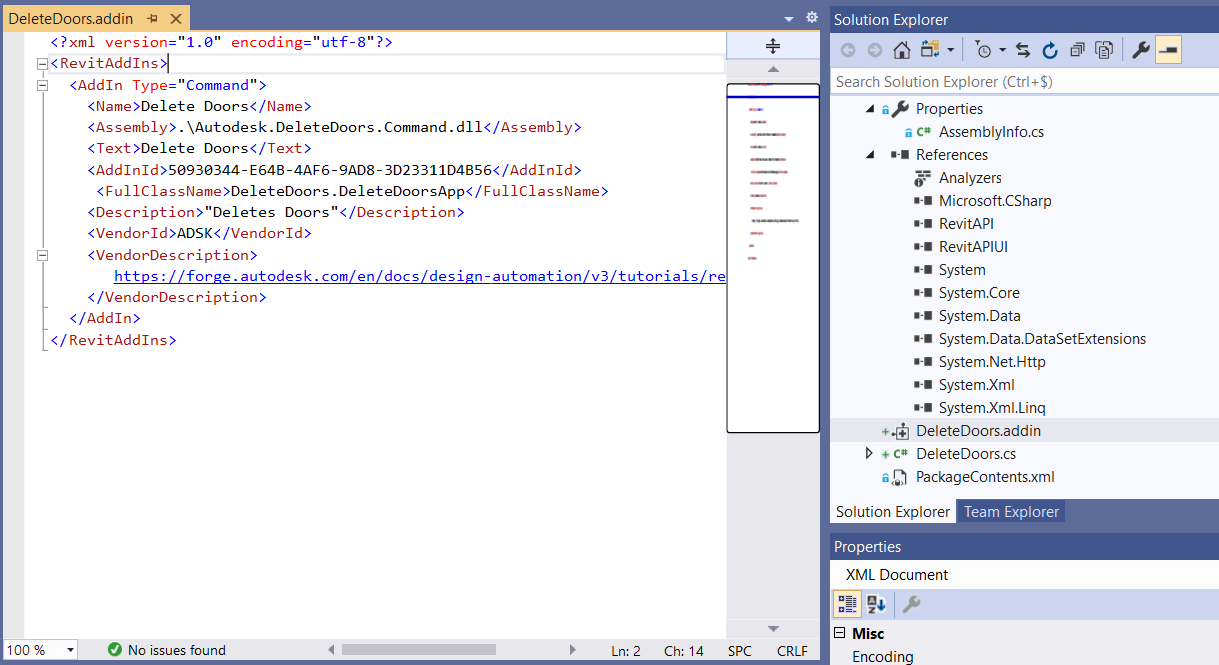
The plug-in manifest is created using XML, which enables Revit to recognize extended commands or applications.
<?xml version="1.0" encoding="utf-8"?>
<RevitAddIns>

	<AddIn Type="Command">
		<Name>Delete Doors</Name>
		<Assembly>.\Autodesk.DeleteDoors.Command.dll</Assembly>
		<Text>Delete Doors</Text>
		<AddInId>50930344-E64B-4AF6-9AD8-3D23311D4B56</AddInId>
		<FullClassName>DeleteDoors.DeleteDoorsApp</FullClassName>
		<Description>"Deletes Doors"</Description>
		<VendorId>ADSK</VendorId>
		<VendorDescription>
https://forge.autodesk.com/en/docs/design-automation/v3/tutorials/revit/
		</VendorDescription>
   </AddIn>
</RevitAddIns>
There are two ways to save the plugin manifest to its directory: create it manually txt file, and then use the extension addin saves it, and then automatically saves it by adding a configuration file to the VS solution and writing a command line (as I explained above).
Set the Copy Local property of "DeleteDoors.addin" to "copy if new". If the plug-in has been modified or does not exist in the directory, this property can copy the plug-in to the correct location.
5, Package content configuration
To add The XML file to the package content, click solution and add a new project. Select "XML file" and rename it to "PackageContents" and copy the following code into the file.
<?xml version="1.0" encoding="utf-8" ?>
<ApplicationPackage>
	<Components Description="Delete Doors">
		<RuntimeRequirements OS="Win64"
							 Platform="Revit"
							 SeriesMin="R2021"
							 SeriesMax="R2021" />
		<ComponentEntry AppName="DeleteDoors"
						Version="1.0.0"
						ModuleName="./DeleteDoors.addin"
						AppDescription="Deletes all doors"
						LoadOnCommandInvocation="False"
						LoadOnRevitStartup="True" />
        </Components>
</ApplicationPackage>
6, Testing phase
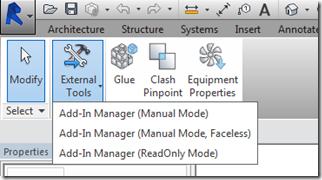
We have completed our Revit plug-in project, and now it's time to test it. Click start or press F5 to start the Revit application. When Revit opens, when you see a pop-up window, click the always load button.
If you check add ins > external tools, you will see that the DeleteDoors plug-in has been loaded.
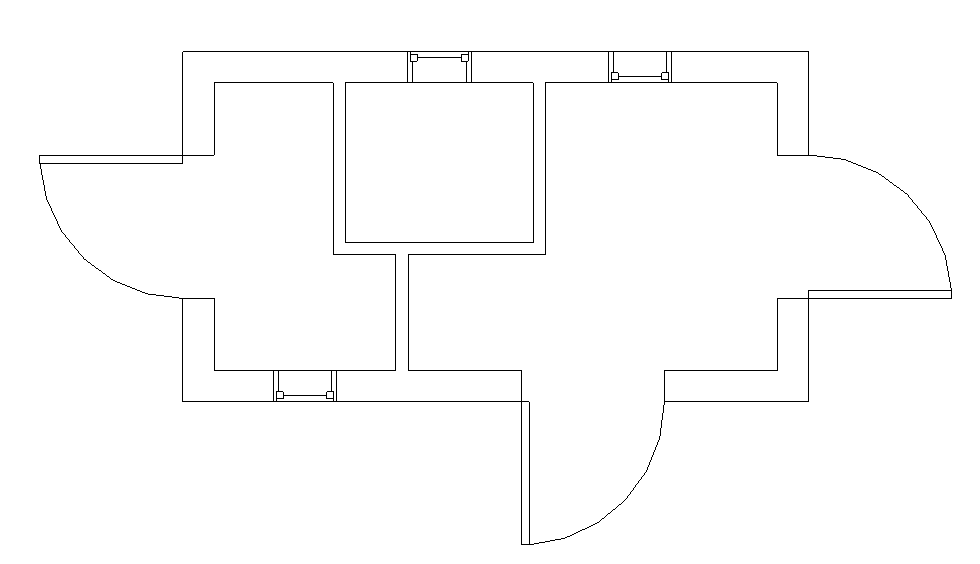
Try to create a project with walls and doors and execute the DeleteDoors plug-in:
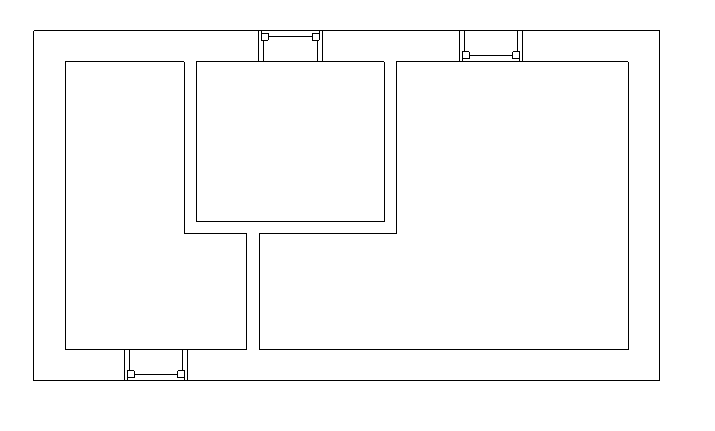
If you try to execute the plug-in, it will delete the door, and then you will get this:
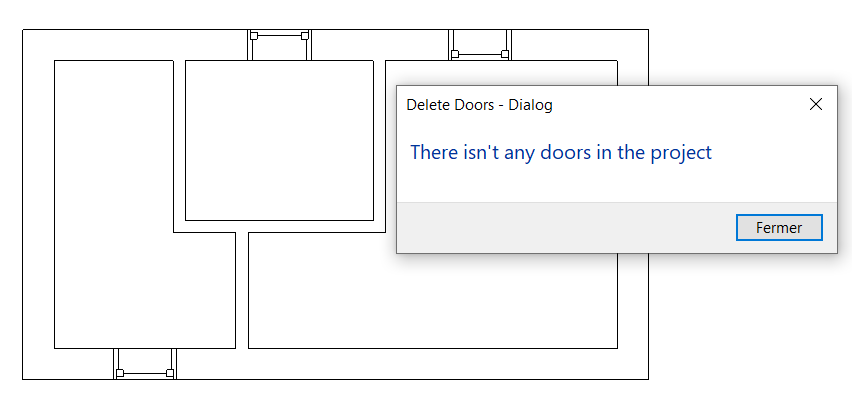
If you continue to execute the plug-in, you will get a prompt message indicating that there are no doors in the current project.
External command: a declaration interface for loading plug-ins into the external tool toolbar:
Original link: Getting started with Revit plug-in development - BimAnt