Technical work should be rewarded
 follow+Click three times (like, comment, collect) and watch again to form a good habit
RocketMQ tutorial related series directory
catalogue
Section 2: installing RocketMQ
Create rocketmq storage directory
rocketmq environment variable configuration
Synchronize configuration to multiple servers
Start the namesrv of the master and slave hosts first
Section 5: verify whether the master and slave are started
Section I: server preparation
A dual master and dual slave cluster is built here. The cluster is built by means of synchronous replication and asynchronous disk brushing.
Install four virtual machines as follows.
| IP | hostname | mastername |
| 192.168.88.135 | rocketmq-nameserver4 | rocketmq-master2-salave1 |
| 192.168.88.134 | rocketmq-nameserver3 | rocketmq-master2 |
| 192.168.88.133 | rocketmq-nameserver2 | rocketmq-master1-slave1 |
| 192.168.88.131 | rocketmq-nameserver1 | rocketmq-master1 |
Install virtual machine Portal -- >
Section 2: installing RocketMQ
Install RocketMQ on each machine, which will not be repeated here
Chapter 1: RocketMQ installation -- > portal
The key points are explained again
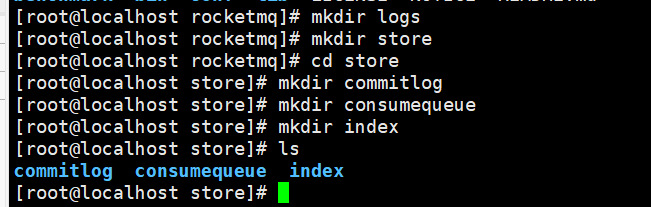
Create rocketmq storage directory
The existing directory structure is like this

Create storage directory
mkdir logs
mkdir store
cd store
mkdir commitlog
mkdir consumequeue
mkdir index
Modify log path
Enter the conf directory and replace ${user.home} in all xml to ensure that the log path is correct

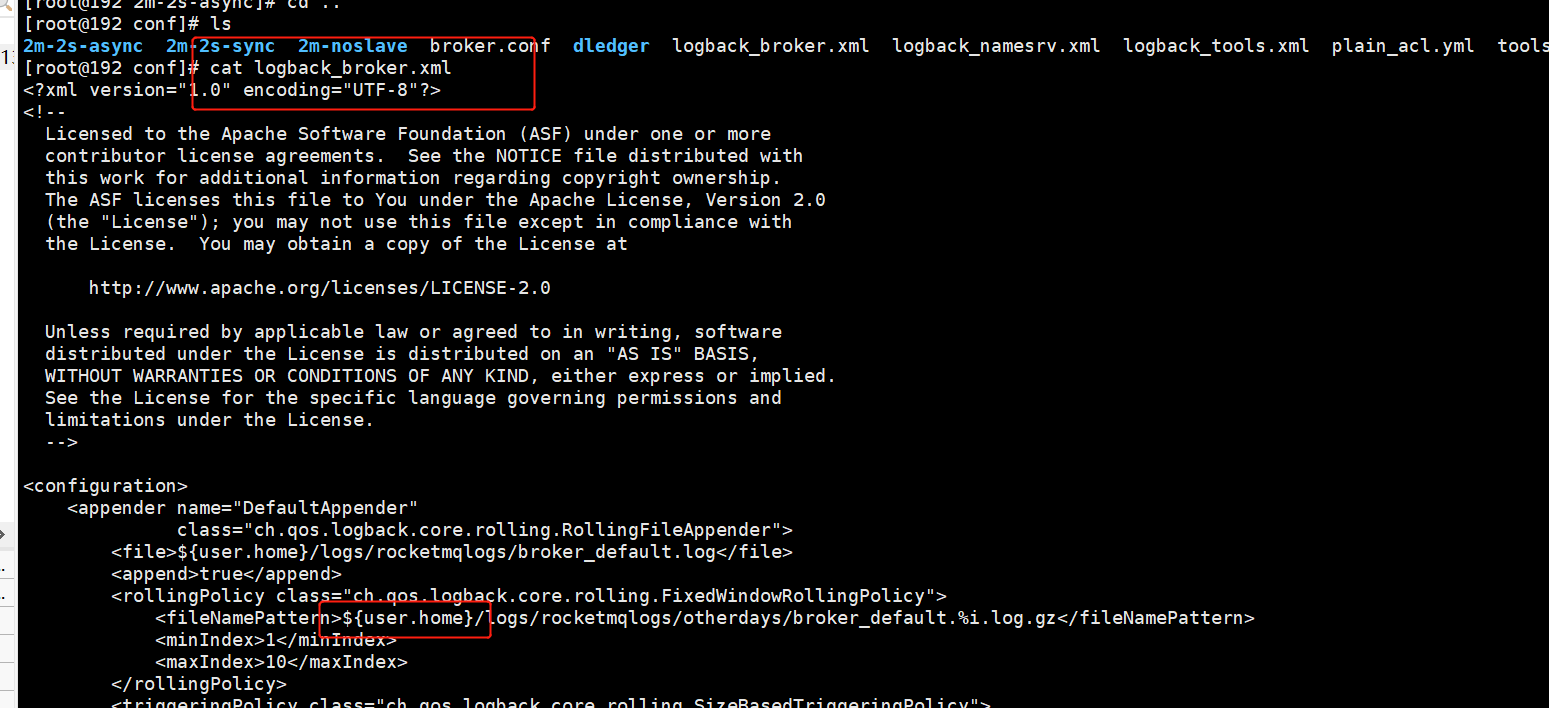
Syntax:
sed -i batch replacement function
sed -i 's#Original string#New string#g 'replaced file
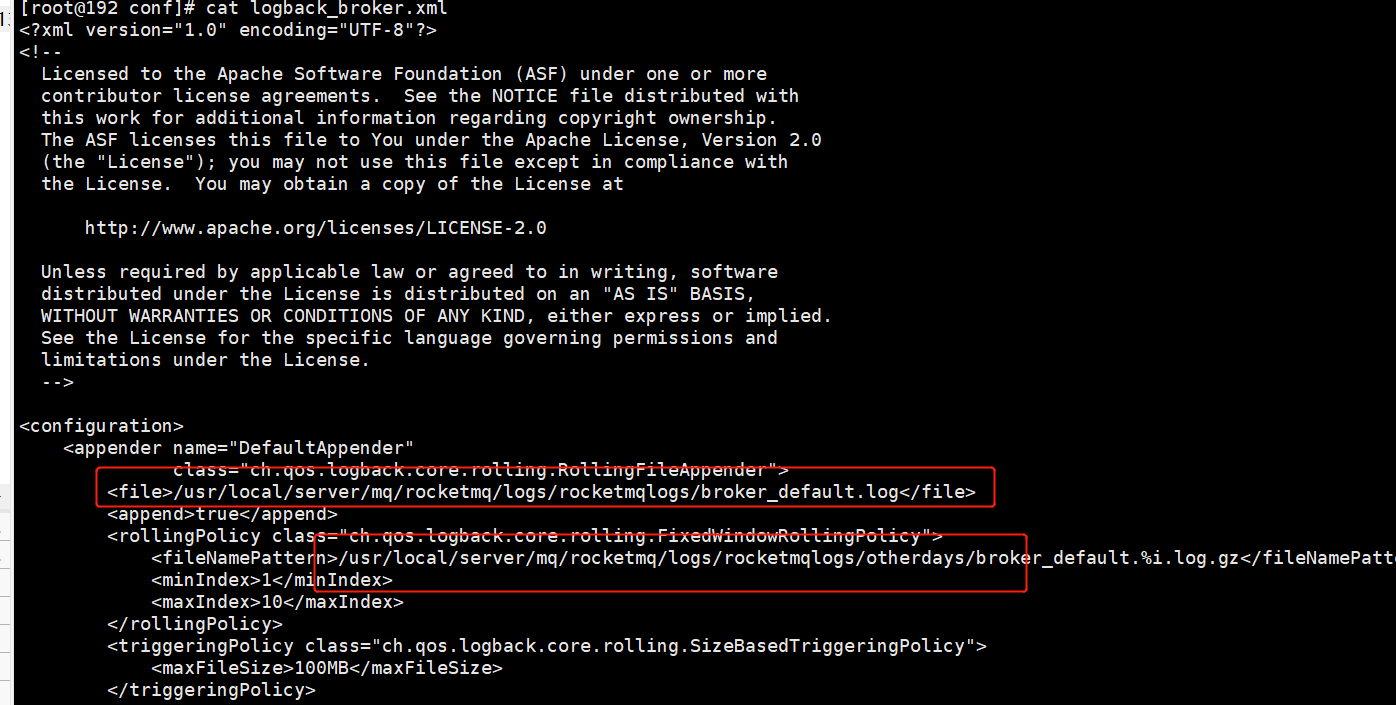
sed -i 's#${user.home}#/usr/local/server/mq/rocketmq#g' *.xml
Description the replacement was successful
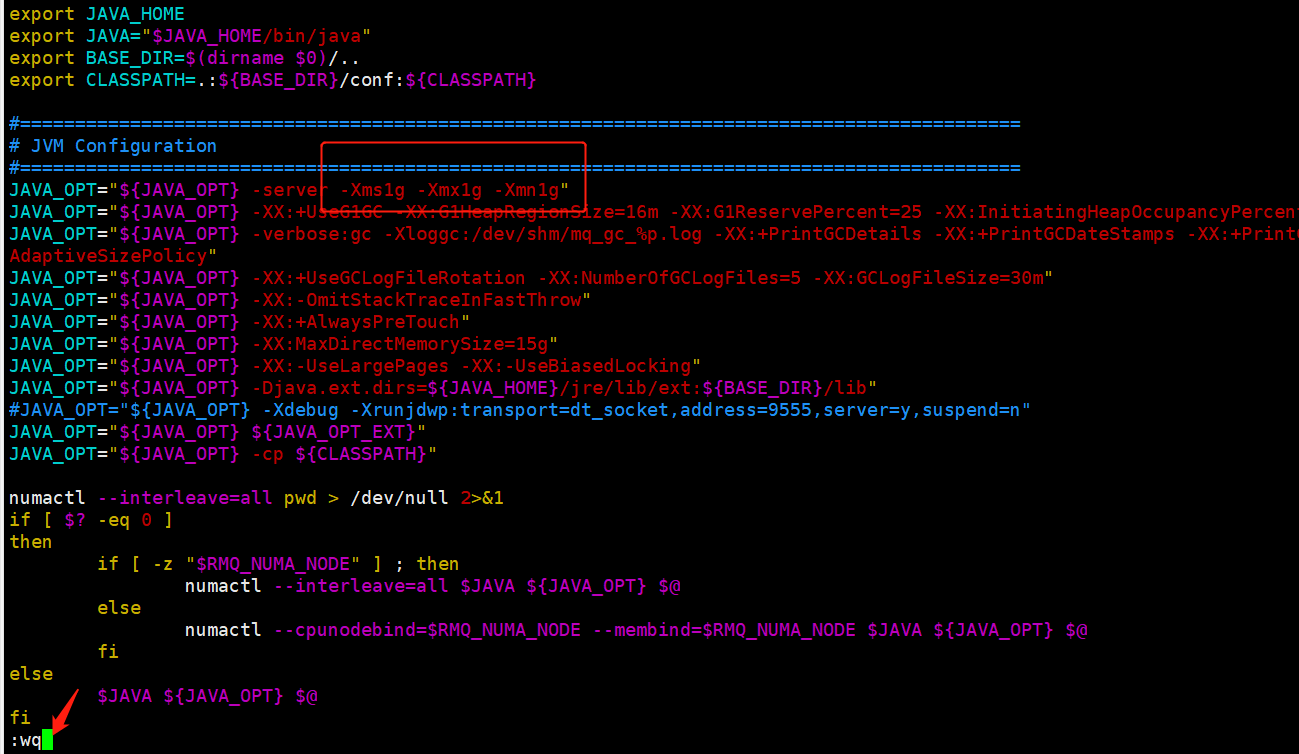
Modify runbroker sh
Adjust the memory size (this is for demonstration purposes only, and the actual memory size shall be subject to the production environment)
cd ..
cd bin/
vim runbroker.sh

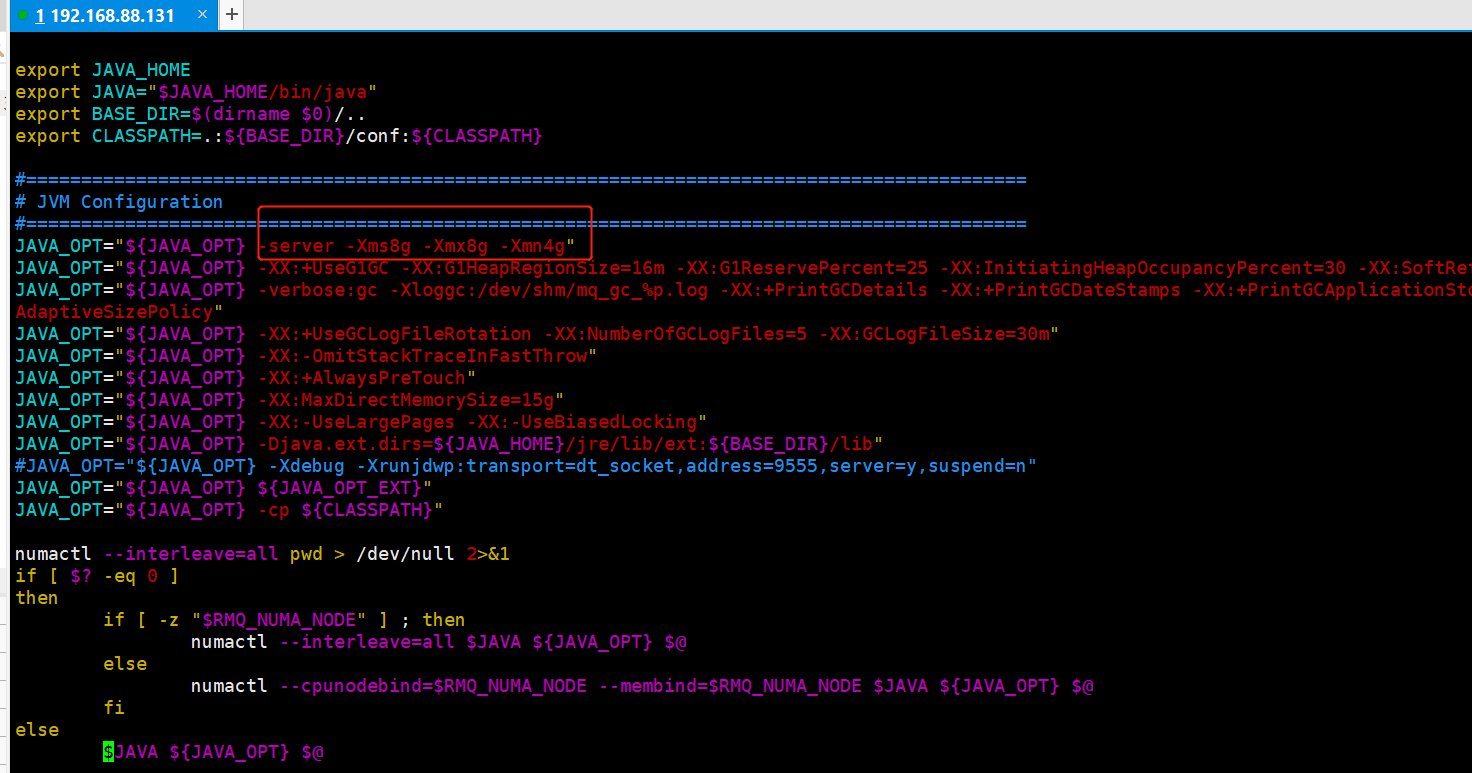
Adjust to 1g
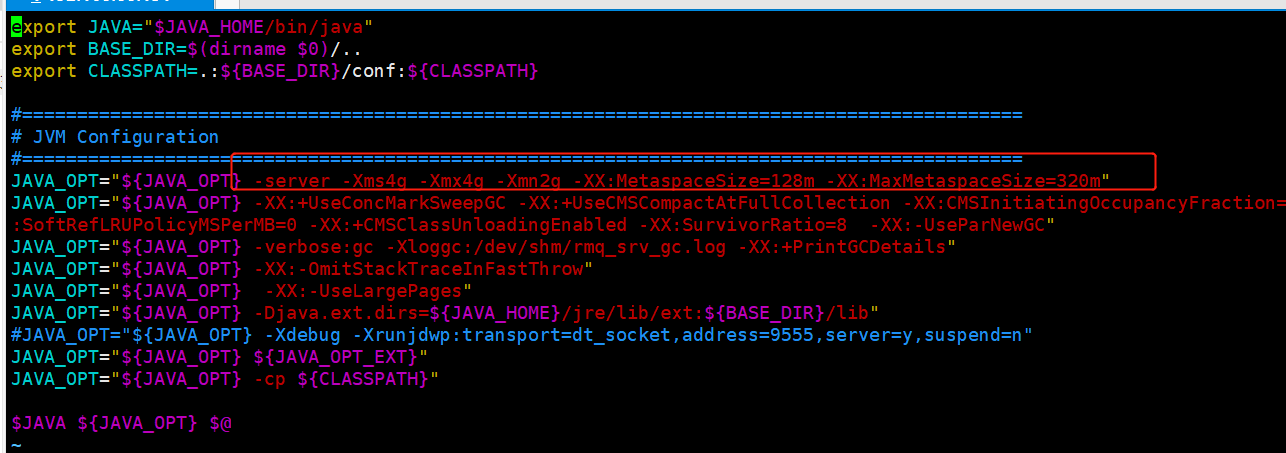
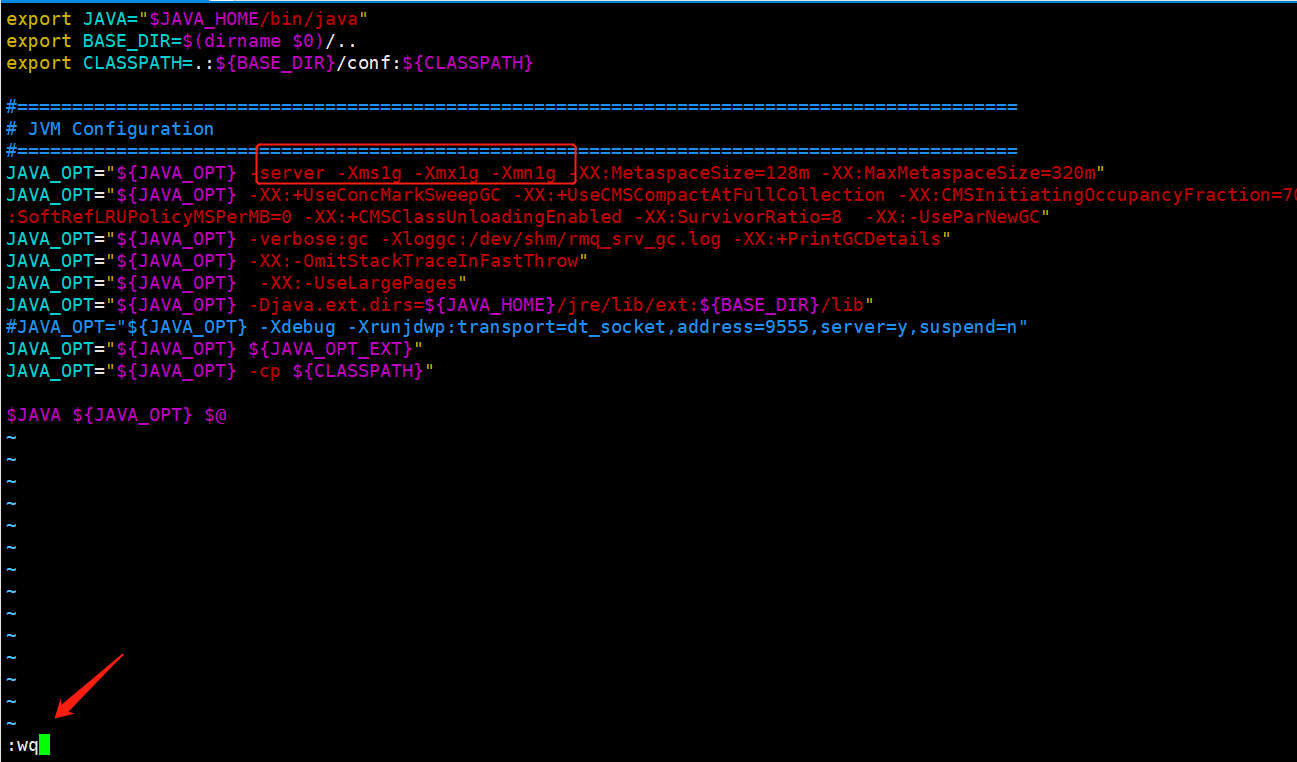
Modify runserver sh
Adjust the memory size (this is for demonstration purposes only, and the actual memory size shall be subject to the production environment)
vim runserver.sh
Section III: Configuration
Configure hosts
Configure the mapping relationship between address and IP in the host file
Modify the / etc/hosts file of each machine and add the following mapping relationship
vim /etc/hosts
192.168.88.131 rocketmq-nameserver1
192.168.88.131 rocketmq-master1
192.168.88.133 rocketmq-nameserver2
192.168.88.133 rocketmq-master1-slave1
192.168.88.134 rocketmq-nameserver3
192.168.88.134 rocketmq-master2
192.168.88.135 rocketmq-nameserver4
192.168.88.135 rocketmq-master2-slave1
After configuration, restart the network card
systemctl restart network
rocketmq environment variable configuration
vim /etc/profile
Add the following command at the end of the profile file
#set rocketmq
ROCKETMQ_HOME=/usr/local/server/mq/rocketmq/
PATH=$PATH:$ROCKETMQ_HOME/bin
export ROCKETMQ_HOME PATH
Input: wq! Save and exit and make the configuration effective immediately:
source /etc/profile
jdk installation
centos installs the open-jdk8 -- > portal
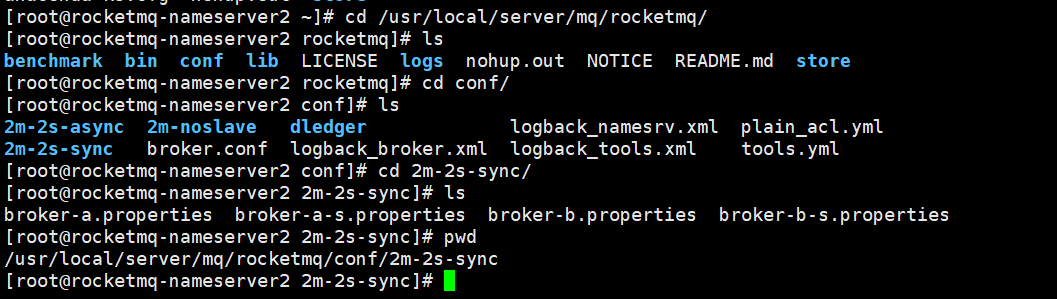
Master slave configuration
Host: 192.168.88.131
cd /usr/local/server/mq/rocketmq/conf
cd 2m-2s-sync/
vim broker-a.properties

#Cluster name
brokerClusterName=xuzhu_cluster
#The name of the broker. Note that different configuration files here are filled in differently
brokerName=broker-a
#Slave 0 means Master
brokerId=0
#nameServer address, semicolon split
namesrvAddr=rocketmq-nameserver1:9876;rocketmq-nameserver2:9876;rocketmq-nameserver3:9876;rocketmq-nameserver4:9876
#When sending messages, automatically create topic s that do not exist in the server. The number of queues created by default
defaultTopicQueueNums=4
#Whether to allow the Broker to automatically create topics. It is recommended to open offline and close online
autoCreateTopicEnable=true
#Whether to allow the Broker to automatically create subscription groups. It is recommended to open offline and close online
autoCreateSubscriptionGroup=true
#Listening port of Broker external service
brokerIP1=192.168.88.131
brokerIP2=192.168.88.131
listenPort=10911
#Delete file time: 4 am by default
deleteWhen=04
#File retention time, 48 hours by default
fileReservedTime=120
#commitLog the default size of each file is 1G
mapedFileSizeCommitLog=1073741824
#ConsumeQueue stores 30W files by default, which can be adjusted according to business conditions
mapedFileSizeConsumeQueue=300000
#destroyMapedFileIntervalForcibly=120000
#redeleteHangedFileInterval=120000
#Check physical file disk space checkTransactionMessageEnable
diskMaxUsedSpaceRatio=88
#Storage path
storePathRootDir=/usr/local/server/mq/rocketmq/store
#commitLog storage path
storePathCommitLog=/usr/local/server/mq/rocketmq/store/commitlog
#Consumption queue storage path storage path
storePathConsumeQueue=/usr/local/server/mq/rocketmq/store/consumequeue
#Message index storage path
storePathIndex=/usr/local/server/mq/rocketmq/store/index
#checkpoint file storage path
storeCheckpoint=/usr/local/server/mq/rocketmq/store/checkpoint
#abort file storage path
abortFile=/usr/local/server/mq/rocketmq/store/abort
#Limited message size
maxMessageSize=65536
#flushCommitLogLeastPages=4
#flushConsumeQueueLeastPages=2
#flushCommitLogThoroughInterval=10000
#flushConsumeQueueThoroughInterval=60000
#Role of Broker
#- ASYNC_MASTER asynchronous replication master
#- SYNC_MASTER synchronous double write master
#- SLAVE
brokerRole=SYNC_MASTER
#Disc brushing mode
#- ASYNC_FLUSH asynchronous brush disk
#- SYNC_FLUSH synchronous brush disc
flushDiskType=ASYNC_FLUSH
#checkTransactionMessageEnable=false
#Number of message sending thread pools
#sendMessageThreadPoolNums=128
#Number of pull message thread pools
#pullMessageThreadPoolNums=128
#The default value is false, which means that the Broker does not host the topic customized by the system to store message tracks
traceTopicEnable=false
Key configuration:
#The name of the broker. Note that different configuration files here are filled in differently
brokerName=broker-a
#0 means Master and > 0 means Slave
brokerId=0
#nameServer address, semicolon split
namesrvAddr=rocketmq-nameserver1:9876;rocketmq-nameserver2:9876;rocketmq-nameserver3:9876;rocketmq-nameserver4:9876
#Role of Broker
#- ASYNC_MASTER asynchronous replication master
#- SYNC_MASTER synchronous double write master
#- SLAVE
brokerRole=SYNC_MASTER
#Disc brushing mode
#- ASYNC_FLUSH asynchronous brush disk
#- SYNC_FLUSH synchronous brush disc
flushDiskType=ASYNC_FLUSH
Remove broker-a-s.properties
rm -rf broker-a-s.properties

Copy broker-a.properties to broker-a-s.properties and then modify
cp broker-a.properties ./broker-a-s.properties
vim broker-a-s.properties

Key configuration modification:
#The name of the broker. Note that different configuration files here are filled in differently
brokerName=broker-a
#0 means Master and > 0 means Slave
brokerId=1
#nameServer address, semicolon split
namesrvAddr=rocketmq-nameserver1:9876;rocketmq-nameserver2:9876;rocketmq-nameserver3:9876;rocketmq-nameserver4:9876
#Role of Broker
#- ASYNC_MASTER asynchronous replication master
#- SYNC_MASTER synchronous double write master
#- SLAVE
brokerRole=SLAVE
#Disc brushing mode
#- ASYNC_FLUSH asynchronous brush disk
#- SYNC_FLUSH synchronous brush disc
flushDiskType=ASYNC_FLUSH
Remove broker-b.properties, copy broker-a.properties to broker-b.properties, and then modify
rm -rf broker-b.properties
cp broker-a.properties ./broker-b.properties
vim broker-b.properties

Key configuration modification:
#The name of the broker. Note that different configuration files here are filled in differently
brokerName=broker-b
#0 means Master and > 0 means Slave
brokerId=0
#nameServer address, semicolon split
namesrvAddr=rocketmq-nameserver1:9876;rocketmq-nameserver2:9876;rocketmq-nameserver3:9876;rocketmq-nameserver4:9876
#Role of Broker
#- ASYNC_MASTER asynchronous replication master
#- SYNC_MASTER synchronous double write master
#- SLAVE
brokerRole=SYNC_MASTER
#Disc brushing mode
#- ASYNC_FLUSH asynchronous brush disk
#- SYNC_FLUSH synchronous brush disc
flushDiskType=ASYNC_FLUSH
Remove broker-b-s.properties, copy broker-a-s.properties to broker-b-s.properties, and then modify
rm -rf broker-b-s.properties
cp broker-a-s.properties ./broker-b-s.properties
vim broker-b-s.properties

Key configuration modification:
#The name of the broker. Note that different configuration files here are filled in differently
brokerName=broker-b
#0 means Master and > 0 means Slave
brokerId=1
#nameServer address, semicolon split
namesrvAddr=rocketmq-nameserver1:9876;rocketmq-nameserver2:9876;rocketmq-nameserver3:9876;rocketmq-nameserver4:9876
#Role of Broker
#- ASYNC_MASTER asynchronous replication master
#- SYNC_MASTER synchronous double write master
#- SLAVE
brokerRole=SLAVE
#Disc brushing mode
#- ASYNC_FLUSH asynchronous brush disk
#- SYNC_FLUSH synchronous brush disc
flushDiskType=ASYNC_FLUSH
Synchronize configuration to multiple servers
Get synchronization path
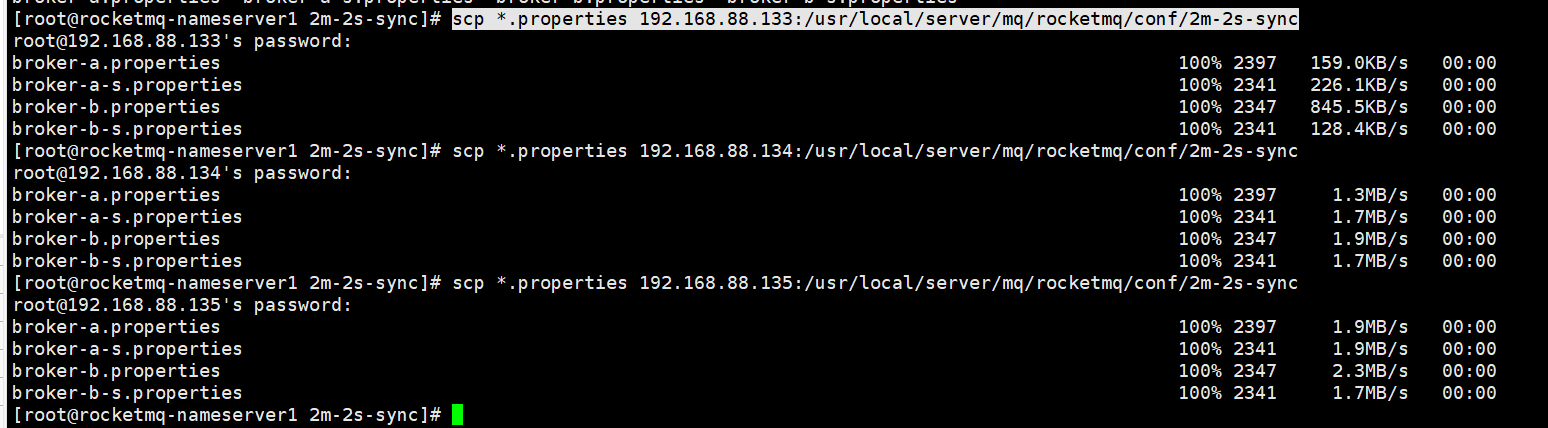
The host 192.168.88.131 enters / usr/local/server/mq/rocketmq/conf/2m-2s-sync directory
scp *.properties 192.168.88.133:/usr/local/server/mq/rocketmq/conf/2m-2s-sync

Several other servers are copied in a similar way
Section IV: startup
Start the namesrv of the master and slave hosts first
nohup sh mqnamesrv > /dev/null 2>&1 &

Start broker
Different servers start different broker files
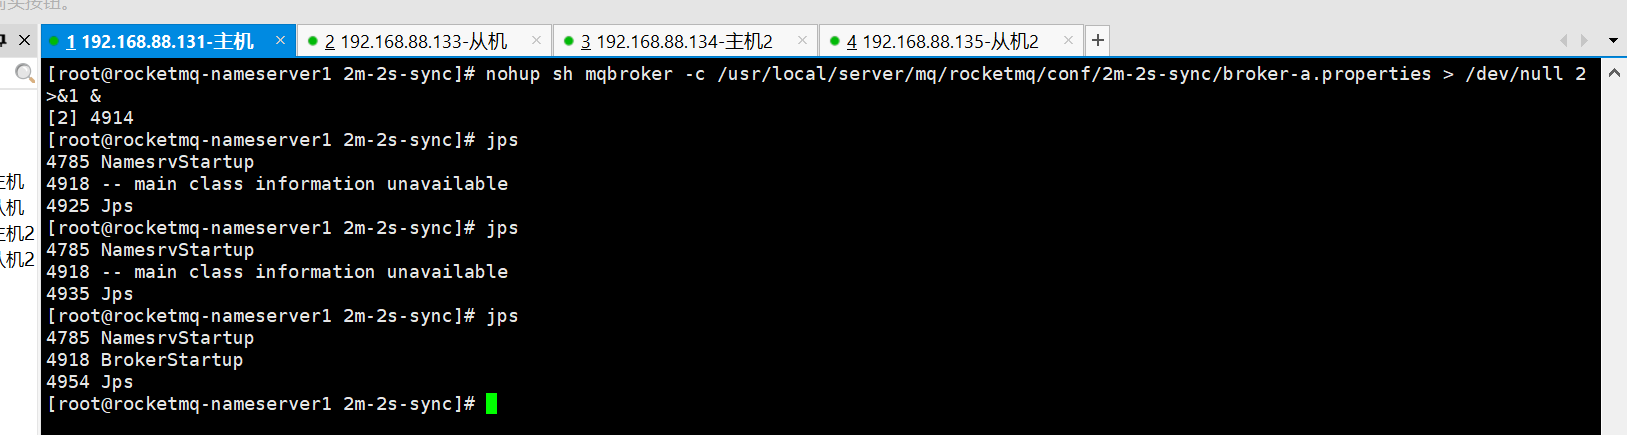
Master 1, start the broker
nohup sh mqbroker -c /usr/local/server/mq/rocketmq/conf/2m-2s-sync/broker-a.properties > /dev/null 2>&1 &
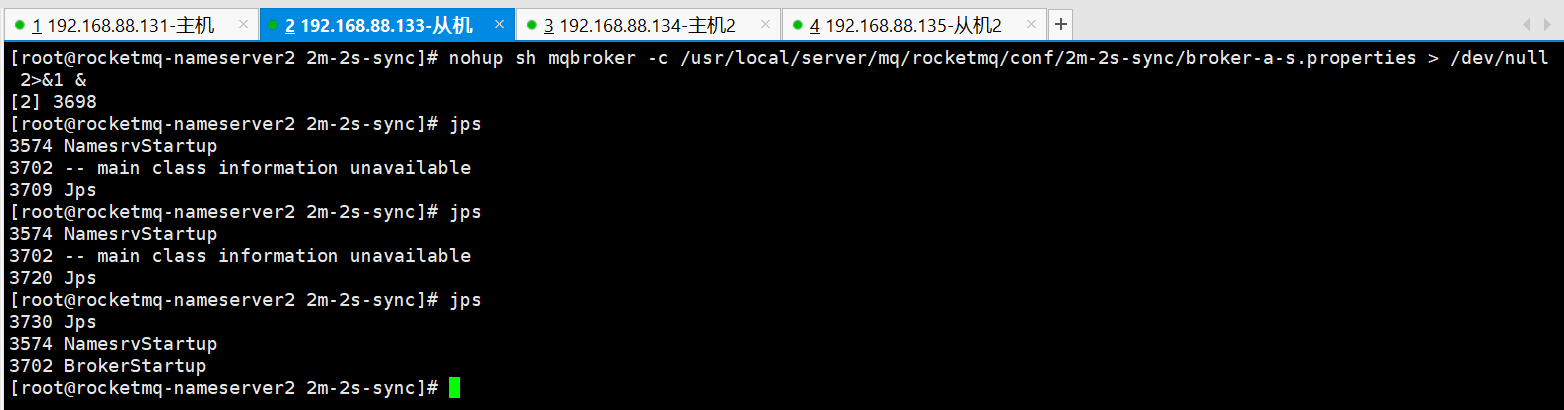
From 1, start the broker
nohup sh mqbroker -c /usr/local/server/mq/rocketmq/conf/2m-2s-sync/broker-a-s.properties > /dev/null 2>&1 &
Master 2: start the broker
nohup sh mqbroker -c /usr/local/server/mq/rocketmq/conf/2m-2s-sync/broker-b.properties > /dev/null 2>&1 &

From 2, start the broker
nohup sh mqbroker -c /usr/local/server/mq/rocketmq/conf/2m-2s-sync/broker-b-s.properties > /dev/null 2>&1 &

Section 5: verify whether the master and slave are started
start-up
Check whether the docker container rocketmq console ng exists in advance. If so, delete it first
Students who are not familiar with docker, Portal -- > docker common operation container commands
docker run -e "JAVA_OPTS=-Drocketmq.namesrv.addr=192.168.88.131:9876;192.168.88.133:9876;192.168.88.134:9876;192.168.88.135:9876 -Dcom.rocketmq.sendMessageWithVIPChannel=false" -p 8080:8080 -t --name rocketmq-console-ng styletang/rocketmq-console-ng
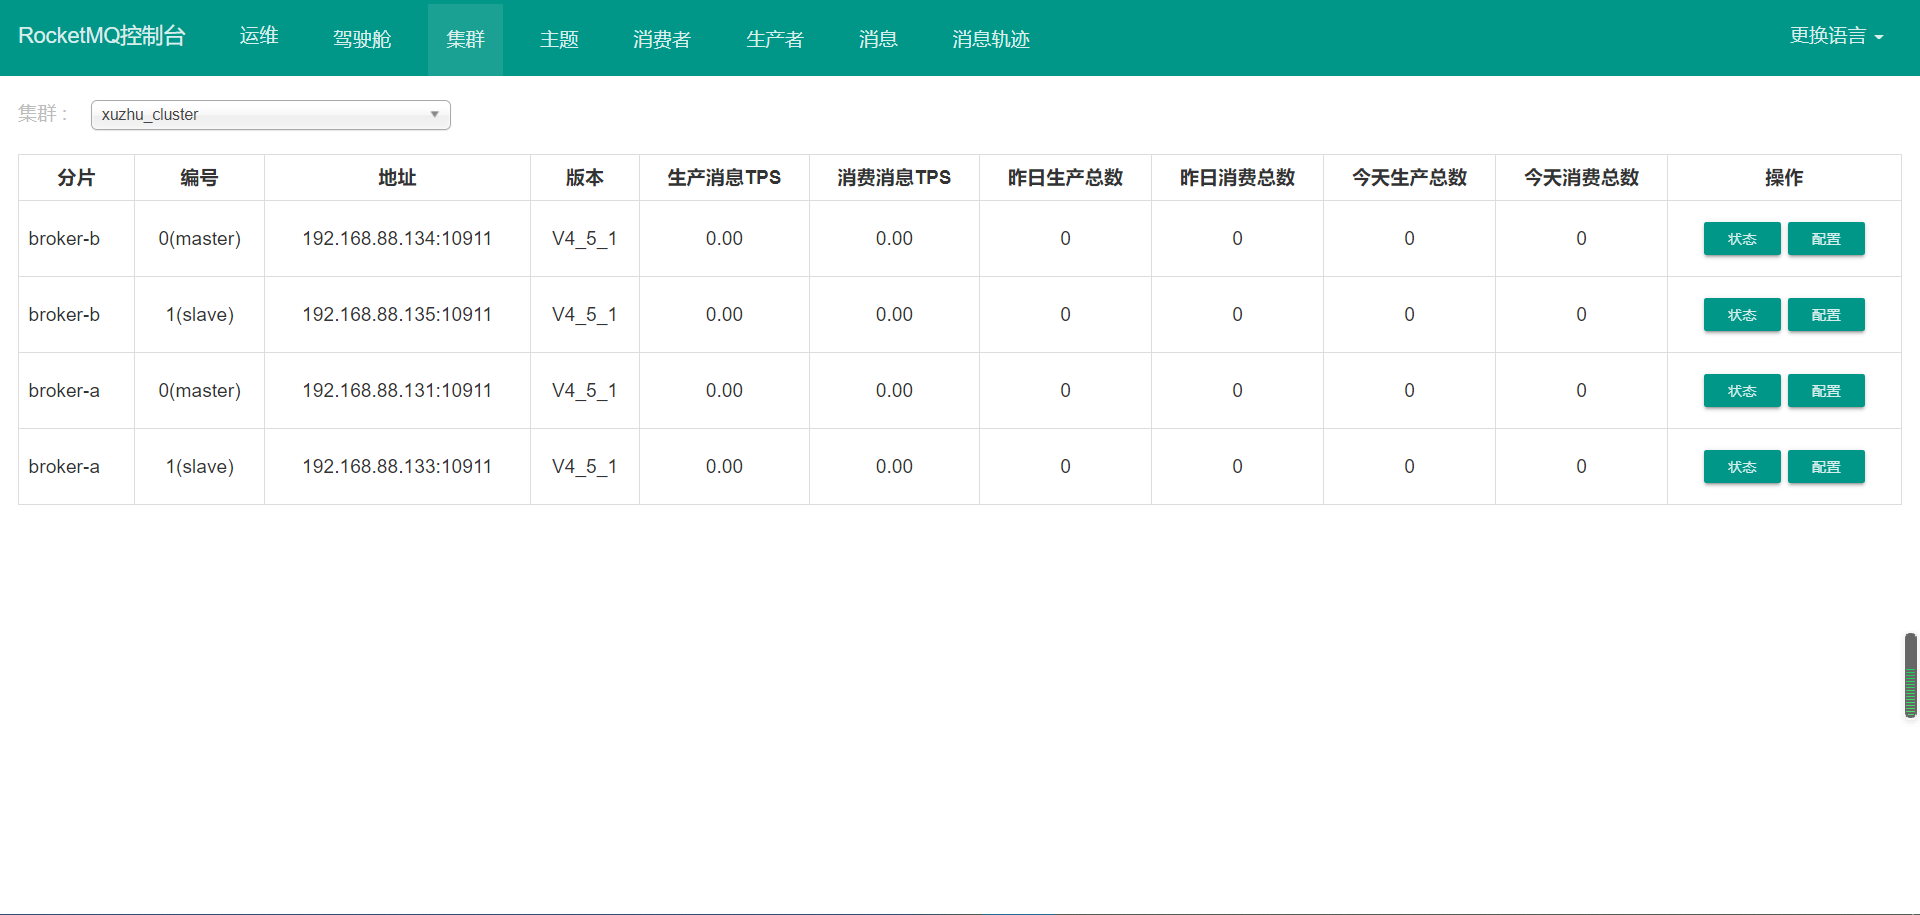
As shown in the figure, the cluster of two masters and two slaves has been built successfully.