1. Symmetric encryption and asymmetric encryption
Encryption technology is the most common security means. The key of data encryption technology is encryption / decryption algorithm and key management. The basic process of data encryption is to process the original plaintext file or data according to some encryption algorithm, making it an unreadable piece of code, usually known as "ciphertext". The "ciphertext" can only display the original content after inputting the corresponding key, so as to ensure that the encrypted content is not stolen.
The characteristic of symmetric encryption is that files or data encryption and decryption use the same key. This method becomes symmetric encryption algorithm in cryptography.
Asymmetric encryption algorithm is different from symmetric encryption algorithm. Asymmetric encryption algorithm needs two keys, public key and private key. The public key and private key are a pair. If the public key is used to encrypt data, the corresponding private key is required to decrypt; if the private key is used to encrypt data, the corresponding public key is required to decrypt.
2. Asymmetric encryption -- RSA algorithm
RSA algorithm is a commonly used asymmetric encryption technology. The origin of the name is the initial of the surname of the three proponents, Ron Rivest, Adi Shamir and Leonard Adleman. Generally speaking, asymmetric encryption technology has two uses: one is to use public key encryption and private key decryption; the other is the private key signature and public key signature verification described in this paper.
2.1 generate certificate file
First, RSA algorithm is used to generate the certificate file, which contains the information of public key and private key.
Keytool is a certificate management tool provided by Java. Here we use keytool to generate key certificates. Using keytool to generate certificate file has the following steps
1. Ensure that the environment variables of JDK are available;
2. Open the cmd window and enter the target folder where the certificate is generated (the certificate will be generated in the current folder);
3. Execute the command in the code segment. The meaning of each parameter of the command is as follows:
- alias: the alias of the key. Here I set it to mountainkey
- keyalg: the hash algorithm used, here I use the RSA algorithm
- keypass: the access password of the key. Here I set it to mount
- keystore: the file name of the keystore. Here I set it to mount.keystore. After the file is generated, the certificate content will be saved in mount.keystore
- storepass: the access password of the keystore. Here I set it to mountainkeystore
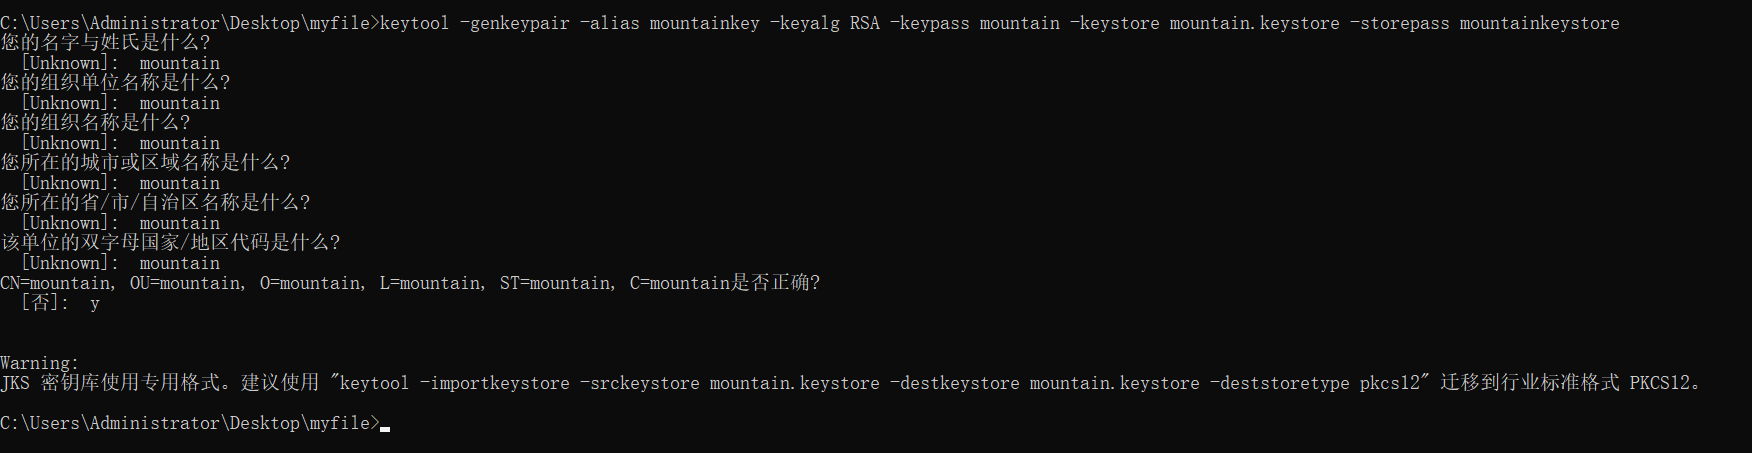
keytool -genkeypair -alias mountainkey -keyalg RSA -keypass mountain -keystore mountain.keystore -storepass mountainkeystore
The input process of the command is shown in the following figure.
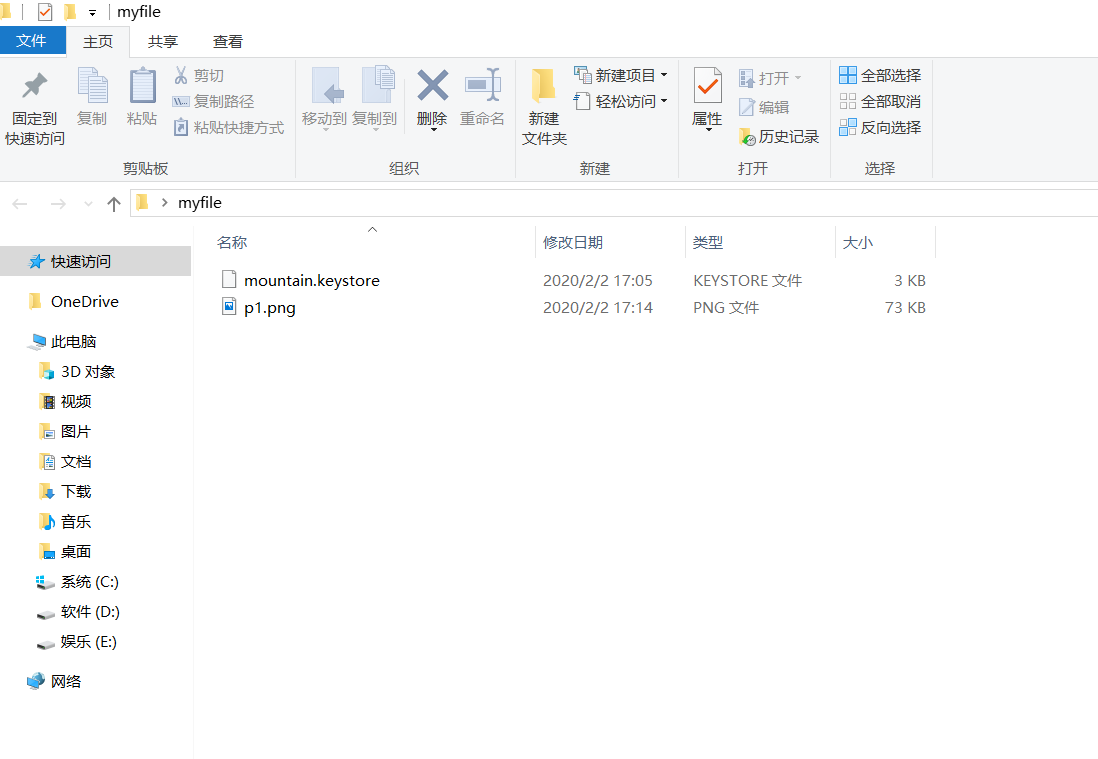
A successful execution will generate a certificate file in the directory where the dos window is located, as shown in the following figure.
2.2 obtaining public key
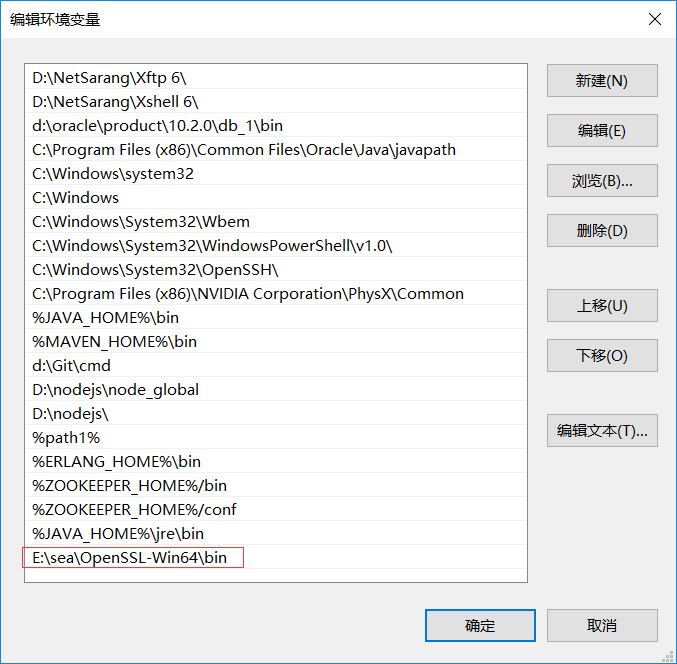
The generated certificate file, mountain.keystore, contains the public key and private key, and now obtains the public key from the certificate. You need to use the openssl toolkit. The download address is http://slproweb.com/products/Win32OpenSSL.html
After the download and installation is successful, add the bin directory of openssl to the path environment variable, as shown in the following figure.
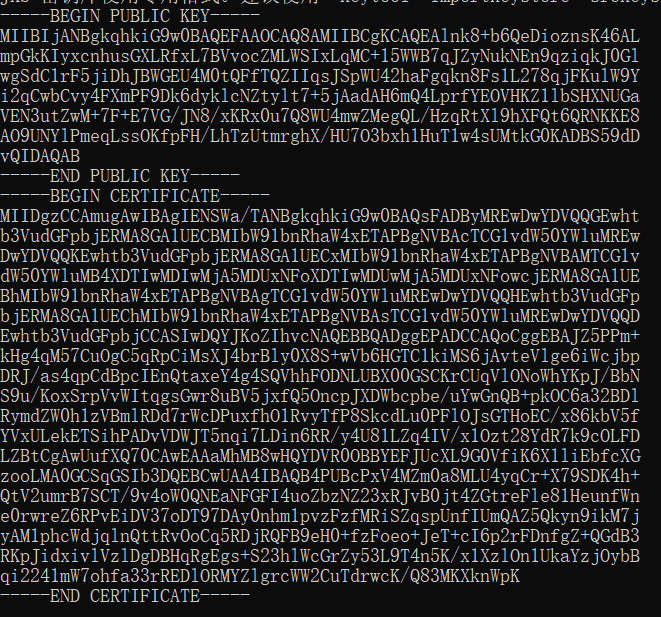
Now, use cmd to enter the directory where the certificate file is located, enter the following command (the certificate file is mount. Keystore), and enter the contents set by storepass, that is, the secret key library password, after prompting for the secret key library password.
keytool -list -rfc --keystore mountain.keystore | openssl x509 -inform pem -pubkey
The displayed content is as follows, which contains the public key information, that is, the content from BEGIN PUBLIC KEY to END PUBLIC KEY. This string is used to verify the content encrypted by the private key.
2.3 signing with private key
Now we test to encrypt the data by obtaining the private key in the certificate. There are many ways to read the certificate file and obtain the private key. Here I use the method provided by Spring Security to perform this operation.
    /**
     * Read the private key in the certificate file and encrypt the data with the private key to get the encrypted string
     */
    @Test
    public void testGenerateToken(){
        String keystore = "mountain.keystore";
        String keystorePassword = "mountainkeystore";
        ClassPathResource classPathResource = new ClassPathResource(keystore);
        String alias  = "mountainkey";
        String keyPassword = "mountain";
        KeyStoreKeyFactory keyStoreKeyFactory = new KeyStoreKeyFactory(classPathResource,keystorePassword.toCharArray());
        KeyPair keyPair = keyStoreKeyFactory.getKeyPair(alias, keyPassword.toCharArray());
        RSAPrivateKey aPrivate = (RSAPrivateKey) keyPair.getPrivate();
        Map<String,String> contentMap = new HashMap<>();
        contentMap.put("hello","hello world");
        String bodyString = JSON.toJSONString(contentMap);
        Jwt jwt = JwtHelper.encode(bodyString, new RsaSigner(aPrivate));
        String encodedContent = jwt.getEncoded();
        System.out.println(encodedContent);
    }
The content of the encrypted private key printed by the console is as follows.
eyJhbGciOiJSUzI1NiIsInR5cCI6IkpXVCJ9.eyJoZWxsbyI6ImhlbGxvIHdvcmxkIn0.LNB7GpiTYl1G4MNYpFDPgay6funMLXeoGUo3TU30IfhIJiSU7zobJ-SpJap6ARbCJoRc5_JURb4ti-6vanf3cpIyOayk2H83gfBOSY8_wACbpfhlt_PGT0RYfStGC7OVwKFUAdEaO6hYYD466vI8d6d9uNb1RfNfGToYlosH05McYAyrM2XLcy0T7glZmuNw_JgMflRAjN09K13MlQZttn6W-lhSlv38CE1_CJ8SzNLHC6U7Dzd1FlcW9Xs-IvDalw1xzgzNRfbNpdvcZTnNhbdNa6_bSlSIfSM9IHngG3EVS_hwQkGOfBeV5gxQZrW4BB9niK8FwvoDB1cVjy4Ktw
2.4 use public key verification
The data signed by the private key will be used for verification, and the method provided by Spring Security will still be used here.
    /**
     * Use public key to verify encrypted string
     */
    @Test
    public void testCheckTokenByPublicKey() {
        // Public key
        String publickey = "-----BEGIN PUBLIC KEY-----" +
                "MIIBIjANBgkqhkiG9w0BAQEFAAOCAQ8AMIIBCgKCAQEAtbuddIbMU5FjqpJR4Ikn" +
                "xktq1k/0C10XfOR2VU79qh4PXGSNn6Vt5BZgK8Ow4cA7SzAMoBUkxev/5I2Mx4p4" +
                "gk+6ImQ+IsTi6tqXOQ7DHjpogfsX/VeXJ93Aeq8v9hOqtKYj5q1jy4skGRvbD+c8" +
                "Z6knxLQb9I6HE39v3BZZL+WTYz6kx8BTZ0rPd7C5uOVqYo/FG+QzY+Ndv2u7gNcy" +
                "V9sRnM+hI2w5e87LuG+V6GhekdKqtS0dsjKskpjX/L2ppykdi1hkCtS/ipZ5aaAj" +
                "/SzVfWfQTxw4Yh+3QVc+KoSW61KlCZ+SSu7YrszAqlg93927/eWWLjYUFsCqP0jw" +
                "5wIDAQAB" +
                "-----END PUBLIC KEY-----";
        // Content after private key encryption
        String token = "eyJhbGciOiJSUzI1NiIsInR5cCI6IkpXVCJ9.eyJoZWxsbyI6ImhlbGxvIHdvcmxkIn0.LNB7GpiTYl1G4MNYpFDPgay6funMLXeoGUo3TU30IfhIJiSU7zobJ-SpJap6ARbCJoRc5_JURb4ti-6vanf3cpIyOayk2H83gfBOSY8_wACbpfhlt_PGT0RYfStGC7OVwKFUAdEaO6hYYD466vI8d6d9uNb1RfNfGToYlosH05McYAyrM2XLcy0T7glZmuNw_JgMflRAjN09K13MlQZttn6W-lhSlv38CE1_CJ8SzNLHC6U7Dzd1FlcW9Xs-IvDalw1xzgzNRfbNpdvcZTnNhbdNa6_bSlSIfSM9IHngG3EVS_hwQkGOfBeV5gxQZrW4BB9niK8FwvoDB1cVjy4Ktw";
        //Verify jwt token
        Jwt jwt = JwtHelper.decodeAndVerify(token, new RsaVerifier(publickey));
        //Get the customized content in jwt token
        String claims = jwt.getClaims();
        System.out.println(claims);
    }
The content printed by the console is the content before signing with the private key.
{"hello":"hello world"}

