catalogue
Why use a separate reasoning container?
Building and running containers
introduce
Container technologies such as Docker significantly simplify the dependency management and portability of software. In this series of articles, we explore Docker Use in machine learning (ML) scenarios.
This series assumes that you are familiar with ML, containerization in general, and Docker in particular. Welcome to download Project code.
stay In the last article , we created a basic container for experiments and training. In this section, we will create a container to run predictions on the trained model.
Why use a separate reasoning container?
In theory, we can use our previous experimental container for production reasoning. However, the recommended approach is to make the image as simple and small as possible. This means getting rid of any components that are not needed for reasoning, such as redundant packages, Jupiter notebook, or building tools (if we have them).
Dependency
Although our experimental image in the last article contains multiple ML libraries, we have used it TensorFlow Trained our model. Therefore, we can trim our requirements as follows txt:
numpy==1.19.5
opencv-python==4.5.1.48
tensorflow-cpu==2.4.0
Adding NumPy here only fixes it to a specific version (different versions can be installed as TensorFlow dependencies). Unfortunately, updates to Python libraries often introduce significant changes or errors. Adding explicit requirements with fixed versions -- even indirect dependencies -- helps avoid the hassle of recreating the environment.
Dockerfile
Most of our dockerfiles are the same as in the previous article:
FROM python:3.8.8-slim-buster
ARG DEBIAN_FRONTEND=noninteractive
RUN apt-get update \
&& apt-get -y install --no-install-recommends ffmpeg libsm6 libxext6 \
&& apt-get autoremove -y && apt-get clean -y && rm -rf /var/lib/apt/lists/*
ARG USERNAME=mluser
ARG USERID=1000
RUN useradd --system --create-home --shell /bin/bash --uid $USERID $USERNAME

COPY requirements.txt /tmp/requirements.txt
RUN pip3 install --no-cache-dir -r /tmp/requirements.txt \
&& rm /tmp/requirements.txt
USER $USERNAME
WORKDIR /home/$USERNAME/app
Because we still use opencv python, we need to keep the apt get statement to install system components.
The last two lines are the only lines that differ from previous versions:
COPY app /home/$USERNAME/app
ENTRYPOINT ["python", "predict.py"]
First, we COPY the application code into the image. The copied app folder contains the reasoning code and model we trained in the previous article. Such a COPY statement is usually one of the last statements in the Dockerfile, which ensures that only a few top layers need to be recreated when the application code changes.
Next, we define ENTRYPOINT for our application. It is the prefix of any command that will be executed when the container starts. Any CMD statement added using the Dockerfile or docker run command will be added as a parameter to the entry point statement.
Building and running containers
After downloading our application code and data, you can build the image as mld03_cpu_predict:
$ docker build --build-arg USERID=$(id -u) -t mld03_cpu_predict .
On Windows, you can skip this -- build Arg userid section:
$ docker build -t mld03_cpu_predict .
After the image construction is completed, we run reasoning:
docker run -v $(pwd)/data:/home/mluser/data --rm --user $(id -u):$(id -g) mld03_cpu_predict
--images_path /home/mluser/data/test_mnist_images/*.jpg
On Windows:
docker run -v $(pwd)/data:/home/mluser/data --rm mld03_cpu_predict
--images_path /home/mluser/data/test_mnist_images/*.jpg
Please note, -- images_path above is the parameter of the application contained in the container. It is attached to the command defined by the entry point statement in Dockerfile. This time we only mirror folders with data, relying on the application code (and training model) embedded in the image.
The expected results are as follows:
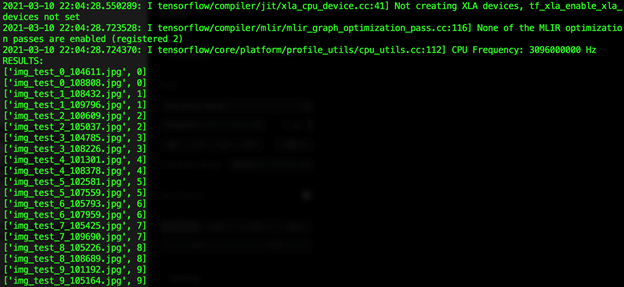
Use the expected value contained in each file name ("test_" We can confirm that all predictions of our limited data set are correct.
generalization
In this article, we use the Docker container to run ML reasoning. In the next article, we will focus on the system with ARM processor Raspberry Pi Adjust this mirror.
https://www.codeproject.com/Articles/5300726/Running-AI-Models-in-Docker-Containers