Official website tutorial: https://pquic.org/
Introduction to PQUIC
PQUIC (Pluginized quic), namely plug-in QUIC, is a framework that enables QUIC clients and servers to dynamically exchange protocol plug-ins (the protocol can be extended on the basis of each connection). Among them, QUIC (Quick UDP Internet Connection) is an Internet transport layer protocol with low delay based on UDP developed by Google.
Running steps
In the tutorial, assume that our working directory is working_dir
Step 1: compile PQUIC
First, you need clone picotls. Picotls provides the TLS implementation based on PQUIC. Picotls itself needs openssl
$ sudo apt install libssl-dev  # or dnf install openssl-devel
$ cd working_dir
$ git clone https://github.com/p-quic/picotls.git
$ cd picotls
# the following instructions just come from the picotls README
$ git submodule init
$ git submodule update
$ cmake .
# If dependencies are missing, cmake may fail. Download these dependencies and try cmake again
$ make
# once picotls is compiled, just go back to the working directory
$ cd ..
# You should go back to the working directory_ dir
After picotls is ready, you can compile pqic with the following command
$ git clone https://github.com/p-quic/pquic
$ cd pquic
# install libarchive, used for the plugin exchange (on Fedora, dnf install libarchive-devel)
$ sudo apt install libarchive-dev
# fetch and compile ubpf, the virtual machine used within PQUIC
$ git submodule update --init
$ cd ubpf/vm
$ make
# make might generate warnings, but should compile
$ cd ../..
# compile michelfralloc dependency to handle memory
$ cd picoquic/michelfralloc
$ make
$ cd ../..
# also install gperftools, required in the current build process (on Fedora, dnf install gperftools)
$ sudo apt install google-perftools
$ cmake .
# if all the dependencies are present, cmake should not report any issue
$ make
At the end of this step, multiple executables should be generated, including picoquicdemo, which can act as PQUIC client and server
Step 2: check the operation of picoquicdemo
Before further experiments, check that our compiled code can exchange data. According to the parameters provided, picoquicdemo can be used as (P)QUIC client or (P)QUIC server. Next, we generate the first connection.
We open two different terminals. First, in one terminal, we run the server with the following command:
$ cd working_dir/pquic
$ ./picoquicdemo
Starting PicoQUIC server on port 4443, server name = ::, just_once = 0, hrr= 0, 0 local plugins and 0 both plugins
Then run the client in another terminal according to the following command:
$ cd working_dir/pquic
$ ./picoquicdemo ::1 4443
A large number of logs will be displayed, but in the last line of the client, we should see that the connection is successfully completed without error. The effect is as follows:
(server side)

(client execution. / picoquicdemo:: 1 4443)

Step 3: compile the first plug-in
Now the basic implementation works normally. We can make some modifications so that it can protect the exchanged data through forward error correction. The fec plug-in does this, but first, we need to compile it into eBPF code.
The compilation process requires clang-6.0 and llc-6.0, which can be based on https://apt.llvm.org/ Download the content in. The updated version is also available, but in this experiment, the Lang and LLC variables need to be modified in Makefile. When you are ready, you can compile the fec plug-in with the following command:
$ cd working_dir/pquic
$ cd plugins/fec
$ make
# if it raises an error about clang-6.0 not found, update the CLANG and LLC variables in Makefile
Several object files are generated, each of which is an ELF file containing the eBPF code to realize the plug-in behavior. We can insert these files in PQUIC
Step 4: run the first plug-in in PQUIC
Just like running picoquicdemo for the first time, open two terminals. First, run the server with fec plug-in on one terminal:
$ cd working_dir/pquic
$ ./picoquicdemo -P plugins/fec/fec.plugin
Starting PicoQUIC server on port 4443, server name = ::, just_once = 0, hrr= 0, 1 local plugins and 0 both plugins
	local plugin plugins/fec/fec.plugin
At another terminal, run the client with the fec plug-in. Here, for simpler log processing, we use the - G and - 4 options to limit the transfer exchange to 10KB
$ cd working_dir/pquic
$ ./picoquicdemo -4 -G 10000 -P plugins/fec/fec.plugin ::1 4443

Viewing the log of the client, you can see that the new frame SFPID FRAME is used on the connection. These frames are special for the injected fec plug-in, indicating that we have successfully injected forward error correction in this connection.
Problems and Solutions
1. Cannot find - lpprofiler
When running make in the last step of Compiling PQUIC, an error is reported
/usr/bin/ld:can't find -lprofiler

resolvent:
After downloading locate using the sudo apt install mlocate command, view the locate libprofiler

As you can see, there is libprofiler so.*** File, but libprofiler does not exist So file, so you need to create a new soft link
cd /usr/lib/x86_64-linux-gnu/
//Enter the corresponding directory
sudo ln -s libprofiler.so.0 libprofiler.so
//Create a new libprofiler So soft link, link to the existing libprofiler so.*** file
ll libprofiler.so*
//After completion, you can check whether it is successful
The effect is shown in the figure:

Back to / working_ Dir / pqic executes the make command and compiles successfully:

2. clang,llc version problem when compiling plugin
Running make directly is likely to report an error, indicating that clang-6.0 and llc-6.0 cannot be found
Solution 1:
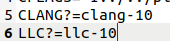
Check the version numbers of clang and llc installed in the system (execute ls command under / usr/bin), and modify the value of variables in Makefile, as shown in the figure:
Solution 2:
If you have installed clang-6.0 and llc-6.0, but the version displayed in -- version is a higher version, you can change the default version to 6.0
Reference link: https://blog.csdn.net/DumpDoctorWang/article/details/84567757
expand
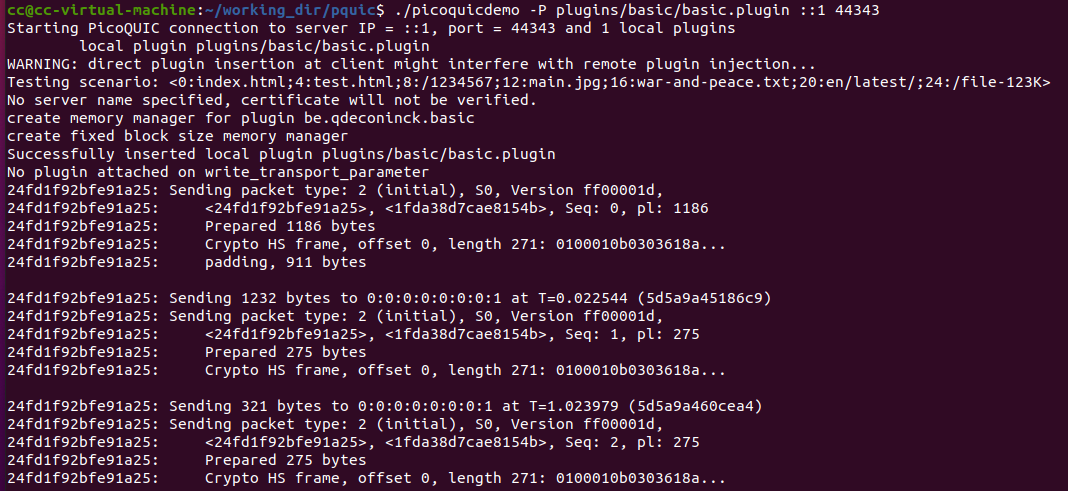
Running basic is the same as running fec plug-in. You should first execute a make under plugins/basic and then execute the running command
The effect is shown in the figure:
(server side)

(client)