School information system maintenance (2)
Start preparation: 1. Open the Layui framework offline manual or online manual. 2. Open the bootstrap offline manual. 3. Open the SQL Sever database
1, Construction of school information data form
1.1 document introduction
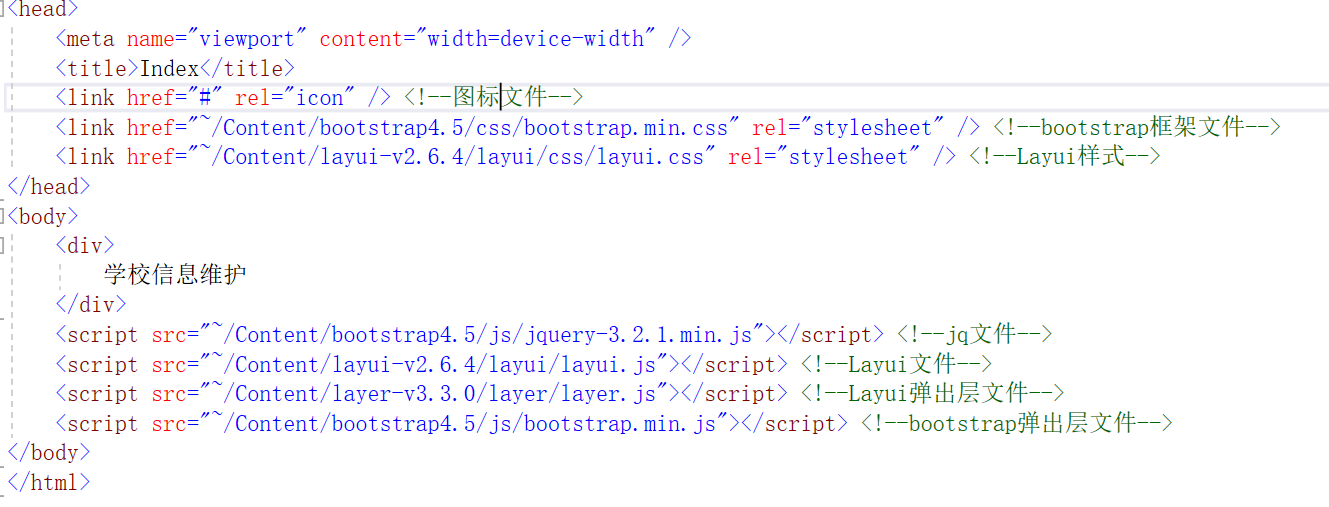
Open the view in the [SchoolInformation] area controller created in the previous article
The following documents have been copied in the price inquiry folder of [Comtent] from the beginning, and can be dragged directly
1.2. Table data table
Open the Layui manual and find the [table data table] in the built-in module
Copy the first example code in the manual and modify it
The table tag is used to store table data. Find it through id. lay filter is a user-defined attribute, which will be used for subsequent modification and deletion
container class is a middle class of bootstrap
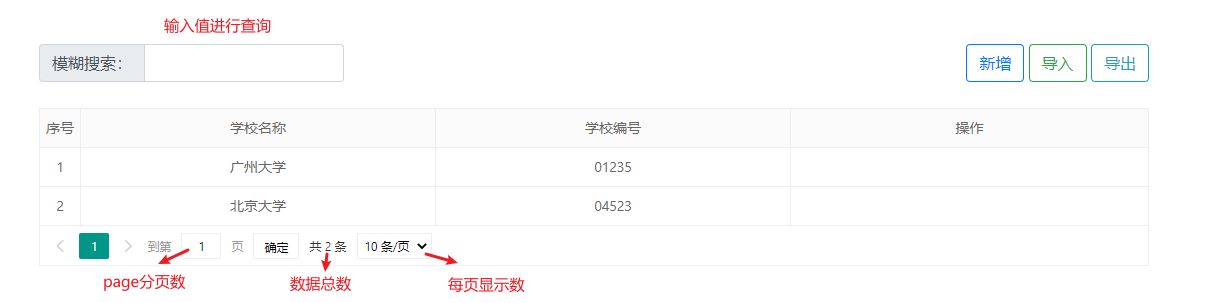
There is a fuzzy query button, as well as add, import and export buttons
<div class="container mt-5">
        <!--Fuzzy search, add, import-->
        <div class="row justify-content-between mt-3">
            <!--Distance between two sides of forced isolation-->
            <div class="col-auto mr-auto">
                <div class="input-group mb-3">
                    <div class="input-group-prepend">
                        <span class="input-group-text" id="inputGroup-sizing-default">Fuzzy search:</span>
                    </div>
                    <input type="text" class="form-control" aria-label="Default" aria-describedby="inputGroup-sizing-default" oninput="studentReload()">
                </div>
            </div>
            <!--Add button-->
            <div class="col-auto">
                <button type="button" class="btn btn-outline-primary" onclick="newGrade()">newly added</button>
                <button type="button" class="btn btn-outline-success">Import</button>
                <button type="button" class="btn btn-outline-info">export</button>
            </div>
        </div>
        <!--Rendered table-->
        <table id="demo" lay-filter="test"></table>
    </div>
After modifying the table rendering code:
<script>
var table; // Global variable table
layui.use('table', function () {
table = layui.table; // Module loading
//First instance
table.render({ // render rendering
elem: '#demo '/ / ID of rendering
// , url: '/demo/table/user /' / / data interface
, data:[] // Default render first page
, page: true //Open paging
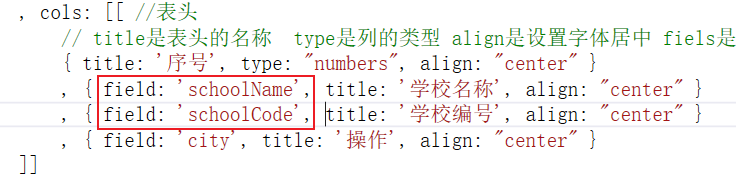
, cols: [[ //Header
// title is the name of the header, type is the type of the column, align is the setting of the font, and fields is the field interface with the query data
{ title: 'Serial number', type: "numbers", align:"center"}
, { field: 'schoolName', title: 'School name', align: "center"}
, { field: 'schoolCode', title: 'School number', align: "center"}
, { field: 'city', title: 'operation', align: "center"}
]]
});
});
The rendering of the table is as follows

1.3. Fabrication of new modal box
Go back to the bootstrap manual and find the component - pop up modal box - set the form properties
<!--New modal box-->
<div class="modal" id="myModal" tabindex="-1" role="dialog">
<div class="modal-dialog" role="document">
<div class="modal-content">
<div class="modal-header">
<h5 class="modal-title">New school information</h5>
<button type="button" class="close" data-dismiss="modal" aria-label="Close">
<span aria-hidden="true">×</span>
</button>
</div>
<div class="modal-body">
<!--Add form-->
<form id="myForm">
<!--School name-->
<div class="form-group row">
<label for="academeNameI" class="col-3 col-form-label">School Name:</label>
<div class="col-9">
<input class="form-control" type="text" name="SchoolName" placeholder="School name" />
</div>
</div>
<!--School number-->
<div class="form-group row">
<label for="academeNameI" class="col-3 col-form-label">School No.:</label>
<div class="col-9">
<input class="form-control" type="text" name="SchoolName" placeholder="School number" />
</div>
</div>
</form>
</div>
<div class="modal-footer">
<button type="button" class="btn btn-primary" onclick="">preservation</button>
<button type="button" class="btn btn-secondary" data-dismiss="modal">cancel</button>
</div>
</div>
</div>
</div>
1.4 pop up of new mode box
The pop-up of the modal box mainly uses the js of the [bootstrap] framework
Form reset: Although automatic submission is disabled in the form, in order to avoid accidents, reset it by converting js objects. The previously written will not pop up the next time you click Add
// Pop up of new mode box
        function newSchool() {
            // It is used to determine whether to add or edit the modal box
            $("#SchoolID").val(0);
            // Reset form
            $("#myForm").get(0).reset();
            // Modify title
            $("#Title ". Text (" new school information ");
            // The new mode box pops up
            $("#myModal").modal();
        }
2, Connect database
For more information about MVC connecting to the database, please refer to MVC connecting to SQL server through EF
https://blog.csdn.net/baidu_39378193/article/details/116332285?spm=1001.2014.3001.5501
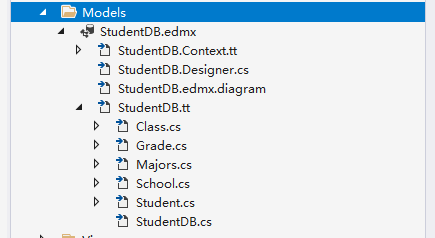
1.1. Create model [StudentDB]
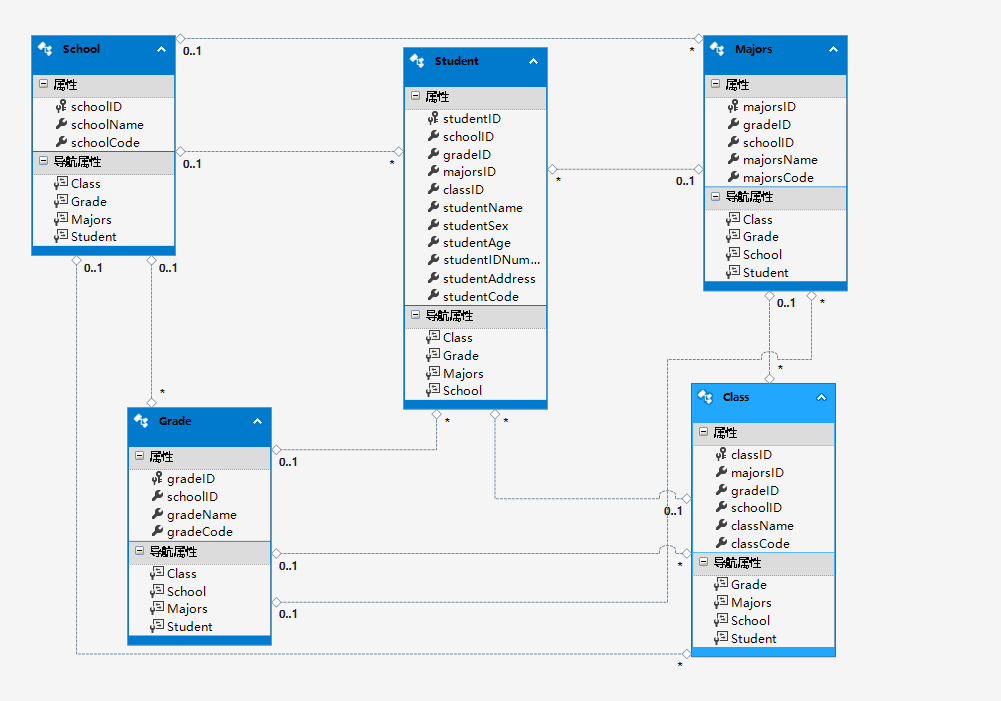
Imported data diagram
3, New school information
Although the database table was created earlier, no specific information was written into the database. In order to match the following information one by one, it was written into the database through the new method
1.1. Instantiate Models
Models is our model layer, and the following StudentDataEntities are actually the name of our database
Create database objects through new, and then get the data table by calling [myModels]
Models.StudentDataEntities myModels = new Models.StudentDataEntities();
1.2. New controller method
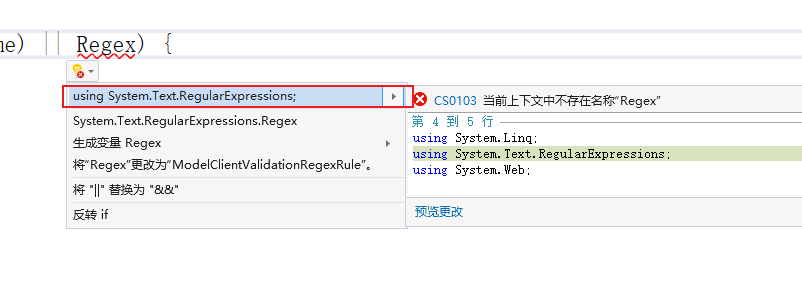
For the use of regular expressions [Regex], the error is reported at the beginning of the call because the namespace is not introduced. Use the following two methods to introduce it
Move the mouse to the bottom and click display and repair
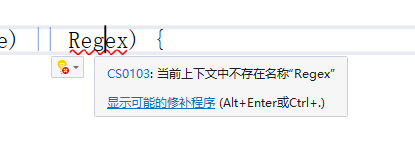
[using] will appear after the display. Click it
In the future, if there are error pages in some methods, follow this method. Pay attention to using before clicking others. Don't move around
There are three verification methods for adding school information. The most important one is that the query is repeated, and the school information and code cannot be repeated. Therefore, the query operation mainly uses the meaning that the [Contains] Contains a field, that is, the school name field in the school table Contains the newly added field, which will be + 1, and the code is the same, If it is equal to 1, there is no repetition. You can add
#region step 1: add school information
        /// <summary>
        ///Receive new data through entity class
        /// </summary>
        ///< param name = "school" > entity class of school table < / param >
        /// <returns></returns>
        public ActionResult AddStudent(School school)
        {
            var str = "";
            // Judge whether the school name is empty
            if (!string.IsNullOrEmpty(school.schoolName))
            {
                // Judge whether the school number is empty and whether the number conforms to the regular expression, a five digit integer
                if (!string.IsNullOrEmpty(school.schoolCode) && Regex.IsMatch(school.schoolCode, "^\\d{5}$")) {
                    // Determine whether the data is repeated
                    int studentTow = myModels.School.Count(o => o.schoolName.Contains(school.schoolName) || o.schoolCode.Contains(school.schoolCode));
                    // If the data is not repeated, it is equal to 0
                    if (studentTow == 0)
                    {
                        // Use try to determine whether there is an error
                        try
                        {
                            // Add means to add a new value-added database
                            myModels.School.Add(school);
                            // SaveChanges() save to database
                            if (myModels.SaveChanges() > 0)
                            {
                                str = "School information added successfully";
                            }
                            else
                            {
                                str = "Failed to add school information";
                            }
                        }
                        catch (Exception e)
                        {
                            return Content("Error adding");
                        }
                    }
                    else {
                        str = "Duplicate data, please check";
                    }
                }
                else {
                    str = "The school number consists of five integers";
                }
            }
            else {
                str = "Please enter the school name";
            }
            // Return value
            return Json(str,JsonRequestBehavior.AllowGet);
        }
        #endregion
1.3. js add save call controller method
Call time when the Save button in the new mode box is clicked
// Add and save school information
        function saveSchool() {
            var schoolName = $("#schoolName").val();
            var schoolCode = $("#schoolCode").val();
            // Judgment data information
            if (schoolName == "" || schoolName == undefined) {
                layer.alert("Please enter the school name");
                return;
            }
            if (schoolCode == undefined || schoolCode == "" || !/^\d{5}/.test(schoolCode)) {
                layer.alert("Please enter the correct school number, consisting of five integers");
                return;
            }
            // Data request
            $.post("AddStudent", {
                    schoolName: schoolName,
                    schoolCode: schoolCode
            }, function (data) {
                   layer.alert(data);
                   // Table overload
                   studentReload();
                   // Close modal box
                   $("#myModal").modal("hide");
            });
        }
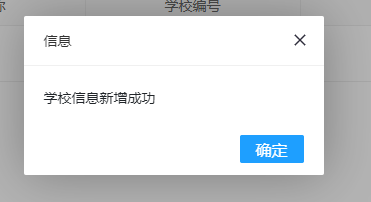
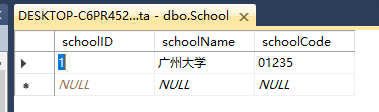
1.4. Successfully added school information
The data is added successfully. As for why it has not been displayed, it is because no data has been written. The following will be written
Open SQL database
4, Data appearance and table reset
1.1. Encapsulate the returned entity class
Latyu's asynchronous interface data will pass two paging data by default [page=1, limit=10], so we encapsulate the two default parameters into an entity class of [LayuiTablePage], and also encapsulate a method to query the beginning of paging in the entity class
Page is the number of pages paged, limit is the number of entries displayed on each page, and the calculated number is the subscript number of data
public class LayuiTablePage
 {
     // paged
     public int page { get; set; }
     // Number of items displayed per page
     public int limit { get; set; }
     // Find the index at the beginning of each page
     public int getPage()
     {
         return (page - 1) * limit;
         // (1 - 1) * 10 = 0  (2 - 1) * 10 = 10
     }
 }
The second encapsulated entity class is a default return value of Layui
These four fields are required. Return the number of pages queried through data and the total number of data through count. code is 0 by default
List refers to the return of a list, which can be shown by the mapping from Models
public class LayuiTableData<T> // T generic
 {
     // Returns the total number of rows
     public int count { get; set; }
     // Return data list
     public List<T> data { get; set; }
     // The default data interface is 0. You must
     public int code { get; set; }
     // status information
     public string msg { get; set; }
 }
1.2 controller method
Receive the number of pages through LayuiTablePage. The SchoolName of string type is the value of the school name passed by receiving fuzzy search
Table overloading is divided into five steps
Count() is all the elements of the obtained sequence
OrderBy() sorts from small to large, or from large to small
Skip() skips the elements specified in the sequence
Take()
Return data through the encapsulated [LayuiTableData] entity class
#region step 2, table query and fuzzy search
        public ActionResult SelectStudent(LayuiTablePage layuiTable, string SchoolName)
        {
            // Step 1: school data query
            var SchoolData = (from tbStudent in myModels.School
                              select tbStudent).ToList();
            // Step 2: fuzzy search (condition filtering)
            SchoolName = SchoolName.Trim(); // De space operation
            SchoolData = SchoolData.Where(o => o.schoolName.Contains(SchoolName)).ToList();
            // Step 3: query total data
            int SchoolCount = SchoolData.Count();
            // Step 4: paging query
            List<School> schoolPage = new List<School>();
            schoolPage = SchoolData.OrderBy(o => o.schoolID).Skip(layuiTable.getPage()).Take(layuiTable.limit).ToList();
            // Step 5: encapsulate the returned data
            LayuiTableData<School> schoolData = new LayuiTableData<School>();
            schoolData.count = SchoolCount;
            schoolData.data = schoolPage;
            return Json(schoolData, JsonRequestBehavior.AllowGet);
        }
#endregion
1.3 field correspondence
The fields of our query school table should correspond to the [field] rendered in the header
schoolName is the school name field
schoolCode is the school number field
1.4 table overloading and fuzzy search
Get the form value of fuzzy search, and the value changes[ ο When ninput = ""], call the overload event [studentReload()]
table is a global variable set
Reload means reload
url is an asynchronous request controller
where is the past value to be passed by the fuzzy query
// Table overload (fuzzy search)
        function studentReload() {
            var fuzzySearch = $("#fuzzySearch").val();
            table.reload("demo", {
                url: "@Url.Content("/RegionalFile/SchoolInformation/SelectStudent")",
                where: {
                    SchoolName: fuzzySearch
                }
            });
        }
Pay attention to a method of table overloading, which means reloading and refreshing.
Reload after adding data successfully
1.5 the rendering results are as follows:
5, Operate on custom column settings
The user-defined column mainly uses the header parameter [templet: operate]

1.1. Return to header button
// Package operation button return
function operate(rowData) {
// rowData is the information obtained from the current row
var schoolID = rowData.schoolID;// Get the school ID of each row
// Pass the school ID when clicking
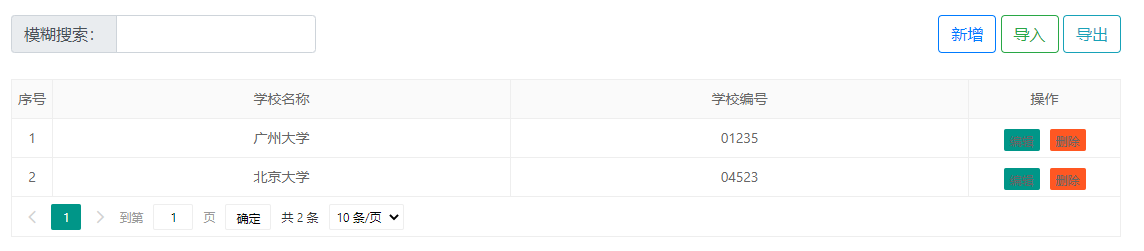
return '<a class="layui-btn layui-btn-xs" lay-event="edit" οnclick="saveSchool(' + schoolID + ')">edit</a>< a class="layui-btn layui-btn-danger layui-btn-xs" lay - event="del" onclick = "saveSchool(' + schoolID + ')" > delete</a > '
}
1.2 rendering results
5, Edit school information
1.1. Pop up the edit mode box
We only set up a modal box. Just modify one of its titles and call it any time
The ID is passed through splicing, and the query data of the past controllers are shown below 👇
// Pop up of edit mode box
        function editStudent(schoolID) {
            // It is used to determine whether to add or edit the modal box
            $("#SchoolID").val(schoolID);
            // Reset form
            $("#myForm").get(0).reset();
            // Modify title
            $("#Title ". Text (" edit school information ");

            // Data binding
            $.get("queryStudent?studentID=" + schoolID, function (data) {
                // School name
                $("#schoolName").val(data.schoolName);
                // School number
                $("#schoolCode").val(data.schoolCode);
            });
            // The new mode box pops up
            $("#myModal").modal();
        }
1.2. Method of querying and editing school information controller
#Step 3: edit the school information again
        /// <summary>
        ///Re edit school information
        /// </summary>
        ///< param name = "studentID" > ID of receiving query < / param >
        /// <returns></returns>
        public ActionResult queryStudent(int studentID)
        {
            School query = myModels.School.Where(o => o.schoolID == studentID).Single();
            return Json(query, JsonRequestBehavior.AllowGet);
        }
#endregion
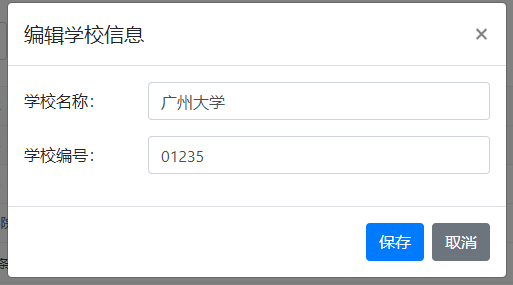
For editing, we usually bind an information of the current line to the editing mode box, but we know which information has been modified
Edit the effect of binding
1.3. Edit and save school information
The method of saving the edit mode box is the same as that of saving the new information. Then we can make the following modifications in the original js method, and then write the edit controller method
In fact, you can modify a path of the request. You can judge whether to add or modify it mainly by the value of the hidden field
The method of request is the same
// Add and save school information
        function saveSchool() {
            var schoolID = $("#SchoolID").val();
            var schoolName = $("#schoolName").val();
            var schoolCode = $("#schoolCode").val();
            // Judgment data information
            if (schoolName == "" || schoolName == undefined) {
                layer.alert("Please enter the school name");
                return;
            }
            if (schoolCode == undefined || schoolCode == "" || !/^\d{5}/.test(schoolCode)) {
                layer.alert("Please enter the correct school number, consisting of five integers");
                return;
            }

            // Send request data
            var strUrl = "";
            if (schoolID == undefined || schoolID == "" || schoolID < 1) {
                // New professional information
                strUrl = '@Url.Content("/RegionalFile/SchoolInformation/AddStudent")';
            } else {
                // Edit professional information
                strUrl = '@Url.Content("/RegionalFile/SchoolInformation/editStudent")';
            }

            // Data request
            $.post(strUrl, {
                    schoolName: schoolName,
                    schoolCode: schoolCode
            }, function (data) {
                   layer.alert(data);
                    // Table overload
                    studentReload();
                    // Close modal box
                    $("#myModal").modal("hide");
            });
        }
1.4. Saving of editing controller
In fact, it's very simple. Just copy the newly added, saved and modified code
myModels.Entry(school).State = System.Data.Entity.EntityState.Modified;
#region step 4: how to save the edit mode box
public ActionResult editStudent(School school)
{
var str = "";
// Judge whether the school name is empty
if (!string.IsNullOrEmpty(school.schoolName))
{
// Judge whether the school number is empty and whether the number conforms to the regular expression, a five digit integer
if (!string.IsNullOrEmpty(school.schoolCode) && Regex.IsMatch(school.schoolCode, "^\\d{5}$"))
{
// Determine whether the data is repeated
int studentTow = myModels.School.Count(o => o.schoolName.Contains(school.schoolName) || o.schoolCode.Contains(school.schoolCode));
// If the data is not repeated, it is equal to 0
if (studentTow == 0)
{
// Use try to determine whether there is an error
try
{
// Add means to add a new value-added database
// Modified is modified
myModels.Entry(school).State = System.Data.Entity.EntityState.Modified;
// SaveChanges() save to database
if (myModels.SaveChanges() > 0)
{
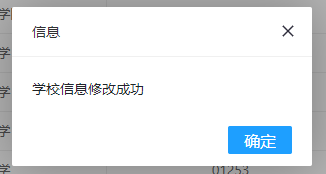
str = "School information modified successfully";
}
else
{
str = "School information modification failed";
}
}
catch (Exception e)
{
return Content("An unknown error occurred");
}
}
else
{
str = "Duplicate data, please check";
}
}
else
{
str = "The school number consists of five integers";
}
}
else
{
str = "Please enter the school name";
}
// Return value
return Json(str, JsonRequestBehavior.AllowGet);
}
#endregion
Editing success effect:
6, Delete school information
The idea of deletion is mainly to pass the current school ID to be deleted to the controller. If there is data, delete it.
Deleting is a rigorous choice, so you should ask whether you want to delete before deleting
1.1. Delete js method
// Delete school information
        function deletionStudent(schoolID) {
            layer.confirm('Are you sure you want to delete', { icon: 0, title: 'Delete school information' }, function (index) {
                // Pass the school ID to the controller for deletion
                $.post("deletionStudent?schoolID=" + schoolID, function (data) {
                    // Information backfill
                    layer.alert(data);
                    // Table overload
                    studentReload();
                });
                // OK to close the query box
                layer.close(index);
            },function (index) {
                    layer.alert("You have cancelled the deletion");
                    // OK to close the query box
                    layer.close(index);
            });
        }
Method of controller
Remove() means to delete
The school information must be queried according to the ID before deletion
Before deleting, you should first judge whether the current school information has been used. If it is used, it cannot be deleted. Imagine that if the previous information is deleted, the following information is all messy
#Step 5: delete school information
        public ActionResult deletionStudent(int schoolID)
        {
            var str = "";
            // Judge whether the school information is used
            int MajorsUseSchool = myModels.Majors.Count(o => o.schoolID == schoolID); // Professional use
            int GradeUseSchool = myModels.Grade.Count(o => o.schoolID == schoolID); // Grade usage
            int ClassUseSchool = myModels.Class.Count(o => o.schoolID == schoolID); // Class usage
            int StudentUseSchool = myModels.Student.Count(o => o.schoolID == schoolID); // Student usage
            // Judge the number of items used, and you can't delete them if you use them
            if ((MajorsUseSchool + GradeUseSchool + ClassUseSchool + StudentUseSchool) == 0)
            {
                // The data appears according to the school ID
                School delectS = myModels.School.Where(o => o.schoolID == schoolID).Single();
                try
                {
                    myModels.School.Remove(delectS);
                    // Judge success
                    if (myModels.SaveChanges() > 0)
                    {
                        str = "School information deleted successfully";
                    }
                    else
                    {
                        str = "School information deleted successfully";
                    }
                }
                catch (Exception e)
                {
                    return Content("Error deleting information");
                }
            }
            else {
                str = "School data is in use and cannot be deleted";
            }
            return Json(str,JsonRequestBehavior.AllowGet);
        }
#endregion
6, Import school data
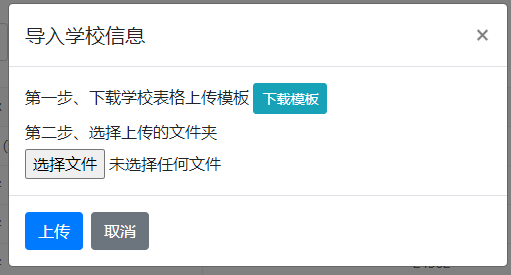
1.1. Import mode box
<!--Import school information-->
<div class="modal" id="importModal" tabindex="-1" role="dialog">
<div class="modal-dialog" role="document">
<div class="modal-content">
<div class="modal-header">
<h5 class="modal-title" id="title">Import school information</h5>
<button type="button" class="close" data-dismiss="modal" aria-label="Close">
<span aria-hidden="true">×</span>
</button>
</div>
<div class="modal-body">
<h6>Step 1: download the school form upload template <button type="button" class="btn btn-info btn-sm">Download template</button></h6>
<div>
<h6>Step 2: select the uploaded folder</h6>
<input type="file" class="form-control-file" id="exampleFormControlFile1">
</div>
</div>
<div class="modal-footer justify-content-start">
<button type="button" class="btn btn-primary" onclick="">upload</button>
<button type="button" class="btn btn-secondary" data-dismiss="modal">cancel</button>
</div>
</div>
</div>
</div>
1.2. Pop up of import mode box
Note: this method is called when the import button is clicked
It is important to clear the file attribute. If you do not clear it, the last uploaded file will be retained when you open it again, and so on
// Open the import mode box
        function importStudent() {
            // Empty file
            $("#exampleFormControlFile1").val("");
            // Open modal box
            $("#importModal").modal();
        }
Effect of importing modal box
1.3. Template download
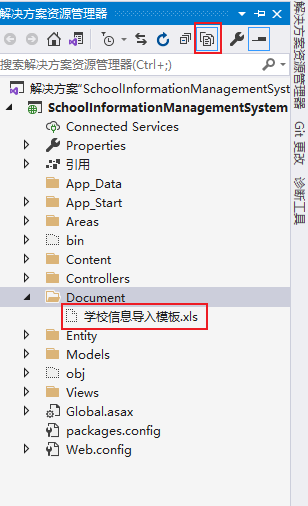
1.1. Create Document
Right click to open the [Document] file in Explorer and drag the template to be downloaded into the value folder. Be careful not to copy and paste it in vs
The files directly put in can only be seen and used through the following operations. The first box [display all files] and the second box are the downloaded files put in
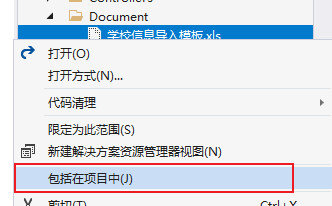
Right click [school information import template. xls] to include it in the project
1.2. Download template
Controller method
1. Find the path to download the file first
2. Determine whether the file exists
3. Return file to download
[System.IO] is the naming method of File
[File] provides static methods for creating, copying, deleting, moving and opening files, and assists in creating system IO. FileStream object.
Exists() determines whether the specified file exists. Boolean type
Note that the returned file type is
#region step 6: Download and upload the template
        public ActionResult DownloadTemplate()
        {
            var str = "";
            // Step 1: find the path to download the file
            string templatePath = Server.MapPath("/Document/School information import template.xls");
            // Step 2: judge whether the file you are looking for exists
            // Exists() determines whether the specified file exists. Boolean type
            if (System.IO.File.Exists(templatePath))
            {
                // Step 3: return to the download file
                //           The found file specifies the name of the download template when it is opened
                return File(templatePath,"application/vnd.ms-excel", "School information import template.xls");
            }
            else {
                str = "Download template does not exist";
            }
            return Json(str, JsonRequestBehavior.AllowGet);
        }
#endregion
1.3 receiving controller method
The receiving method uses only one open to indicate which controller name
Click the [download template] button to call this method
// Template download
function downImportTemplate() {
         window.open("/RegionalFile/SchoolInformation/DownloadTemplate");
}
Click the download template in the import mode box to download the file
7, NPOI file reference
1.1. Find NPOI file

1.2. Copy NPOI
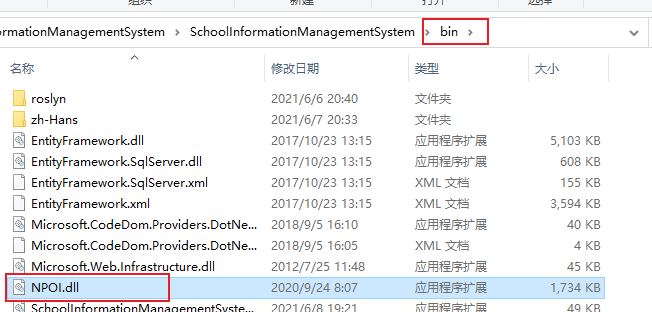
Open the project file in the resource management library and click project file
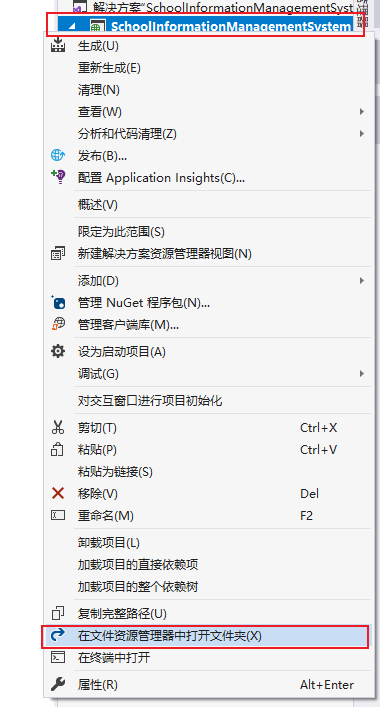
Find the bin file and copy NPOI into it
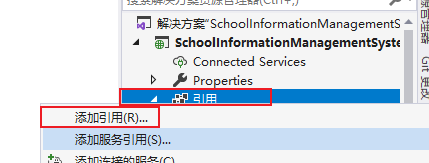
1.3 reference NPOI
Right click reference - Add Reference - Browse
browse
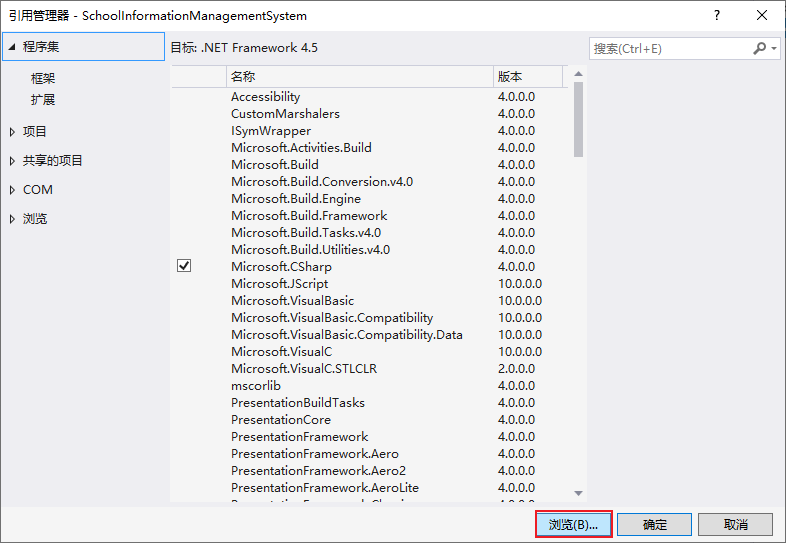
Note: when clicking browse, you will not jump to the [bin] file of the project and manually find the bin of the project file
 Click OK when you find it
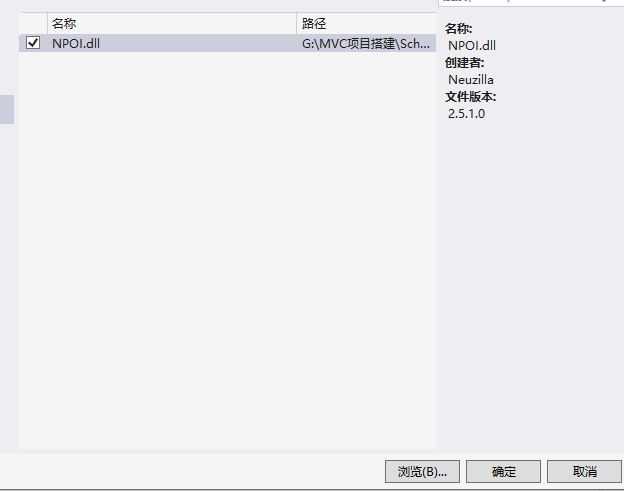
After that, you will see the NPOI file in the reference of the project. You can use the method inside only after referencing the file
8, Upload file operation
1.1. Upload files
The uploaded files are obtained through the [files] method in js
The output results are as follows:

To upload the obtained file to the controller, you need to put the obtained content into the FormData() object
ajax is used to submit data, and the data object is submitted to the controller
// Upload school information file
        function uploadSchool() {
            // Step 1: get the uploaded file
            var File1Excle = $("#File1Excle").get(0).files[0];
            console.log(File1Excle);
            // Create FormData() object
            var formData = new FormData();
            // Insert the obtained file into the object
            formData.append("excelFile", File1Excle);
            // Layer load layer
            var layerIndex = layer.load();
            // Step 2: submit and upload files
            $.ajax({
                url: "", // Upload file submission path
                method: "post", // Submission method
                contentType: false, // Let Ajax not specify a data type
                processData: false, // Let ajax not process the data
                data: formData, // Pass the uploaded file
                success: function (msg) {
                    // Close load layer
                    layer.close(layerIndex);
                    // Pop up callback status information
                    layer.alert(msg);
                    // Table refresh
                    studentReload();
                }
            });
        }
1.2. Controller method for receiving documents
The controller needs to receive the uploaded file through the [httppostedfilebase excel file] method. The second parameter must be matched with the key that inserts the file into the object in js
thinking
1. Get read file
2. Convert files to binary arrays
3. Convert binary array to memory stream
4. Using NPOI to read the data in the memory stream to Excel layer
#Step 7: upload template file
        public ActionResult ImportExcel(HttpPostedFileBase excelFile)
        {
            var str = "";
            try {
                //thinking
                //1. Get read file
                //2. Convert files to binary arrays
                //3. Convert binary array to memory stream
                //4. Using NPOI to read the data in the memory stream to Excel layer

            }
            catch (Exception e) {
                return Content("Failed to upload file, please check");
            }
            return Json(str, JsonRequestBehavior.AllowGet);
        }
#endregion
1.3 step by step operation
The following code is consistent with the steps in try
Step 1: get the file extension
Path.GetExtension gets the extension of the file, and the path should be introduced into the namespace [System.IO]
Get the name of the entire uploaded file
// Step 1: get the file extension
string fileExtension = Path.GetExtension(excelFile.FileName);
Step 2: judge whether the file type is the specified file type
The suffix of the file may be lowercase or uppercase
Equals() compares the parameters inside and has the same value. If yes, it returns true. Otherwise, it is false
// Step 2: judge whether the file type is the specified file type
if (".xls".Equals(fileExtension) || ".XLS".Equals(fileExtension))
{

}
else {
     str = "Uploaded file type does not match Excel";
}
Step 3: declare the binary array storage file
The following code is written in the judgment file type
The declaration of the array is created through the new object using [byte []]
The length of the array is the content length of the uploaded file
ContentLength gets the size of the uploaded file (in bytes)
// Step 3: declare the binary array storage file
byte[] fileBytes = new byte[excelFile.ContentLength];
// Convert the uploaded files into binary arrays and store them in fileBytes
// Read parameter interpretation (read the starting position and ending position in which array)
excelFile.InputStream.Read(fileBytes,0,excelFile.ContentLength);
Step 4: convert binary file into memory stream
MemoryStream creates a stream whose support store is memory. It's also a Class
// Step 4: convert the file into a memory stream
MemoryStream excelFileStream = new MemoryStream(fileBytes);
The following method is to use NPOI to read data
Step 5: convert the memory stream file excel FileStream into a Workbook (Excel file)
A workbook is an Excel file
Namespace referencing HSSFWorkbook

// Reading data using NPOI
// Convert memory stream excel FileStream into Workbook (Excel file)
NPOI.SS.UserModel.IWorkbook workbook = new HSSFWorkbook(excelFileStream);
Determine whether there is data in the workbook
NumberOfSheets determines how many payroll sheets there are
Determine whether there is data in the workbook

> NumberOfSheets Judge how many payroll tables there are sheet
The following code is written in the judgment worksheet
The latter foreign key is an ID, so we need to query the foreign key information through one first
There is no foreign key connected here, so no query is performed
// Create a list to store the data to be saved
List<School> listSchool = new List<School>();
Get first worksheet
Workbook is a declared workbook
GetSheetAt(0) gets the first sheet worksheet. The parameter is the subscript index
// Get first worksheet
NPOI.SS.UserModel.ISheet sheet = workbook.GetSheetAt(0);
Determine whether there is data in the worksheet
PhysicalNumberOfRows gets the number of physical rows, that is, those empty rows are not included
// Judge whether the sheet contains data (row count judgment)
if (sheet.PhysicalNumberOfRows > 0)
{

}
else {
    str = "There is no data in the uploaded form, please check";
}
The following code is put in the judgment
Create an in memory table DataTable (namespace to be referenced)
sheet is the first table obtained
GetRow(0) gets the first row of data through the index
// Create an in memory table (to be used for namespaces)
DataTable dtExcel = new DataTable();
// Get the title row (field). The first row is obtained by index
NPOI.SS.UserModel.IRow rowHeader = sheet.GetRow(0);
I don't know how many pieces of data there are in the table, so I can only judge by circulation
FirstCellNum: gets the subscript of the first cell in a row
LastCellNum: gets the number of columns in a row
FirstRowNum: get the subscript of the first actual row
LastRowNum: gets the subscript of the last actual row
// Gets the number of columns in the table
int cellCount = rowHeader.LastCellNum;
// Gets the number of rows in the table
int rowCount = sheet.LastRowNum + 1;
Loop to add cells in the header to dtExcel of DataTable object
//Create a column in the DataTable and add the value of each cell in the header row in a loop
// i is equal to the title subscript index of the first row obtained, and i is less than the number of columns of the obtained table
for (int i = rowHeader.FirstCellNum; i < cellCount; i++) {
         // Create cell dtColumn get cell getcell() stringcellvalue get its value
         // Get the data of each cell in the header row (header) by traversing each cell in the row
      DataColumn dtColumn = new DataColumn(rowHeader.GetCell(i).StringCellValue);
         // Add the obtained cell data into dtExcel
         // Columns is a collection of columns
         dtExcel.Columns.Add(dtColumn);
}
Step 5: read the data in Excel
This is the second cycle
After this cycle, the data is successfully traversed and added to dtExcel
// Step 5: read the data in Excel
// FirstRowNum: get the subscript (useful data) of the first actual row, starting with 0 rowCount and the number of rows of the actual table
for (int i = sheet.FirstRowNum +1; i < rowCount; i++) {
         // Get row (1, 2,...) Data
         NPOI.SS.UserModel.IRow row = sheet.GetRow(i); // 1
         // Create DataRow row dtExcel create a row in the table dtExcel in memory
         DataRow dtRow = dtExcel.NewRow();
         // Judge that the data of the obtained row is not equal to null
         if (row != null) {
                // Take out the data of the obtained row and put it into dtRow
                // Traverse all cells in a row in Excel
                // FirstCellNum subscript cellCount of the first cell gets the number of columns in the table
                for (int j = row.FirstCellNum; j < cellCount; j++) {
                // The value of each cell taken out is not equal to null
                if (row.GetCell(j) != null) {
                          // Add value to row
                          dtRow[j] = row.GetCell(j).ToString();
                  }
           }
           // Add dtRow filled with data into dtExcel
           // dtExcel table created in memory
           dtExcel.Rows.Add(dtRow);
          }
}
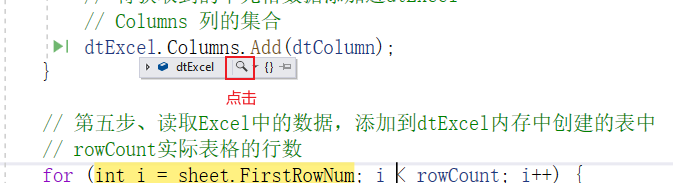
Break debugging and view table results
Breakpoints at the beginning and end of} step 5
View the created dtExcel table (click the magnifying glass)
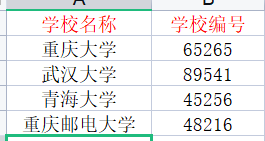
Let's see the effect of the form template first
Several pieces of data information are added to it. Later, we need to add them to the database
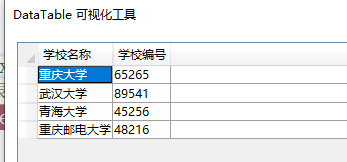
View results
Note: the breakpoint here is not that four pieces of data will appear after continuing, because the for loop is used to continue to appear one piece of data at a time, that is, one piece of data will be obtained at a time
Step 6. Write when there is a foreign key, otherwise skip
Note: the sixth step here is only used in the following student table. Now it's just a study. Let's know in advance
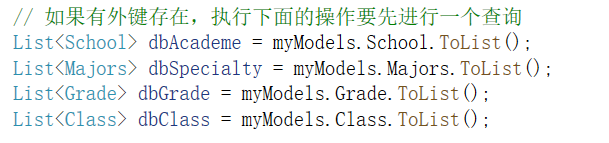
#If there are foreign keys in the region, write the code in the comment. Otherwise, skip
                            // Step 6: traverse and match the school ID, major ID, grade ID and class ID according to the name
                            for (int i = 0; i < dtExcel.Rows.Count; i++)
                            {
                                // Create a row and put the data in the row
                                DataRow row = dtExcel.Rows[i];
                                // Create a student object to save each piece of data
                                School school = new School();
                                // Get the data added to each row
                                school.schoolName = row["School name"].ToString().Trim();
                                school.schoolCode = row["School number"].ToString().Trim();
                                //Add each piece of data to the object list
                                listSchool.Add(school);
                            }
#endregion
Step 7: start the transaction and save it to the database
Ensure that all are saved successfully before saving
1.1. Add transaction reference

The transaction is used when it is used and destroyed when it is not used
//Open transaction
using (TransactionScope scope = new TransactionScope())
{
          //Save data to database
          myModel.SYS_Student.AddRange(listStudent);
          if (myModel.SaveChanges() == dtExcel.Rows.Count)
                   {
                          scope.Complete();//Commit transaction
                          msg.State = true;
                          msg.Text = "Import succeeded";
                    }
                    else {
                          msg.Text = "Import failed";
                    }
}
1.2. Transaction breakpoints
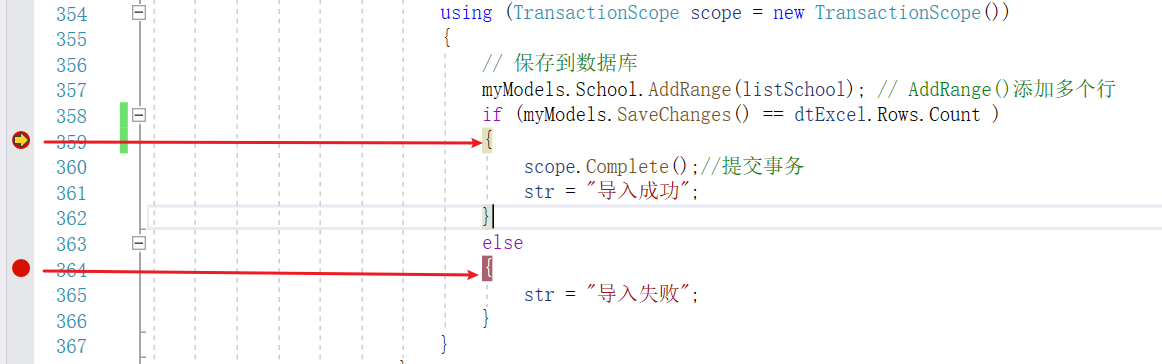
1.3. View database
It will stop at the breakpoint, and our database will be locked as shown in the figure below

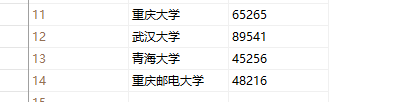
When you click the breakpoint to continue, you will see that the database will insert the four pieces of data we imported
Problem: when importing, we will find a lot of empty lines, which are added when writing data in Excel
The complete upload file code is as follows:
#Step 7: upload template file
public ActionResult ImportExcel(HttpPostedFileBase excelFile)
{
var str = "";
try {
//thinking
//1. Get read file
//2. Convert files to binary arrays
//3. Convert binary array to memory stream
//4. Using NPOI to read the data in the memory stream to Excel layer
// Step 1: get the file extension
string fileExtension = Path.GetExtension(excelFile.FileName);
// Step 2: judge whether the file type is the specified file type
if (".xls".Equals(fileExtension) || ".XLS".Equals(fileExtension))
{
// Step 3: declare the binary array storage file
byte[] fileBytes = new byte[excelFile.ContentLength];
// Convert the uploaded files into binary arrays and store them in fileBytes
// Read parameter interpretation (read the starting position and ending position in which array)
excelFile.InputStream.Read(fileBytes,0,excelFile.ContentLength);
// Step 4: convert binary file into memory stream
MemoryStream excelFileStream = new MemoryStream(fileBytes);
// Reading data using NPOI
// Convert memory stream excel FileStream into Workbook (Excel file)
NPOI.SS.UserModel.IWorkbook workbook = new HSSFWorkbook(excelFileStream);
// Determine whether there is data in the workbook
if (workbook.NumberOfSheets > 0)
{
// If a foreign key exists, you need to make a query before performing the following operations
//List<School> dbAcademe = myModels.School.ToList();
//List<Majors> dbSpecialty = myModels.Majors.ToList();
//List<Grade> dbGrade = myModels.Grade.ToList();
//List<Class> dbClass = myModels.Class.ToList();
// Create a list to store the last data to be saved
List<School> listSchool = new List<School>();
// Get first worksheet
NPOI.SS.UserModel.ISheet sheet = workbook.GetSheetAt(0);
// Judge whether the sheet worksheet contains data (number of rows) and the number of physical rows
if (sheet.PhysicalNumberOfRows > 0)
{
// Create an in memory table (to be used for namespace) and store the data in it
DataTable dtExcel = new DataTable();
// Get the title row (field). The first row is obtained by index
NPOI.SS.UserModel.IRow rowHeader = sheet.GetRow(0);
/*
LastCellNum: Gets the number of columns in a row
LastRowNum: Gets the subscript of the last actual row
FirstCellNum: Gets the subscript of the first cell in a row
FirstRowNum: Gets the subscript of the first actual row
*/
// Gets the number of columns in the table
int cellCount = rowHeader.LastCellNum;
// Gets the number of rows in the table
int rowCount = sheet.LastRowNum + 1;
//Create a column in the DataTable and add the value of each cell in the header row in a loop
// i is equal to the title subscript index of the first row obtained, and i is less than the number of columns of the obtained table
for (int i = rowHeader.FirstCellNum; i < cellCount; i++) {
// Create cell dtColumn get cell getcell() stringcellvalue get its value
// Get the data of each cell in the header row (header) by traversing each cell in the row
DataColumn dtColumn = new DataColumn(rowHeader.GetCell(i).StringCellValue);
// Add the obtained cell data into dtExcel
// Columns is a collection of columns
dtExcel.Columns.Add(dtColumn);
}
// Step 5: read the data in Excel and add it to the table created in dtExcel memory
// FirstRowNum: get the subscript (useful data) of the first actual row, starting with 0 rowcount and the number of rows of the actual table
for (int i = sheet.FirstRowNum + 1; i < rowCount; i++)
{
// Get row (1, 2,...) Data
NPOI.SS.UserModel.IRow row = sheet.GetRow(i); // 1
// Create DataRow create a row in the table dtExcel in memory
DataRow dtRow = dtExcel.NewRow();
// Judge that the data of the obtained row is not equal to null
if (row != null)
{
// Take out the data of the obtained row and put it into dtRow
// Traverse all cells in a row in Excel
// FirstCellNum subscript cellCount of the first cell gets the number of columns in the table
for (int j = row.FirstCellNum; j < cellCount; j++)
{
// The value of each cell taken out is not equal to null
if (row.GetCell(j) != null)
{
// Add value to row
dtRow[j] = row.GetCell(j).ToString();
}
}
// Add dtRow filled with data into dtExcel
// dtExcel table created in memory
dtExcel.Rows.Add(dtRow);
}
}
#If there are foreign keys in the region, write the code in the comment. Otherwise, skip
// Step 6: traverse and match the school ID, major ID, grade ID and class ID according to the name
for (int i = 0; i < dtExcel.Rows.Count; i++)
{
// Create a row and put the data in the row
DataRow row = dtExcel.Rows[i];
// Create a student object to save each piece of data
School school = new School();
//Get college ID
//Find the corresponding AcademeID in dbAcademe through the AcademeName in dataTable
// Get the value of the school in the line
//string academeName = row ["College"] ToString().Trim();
//try
//{
// //The school foreign key appearing in front of dbAcademe only needs to query the ID of this data
// student.schoolID = dbAcademe.Where(p => p.schoolName == academeName)
// .Single().schoolID;
//}
//catch (Exception e)
//{
// Debug.WriteLine(e);
// msg.Text = string.Format("the {0} student data cannot match", i + 1);
// return Json(msg, JsonRequestBehavior.AllowGet);
//}
// Get the data added to each row
school.schoolName = row["School name"].ToString().Trim();
school.schoolCode = row["School number"].ToString().Trim();
//Add each piece of data to the object list
listSchool.Add(school);
}
#endregion
// Save to database, use to open transaction
// Open transaction
using (TransactionScope scope = new TransactionScope())
{
// Save to database
myModels.School.AddRange(listSchool); // AddRange() add multiple rows
if (myModels.SaveChanges() == dtExcel.Rows.Count )
{
scope.Complete();//Commit transaction
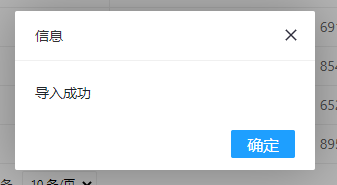
str = "Import succeeded";
}
else
{
str = "Import failed";
}
}
}
else {
str = "There is no data in the uploaded form, please check";
}
}
else {
str = "Sheet is empty";
}
}
else {
str = "Uploaded file type does not match Excel";
}
}
catch (Exception e) {
return Content("Failed to upload file, please check");
}
return Json(str, JsonRequestBehavior.AllowGet);
}
#endregion
Step 8: template view display content
1.1. The effect is as follows:
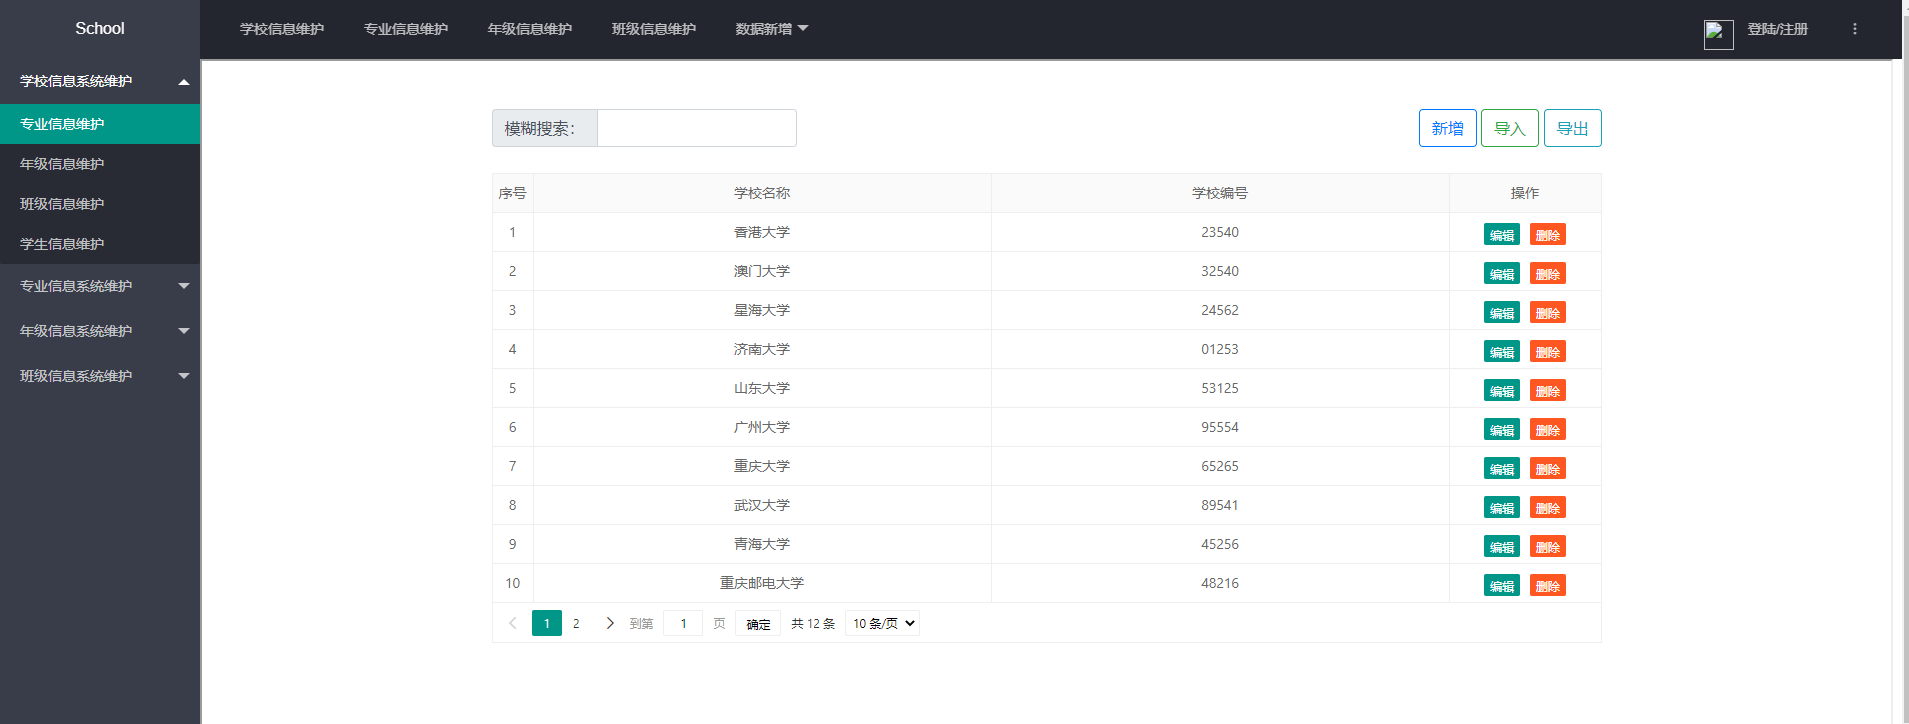
1.2 nested pages
If you want to nest a page in a page, you need to use the [ifrom] tag. Set another page through the src attribute of the ifrom tag to nest the page into the current page, as shown in the above figure

reflection:
There are five different pages in total, and we have to click different tabs to transfer to different management forms. How can we achieve this?
Add a click event to the navigation bar. When clicking, the user-defined attributes of the tag storage file will be obtained, and the obtained attributes will be given to the src of the ifrom tag
1.3. Add custom attributes to labels
Get the dd and a tags of the child elements under the element through the id and add the click event
I have added all the custom attributes in the tag
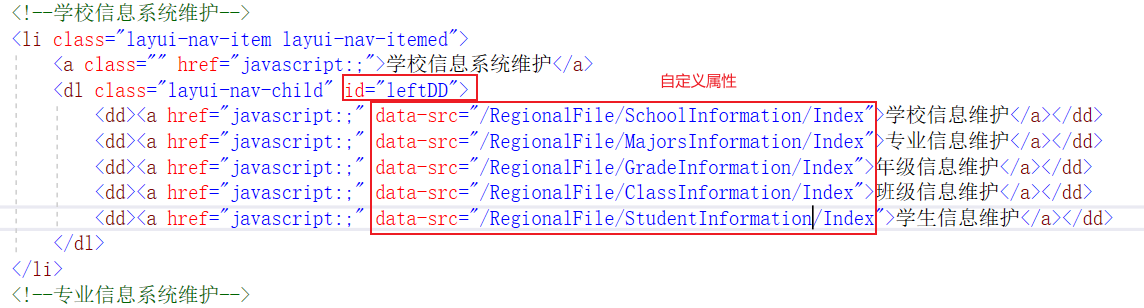
1.4. Get and add attributes
The ifrom tag above has given an id, so you can get the element through the id
When we click the navigation tab, we will get one of its user-defined attributes. The obtained attributes will be copied to the variable thisSrc. How to get the ifrom tag through ID and set one of its user-defined attributes src through attr
// Click the top navigation bar and the left navigation bar will also change
        $("#leftDD>dd a").click(function () {
            // get attribute
            var thisSrc = $(this).data("src");
            // Add src attribute to ifrom
            $("#myIfram").attr("src", thisSrc);
        });