1, Overview of overall functions
In the process of daily learning, it is found that not all web pages can be captured by Scrapy. The reason is that JavaScript is dynamically rendered and Selenium is used to simulate browser crawling. There is no need to care about background requests or analyze the rendering process. As long as the content that can be seen on the final page of the web page can be captured. The web page used in this experiment is lianjia.com. Using scratch + Selenium, the content of the captured data is the housing source information of second-hand houses in Kunming, including the name, region, orientation, area, structure, selling price and unit selling price of the community where the housing source is located. Store the data into MySQL database, count the number of second-hand houses in different regions in groups, screen out the regions with a total number of more than 100, and draw a histogram with pyechards to realize data visualization. Finally, based on this, this paper analyzes the economic development level and population flow in different regions.
2, Specific implementation steps
1. Install the chrome driver and configure the environment variables
(1) View chrome version( chrome://version/ )
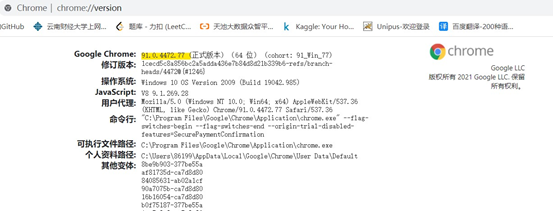
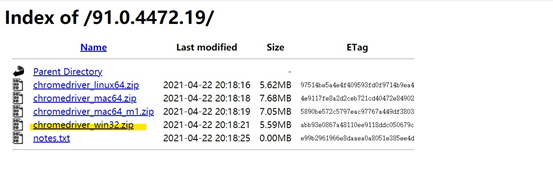
(2) Install the corresponding version of the drive chromdriver, and select the corresponding version and the corresponding operating system (the 64 bit operating system is compatible with 32 bits)
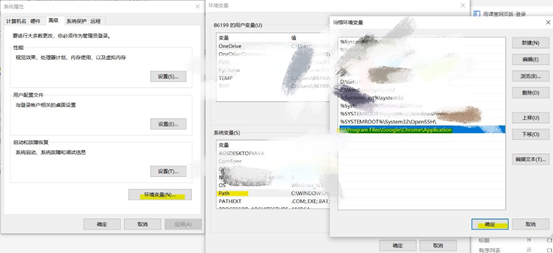
(3) Configure environment variables
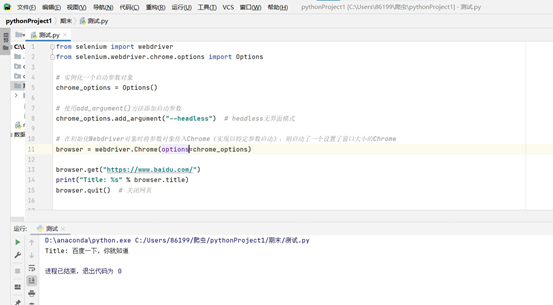
(4) Install Selenium and test the chrome driver

2. Building the basic framework
Create a virtual environment, enter the virtual environment to install the required libraries, create a project, enter the project to create a crawler (the above operations are completed in the black window), and create a new main Py as the entry file.
Scratch framework (2): entry file
3. Integrate Selenium into scripy (download middleware middlewares.py)
Every request sent will go through the download middleware. In order to integrate Selenium into scripy, it is necessary to do some interception in this part to enable Selenium to access the web page according to the corresponding url, and respond the result back to the framework (analyze the data in the crawler logic) without using the downloader.
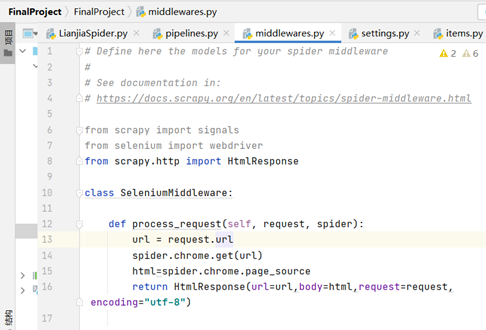
4. Open and close the browser (crawler logic)
It's easy to open the browser, but when do you close the browser? Therefore, the Signals signal is introduced to generate a signal to inform the occurrence of things. The corresponding operation can be done by capturing the corresponding signal.
Scrapy official document Signals page
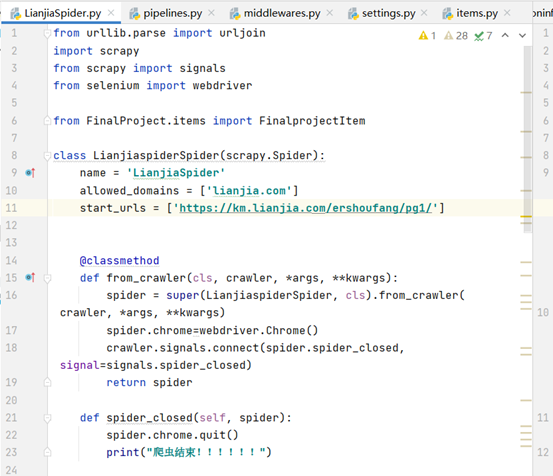
5. Parse data (crawler logic)
Parse is an analytic function. CSS selector is used to filter the target data, i.e. the name, region, orientation, area, structure, selling price and unit selling price of the community where the house source is located. zip is used to package the information of each house source into a tuple, which is passed into pipelines through the engine Py for data processing and other operations. The purpose of the parsing function is not only to obtain the target data, but also to obtain the url of the next page. Understand the principle of Scrapy. Each parsed response has a corresponding url. On this basis, a new url is obtained through string splicing and passed back to the crawler logic.
Scratch framework (3): CSS selector parsing data
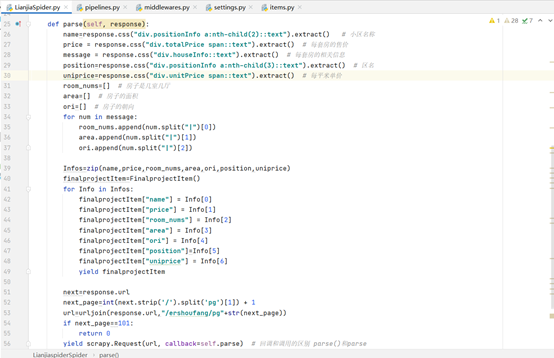
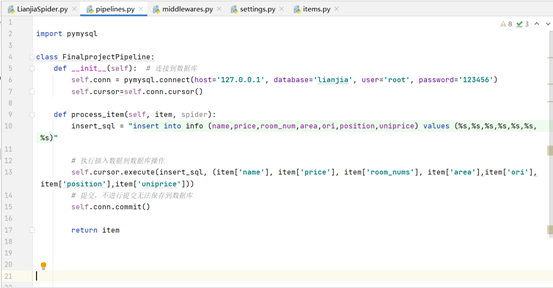
6. Save to database (pipelines.py)
Use pymysql to connect MySQL and pycharm. Use of pymysql (connection between pycharm and mysql)
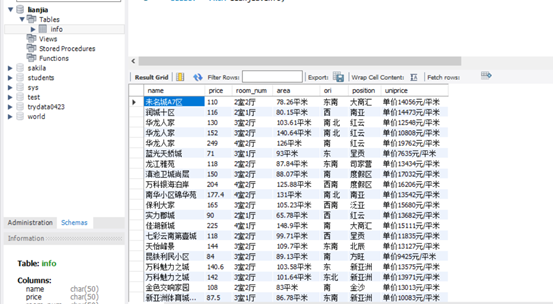
7. Find the data used to plot the histogram
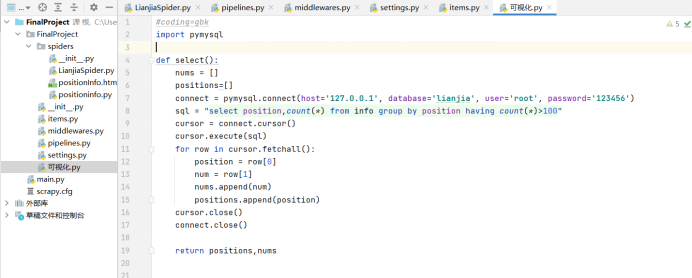
Filter the data with the total number of second-hand houses greater than 100 by region.
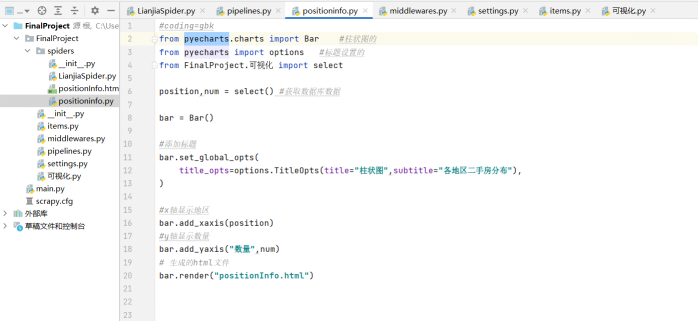
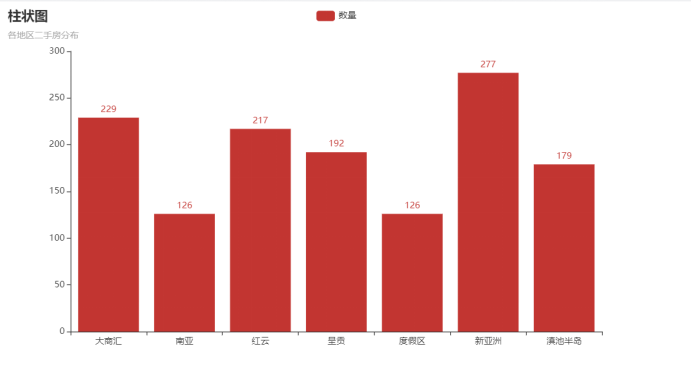
8. Pyecarts drawing
Scrapy framework (5): page turning operation, database storage and simple data visualization
3, Specific code
1. Entry file
import os  # Locate the current directory with the os module
import sys
from scrapy.cmdline import execute
sys.path.append(os.path.dirname(os.path.abspath(__file__)))   # __ file__ Is the current file
execute(["scrapy","crawl","LianjiaSpider"])
2. Reptile logic
from urllib.parse import urljoin
import scrapy
from scrapy import signals
from selenium import webdriver

from FinalProject.items import FinalprojectItem

class LianjiaspiderSpider(scrapy.Spider):
    name = 'LianjiaSpider'
    allowed_domains = ['lianjia.com']
    start_urls = ['https://km.lianjia.com/ershoufang/pg1/']


    @classmethod
    def from_crawler(cls, crawler, *args, **kwargs):
        spider = super(LianjiaspiderSpider, cls).from_crawler(crawler, *args, **kwargs)
        spider.chrome=webdriver.Chrome()
        crawler.signals.connect(spider.spider_closed, signal=signals.spider_closed)
        return spider

    def spider_closed(self, spider):
        spider.chrome.quit()
        print("The reptile is over!!!!!!")

    def parse(self, response):
        name=response.css("div.positionInfo a:nth-child(2)::text").extract()   # Cell name
        price = response.css("div.totalPrice span::text").extract()  # Price per suite
        message = response.css("div.houseInfo::text").extract()  # Information about each suite
        position=response.css("div.positionInfo a:nth-child(3)::text").extract()  # District Name
        uniprice=response.css("div.unitPrice span::text").extract()  # Unit price per square meter

        room_nums=[]  # How many rooms and halls is the house
        area=[]  # Area of the house
        ori=[]  # The orientation of the house
        for num in message:
            room_nums.append(num.split("|")[0])
            area.append(num.split("|")[1])
            ori.append(num.split("|")[2])

        Infos=zip(name,price,room_nums,area,ori,position,uniprice)
        finalprojectItem=FinalprojectItem()
        for Info in Infos:
            finalprojectItem["name"] = Info[0]
            finalprojectItem["price"] = Info[1]
            finalprojectItem["room_nums"] = Info[2]
            finalprojectItem["area"] = Info[3]
            finalprojectItem["ori"] = Info[4]
            finalprojectItem["position"]=Info[5]
            finalprojectItem["uniprice"] = Info[6]
            yield finalprojectItem

        next=response.url
        next_page=int(next.strip('/').split('pg')[1]) + 1
        url=urljoin(response.url,"/ershoufang/pg"+str(next_page))
        if next_page==101:
            return 0
        yield scrapy.Request(url, callback=self.parse)  # The difference between callback and call: parse() and parse
3,items.py
import scrapy


class FinalprojectItem(scrapy.Item):
    name = scrapy.Field()
    price = scrapy.Field()
    position = scrapy.Field()
    uniprice = scrapy.Field()
    room_nums =scrapy.Field()
    area = scrapy.Field()
    ori = scrapy.Field()
    pass
4. Download Middleware
from scrapy.http import HtmlResponse

class SeleniumMiddleware:

    def process_request(self, request, spider):
        url = request.url
        # self.chrome.get(url)
        # html=self.chrome.page_source
        # print(html)
        spider.chrome.get(url)
        html=spider.chrome.page_source
        return HtmlResponse(url=url,body=html,request=request,encoding="utf-8")
5,pipelins.py
import pymysql

class FinalprojectPipeline:
    def __init__(self):  # Connect to database
        self.conn = pymysql.connect(host='127.0.0.1', database='lianjia', user='root', password='123456')
        self.cursor=self.conn.cursor()

    def process_item(self, item, spider):
        with open("ershoufang.json","a+")as f:  # Exchange format of front-end and back-end data
            f.write(str(item._values))


        insert_sql = "insert into info (name,price,room_num,area,ori,position,uniprice) values (%s,%s,%s,%s,%s,%s,%s)"

        # Perform the insert data into the database operation
        self.cursor.execute(insert_sql, (item['name'], item['price'], item['room_nums'], item['area'],item['ori'],item['position'],item['uniprice']))
        # Cannot save to database without submitting
        self.conn.commit()

        return item
6. Visualization py
import pymysql

def select():
    nums = []
    positions=[]
    connect = pymysql.connect(host='127.0.0.1', database='lianjia', user='root', password='123456')
    sql = "select position,count(*) from info group by position having count(*)>100"
    cursor = connect.cursor()
    cursor.execute(sql)
    for row in cursor.fetchall():
        position = row[0]
        num = row[1]
        nums.append(num)
        positions.append(position)
    cursor.close()
    connect.close()

    # print(positions)
    # print(nums)
    return positions,nums
7. Pyechards mapping
#coding=gbk
from pyecharts.charts import Bar    #Histogram
from pyecharts import options   #Title Set
from FinalProject.visualization import select

position,num = select() #Get database data

bar = Bar()

#Add title
bar.set_global_opts(
    title_opts=options.TitleOpts(title="Histogram",subtitle="Distribution of second-hand houses in various regions"),
)

#x-axis display area
bar.add_xaxis(position)
#y-axis display quantity
bar.add_yaxis("quantity",num)
# Generated html file
bar.render("positionInfo.html")