Servlet quick start
Introduction to Servlet
Servlet: short for Server Applet, it is the program (code, function implementation) of the server, which can interactively process the request sent by the client to the server and complete the operation response.
Tracing back to the origin, Servlet is a technology of sun company to develop dynamic web.
Sun provides an interface called Servlet in these API s. If you want to develop a Servlet program, you only need two small steps.
1. Write a class to implement the Servlet interface
2. Deploy the developed Java classes to the web server.
The Java program that implements the Servlet interface is called Servlet.
Getting started with Servlet
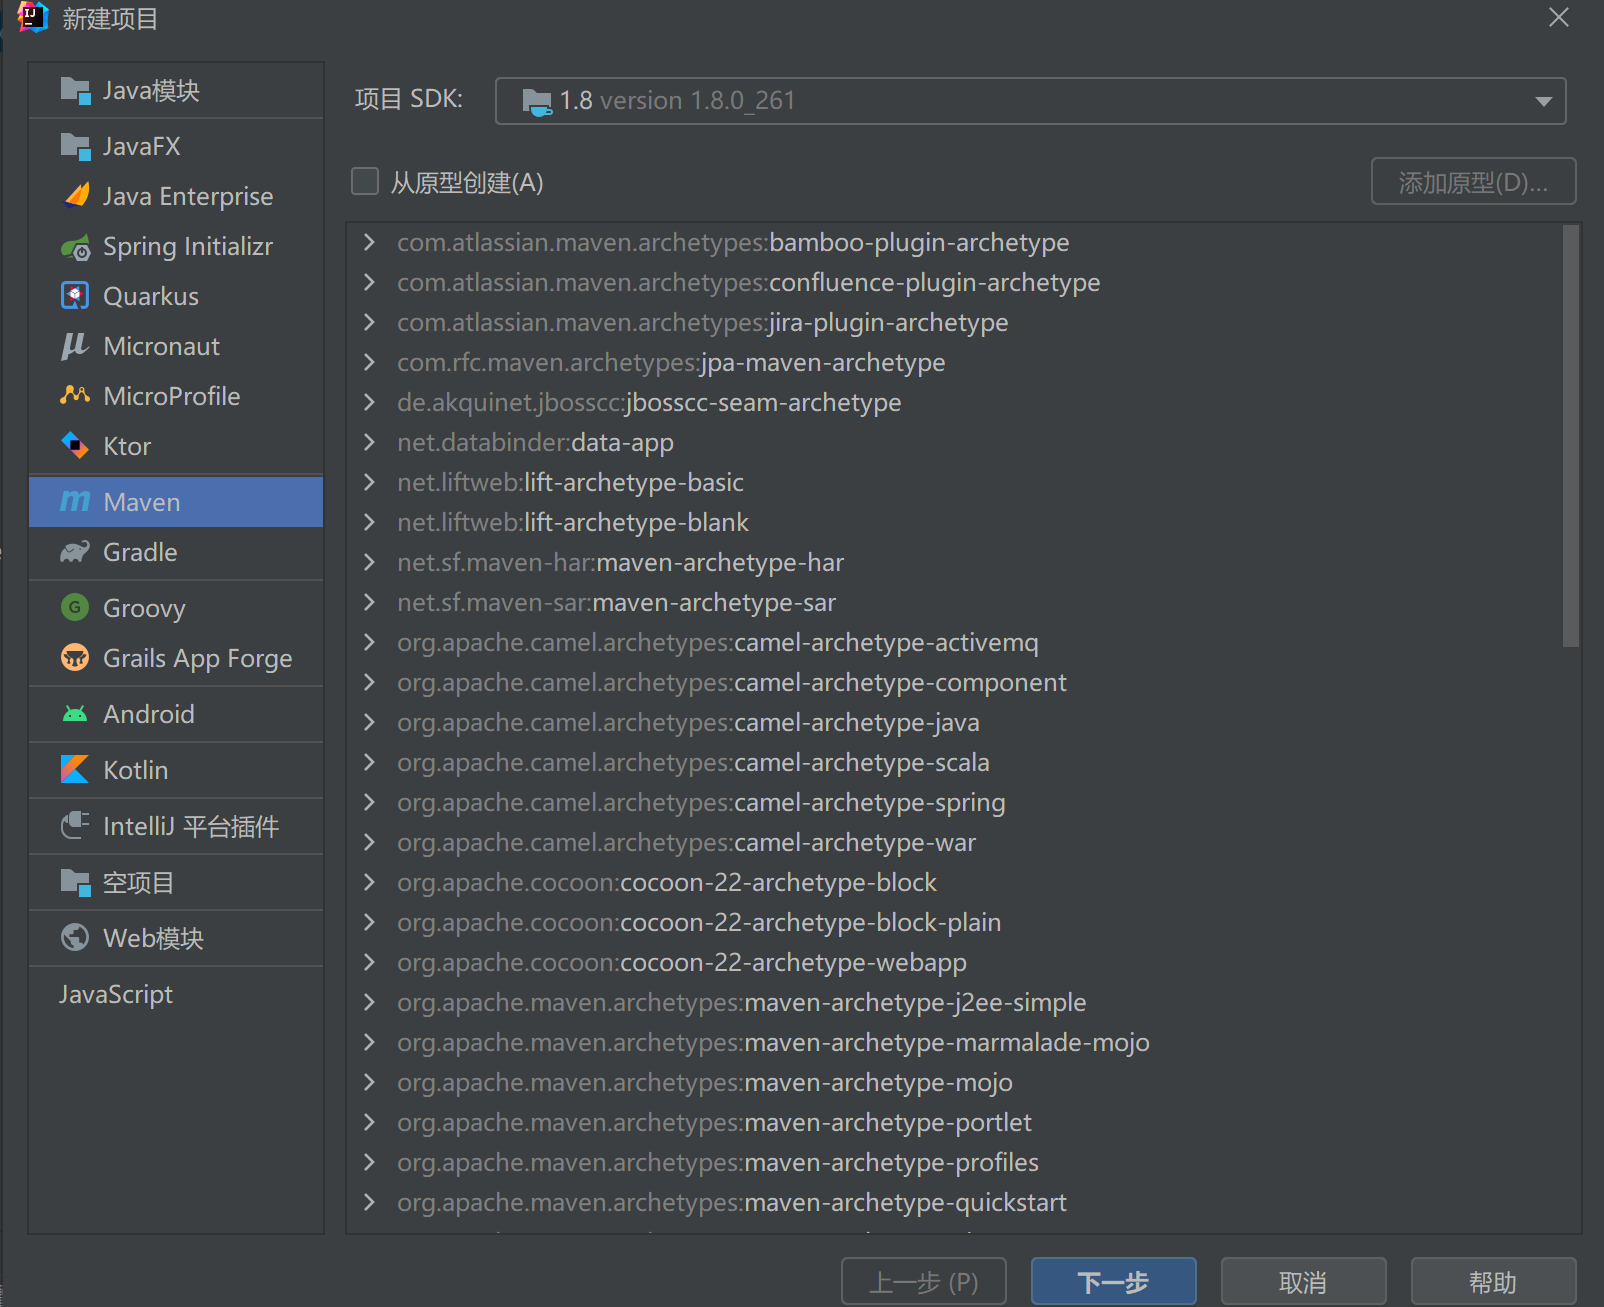
1. Create a normal Maven project
First, open IDEA and create a common Maven project, as shown in the figure:
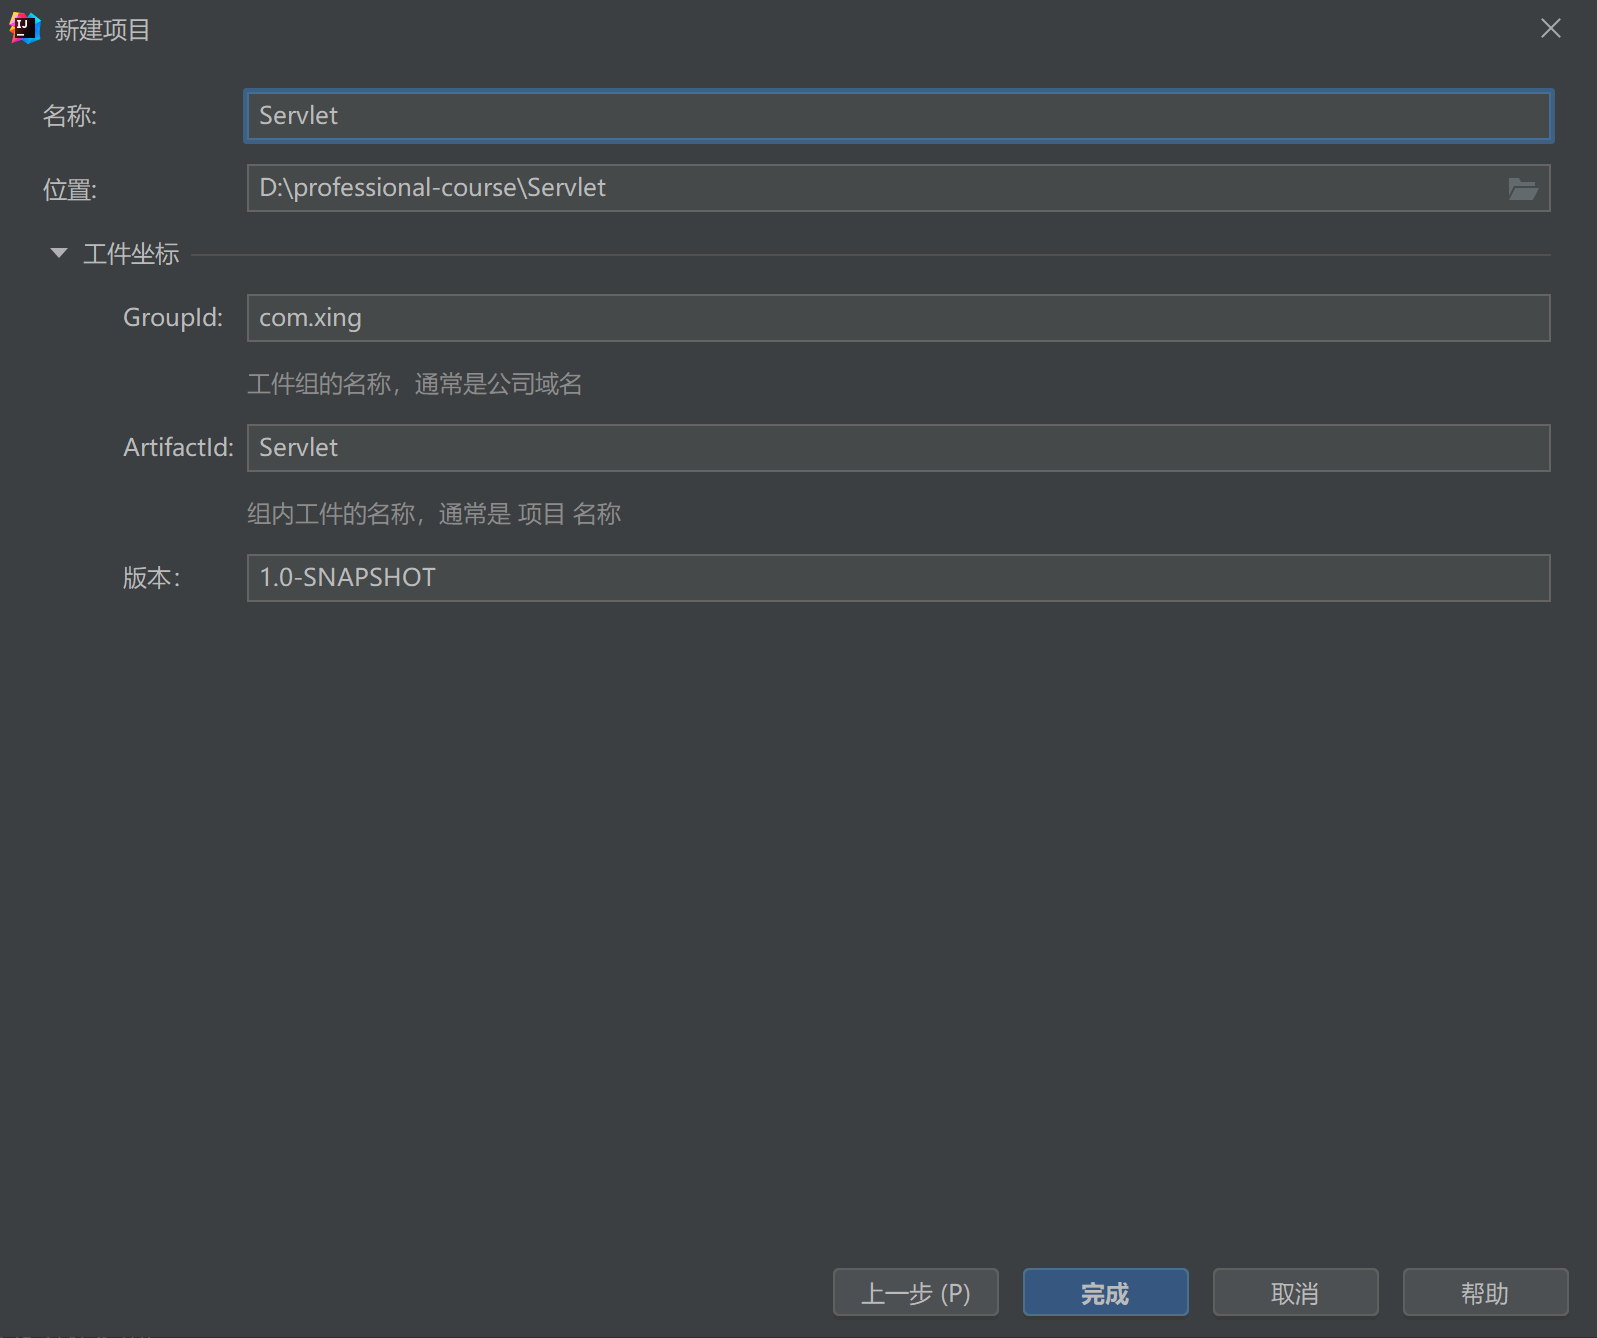
Click Next and select the name, path and working coordinates of the new project. Here, I choose Servlet by default. The project path is customized, as shown in the figure:
2. In POM Import dependency in XML
Import servlet and jsp dependencies as follows:
<dependencies>
        <!-- https://mvnrepository.com/artifact/javax.servlet/javax.servlet-api -->
        <dependency>
            <groupId>javax.servlet</groupId>
            <artifactId>servlet-api</artifactId>
            <version>2.5</version>
        </dependency>
        <dependency>
            <groupId>javax.servlet.jsp</groupId>
            <artifactId>javax.servlet.jsp-api</artifactId>
            <version>2.3.3</version>
        </dependency>
    </dependencies>
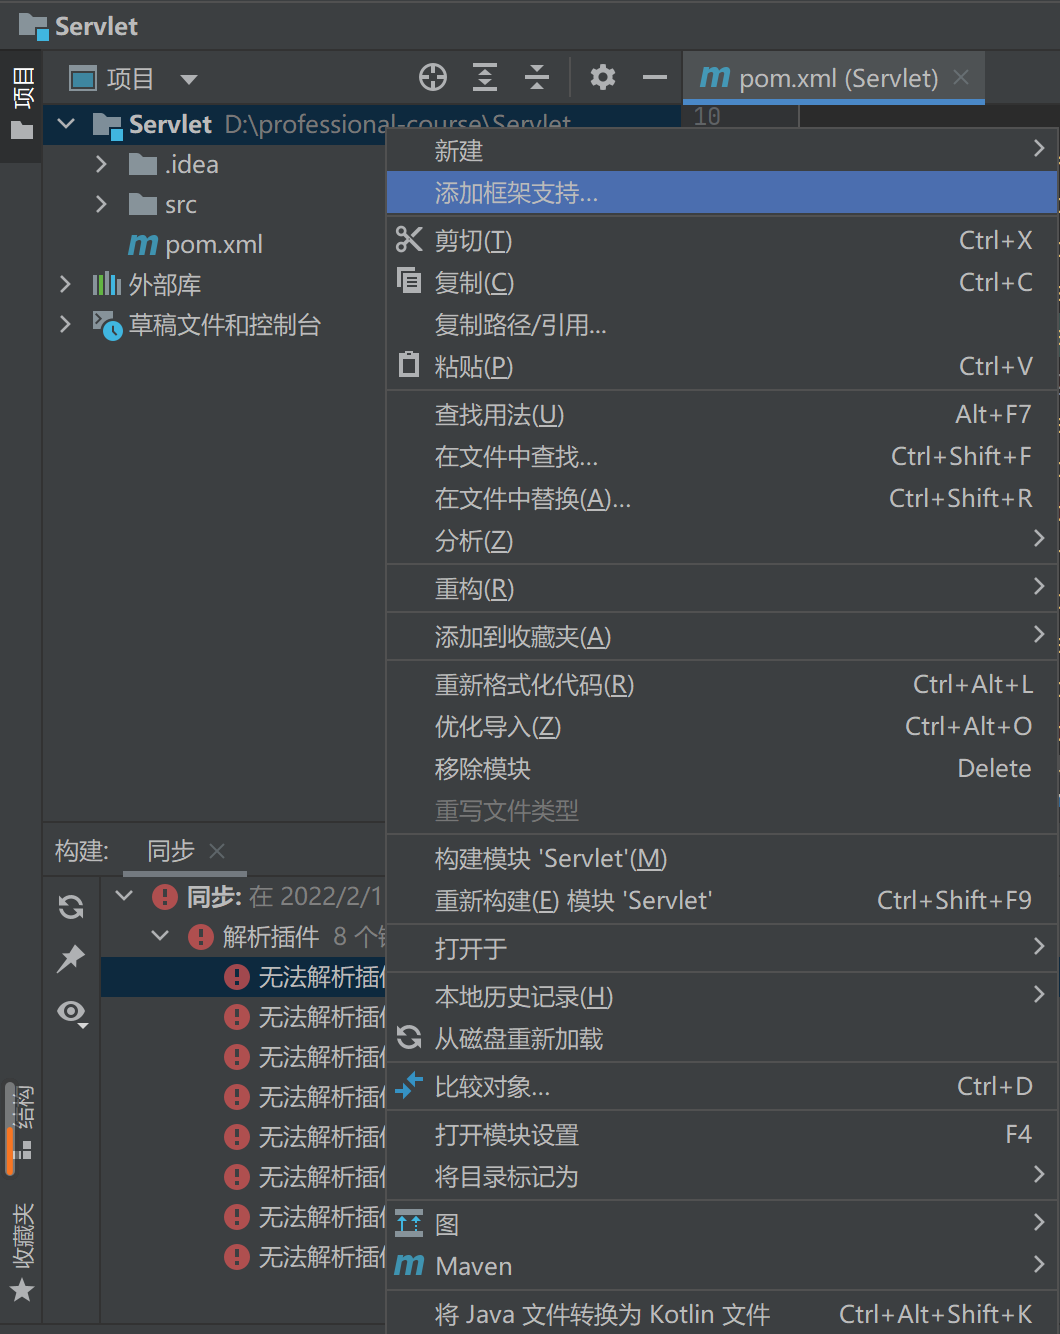
3. Add web Framework Support
Select the project just created, right-click and select Add framework support, as shown in the figure:
Next, select the web application and confirm that the version is 4.0, as shown in the figure:
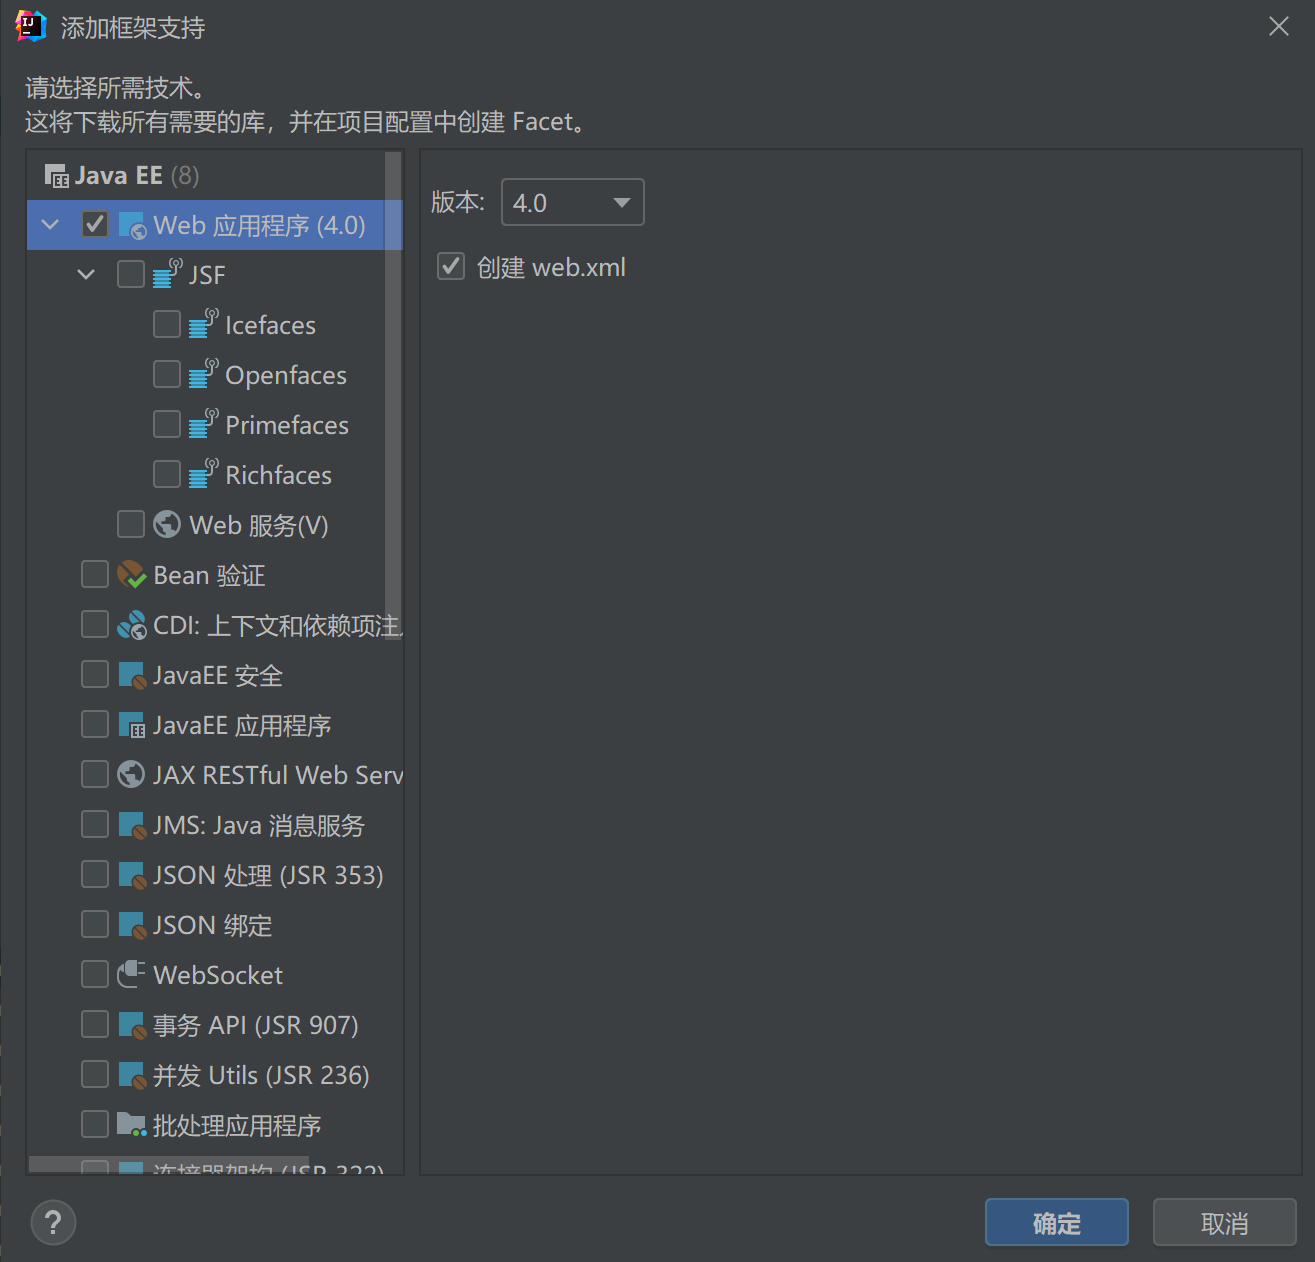
Click OK to finish adding the web framework. This ensures that the web The version of the configuration file in XML is the latest.
4. Write a Servlet ordinary class and inherit HttpServlet
Select the java folder, right-click to create a new package, and enter the package name as com xing. Servlet (I suggest creating a package name to see Alibaba programming specification).
Next, create a HelloServlet class under the servlet package and inherit HttpServlet. Then rewrite the doget and DoPost methods under the HelloServlet class (select ctrl+o under IDEA to realize the shortcut key rewriting method), and call the doget method in DoPost to meet their project calls. The specific code content is as follows:
package com.xing.servlet;

import javax.servlet.ServletException;
import javax.servlet.http.HttpServlet;
import javax.servlet.http.HttpServletRequest;
import javax.servlet.http.HttpServletResponse;
import java.io.IOException;

public class HelloServlet extends HttpServlet {
    @Override
    protected void doGet(HttpServletRequest req, HttpServletResponse resp) throws ServletException, IOException {
        resp.getWriter().write("HelloServlet");
    }

    @Override
    protected void doPost(HttpServletRequest req, HttpServletResponse resp) throws ServletException, IOException {
       doGet(req,resp);
    }
}
The doGet method only implements the output of HelloServlet in the browser.
4. Write Servlet mapping
Because we write Java programs, but we need to access them through browsing, but the browser needs to connect to the web server, so we need to register the servlet we write in the web server and give it an accessible path.
On the web XML configuration mapping path is enough, as shown below:
<?xml version="1.0" encoding="UTF-8"?>
<web-app xmlns="http://xmlns.jcp.org/xml/ns/javaee"
         xmlns:xsi="http://www.w3.org/2001/XMLSchema-instance"
         xsi:schemaLocation="http://xmlns.jcp.org/xml/ns/javaee http://xmlns.jcp.org/xml/ns/javaee/web-app_4_0.xsd"
         version="4.0">
<!--    register servlet-->
    <servlet>
        <servlet-name>HelloServlet</servlet-name>
        <servlet-class>com.xing.servlet.HelloServlet</servlet-class>
    </servlet>
    <servlet-mapping>
        <servlet-name>HelloServlet</servlet-name>
        <url-pattern>/hello</url-pattern>
    </servlet-mapping>
</web-app>
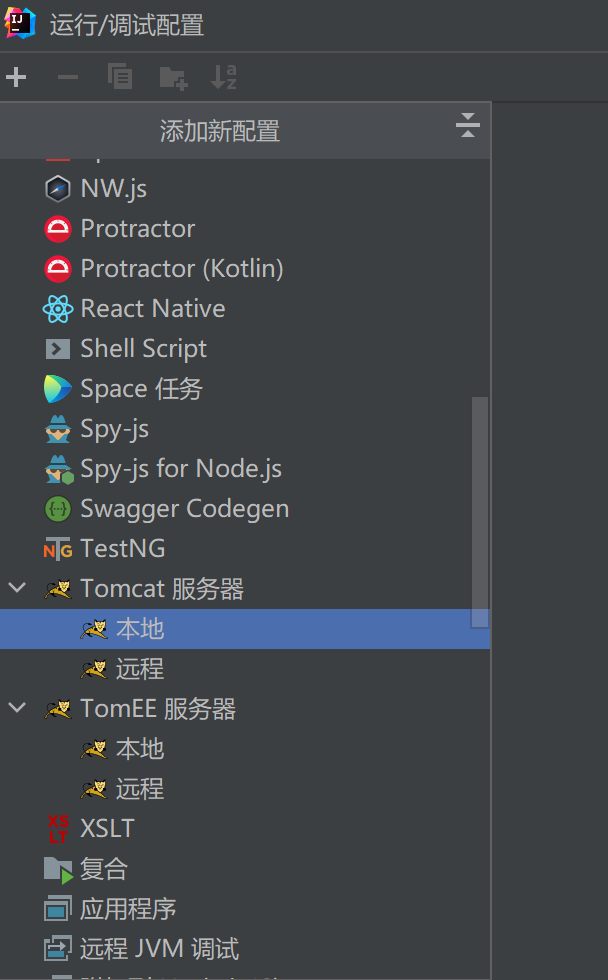
5. Configure tomcat server
Select tomcat local server.
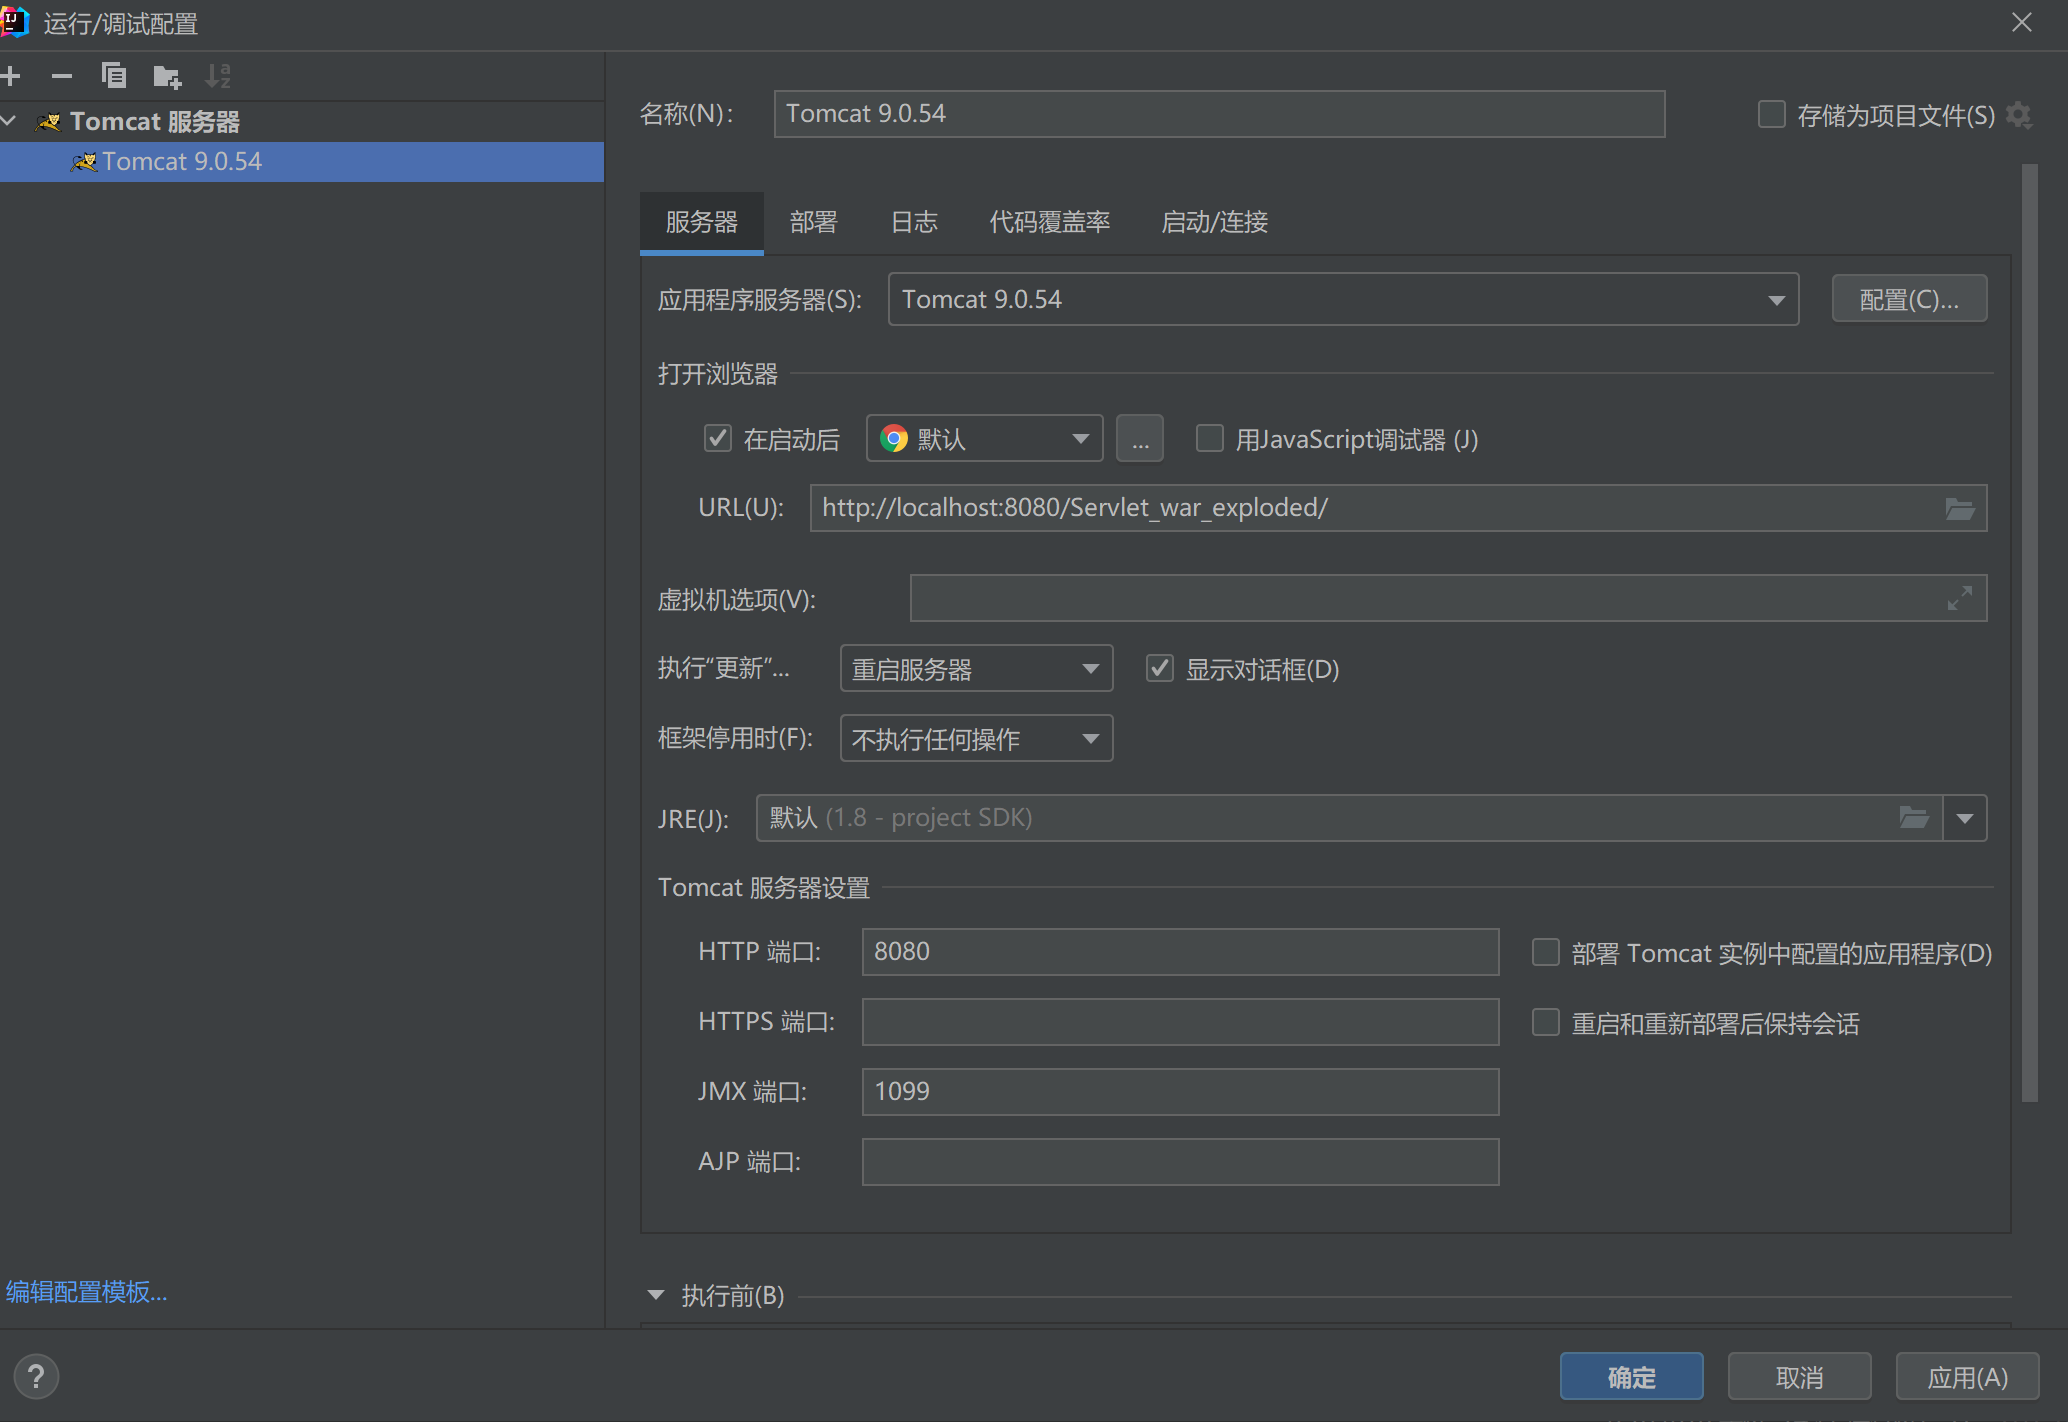
Click deploy, select +, and then add an artifact, as shown in the following figure:
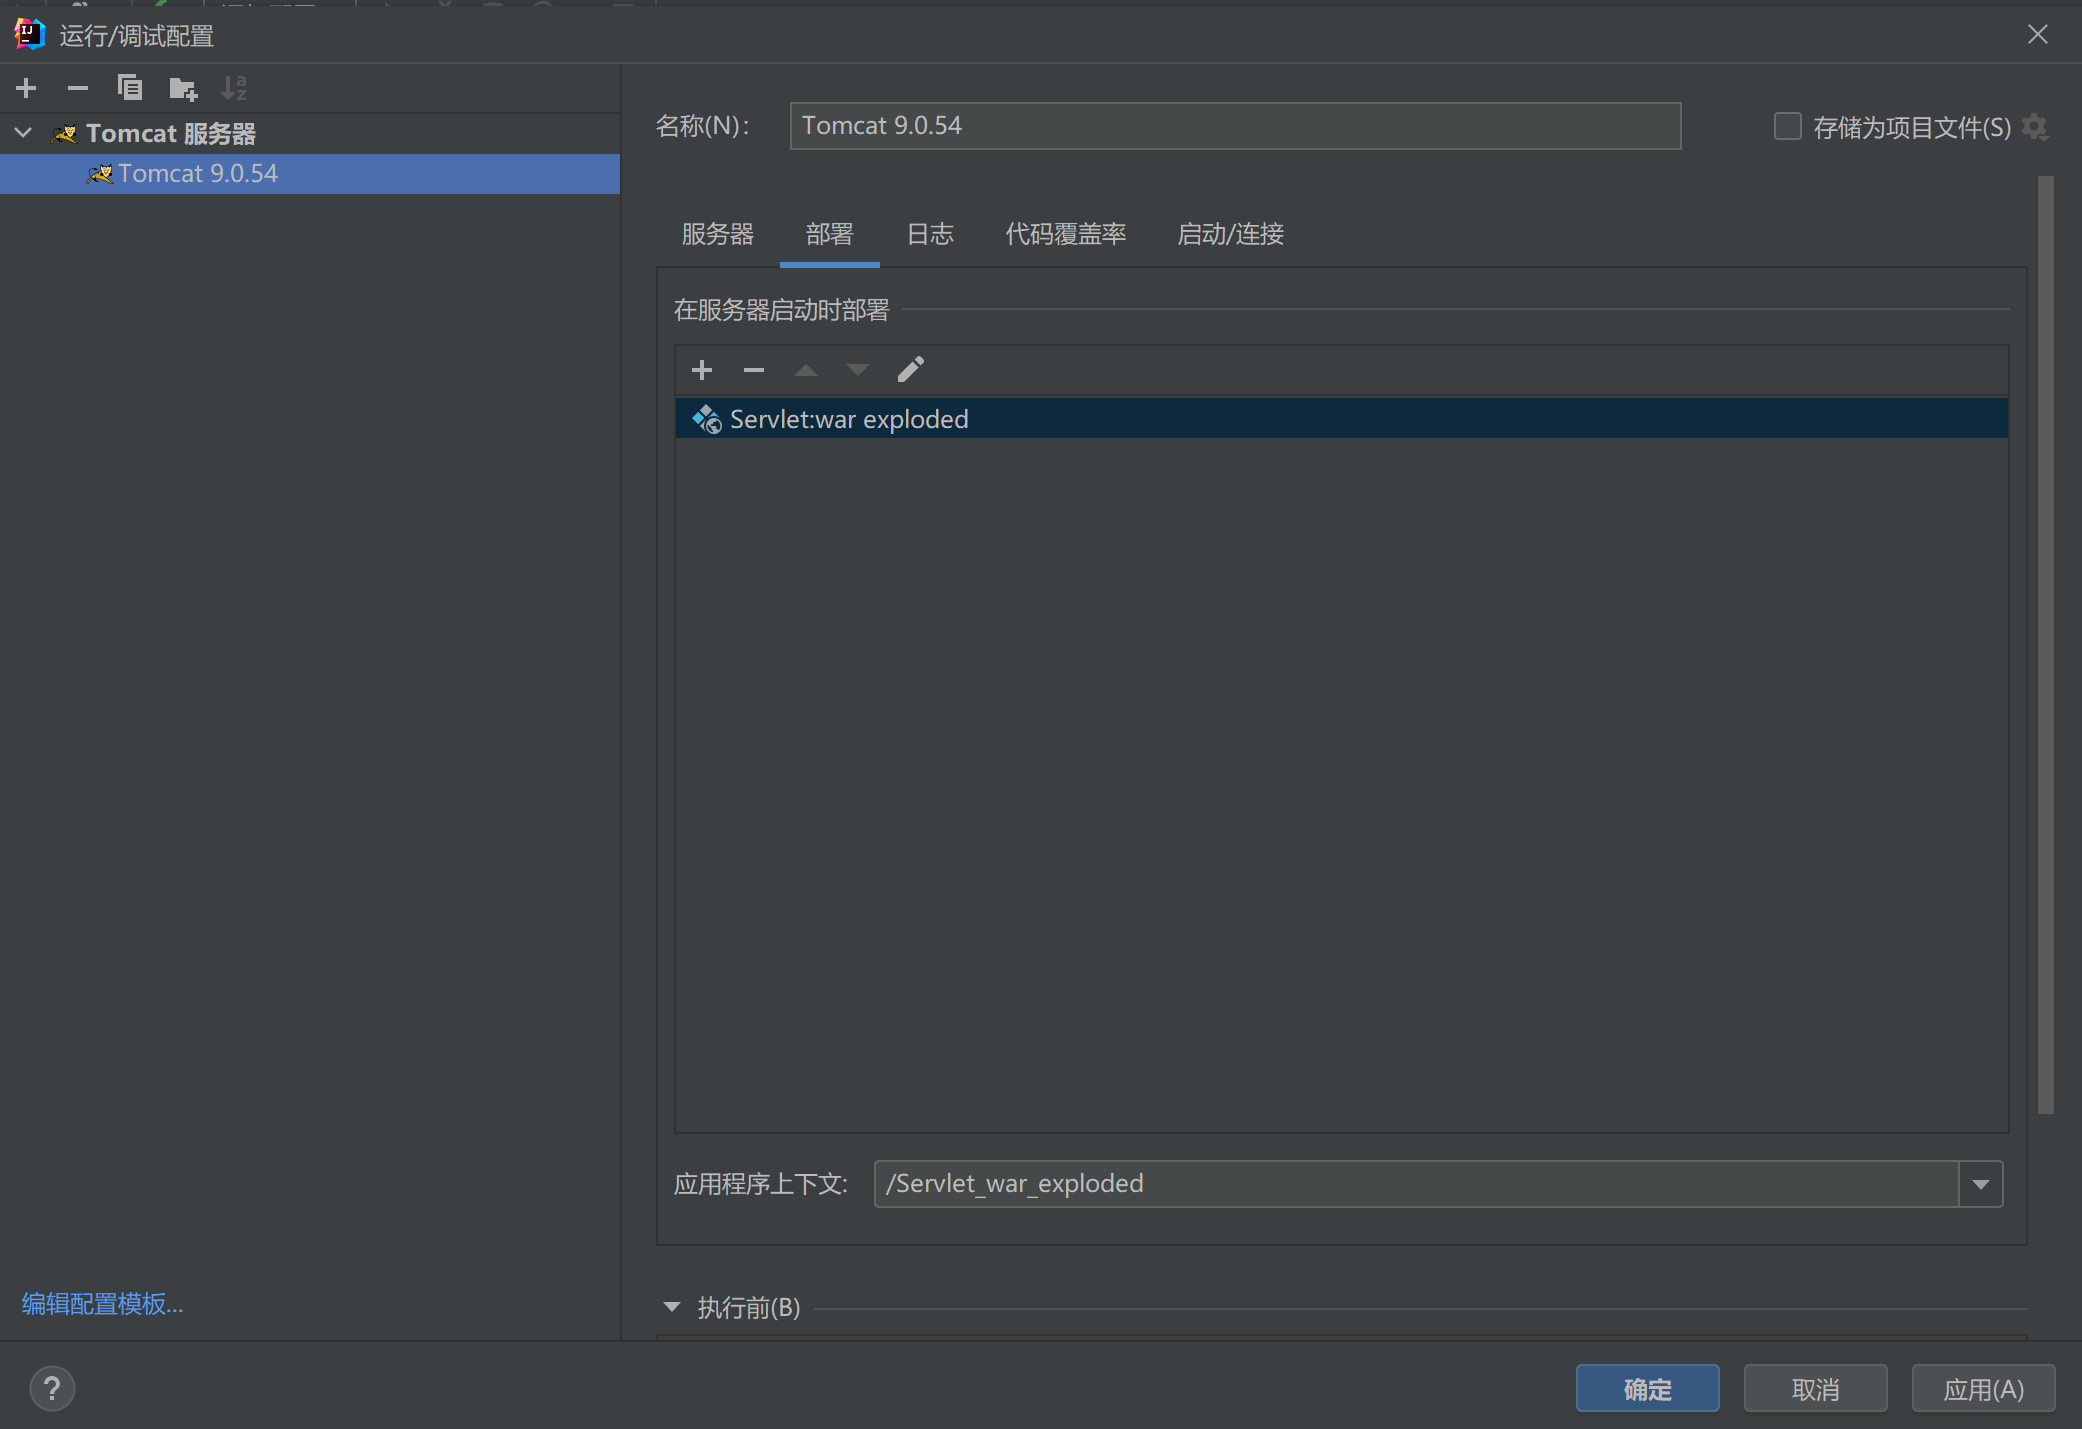
After configuration, select apply and confirm.
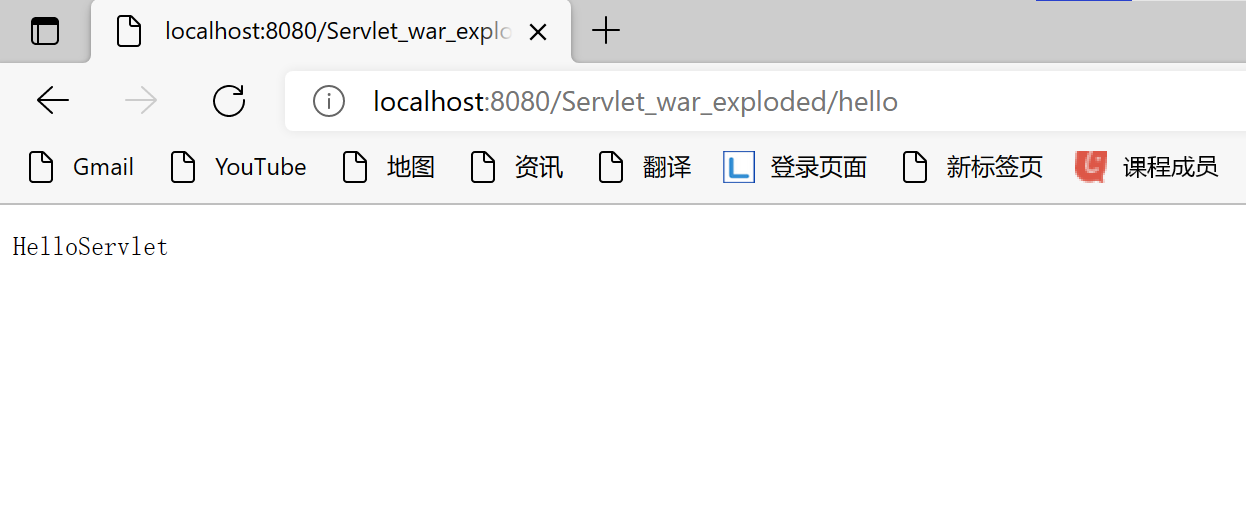
7. Start up test
After completing the above operation steps, start debugging, add hello after the default path of the browser, and you can see the test results as follows:
That's a quick start to servlet s.