Scrapyd is a tool for deploying and running Scrapy projects. With it, you can upload a written Scrapy project to the cloud host and control its operation through an API.
Since the Scrapy project deployment basically uses the Linux host, the installation of this section is for the Linux host.
1. Related links
- GitHub: https://github.com/scrapy/scrapyd
- PyPI: https://pypi.python.org/pypi/scrapyd
- Official documents: https://scrapyd.readthedocs.io
2. pip installation
pip installation is recommended here with the following commands:
pip3 install scrapyd
3. configuration
After installation, you need to create a new configuration file / etc/scrapyd/scrapyd.conf, which Scrapyd will read at run time.
After Scrappyd version 1.2, this file will not be created automatically, and we need to add it ourselves.
First, execute the following command to create a new file:
sudo mkdir /etc/scrapyd
sudo vi /etc/scrapyd/scrapyd.conf
Then write the following:
[scrapyd]
eggs_dir    = eggs
logs_dir    = logs
items_dir   =
jobs_to_keep = 5
dbs_dir     = dbs
max_proc    = 0
max_proc_per_cpu = 10
finished_to_keep = 100
poll_interval = 5.0
bind_address = 0.0.0.0
http_port   = 6800
debug       = off
runner      = scrapyd.runner
application = scrapyd.app.application
launcher    = scrapyd.launcher.Launcher
webroot     = scrapyd.website.Root

[services]
schedule.json     = scrapyd.webservice.Schedule
cancel.json       = scrapyd.webservice.Cancel
addversion.json   = scrapyd.webservice.AddVersion
listprojects.json = scrapyd.webservice.ListProjects
listversions.json = scrapyd.webservice.ListVersions
listspiders.json  = scrapyd.webservice.ListSpiders
delproject.json   = scrapyd.webservice.DeleteProject
delversion.json   = scrapyd.webservice.DeleteVersion
listjobs.json     = scrapyd.webservice.ListJobs
daemonstatus.json = scrapyd.webservice.DaemonStatus
The content of the configuration file can be found in the official documentation. https://scrapyd.readthedocs.io/en/stable/config.html#example-configuration-file . The configuration file here has been modified, one of which is that max_proc_per_cpu is officially defaulted to 4, that is, a host runs up to four Scrapy tasks per CPU, which is raised to 10. The other is bind_address, which defaults to local 127.0.0.1, and is modified to 0.0.0 here to make the extranet accessible.
4. Background operation
Scrapyd is a pure Python project that you can call directly to run. To keep the program running in the background, Linux and Mac can use the following commands:
(scrapyd > /dev/null &)
In this way, Scrapyd will continue to run in the background, and the console output will be ignored directly. Of course, if you want to record the output log, you can modify the output target, such as:
(scrapyd > ~/scrapyd.log &)
At this point, the results of Scrapyd will be output to the ~/scrapyd.log file.
Of course, you can also use screen, tmux, supervisor and other tools to achieve process daemon.
After running, you can access the Web UI on the browser's 6800 port, from which you can see the current Scrapyd's running tasks, logs and so on, as shown in Figure 1.
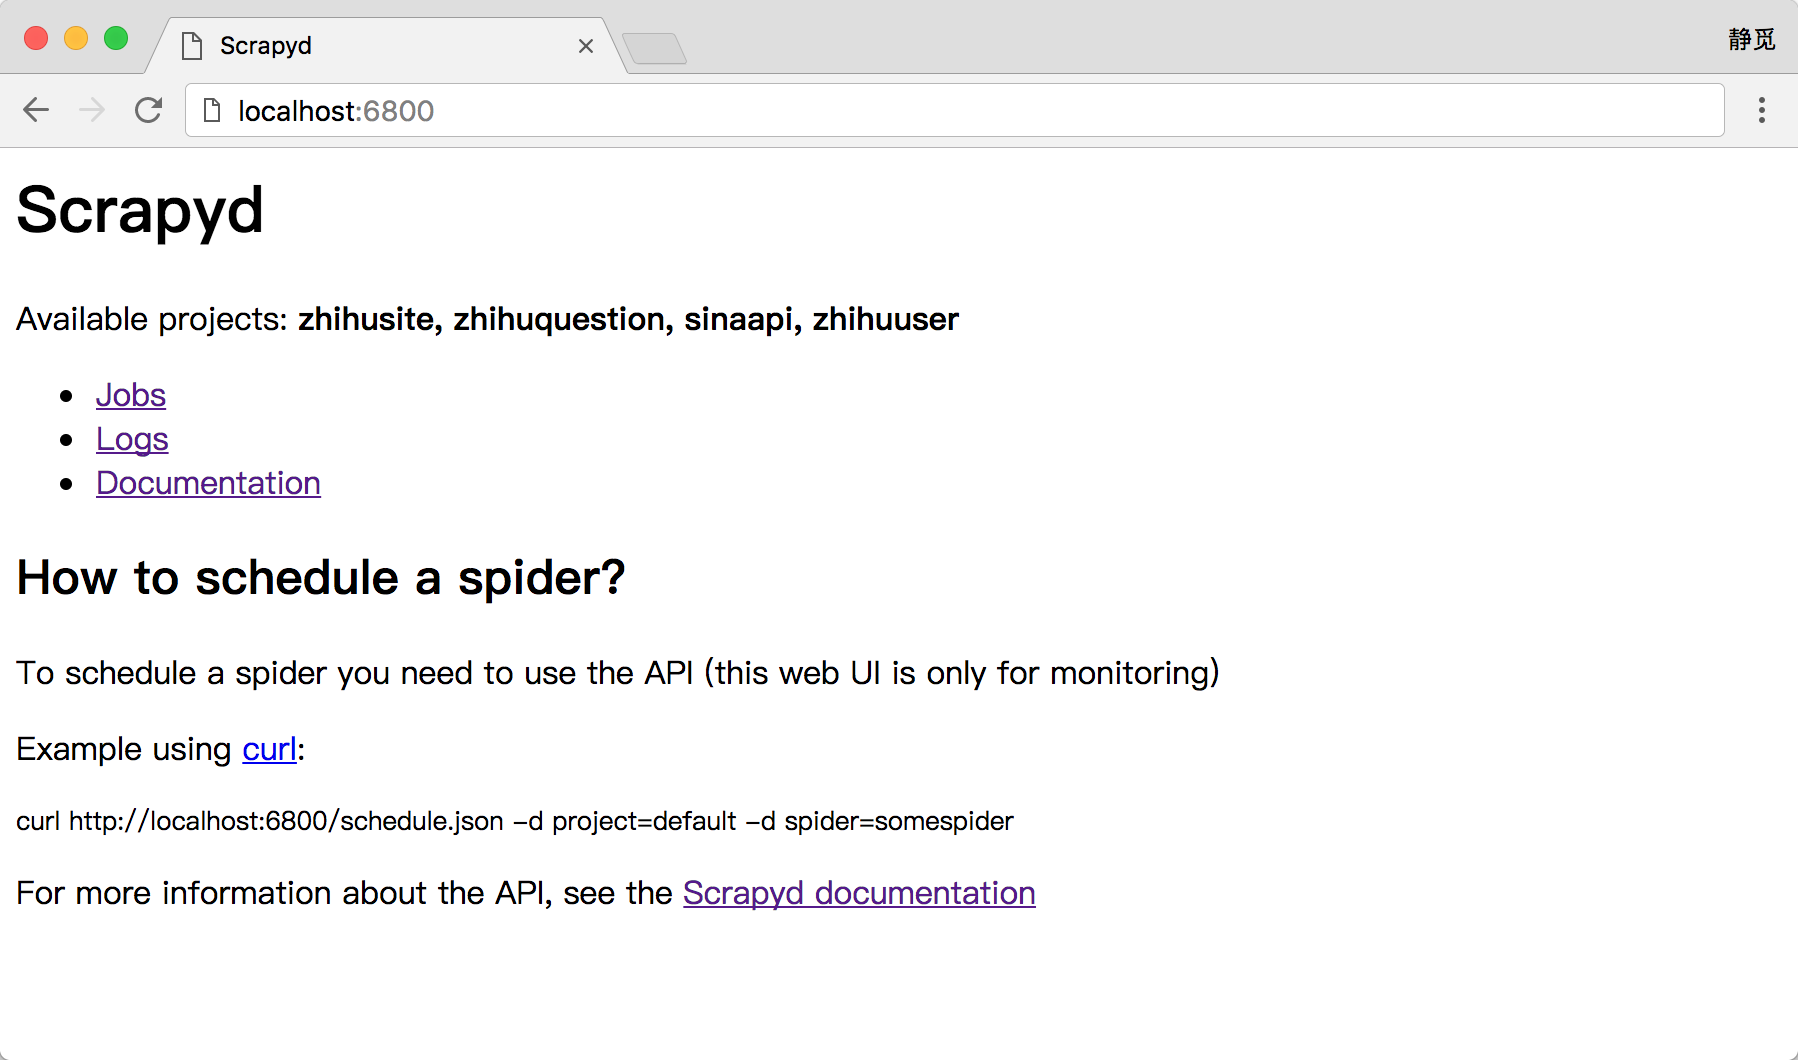 Figure 1 Scrapyd Home Page
Of course, a better way to run Scrapyd is to use the Supervisor daemon, which you can refer to if you are interested in: http://supervisord.org/.
In addition, Scrapyd also supports Docker. Later, we will introduce how to make and run Scrapyd Docker images.
5. Access authentication
When the configuration is complete, Scrapyd and its interfaces are publicly accessible. If you want to configure access authentication, you can use Nginx as a reverse proxy, where you need to install the Nginx server first.
Here, Ubuntu is taken as an example to illustrate the installation commands as follows:
sudo apt-get install nginx
Then modify the configuration file nginx.conf of Nginx to add the following configuration:
http {
    server {
        listen 6801;
        location / {
            proxy_pass    http://127.0.0.1:6800/;
            auth_basic    "Restricted";
            auth_basic_user_file    /etc/nginx/conf.d/.htpasswd;
        }
    }
}
The username and password configuration used here is placed in the / etc/nginx/conf.d directory, and we need to create it using the htpasswd command. For example, create a file named admin with the following commands:
htpasswd -c .htpasswd admin
Then we will be prompted to enter the password. After two entries, the password file will be generated. View the contents of this file at this time:
cat .htpasswd
admin:5ZBxQr0rCqwbc
When the configuration is complete, restart the Nginx service and run the following commands:
sudo nginx -s reload
This successfully configures Scrapyd's access authentication.