Some insights about the web, the web course really reaps a lot (although the final score is not ideal). From the beginning of the simple coping course to watching the online learning, it can be said that the course can still reap a lot if you study carefully, so if you are browsing this blog post is SDU, you should study the web course seriously, which is a very useful course! Don't talk about dry goods.
1. Introduction: advantages and disadvantages of B/S C/S
1)c/s
c/s is Client/Server, which refers to client and server. Client software and corresponding environment must be installed on the client before accessing the server (fat client).
The second semester of Java course design is obviously based on c/s design:
Like qq, wechat, King glory, GTA5 Such software is based on c/s design. The advantage is that it can give full play to the processing power of the client PC, and a lot of work can be submitted to the server after the client processing. The client responds quickly. In particular, large-scale games and other software with high fluency requirements generally use c/s mode.
Corresponding disadvantages:
Because every user has to download the client, the client needs to install special client software and running environment. First of all, it involves the workload of installation. Secondly, any computer has problems, such as virus and hardware damage, which need to be installed or maintained. In addition, when the system software is upgraded, each client needs to be reinstalled, and its maintenance and upgrade costs are very high.
2)b/s
B/S is Browser/Server, which refers to browser and server. There is no need to install special software on the client, just one browser (thin client)
This web course design is b/s mode. The biggest advantage of b/s is that the client does not need to be maintained, which is suitable for the situation that the user group is huge or the customer demand often changes. Like Taobao, Jingdong, 4399 games All belong to b/s mode.
**Corresponding disadvantages: * * when the server becomes more and more "fat", the response speed of the client will slow down and the user experience will be very poor.
2. Curriculum design requirements:
Is to design a simple course introduction website. But the first is to only use the front-end development technology, and the second is to add back-end content (connect to the database). Only one website development including backend is introduced here.
3. Preliminary preparation ("equipment")
1)Tomcat
Tomcat is a Servlet container developed by the Jakarta project under the Apache Software Foundation. According to the technical specifications provided by Sun Microsystems, Tomcat implements the support of Servlet and JavaServer Page (JSP), and provides some unique functions as a Web server, such as Tomcat management and control platform, security administration and Tomcat valve. Because Tomcat itself also contains HTTP servers, it can also be regarded as a separate Web server.
In short, Tomcat is an open source, free small web server, which is very useful for developers to debug websites.
Download:
(1) The most direct and secure way to download all software is to go directly to the official website: tomcat's official website: Click here.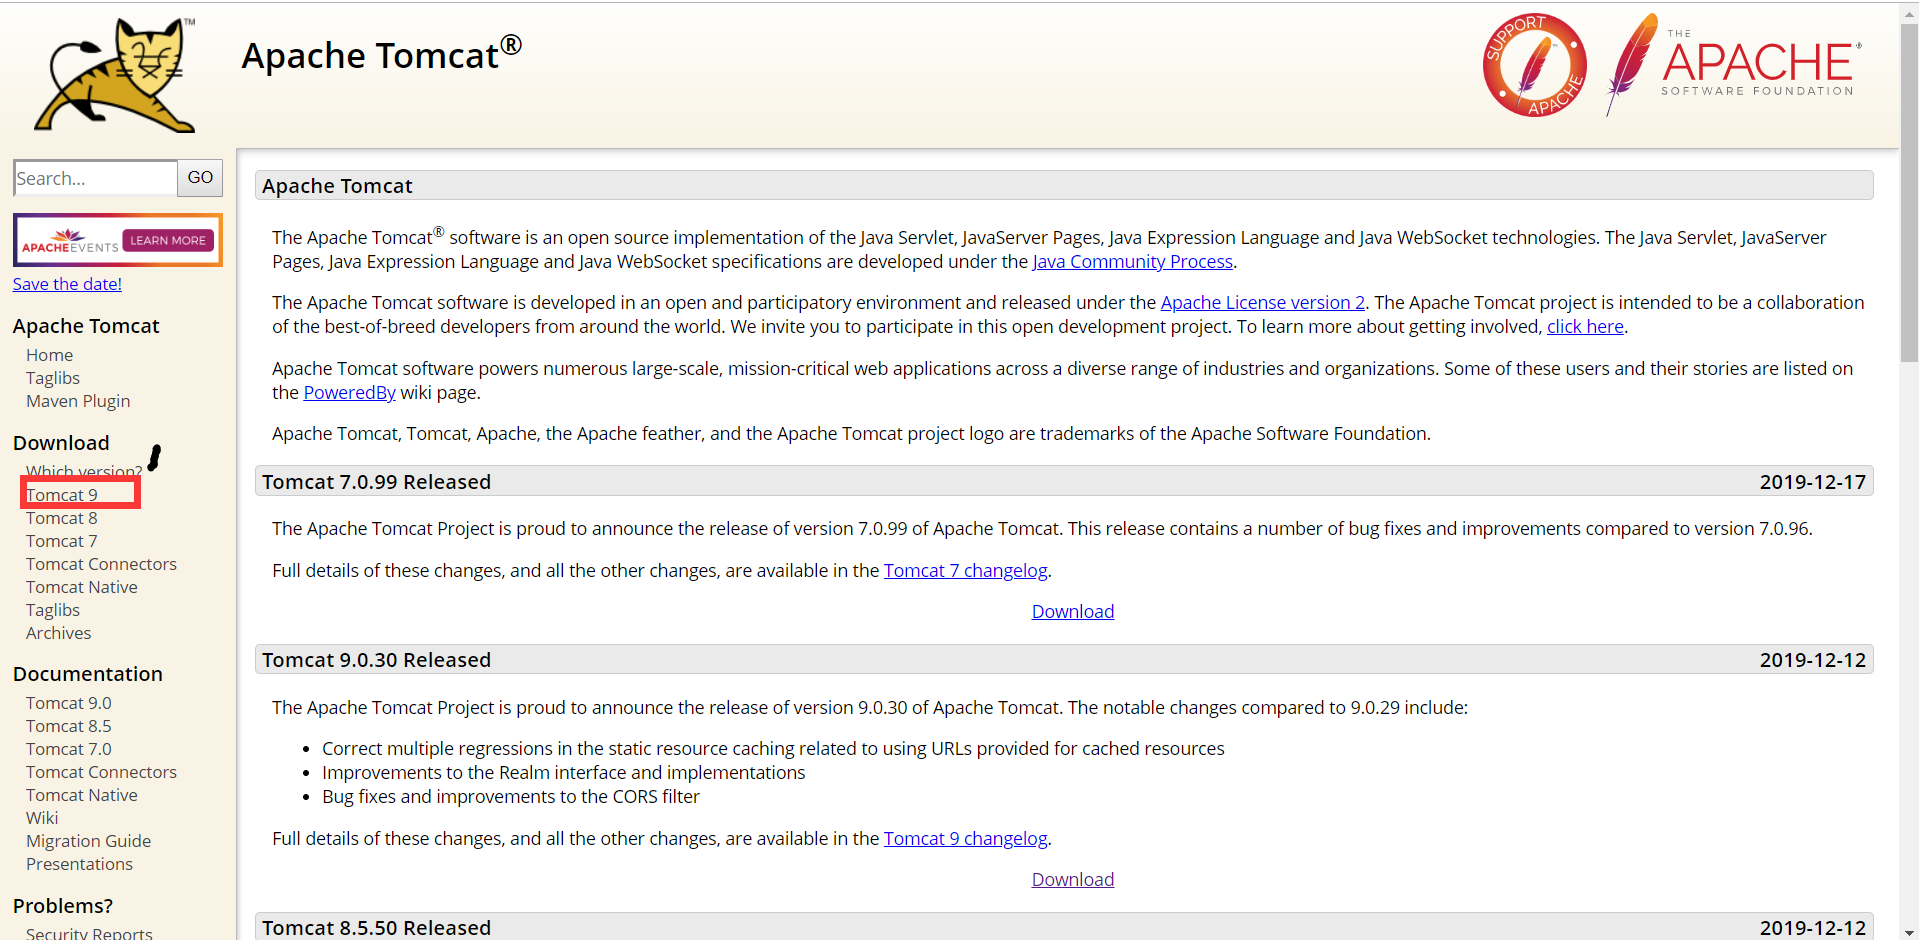
Here we choose the latest Tomcat 9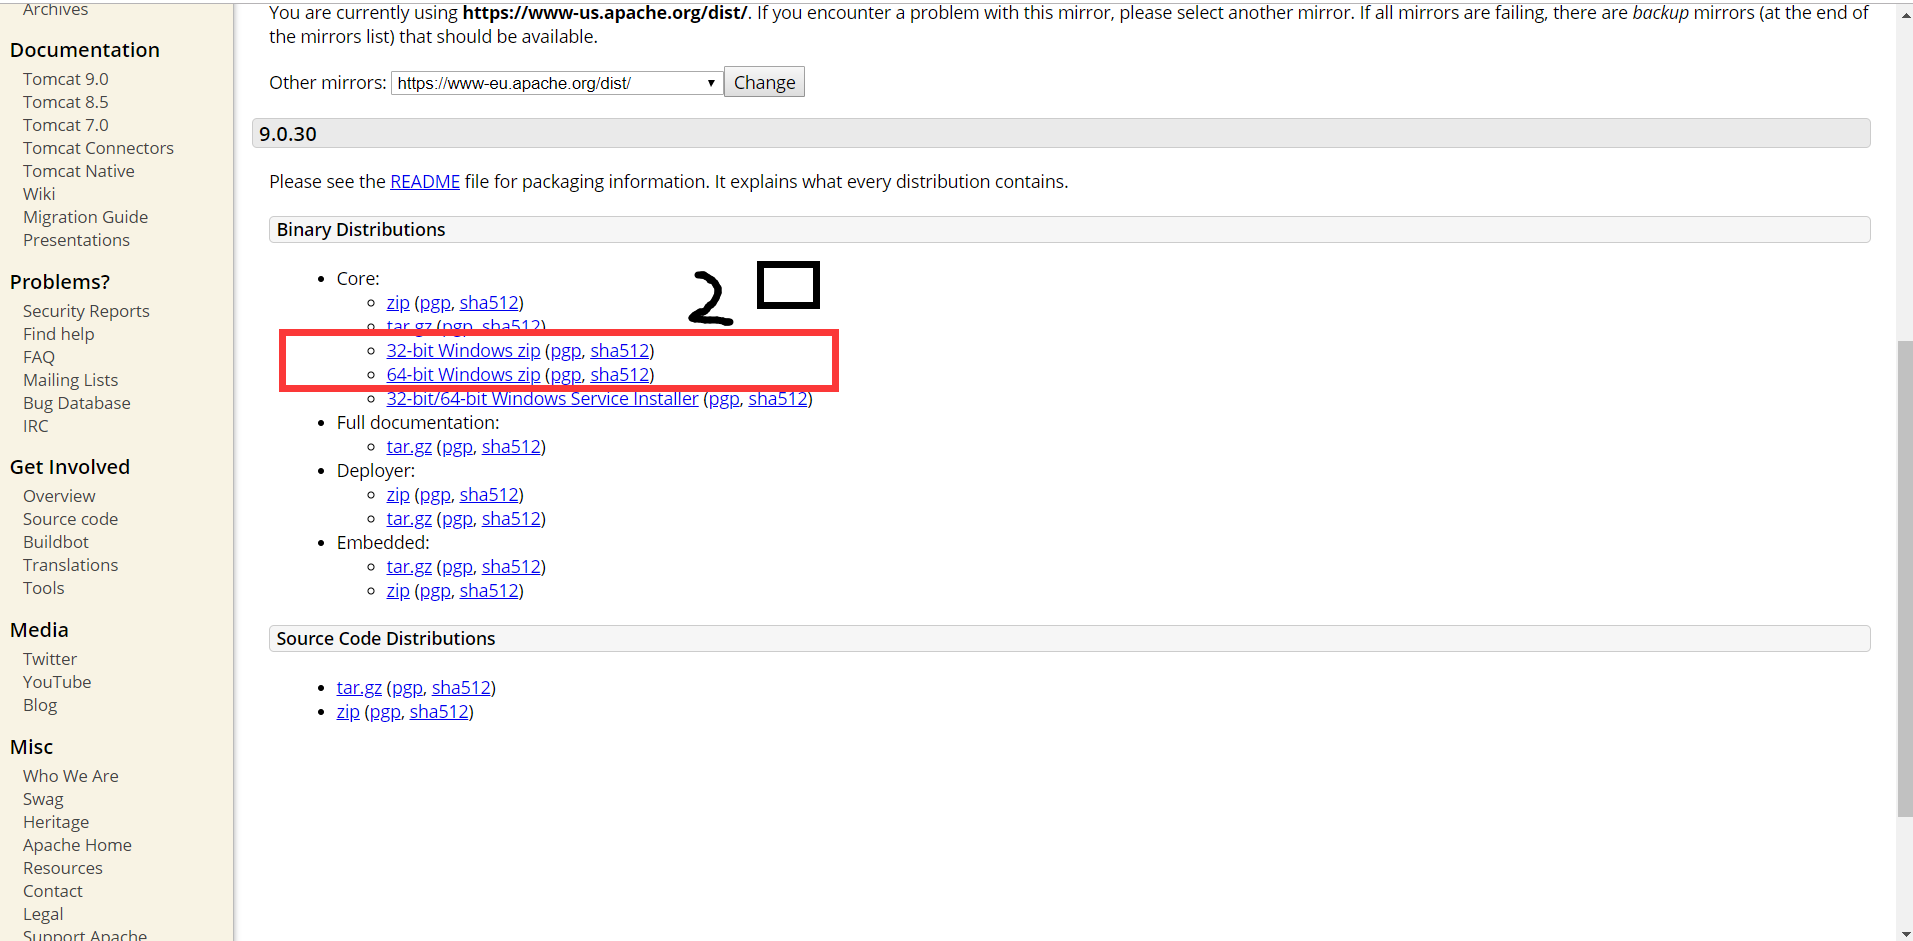
Choose whether you want to download 32-bit or 64 bit based on your version of Windows.
(2) Through Baidu online disk, this is my share: Click here. Password i4qh
Download directly after decompression!
tomcat structure
After decompression, tomcat directory mainly grasps bin folder and webapps folder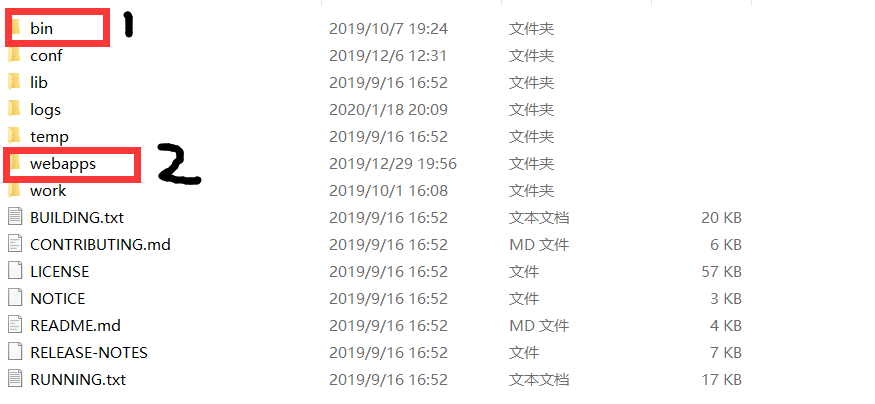
(1) bin contains two bat files. start.bat is used to start tomcat, and shutup.bat is used to close Tomcat
(2) The webapps folder is used to deploy your own web files, usually war packages. tomcat can extract war packages automatically
Environment configuration of tomcat:
A super detailed video of station b, it is recommended to match the environment after watching.
2) web development tools
If it's just the front end, you can use JetBrains WebStorm and dreamweaver. But because we are involved in back-end development, we recommend using eclipse or IntelliJ IDEA.
I use intelliJ IDEA here, which is very easy to use.
Download official website
3) Database
Use MySQL, which is still free and open source.
(1) Download: Download official website
(2) Visualization software: navicat
Navicat is a series of graphical database management and development software for MySQL, MariaDB, MongoDB, Oracle, SQLite, PostgreSQL and Microsoft SQL Server produced by Hong Kong zhuosoft Digital Technology Co., Ltd. It has a browser like GUI that supports multiple connections to local and remote databases. It is designed to meet the needs of a variety of users, from database administrators and programmers to a variety of different enterprises or companies that serve customers and share information with partners.
Anyway, it's a magic weapon to connect to the database (of course, there's a charge, but you can search and crack the version on the Internet.) Extraction code: s7yb
4. learning:
First, learn html, css, js and jQuery A series of front-end knowledge
Learning is Chu jiuliang's web front-end development, but there is no jQuery learning. JQuery is a set of cross browser JavaScript library, which simplifies the operation between HTML and JavaScript. Of the top 10000 websites in the world, 65% use jQuery, which is currently the most popular JavaScript library.
Download address: jQuery.
Learning jsp and servlet
A servlet is a server-side program written in Java. Its main function is to browse and modify data interactively and generate dynamic Web content. In a narrow sense, servlet refers to an interface implemented by java language. In a broad sense, servlet refers to any class that implements the servlet interface. In general, people understand servlet as the latter. The servlet runs on an application server that supports Java. In terms of implementation, servlet can respond to any type of request, but in most cases, servlet is only used to extend the Web server based on HTTP protocol.
JSP is a dynamic Web page technology standard created by Sun Microsystems. JSP deployed on the network server can respond to the request sent by the client, and dynamically generate the Web page of HTML, XML or other format documents according to the request content, and then return it to the requester. JSP technology uses Java language as script language to provide services for users' HTTP requests, and can handle complex business requirements together with other Java programs on the server.
Generally speaking, jsp is a servlet, but the server interprets the Java code in the jsp file as a servlet.
Learning video: Han Shunping's servlet video
jsp video of power node
Using IDEA from front end to back end
5. Coding
0) (take care of the students who use IDEA for the first time) IDEA creates a web project
If IDEA doesn't have a good environment, it must be done first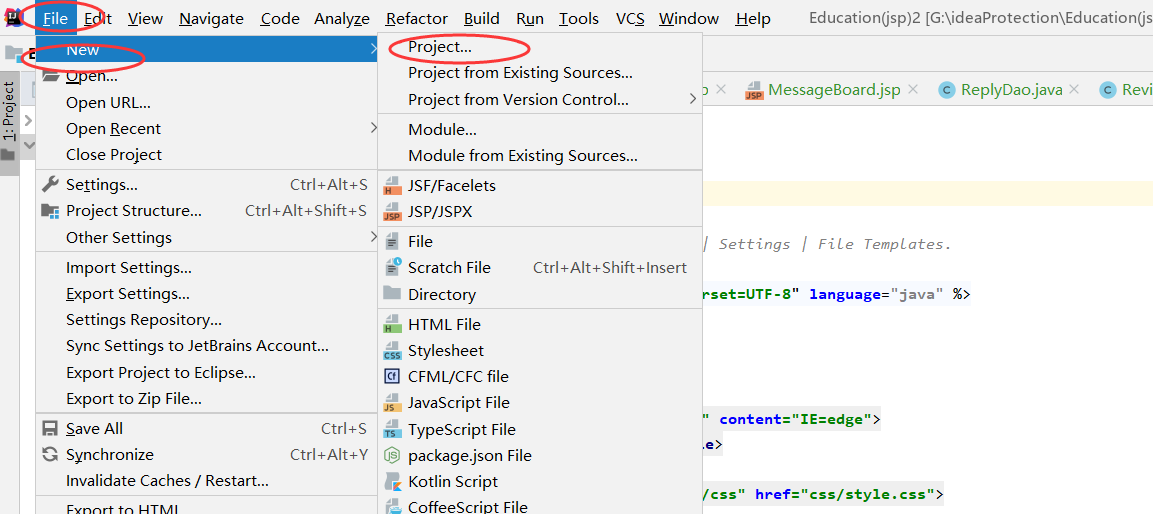
Creating WebApplication in Java EE
After creating your own project
src is used to put the back-end code (servlet), and web is used to store the front-end code (but including JSP). An index.jsp is initialized, which is the initial interface.
Because the project is too big to show all the code, I can only select some common function implementation codes that I think are important.
1) Big picture rotation
At the beginning, I plan to use Swiper, a good plug-in, and a few lines of code can realize large-scale rotation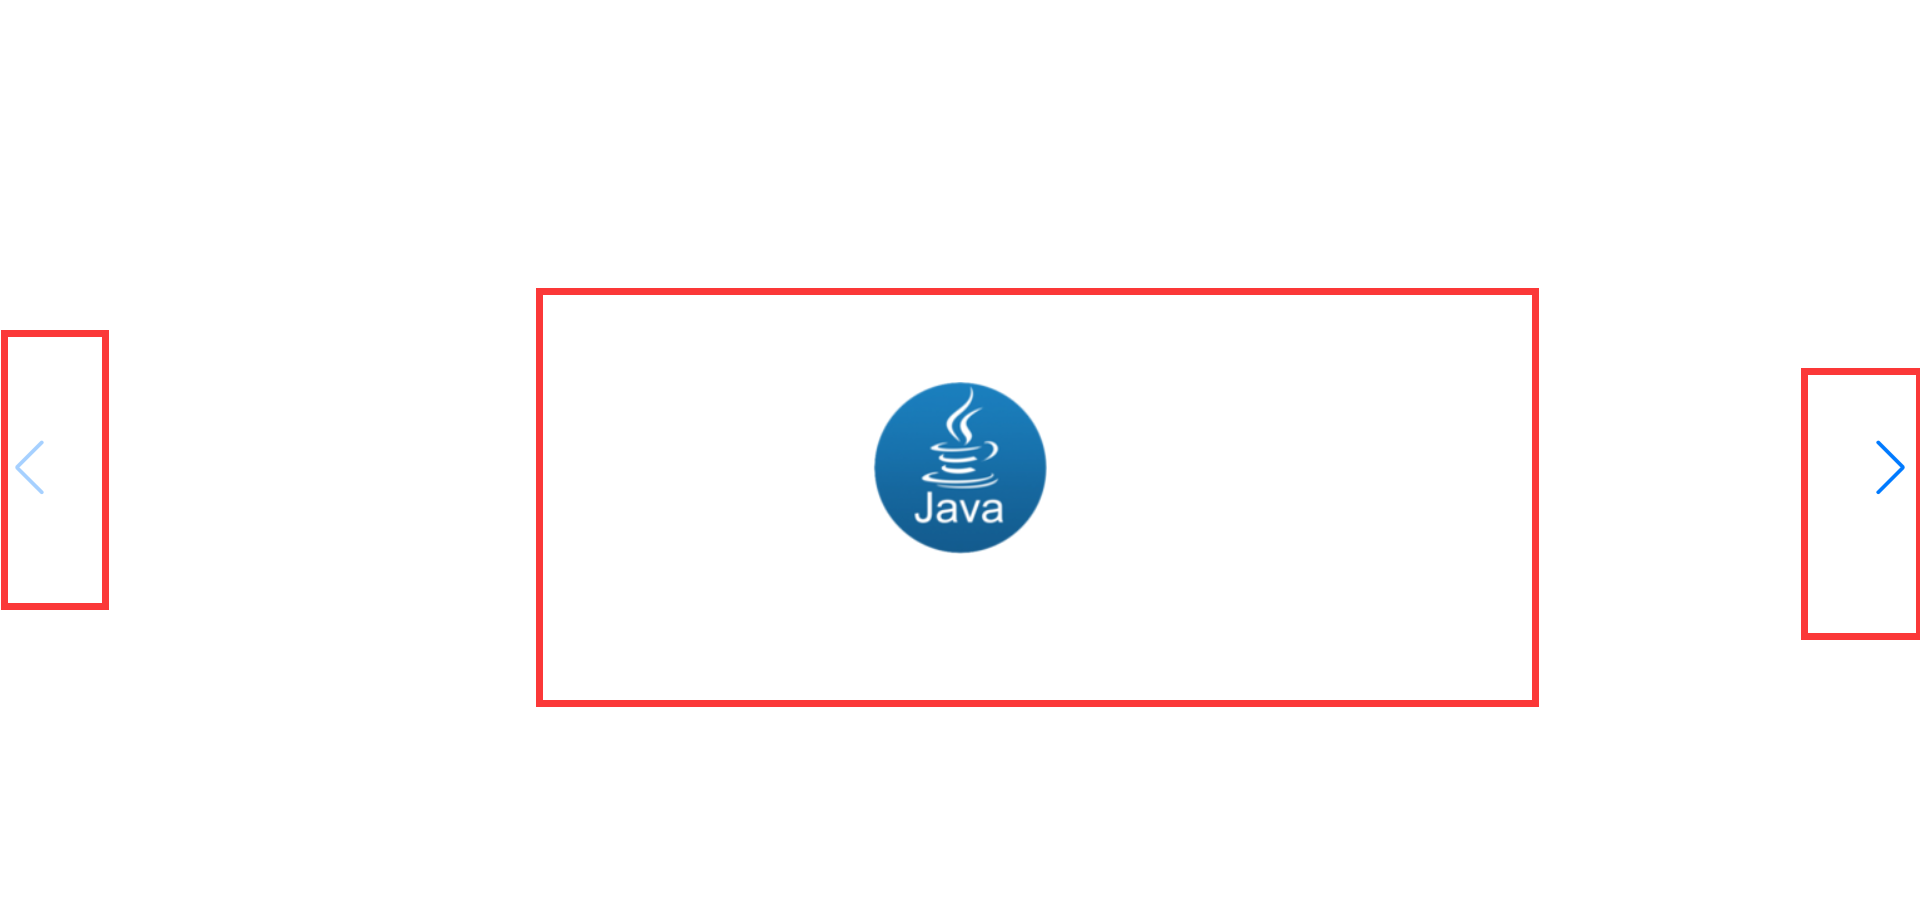
It can move forward and backward, with little code, less than 100 lines. As follows:
<html lang="en">
<head>
    <meta charset="utf-8">
    <title>Swiper demo</title>
    <meta name="viewport" content="width=device-width, initial-scale=1, minimum-scale=1, maximum-scale=1">

    <!-- Link Swiper's CSS -->
    <link rel="stylesheet" href="swiper/package/css/swiper.min.css">

    <!-- Demo styles -->
    <style>
        html, body {
            position: relative;
            height: 100%;
        }
        body {
            background: #eee;
            font-family: Helvetica Neue, Helvetica, Arial, sans-serif;
            font-size: 14px;
            color:#000;
            margin: 0;
            padding: 0;
        }
        .swiper-container {
            width: 100%;
            height: 100%;
        }
        .swiper-slide {
            text-align: center;
            font-size: 18px;
            background: #fff;

            /* Center slide text vertically */
            display: -webkit-box;
            display: -ms-flexbox;
            display: -webkit-flex;
            display: flex;
            -webkit-box-pack: center;
            -ms-flex-pack: center;
            -webkit-justify-content: center;
            justify-content: center;
            -webkit-box-align: center;
            -ms-flex-align: center;
            -webkit-align-items: center;
            align-items: center;
        }
    </style>
</head>
<body>
<!-- Swiper -->
<div class="swiper-container">
    <div class="swiper-wrapper">
        <div class="swiper-slide"><img src="Photos/java.png"></div>
        <div class="swiper-slide"><img src="Photos/jiazaineirong.jpg"></div>
        <div class="swiper-slide">Slide 3</div>
        <div class="swiper-slide">Slide 4</div>
        <div class="swiper-slide">Slide 5</div>
        <div class="swiper-slide">Slide 6</div>
        <div class="swiper-slide">Slide 7</div>
        <div class="swiper-slide">Slide 8</div>
        <div class="swiper-slide">Slide 9</div>
        <div class="swiper-slide">Slide 10</div>
    </div>
    <!-- Add Arrows -->
    <div class="swiper-button-next"></div>
    <div class="swiper-button-prev"></div>
</div>

<!-- Swiper JS -->
<script src="swiper/package/js/swiper.min.js"></script>

<!-- Initialize Swiper -->
<script>
    var swiper = new Swiper('.swiper-container', {
        navigation: {
            nextEl: '.swiper-button-next',
            prevEl: '.swiper-button-prev',
        },
    });
</script>
</body>
</html>
But I found that I couldn't use this plug-in to combine timing rotation with manual progress, which led to buff, so I plan to use jQuery.
At the beginning, js code was used:
<!--Realize the rotation of pictures js logic-->
    <script type="text/javascript">
        var len = document.getElementsByName("i");
        var pos = 0;
        function changeImage() {
            len[pos].style.display = "none";//Hidden elements
            pos++;
            if (pos == len.length){
                pos=0;//Play from scratch again
            }

            len[pos].style.display = "block";//Display element

        }
        setInterval('changeImage()',2000);//Function every two seconds
    </script>
Later it was changed to jQuery Code:
Final style:
There are forward and backward, and small dots represent the first few pictures. Adding hyperlinks to pictures can achieve the same effect as Taobao and many other shopping websites.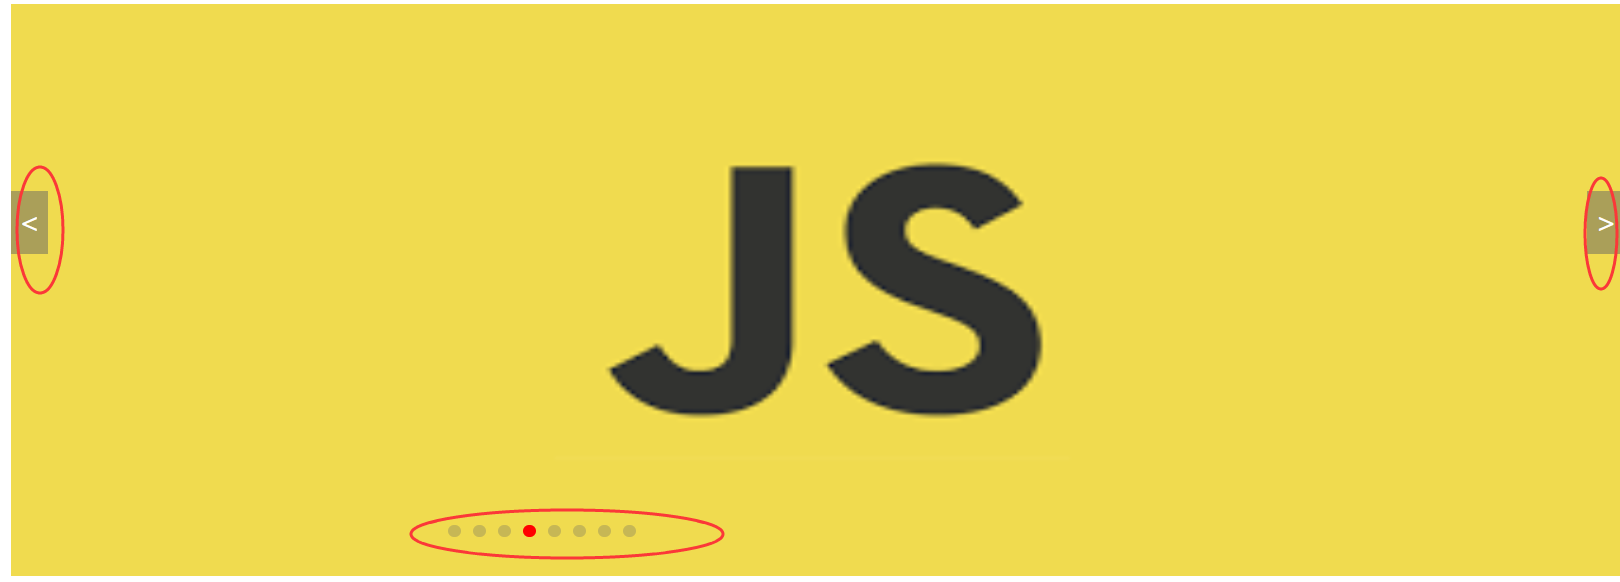
html skeleton:
<!--Realize the rotation of pictures-->
    <div id="Header" class="pic">
        <div id="front" class="content">
            <a class="class_i" href="#"><img src="CSS file/frontEnd/why.jpg" style="width: 1290px" height="458px"></a>
            <a class="class_i" href="#"><img src="CSS file/frontEnd/html5.jpg" style="width: 1290px" height="458"></a>
            <a class="class_i" href="#"><img src="CSS file/frontEnd/css.jpeg" style="width: 1290px" height="458"></a>
            <a class="class_i" href="#"><img src="CSS file/frontEnd/js.png" style="width: 1290px" height="458"></a>
            <a class="class_i" href="#"><img src="CSS file/frontEnd/jQuery.jpg" style="width: 1290px" height="458"></a>
            <a class="class_i" href="#"><img src="CSS file/afterEnd/jsp.jpg" style="width: 1290px" height="458px"></a>
            <a class="class_i" href="#"><img src="CSS file/afterEnd/jsf.jpg" style="width: 1290px" height="458px"></a>
            <a class="class_i" href="#"><img src="CSS file/afterEnd/mysql.png" style="width: 1290px" height="458px"></a>
            <a class="class_i" href="#"><img src="CSS file/afterEnd/node.png" style="width: 1290px" height="458px"></a>
        </div>
        <!--    Dot below picture    -->
        <ul class="index" style="align-self: center" >
            <li class="class_li" style=" background-color: red;"></li><!-- The starting point is red -->
            <li class="class_li"></li>
            <li class="class_li"></li>
            <li class="class_li"></li>
            <li class="class_li"></li>
            <li class="class_li"></li>
            <li class="class_li"></li>
            <li class="class_li"></li>
        </ul>
        <div class="right">></div>
        <div class="left"><</div>
    </div>
css Style:
<!--Realize the rotation of pictures css logic-->
    <style>
        .left{
            width: 30px;
            height:50px;
            background-color:rgba(100,100,100,0.5);
            position: absolute;
            left: 0px;
            top: 150px;
            line-height: 50px;
            text-align: center;
            font-size: 20px;
            color: #fff;
            display: none;
        }
        .right{
            width: 30px;
            height:50px;
            background-color:rgba(100,100,100,0.5);
            position: absolute;
            right: 0px;
            top: 150px;
            line-height: 50px;
            text-align: center;
            font-size: 20px;
            color: #fff;
            display: none;
        }
    </style>
jquery logic code:
<!--Realize the rotation of pictures js logic-->
    <script type="text/javascript">
        $(function(){
            //Move pictures every fixed time
            var timer = setInterval(picLoop,2000);
            var index = 0;

            //Move pictures regularly
            function picLoop(){
                index++;
                if (index==8) {index=0;}
                $(".content").animate({"left":-1290*index},300);
                $(".class_li").eq(index).css("background-color","red")
                    .siblings().css("background-color","rgba(100,100,100,0.3)");
            }

            //Timer control
            $(".pic").hover(function(){
                clearInterval(timer);
                $(".left").show();
                $(".right").show();
            },function(){
                timer = setInterval(picLoop,2000);
                $(".left").hide();
                $(".right").hide();
            });


            //Small dot control display that picture
            $(".class_li").mouseover(function(){
                $(this).css("background-color","red")
                    .siblings().css("background-color","rgba(100,100,100,0.3)");
                index = $(this).index();
                $(".content").animate({"left":-1290*index},300);

            })

            //Move picture left and right
            $(".left").click(function(){
                index--;
                if (index==-1) {index=7;}
                $(".content").animate({"left":-1290*index},300);
                $("li").eq(index).css("background-color","red")
                    .siblings().css("background-color","rgba(100,100,100,0.3)");
            })
            $(".right").click(function(){
                index++;
                if (index==8) {index=0}
                $(".content").animate({"left":-1290*index},300);
                $("li").eq(index).css("background-color","red")
                    .siblings().css("background-color","rgba(100,100,100,0.3)");
            })


        })
    </script>
Analytical analysis
Set a container content in jQuery to store all the pictures to be displayed
 .content{
            /*<!--Can save many pictures -- >*/
            width: 99999px;
Then call a function that constantly changes the offset:
//Move pictures regularly
            function picLoop(){
                index++;
                if (index==8) {index=0;}
                //Offset the offset of the contents displayed from the initial contents of the container
                $(".content").animate({"left":-1290*index},500);
                $(".class_li").eq(index).css("background-color","red")
                    .siblings().css("background-color","rgba(100,100,100,0.3)");
            }
Off and start timer:
//Timer control
            $(".pic").hover(function(){
                clearInterval(timer);//clearInterval(timer) only stops the timer, but the timer variable itself still exists
                $(".left").show();
                $(".right").show();
            },function(){
                timer = setInterval(picLoop,2000);//Start timer when leaving
                $(".left").hide();
                $(".right").hide();
            });
2) Login function
1. To achieve the login function, you must connect to the database.
1) To create a table in MySQL:
Include the id,name,username and password of the student applying for the course
2) Connect to database
Connect to database: See this blog for details
3) Verify successful connection
When you write a project, especially a large project, it's better to write a function to test a function, otherwise it's hard to find out what's wrong
It's better to build a package to write a function and check a function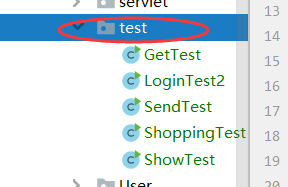
2. Improve logic
Logic: now fill in the login information in a jsp page, and send the login information to the servlet. The servlet calls the method in dao to verify. If it successfully enters the main interface (index.jsp), it will return to the login interface (login.jsp) if it fails.
a login interface
The difference between redirection and forwarding Click here.
b after success
Back to the main page, but there is a garbled problem.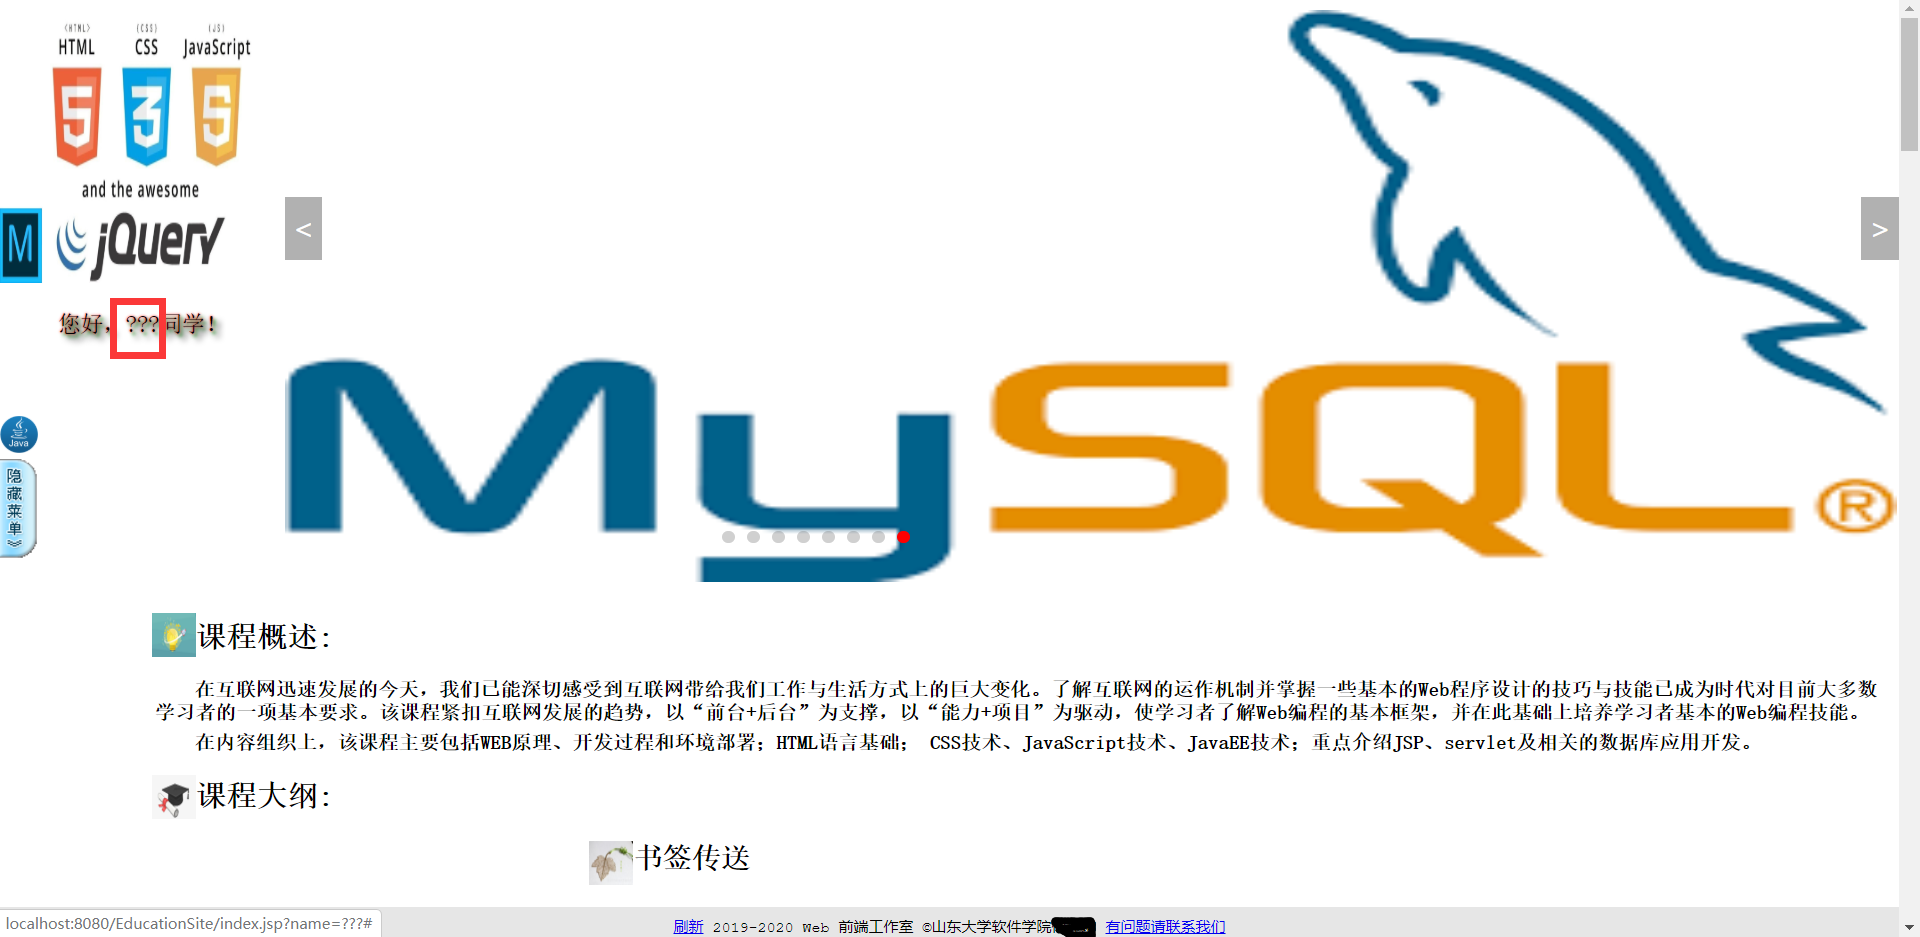
But I checked a lot of data for about two hours, and I didn't solve the problem of Chinese disorder. The method on the Internet is clear and very simple, but I tried all the methods but it was always wrong, so I only made a trick of naming my classmates as pinyin. I hope you can comment on it below
3. effect
Login interface
Log in the main interface: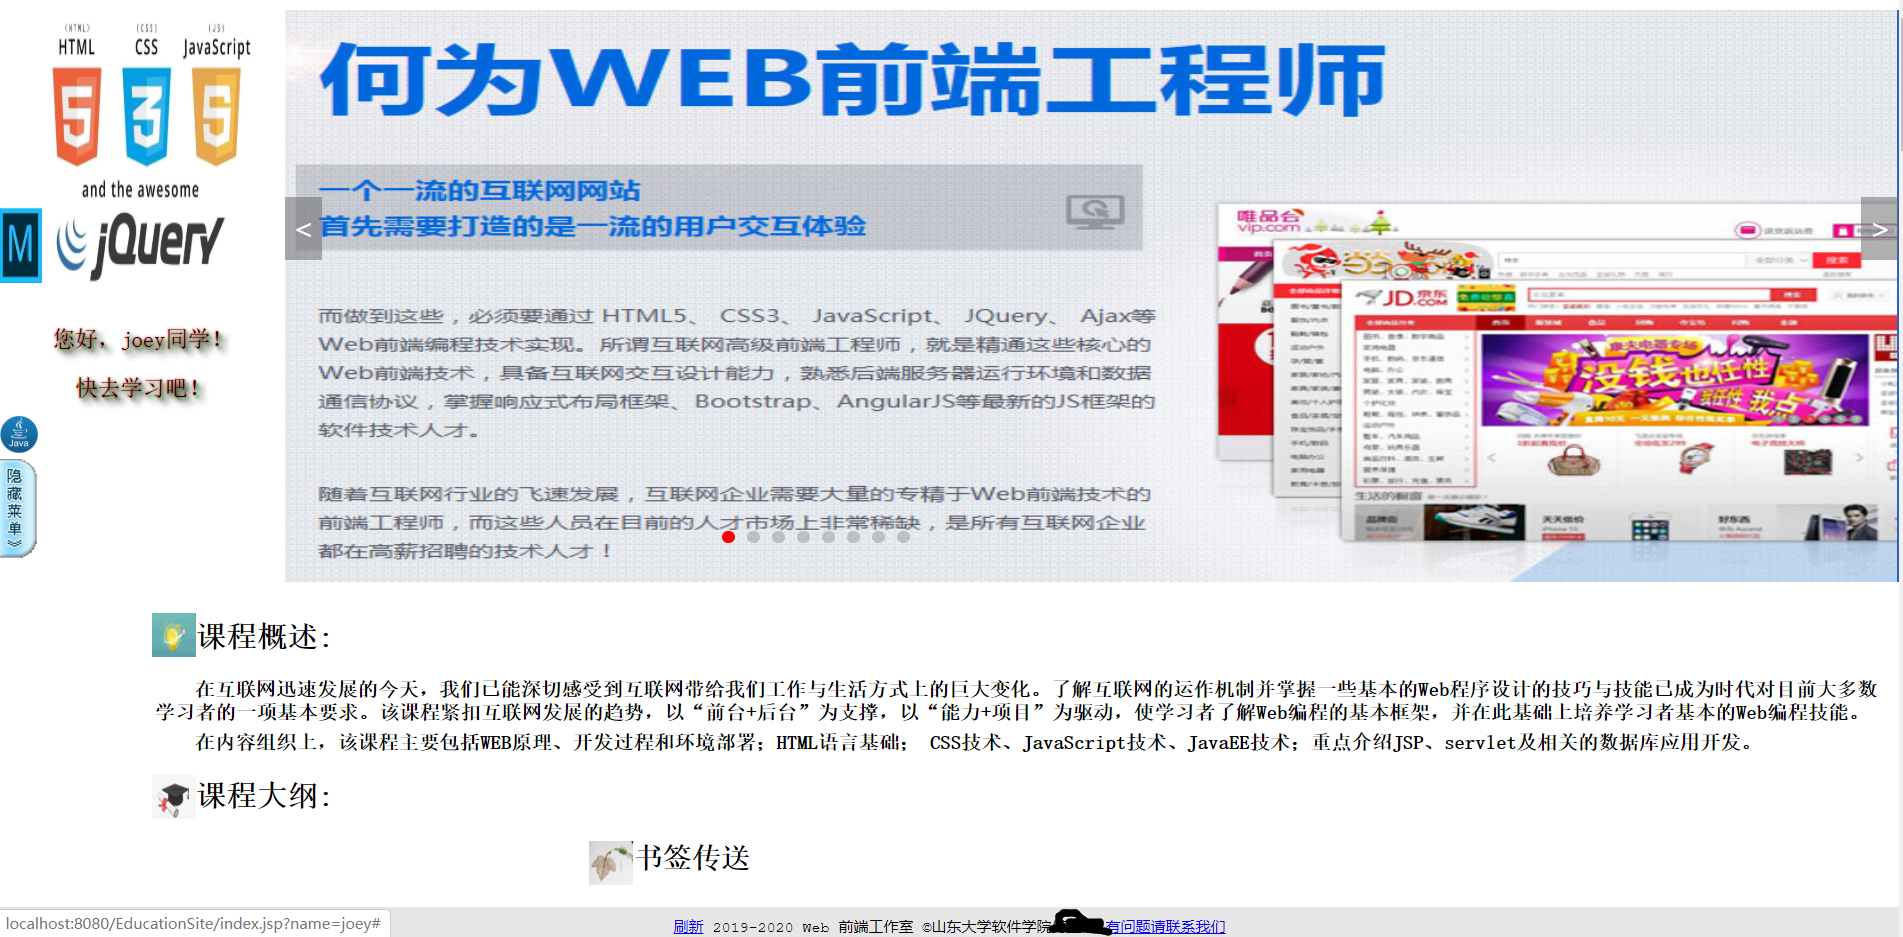
3) Basic function realization
1. Browsing of syllabus, course introduction and other teaching contents
Learn the design method of mooc, with pictures and texts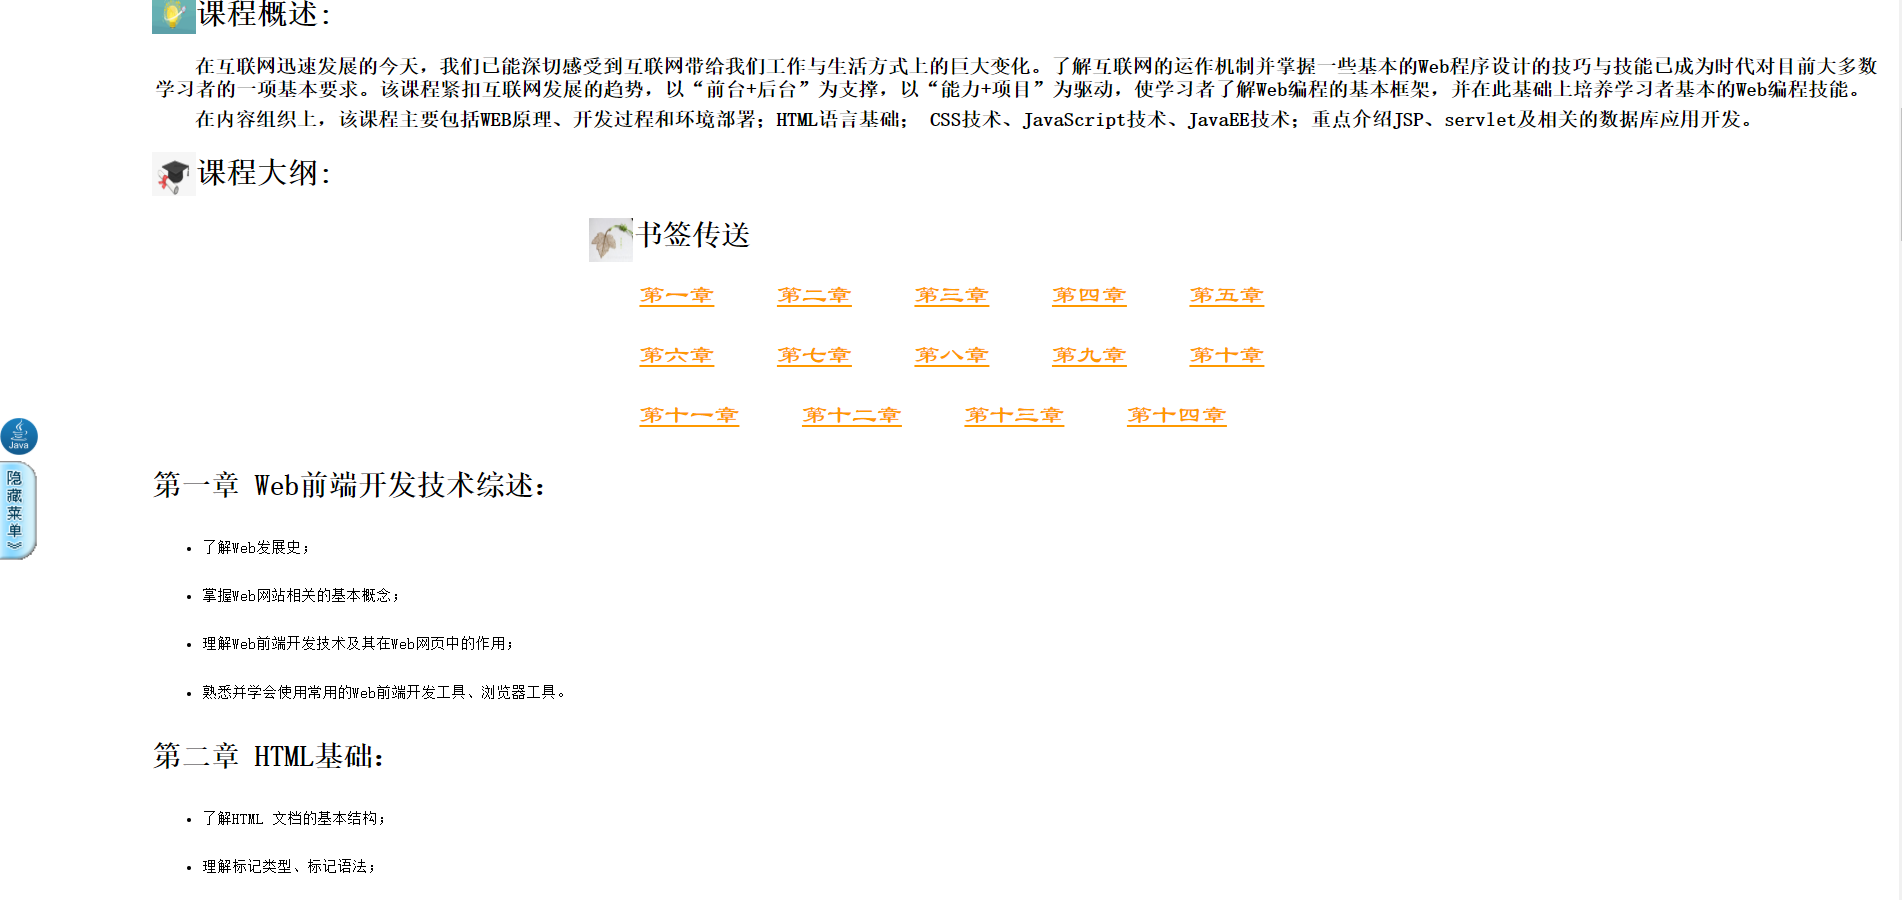
Difficulty: css style debugging, which needs to be done by yourself, can be done several times.
2. Browse and download teaching courseware
As the online display of ppt may be over the wall, I used the form of converting ppt to pdf.
Code used in pdf display: it's very simple
<div id="di1">
             <!--withPDFForm display of-->
             <iframe id="iFrame" src="PDF/HTML-1.pdf" width="100%" height="100%">

                 This browser does not support PDFs. Please download the PDF to view it: <a href="PDF/HTML-1.pdf">Download PDF</a>

             </iframe>
         </div>
Because my download can be multiple-choice, there is a complex js logic. To put it simply:
html is a set of checkboxes
<input type="checkbox" id="1" name="ppt" value="01" class="gcs-checkbox">
js is three functions
1. Make sure to download the ppt
function selectOne() {
    var names = document.getElementsByName("ppt");//Get all checkbox es

    // alert(names.length);

    var flag = false;

    for (var i=0;i<names.length;i++){
        if (names[i].checked){//Determine if the check box is selected
            flag = true;
            names[i].checked = false;//Clear the selection when downloading
            download(i);

        }
    }

    if (!flag){
        alert("Please select at least one!");
        return false;
    }

}
2. Function to determine the ppt to download
function download(i){
    switch (i+1) {
        case 1:
            downloadFile("PPT/Web Technology 01-HTML-1.pptx");
            break;

        case 2:
            downloadFile("PPT/Web Technology 02-HTML-2.pptx");
            break;

        case 3:
            downloadFile("PPT/Web Technology 03-CSS-1.pptx");
            break;

        case 4:
            downloadFile("PPT/Web Technology 04-CSS-2.pptx");
            break;

        case 5:
            downloadFile("PPT/Web Technology 05-CSS-3.pptx");
            break;

        case 6:
            downloadFile("PPT/Web Technology 06-JS-1.pptx");
            break;

        case 7:
            downloadFile("PPT/Web Technology 07-JS-2.pptx");
            break;

        case 8:
            downloadFile("PPT/Web Technology 08-Servlet.ppt");
            break;

        case 9:
            downloadFile("PPT/Web Technology 09-JSP.ppt");
            break;

         case 10:
            downloadFile("PPT/Web Technology 10-Conversation JDBC.ppt");
            break;

        case 11:
            downloadFile("PPT/Web Technology 11-EL,JSTL.ppt");
            break;

        case 12:
            downloadFile("PPT/Web Technology 12-Other topics.ppt");
            break;

        case 13:
            downloadFile("PPT/Web Technology 13-SSH-1.ppt");
            downloadFile("PPT/Web Technology 14-SSH-2.ppt");
            break;

        case 14:
            downloadFile("PPT/Web Technology 15-Vue.ppt");
            break;

        case 15:
            downloadFile("PPT/Web Technology 16-Development case.ppt");
            break;

    }
}
3. Determine the file to download according to the url
function downloadFile(url)
{
    try{
        var elemIF = document.createElement("iframe");
        elemIF.src = url;
        elemIF.style.display = "none";
        document.body.appendChild(elemIF);
    }catch(e){

    }
}
3. Video browsing and downloading
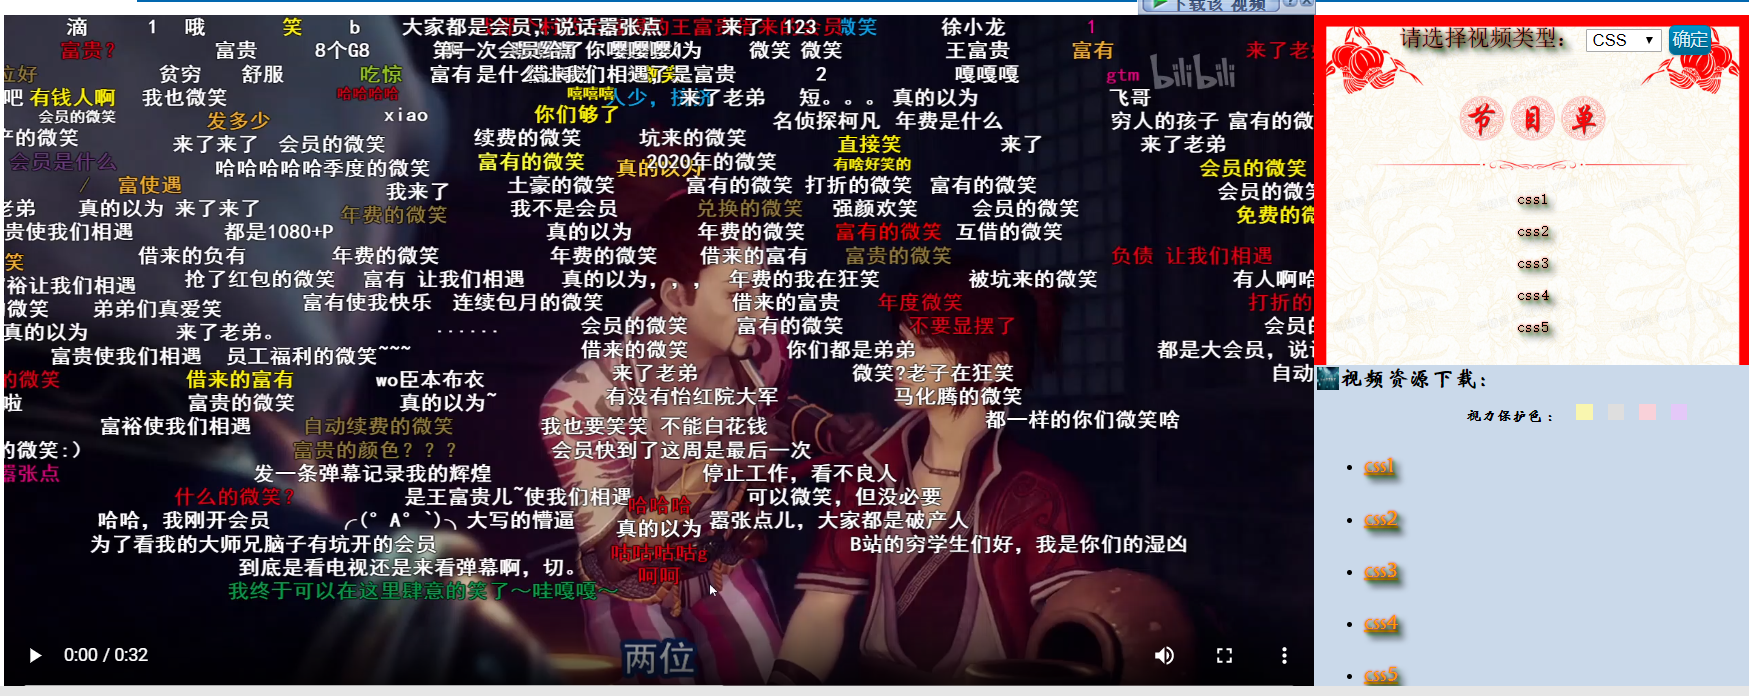
The difficulty is that I use js logic to realize the function of switching program list (although it is ugly, my UI is always bad). But as long as I learn logic to beautify it, it should be a very good function.
Code implementation:
html
<div id="di2"> <!--Change program list--> <span class="font40" style="margin-top: 5px"> Please select a video type:</span> <label> <select id="getVideo"> <option selected = selected value="html">HTML</option> <option value="css">CSS</option> <option value="js">JS</option> </select> <input type="button" class="new_button" id="ok" value="Determine" onclick="changeVideo()"> </label><br> <!--Program guides:--> <!--html Video about--> <br> <br> <br> <br> <br> <div id="html" > <a onclick="getVideo1(1)" target="_self" title="Watch Video 1"><p align="center" class="font41">watchPHP</p></a><!-- p Paragraph wrapping --> <a onclick="getVideo2(1)" title="Watch Video 2"><p class="font41">Watch Chandler dance</p></a> <a onclick="getVideo3(1)" title="Watch Video 3"><p class="font41">Watch Monica dance</p></a> <a onclick="getVideo4(1)" title="Watch Video 4"><p class="font41">Watch Linghu Prequel</p></a> <a onclick="getVideo5(1)" title="Watch video 5"><p class="font41">watchGTA5</p></a> </div> <!--css Video about--> <div id="css" > <a onclick="getVideo1(2)" target="_self" title="Watch Video 1"><p align="center" class="font41">css1</p></a><!-- p Paragraph wrapping --> <a onclick="getVideo2(2)" title="Watch Video 2"><p class="font41">css2</p></a> <a onclick="getVideo3(2)" title="Watch Video 3"><p class="font41">css3</p></a> <a onclick="getVideo4(2)" title="Watch Video 4"><p class="font41">css4</p></a> <a onclick="getVideo5(2)" title="Watch video 5"><p class="font41">css5</p></a> </div> <!--js Video about--> <div id="js"> <a onclick="getVideo1(3)" target="_self" title="Watch Video 1"><p align="center" class="font41">js1</p></a><!-- p Paragraph wrapping --> <a onclick="getVideo2(3)" title="Watch Video 2"><p class="font41">js2</p></a> <a onclick="getVideo3(3)" title="Watch Video 3"><p class="font41">js3</p></a> <a onclick="getVideo4(3)" title="Watch Video 4"><p class="font41">js4</p></a> <a onclick="getVideo5(3)" title="Watch video 5"><p class="font41">js5</p></a> </div> </div>
js code:
//Change video playlist and video download sequence
function changeVideo() {

    var myValue = $('#getVideo option:selected').val();//Get the value in the drop-down box

    var html = $('#html');
    var css = $('#css');
    var js = $('#js');

    var html_d = $('#download_html');
    var css_d = $('#download_css');
    var js_d = $('#download_js');

    // alert(myValue);

    switch (myValue) {
        case "html":

            document.querySelector('#play').src = "Video/HTML1.mp4";

            html.show();
            css.hide();
            js.hide();

            html_d.show();
            css_d.hide();
            js_d.hide();
            break;

        case "css":

            document.querySelector('#play').src = "Video/css1.mp4";

            html.hide();
            css.show();
            js.hide();

            html_d.hide();
            css_d.show();
            js_d.hide();
            break;

        case "js":

            document.querySelector('#play').src = "Video/js1.mp4";

            html.hide();
            css.hide();
            js.show();

            html_d.hide();
            css_d.hide();
            js_d.show();
            break;

    }

}
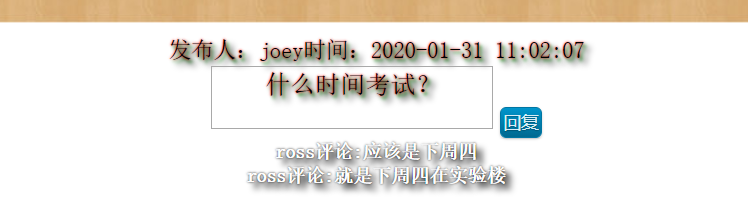
4) Most important function message and reply
Front end implementation:
Database design:
Three tables: record users, messages and replies to messages respectively (there is no reply to message replies at present)
users table, recording each student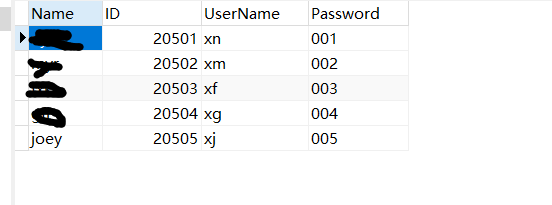
The answering table records everyone's comments
name is the person who left the message, review is the content of the message, time and id are generated automatically, time is the time of the message, id is the different number of each message, and the replies used to record the message are those!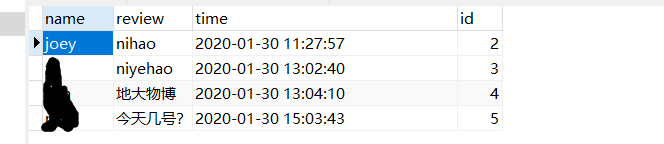
reply record the replies to different messages
Reply'id is the ID of the corresponding message, reply'name is the name of the respondent, and reply'review is the content of the reply.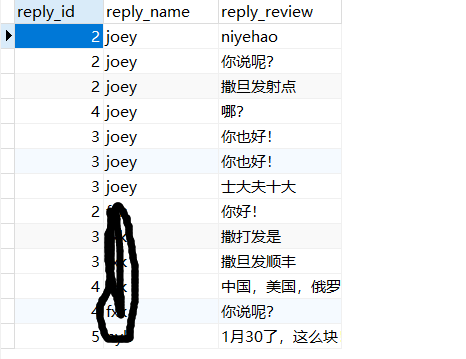
Technological process
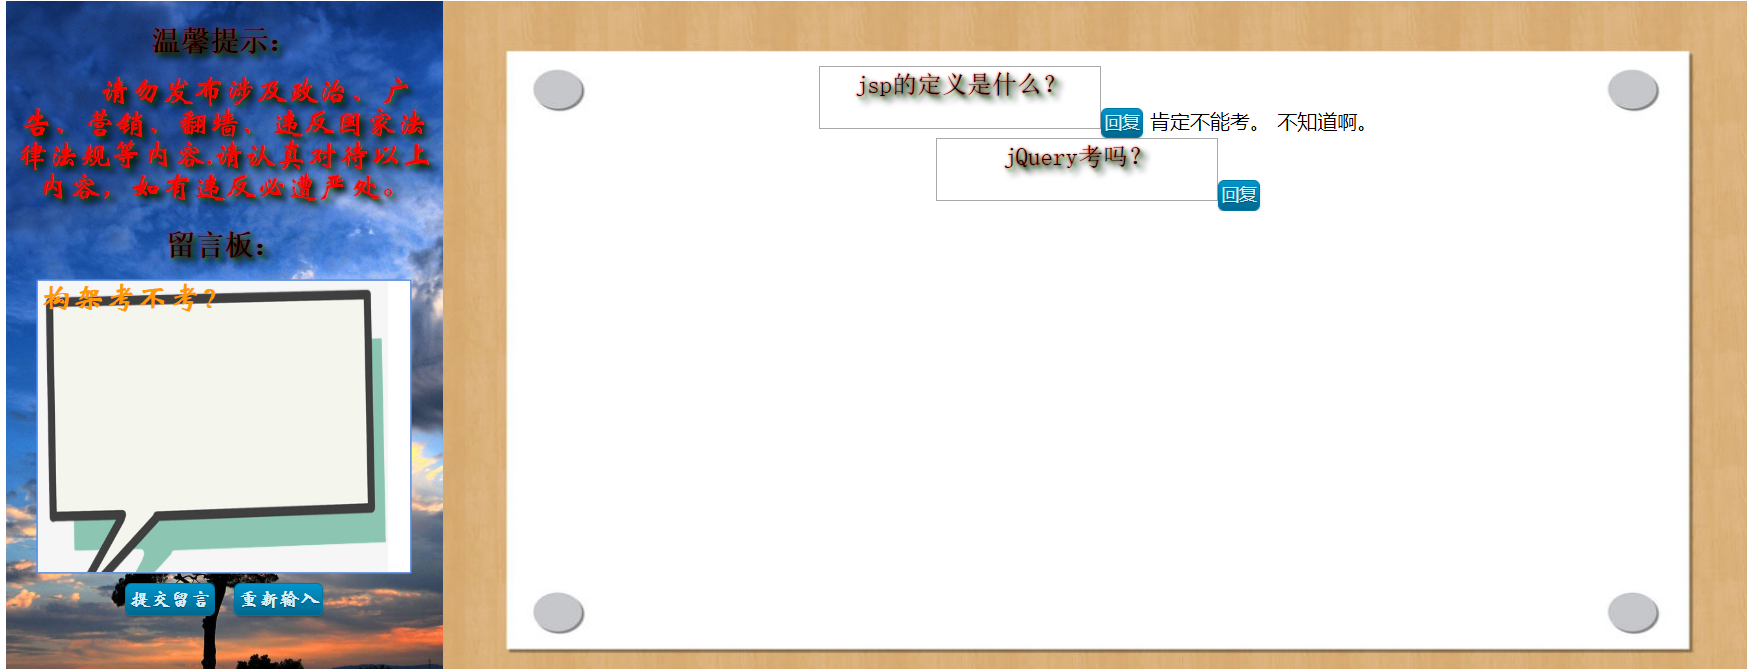
1. Leave a message on the message board:
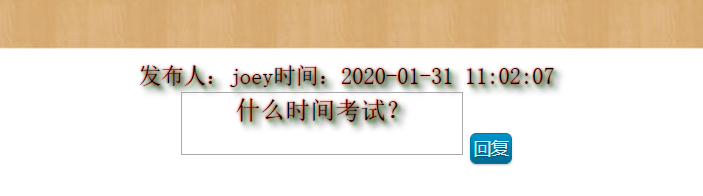
2. Reply to others' messages
Logic and source code

1. Leave a message in answering.jsp and submit it to write [review.jsp for processing and adding to the database.
2. Reply in answering.jsp and submit it to write_sql.jsp for processing and adding to the database.
3. If the message or reply is successful, it will be returned to index.jsp.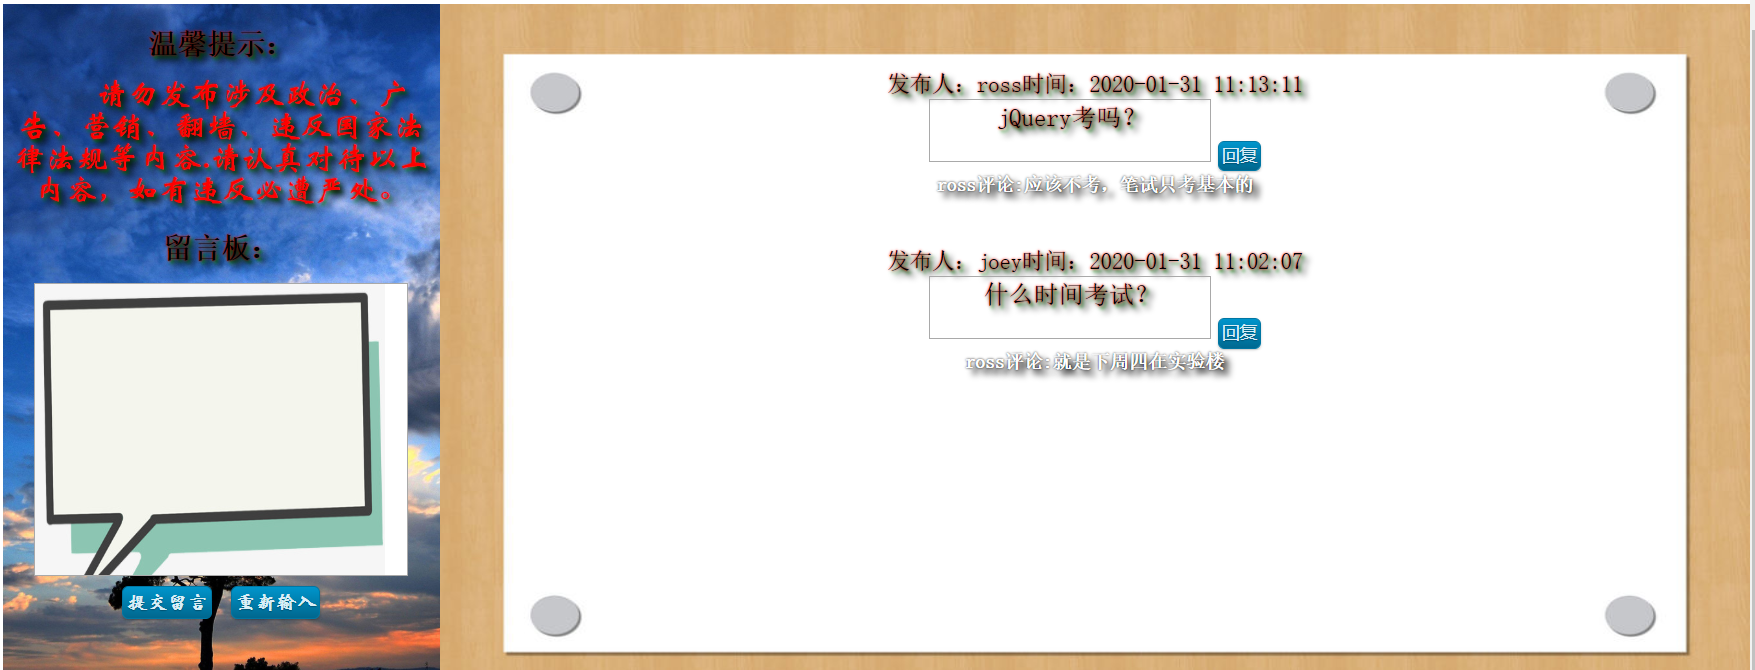
1. Source code of answering.jsp:
<%@ page import="java.util.List" %>
<%@ page import="com.education.User.Reply_content" %>
<%@ page import="com.education.dao.ReviewDao" %>
<%@ page import="com.education.dao.ReplyDao" %>
<%@ page import="com.education.User.ReviewInformation" pageEncoding="UTF-8" %>
<%@ page contentType="text/html;charset=UTF-8" language="java" %>

<%
    String name = (String) session.getAttribute("username_msg");

    System.out.println("The message is"+name);

    if (name==null){
        %>
<script>
    alert("Please log in first!")
</script>

<%
    }else {

//        System.out.println("fuck!");


        %>

<html lang="en">
<head>
    <meta http-equiv="Content-Type" content="text/html; charset=UTF-8" />
    <title>Message Board</title>
    <link type="text/css" href="CSS file/Liuyan.css" rel="stylesheet">
    <style type="text/css">
        #Di0{
            width: 100%;
            height: 560px;
            background-color: #FF9900;
        }
        #Di1{
            width: 25%;
            height: 560px;
            float: left;
            background-color: #cad9ea;
            background-image: url("imgs/back00.jpg");
            background-repeat: no-repeat;
            background-size: cover;
        }
        #Di2{
            width: 75%;
            height: 560px;
            background-color: #cad9ea;
            float: right;
            background-image: url("CSS file/Photos/liuyan.jpg");
            background-size: 100% 560px;/* The first value specifies the width of the picture, and the second value specifies the height of the picture */


            overflow:auto;/*Make the div drop-down box appear*/
        }

        #result{
            font-weight: bold;
            font-family: Official script;
            font-size: 20px;

            text-align: center;

            background-color:transparent;/*background-color Method set to transparent*/
            padding: 0;
            margin: 0;

            /*//Cannot change size*/
            resize:none;

        }

    </style>
    <!--Introduce jQuery-->
    <script language="JavaScript"  src="Jquery/jquery-3.4.1.js"></script>
    <style>
        .font1 {
            font-size: 12px;
            text-shadow: 5px 5px 5px black, 0px 0px 2px black; /* Yes, there are two shadow s */
            color: white;

            font-weight: bolder;
            font-family: "Song style", "Official script";

        }
    </style>
</head>
<body>

<div id="Di0" >
    <!--Left area to submit message-->
    <div id="Di1">
        <h2 class="hh">reminder:</h2>
        <p class="ppp">Please do not publish any content involving politics, advertisement, marketing, turning over the wall, violating national laws and regulations, etc.Please take the above content seriously. Any violation will be punished strictly. </p>

        <h2 class="hh">Message Board:</h2>
        <!-- Multiline text input box -->
        <form class="forms">
            <textarea class="text_write" name="what" rows="9" cols="22px" id="message" style="margin-top: 0" ></textarea><br>
            <input  id="yes" type="button" onclick="f()" name="button" value="Submit message" class="new_button">
            <input id="yes3" type="reset" value="Re input" class="new_button"/>
        </form>

        <form style="display: none" method="get" action="write_review.jsp?name=<%=name%>">
            <input id="review_what" name="review_what" type="text" value="">
            <input id="sumbittttt" type="submit">
        </form>

    </div>

    <!--Right reply area-->
    <div id="Di2">
        <!---->
        <div id="white">
            <font id="this" style="text-align: left"></font>
            <%
                List<ReviewInformation> reviewInformations = ReviewDao.reviewWhat();
                List<Reply_content> replyInformations = ReplyDao.replyWhat();

                if (reviewInformations != null && reviewInformations.size() > 0) {
                    for (int i = reviewInformations.size() - 1; i >= 0; i--) {
                        ReviewInformation message = reviewInformations.get(i);
            %>

            <p class="font4" style="font-size: 18px">Publisher:<%=message.getName()%>Time:<%=message.getTime()%></p>
            <textarea  readonly="readonly" style='text-shadow: 5px 5px 5px black, 0px 0px 2px red, 2px 2px 3px green;font-size: 20px;text-align: center; resize:none;background:transparent'><%=message.getReview()%></textarea>
            <input type='button' onclick='write_reply(<%=message.getID()%>)' value='Reply' class='new_button' name='ss' id='<%=message.getID()%>'><br>
            <%
            for (int j =0;j<replyInformations.size();j++){
                Reply_content reply_content = replyInformations.get(j);
                if (reply_content.getId()==message.getID()){
                    %>
                    <p class="font1" style="font-size: 15px"><%=reply_content.getReply_name()%>comment:<%=reply_content.getReply_review()%></p>
            <%
                }
            }
            %>

            <br><br>

            <%
                }}
            %>
        </div>

        <form style="display: none" method="get" action="write_sql.jsp?name=<%=name%>">
            <input id="reply_id" name="reply_id" type="text" value="">
            <input id="reply_what" name="reply_what" type="text" value="">
            <input id="sumbittt" type="submit">
        </form>

    </div>
</div>

<!--    Monitor the keyboard enter key!   -->
<script type="text/javascript" language=JavaScript>
    document.onkeydown=function(event){
        var e = event || window.event || arguments.callee.caller.arguments[0];
        if(e && e.keyCode==13){ // enter key
            //What to do
            f();
        }
    };

    /*
    Submit message
    */
    function f() {

        var yes;

        yes = confirm("Are you sure you want to submit a message?");

        if (yes){

            var message = document.getElementById('message');//Get message content
            var result = message.value.replace(/\s+/g,"");
            message.value = "";

            if (result!=null&&result!==""){

                document.getElementById("review_what").value = result;

                $("#sumbittttt").click();

            }else {

                alert("Your message is empty, message failed!");

            }
        }else {
            alert("Message failed!");
        }

    }


    /*
    Writing reply
     */
    function write_reply(id){//Take care of the same name.

        var message=prompt("Please write your reply","");

        if (message!=null && message!=="") {

            document.getElementById("reply_what").value = message;

            document.getElementById("reply_id").value = id;//JS assigns a value to the text box. Do not use jQuery. Use js's document


            $("#sumbittt").click();

            // alert(message);

        }else {
            alert("Please input the correct content!");
        }
    }

</script>

</body>
</html>


<%
    }

%>
2. Source code of write menu review.jsp:
<%@ page import="com.education.dao.ReviewDao" %>
<%@ page contentType="text/html;charset=UTF-8" language="java" %>
<%
    String name = (String) session.getAttribute("username_msg");
    String review = request.getParameter("review_what");

    if (ReviewDao.writeView(name,review)){
        response.sendRedirect("http://localhost:8080/EducationSite/index.jsp?pinglun=yes&name="+name);
    }else {

    }

%>
3. Source code of write_sql.jsp:
<%@ page import="com.education.dao.ReplyDao" %>
<%@ page import="com.education.User.Reply_content" pageEncoding="UTF-8" %>
<%@ page contentType="text/html;charset=UTF-8" language="java" %>
<head>
<%
    String name = (String) session.getAttribute("username_msg");
    String review = request.getParameter("reply_what");
    String id0 = request.getParameter("reply_id");

    int id = Integer.parseInt(id0);

    Reply_content reply = new Reply_content(id,name,review);
    if (ReplyDao.addReply(reply)){

        response.sendRedirect("http://localhost:8080/EducationSite/index.jsp?pinglun=yes&name="+name);

    }else {

    }

%>
</head>
ReviewDao.writeView(name,review) and ReplyDao.addReply(reply) are the methods to add data. You can write them yourself.
At last, I emphasized that we must learn well in web class. After class, we should learn more. Then I will share the front-end code. In this class, we should say that the main test of logic is the back-end, so I won't pass on the back-end. Everyone has different ideas.
Baidu online disk resources
ps9z

