1. First you can go to Ueditor on the official website to see detailed documentation, including how to install to Eclipse, related jar packages, and how to use Ueditor. This article mainly describes how to upload single pictures and use your own interface:
Run tomcat, run in google browser (Test is my project name):
http://localhost:8081/Test/jsp/config.json
A long string of json strings appears, indicating that the operation was successful.
Write a picture description here
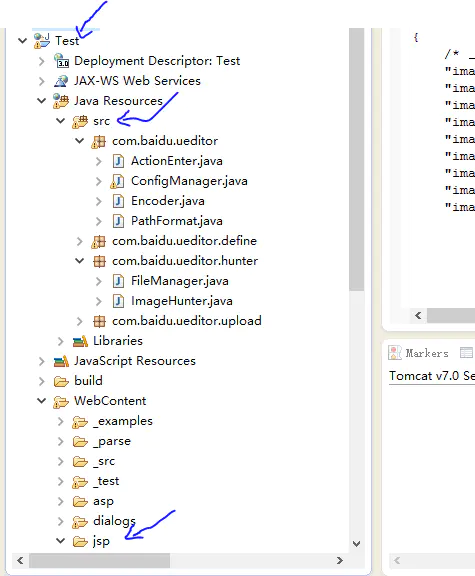
2. copy the java source code under WEB-INF/jsp/src into the project source code for easy debugging later, as shown above
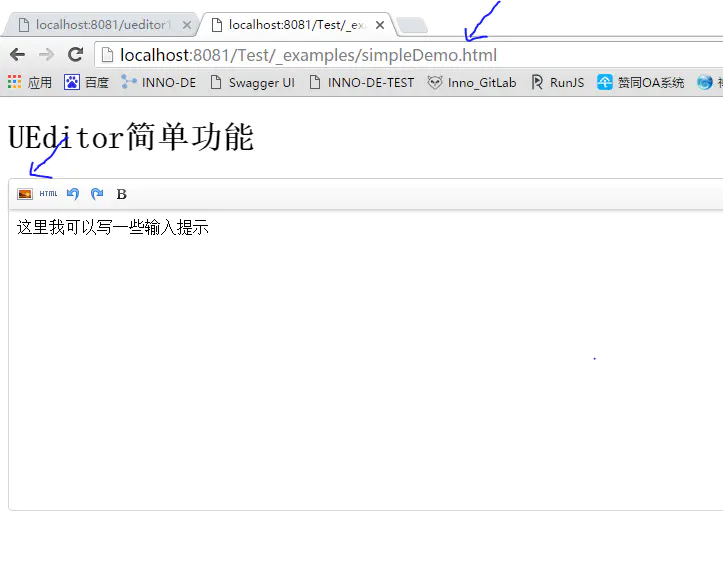
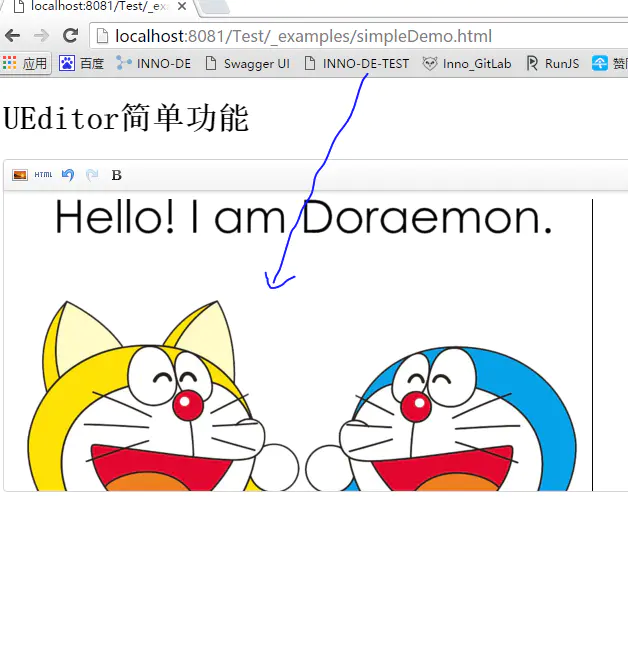
3. Run http://localhost:8081/Test/_examples/simpleDemo.html To open and see this file:
    <!DOCTYPE HTML>
<html>
<head>

    <meta http-equiv="Content-Type" content="text/html;charset=utf-8"/>
    <title></title>
    <script type="text/javascript" charset="utf-8" src="../ueditor.config.js"></script>
    <script type="text/javascript" charset="utf-8" src="editor_api.js"></script>
</head>
<body>
    <h1>UEditor Simple function</h1>

    <!--style Given width can affect the final width of the editor-->
    <script type="text/plain" id="myEditor">
        <p>Here I can write some input tips</p>
    </script>
    <script type="text/javascript">
        UE.getEditor('myEditor',{
            //Here you can choose the name of the tool button you want, but here you can only choose the following five
            toolbars:[['FullScreen', 'Source', 'Undo', 'Redo','Bold','test']],
            //Auto-empty initialization content when focus
            autoClearinitialContent:true,
            //Turn off word count
            wordCount:false,
            //Close elementPath
            elementPathEnabled:false,
            //Default edit area height
            initialFrameHeight:300
            //For more additional parameters, see the configuration item in ueditor.config.js
        })
    </script>

</body>


</html>
The example above is simple: how to initialize a rich text box, how to configure a toolbar, and so on
4. Because we want to achieve the picture upload function, we need to do the picture upload button as follows:
1) First method: add simpleupload to toolbars:

toolbars:[['FullScreen',simpleupload ,'Source', 'Undo', 'Redo','Bold','test']]

2) Second method: comment out toolbars directly
 This reads the default configuration file ueditor.config.js, described below, but displays all the buttons
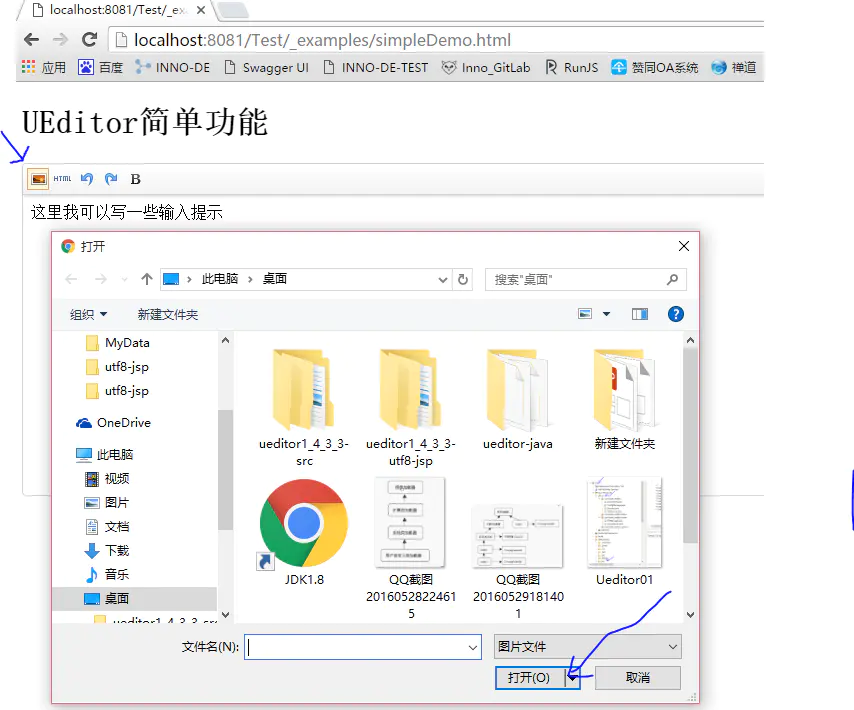
Rerun http://localhost:8081/Test/_examples/simpleDemo.html
Figure:
Write a picture description here
5. However, you will find that clicking on the picture upload button does not respond at all. Nima has nothing to do with it!
The ueditor.config.js file is introduced here.
First of all, you will find that there are many configurations for this file, just look at the following
Emphasis: serverUrl: URL + php/controller.php. Yes, you read it correctly.
This is the Uniform Interface Path of the Request Backend. Remember that it is the Uniform Interface Path, that is, only this path, without the second one, would it be a pit?
We change the path to jsp:, serverUrl: URL + "jsp/controller.jsp"
We remove the comments, restart tomcat, refresh the page, and click the picture upload button.
window.UEDITOR_CONFIG = {

    //Add a path to the editor instance, this cannot be commented out
    UEDITOR_HOME_URL: URL

    // Server Unified Request Interface Path
    , serverUrl: URL + "php/controller.php"

    //All the function buttons and drop-down boxes on the toolbar allow you to choose the redefinition you want when using an instance of the new editor
    , toolbars: [[
        'fullscreen', 'source', '|', 'undo', 'redo', '|',
        'bold', 'italic', 'underline', 'fontborder', 'strikethrough',
        'superscript', 'subscript', 'removeformat', 'formatmatch',
        'autotypeset', 'blockquote', 'pasteplain', '|', 'forecolor',
        'backcolor', 'insertorderedlist', 'insertunorderedlist', 'selectall', 'cleardoc', '|',
        'rowspacingtop', 'rowspacingbottom', 'lineheight', '|',
        'customstyle', 'paragraph', 'fontfamily', 'fontsize', '|',
        'directionalityltr', 'directionalityrtl', 'indent', '|',
        'justifyleft', 'justifycenter', 'justifyright', 'justifyjustify', '|',
        'touppercase', 'tolowercase', '|',
        'link', 'unlink', 'anchor', '|', 'imagenone', 'imageleft', 'imageright', 'imagecenter', '|',
        'simpleupload', 'insertimage', 'emotion', 'scrawl', 'insertvideo', 'music',
        'attachment', 'map', 'gmap', 'insertframe', 'insertcode', 'webapp', 'pagebreak',
        'template', 'background', '|',
        'horizontal', 'date', 'time', 'spechars', 'snapscreen', 'wordimage', '|',
        'inserttable', 'deletetable', 'insertparagraphbeforetable', 'insertrow',
        'deleterow', 'insertcol', 'deletecol', 'mergecells', 'mergeright', 'mergedown',
        'splittocells', 'splittorows', 'splittocols', 'charts', '|',
        'print', 'preview', 'searchreplace', 'drafts', 'help'
    ]]
    //The tooltip prompt that appears when the mouse is over the toolbar, leaving blank to support automatic multilingual configuration, otherwise the configuration value will prevail
    //,labelMap:{
    //    'anchor':'', 'undo':''
    //}

    //Language configuration item, default is zh-cn.If necessary, automatic multilingual switching can also be done in the following way, provided, of course, that the corresponding language files exist in the lang folder:
    //The lang value can also be obtained automatically (navigator.language||navigator.browserLanguage ||navigator.userLanguage).toLowerCase()
    //,lang:"zh-cn"
    //,langPath:URL +"lang/"

    //Theme configuration item, default by default.You can also use the following to automatically switch multiple themes if you want, provided, of course, that a corresponding theme file exists in the themes folder:
    //Existing skin as follows: default
    //,theme:'default'
    //,themePath:URL +"themes/"

    //, zIndex: 900 //Editor level cardinality, default is 900

    //For the getAllHtml method, this encoding setting is added to the corresponding head tag.
    //,charset:"utf-8"

    //If the page of the instantiation editor manually modifies the domain, set it to true here
    //,customDomain:false

    //Common Configuration Items
    //IsShow: true//default display editor

    //, textarea:'editorValue'// When submitting a form, the server gets the parameters used by the editor to submit content. When multiple instances are available, the container name property can be given, giving the name the value that is the most critical value for each instance, instead of setting it every time it is instantiated

    //, initialContent:'Welcome to ueditor!'//Initialize the contents of the editor, or give values via textarea/script to see an example of the official website
Write a picture description here
6. You will find that if you select a picture, my card will not upload the picture
Open google browser debugging as follows:
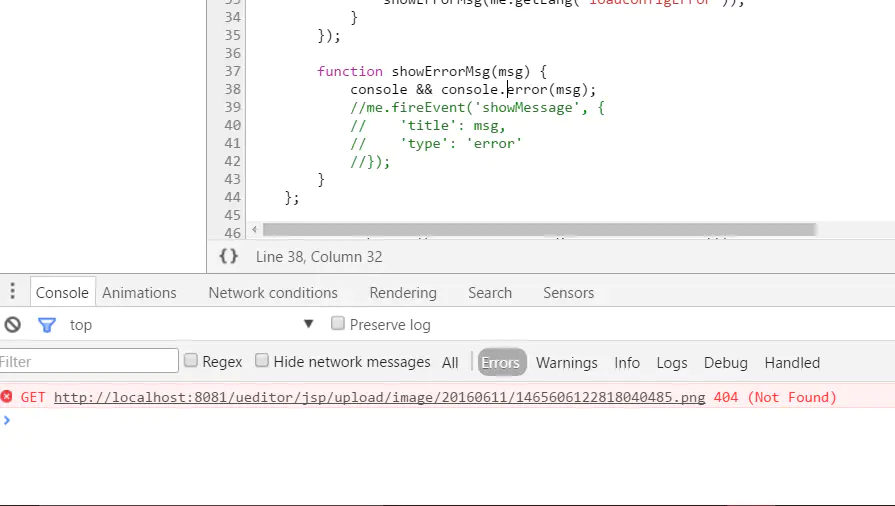
Write a picture description here
7. Note that some configuration files are not ready yet, let's look at the backend request path just configured
    // Server Unified Request Interface Path
    , serverUrl: URL + "jsp/controller.jsp"
Remember, it's important to remember that you want to use this file as a backend java file.
controller.jsp will return the config.json file in the same directory, so you can think of it as the data returned by the backend.
At this point, let's first look at the config.json file:
Just look at some configurations. The following configurations are important, but let's fix the problems above:
The problem above should be that the path of the picture is incorrect, so I did not modify the configuration: imageUrlPrefix, change it to, restart it, refresh it:
"imageUrlPrefix" = http://localhost:8081/Test/


/* Front-end and back-end communication-related configurations, notes only allow multiline */
{
    /* Upload Picture Configuration Item */
    "imageActionName": "uploadimage", /* action name to perform upload of picture */
    "imageFieldName": "upfile", /* Submitted Picture Form Name */
    "imageMaxSize": 2048000, /* Upload size limit, unit B */
    "imageAllowFiles": [".png", ".jpg", ".jpeg", ".gif", ".bmp"], /* Upload Picture Format Display */
    "imageCompressEnable": true, /* Compress pictures, default is true */
    "imageCompressBorder": 1600, /* Maximum Edge Limit for Picture Compression */
    "imageInsertAlign": "none", /* Inserted Picture Floating */
    "imageUrlPrefix": "http://localhost:8081/Test/", /*Picture Access Path Prefix*/
    "imagePathFormat": "/ueditor/jsp/upload/image/{yyyy}{mm}{dd}/{time}{rand:6}", /* Upload save path, you can customize save path and file name format */
                                /* {filename} Will be replaced with the original file name, configuring this requires attention to Chinese scrambling */
                                /* {rand:6} Will be replaced by a random number followed by the number of digits of the random number */
                                /* {time} Will be replaced with a timestamp */
                                /* {yyyy} Will be replaced by four-digit years */
                                /* {yy} Will be replaced by two years */
                                /* {mm} Will be replaced by two months */
                                /* {dd} Will be replaced by two dates */
                                /* {hh} Will be replaced by two hours */
                                /* {ii} Will be replaced by two minutes */
                                /* {ss} Will be replaced by two seconds */
                                /* Illegal Character\: *? "< > |" */
                                /* Keep an eye on online documents: fex.baidu.com/ueditor/#use-format_upload_filename */
The picture is as follows:
Write a picture description here
8. End, DEMO download address: https://dwz.cn/ORcEz9fz