1, Configuration of tabBar
1. Create a new folder
On app Add the following code to JSON to automatically generate three folders
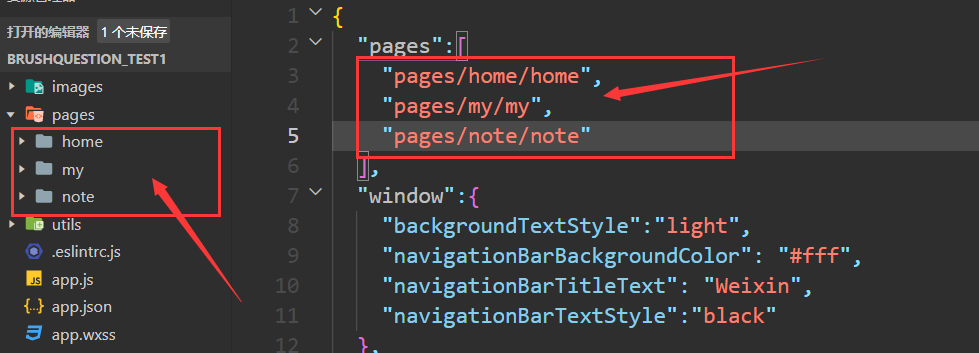
At the same time with app Create a new images folder under the directory at the same level of JSON configuration file, which is used to store some icons, as follows:

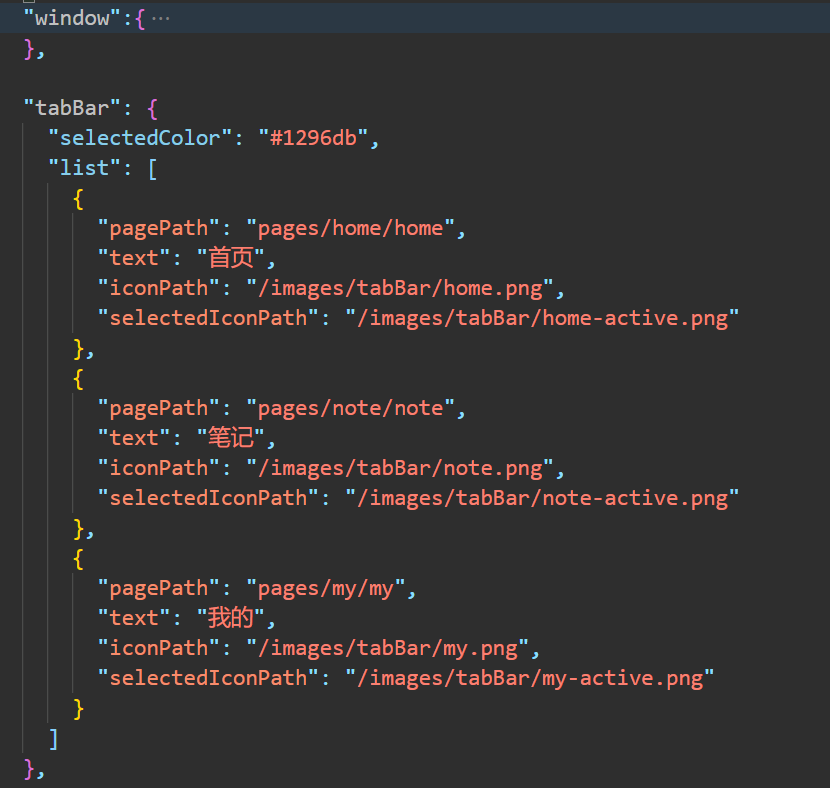
2. Add a tabBar node
On app JSON, add a tabBar node at the same level as the windows node. The configuration is as follows:
The effect diagram after configuration is as follows:

Icon can go Ali Icon Library download
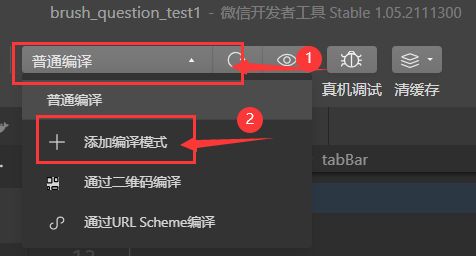
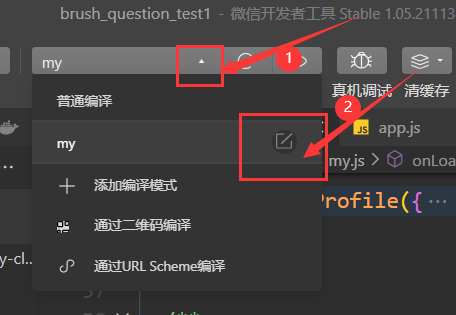
2, Add compilation mode
Since the login page needs to be implemented in the "my" page, in order to avoid jumping from the home page to the "my" page every time, we add the compilation mode here, and the adding steps are as follows:
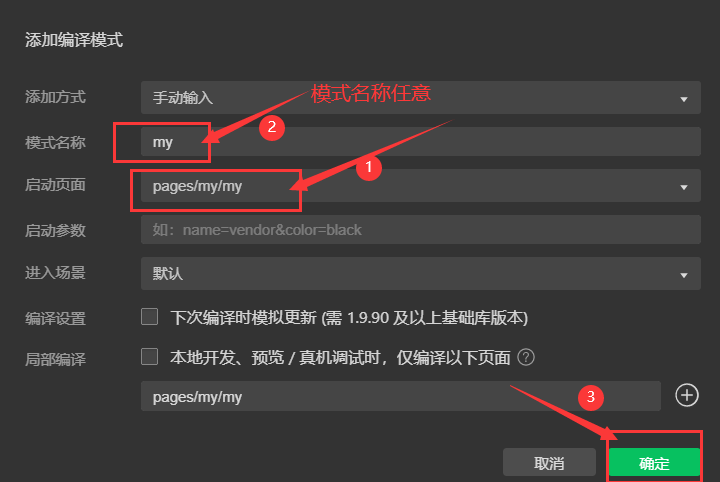
After this addition, the "my" page will be displayed first every time it is recompiled
3, Design of login page
1. wxml structure
<view class="login-container">
  <image src="/images/contact-filled.png" class="contact-filled" mode="widthFix"></image>
  <button class="btn-login">One click login</button>
  <text class="tip-text">Enjoy more benefits after logging in</text>
</view>
2. wxss style
page {
  background-color: #f8f8f8;
}

.login-container {
  height: 900rpx;
  display: flex;
  flex-direction: column;
  align-items: center;
  justify-content: center;
  position: relative;
  overflow: hidden;
}

/* Style of Icon */
.contact-filled {
  width: 150rpx;
  margin-bottom: 16rpx;
}

/* Style of login button */
.btn-login {
  width: 90%;
  border-radius: 100px;
  margin: 15px 0;
  background-color: #c00000;
  color: #f8f8f8;
}

/* The style of the prompt message below the button */
.tips-text {
  font-size: 12px;
  color: gray;
}
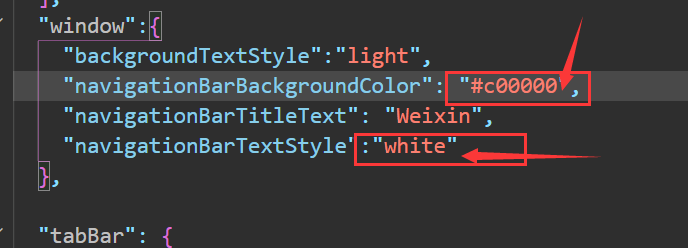
3. Navigation bar style configuration
On app Modify the background color and text color of the navigation bar in JSP
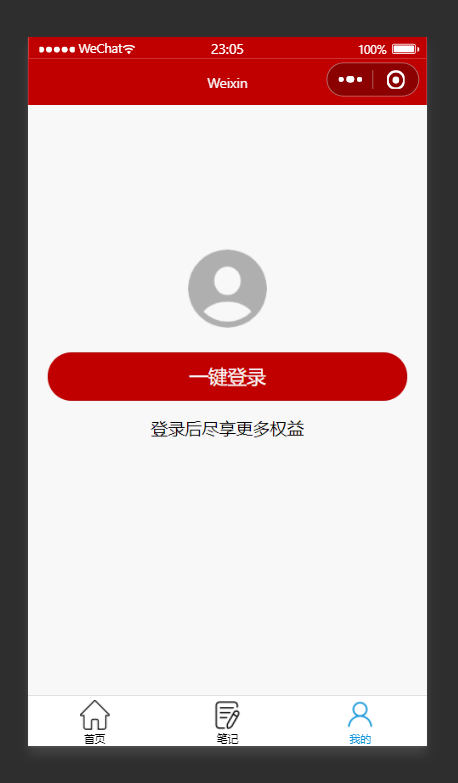
4. Renderings

4, Configuration of cloud development environment
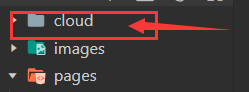
1. Create a new cloud folder
Create a new cloud folder in a directory at the same level as pages
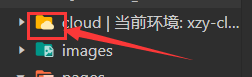
2. Modify project config. JSON configuration
In project config. JSON: add "cloudfunctionRoot": "/ cloud"

After the change, you will find that the cloud folder icon has changed
3. Cloud development environment initialization
On app JS, as follows:

5, Get user unique_ openid
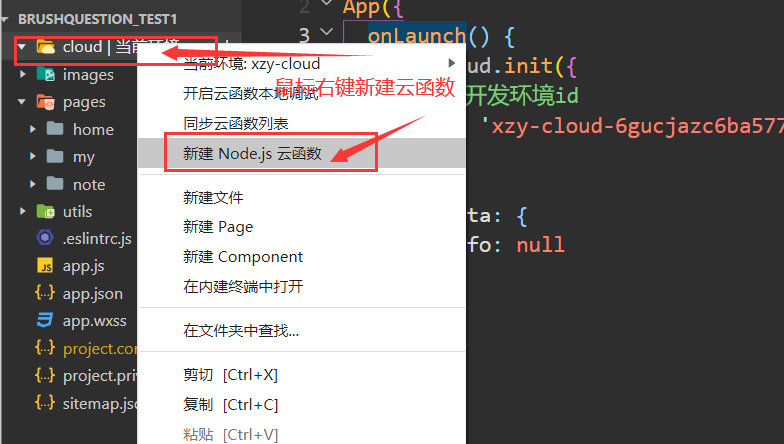
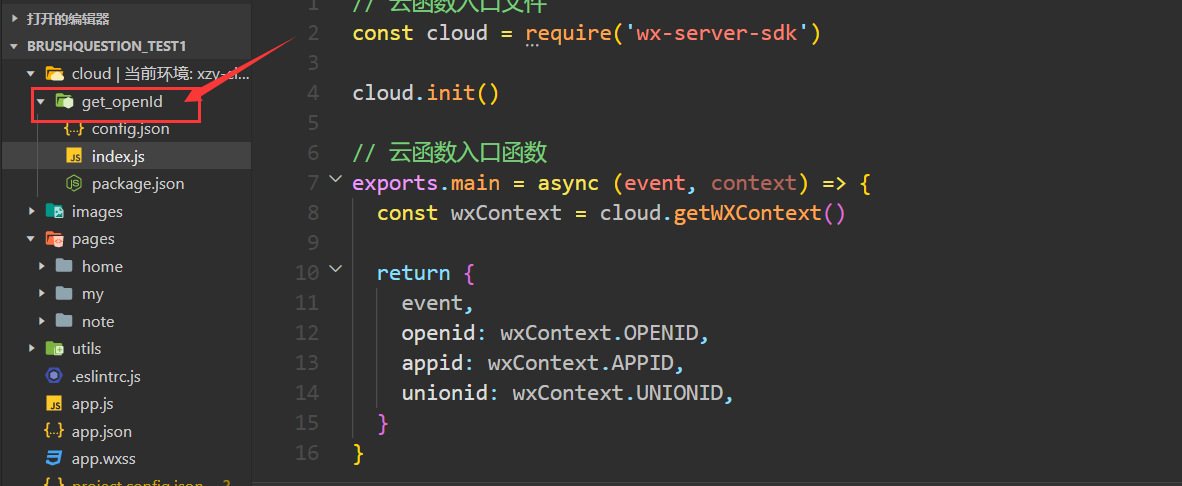
1. Create a new cloud function
2. Call cloud function
In order to make user openid available to all pages, we JS. The code is as follows:
// app.js
App({
  onLaunch() {
    wx.cloud.init({
      //Cloud development environment id
      env: 'xzy-cloud-6gucjazc6ba57719'
    }),

    //Call cloud function
    wx.cloud.callFunction({
      name: 'get_openId',
      success: res => {
        //Get user openid
        this.globalData.user_openid = res.result.openid
        console.log(this.globalData.user_openid)
      }
    })
  },
  //Global data
  globalData: {
    //User openid
    user_openid: '',
    //User information
    userInfo: null
  }
})
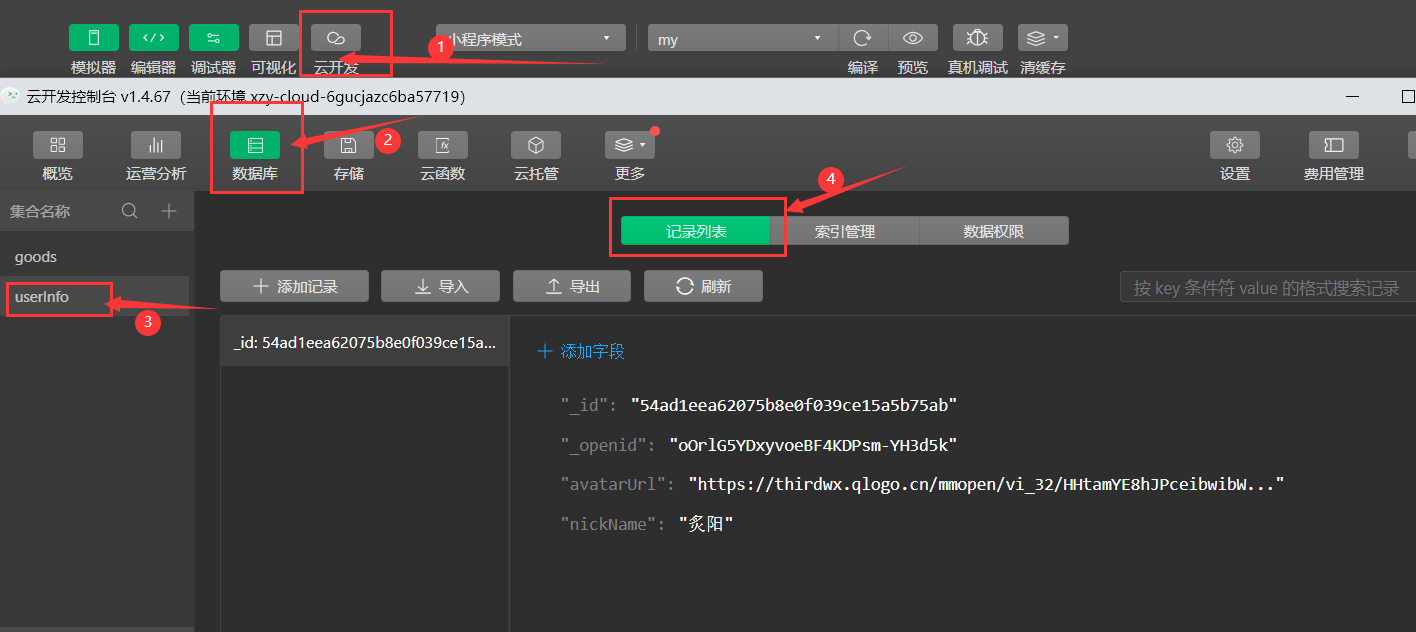
6, Add user information to the database
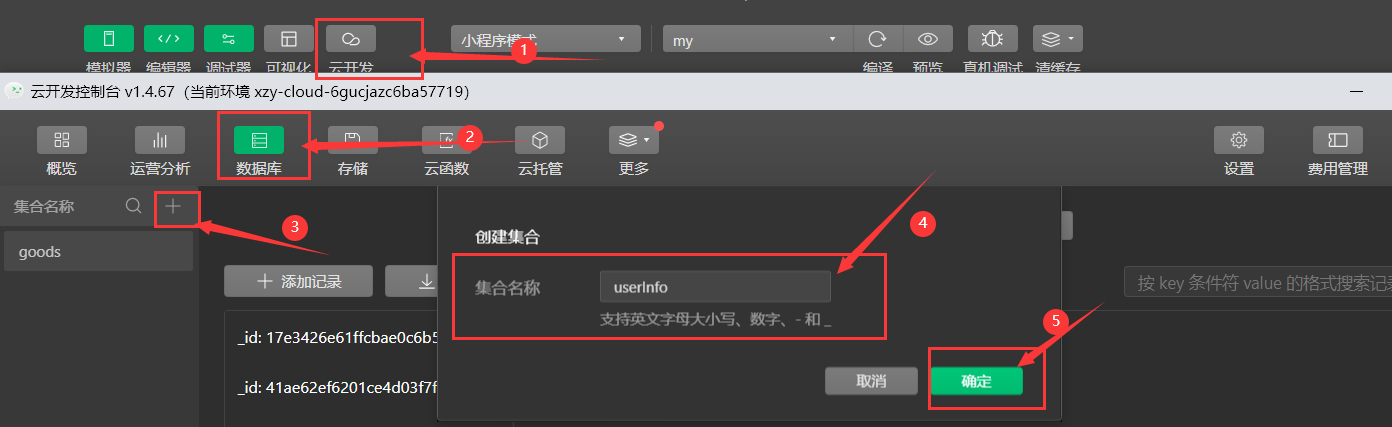
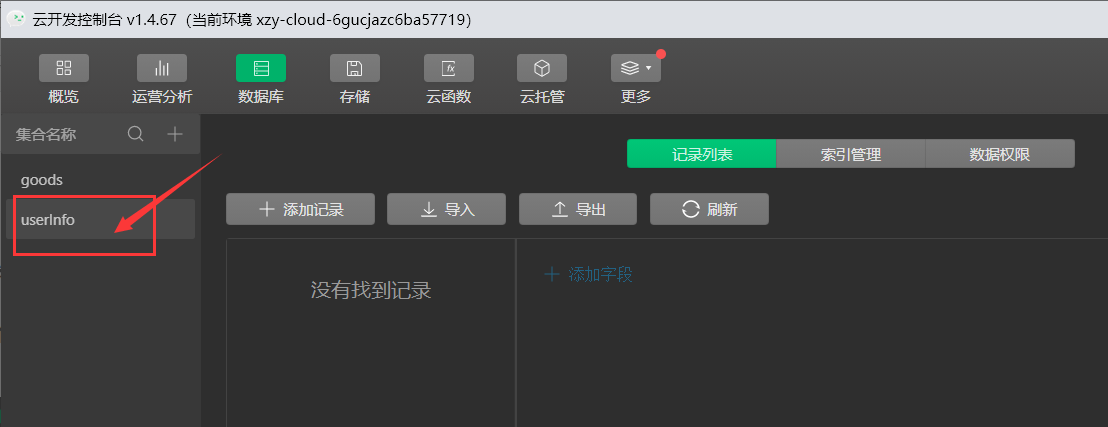
1. Table building
2. Obtain user information
- Step 1: bind event for button button
Add binding event in my page
<button class="btn-login" bindtap="login">One click login</button>
- Step 2: write binding event function
In my JS, write event functions at the same level as data
data: {
    userInfo: null
  },

login() {
    wx.getUserProfile({
      desc: 'Get user information',
      success: res => {
        console.log(res.userInfo)
        //Set global user information
        app.globalData.userInfo = res.userInfo
        //Set local user information
        this.setData({
          userInfo: res.userInfo
        })
      }
    })
  },
Note: before setting user information globally, you need to enter my JS, add the following code at the same level as Page:
const app = getApp()
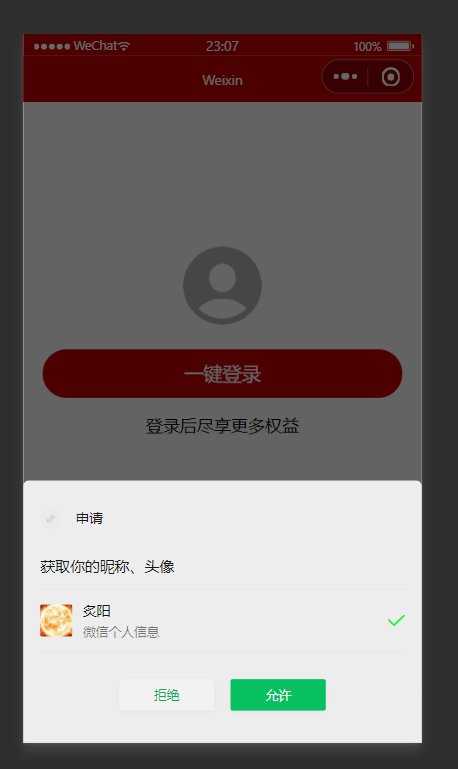
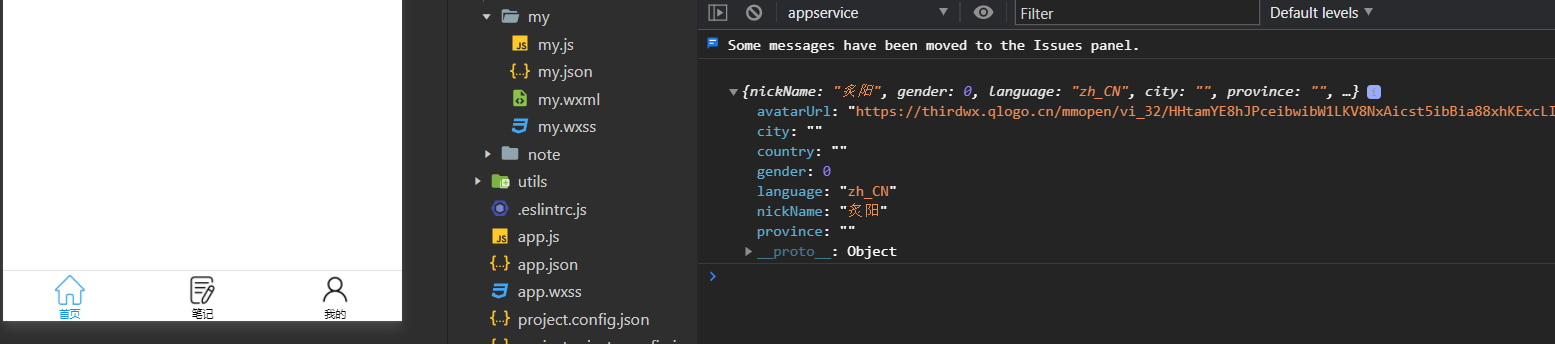
Click the button to obtain the user information as follows:
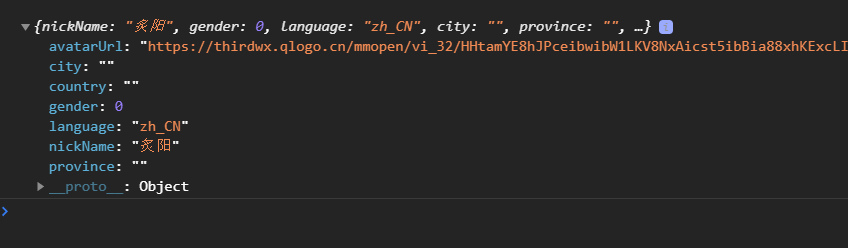
3. Description of incomplete user information
It can be seen from the above figure that some information such as city and country in the user information is empty because of the official adjustment to this interface, as shown below:
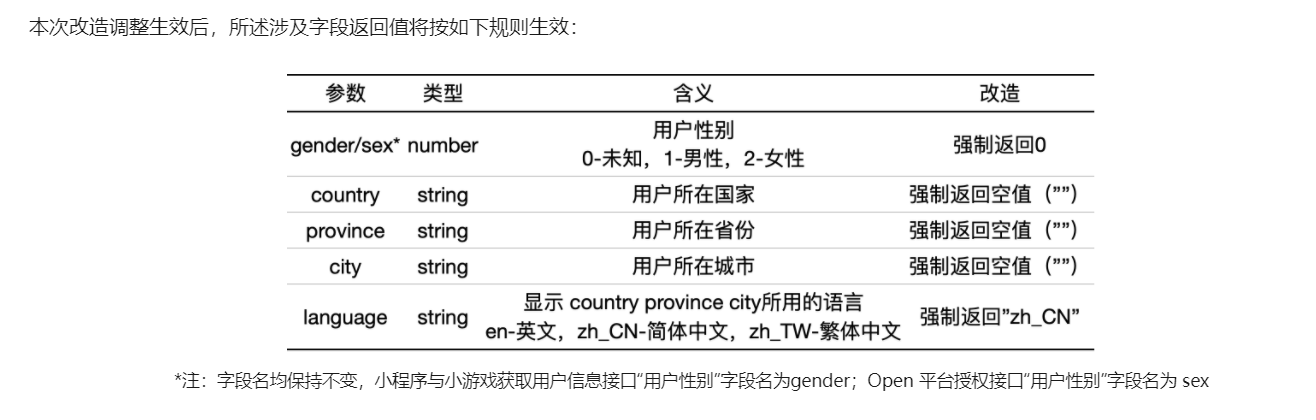
Can refer to Official adjustment announcement
4. Obtain user information from other pages
Take the home Page as an example, first at home JS, add the following code at the same level as Page:
const app = getApp()
Then at home Print user information in onshow function in JS

5. Add user information to the database
In my Continue to write the code for adding information to the database in the login event function of JS, as shown below:
 login() {
    wx.getUserProfile({
      desc: 'Get user information',
      success: res => {
        console.log(res.userInfo)
        var user = res.userInfo
        //Set global user information
        app.globalData.userInfo = user
        //Set local user information
        this.setData({
          userInfo: user
        })

        //Add data to database
        wx.cloud.database().collection('userInfo').add({
          data: {
            avatarUrl: user.avatarUrl,
            nickName: user.nickName
          },
          success: res => {
            console.log(res)
          }
        })
      }
    })
  },
After clicking the button to authorize login, you can view the database
6. Solve the problem of adding users repeatedly
Since the add command will be executed every time you log in, and a piece of data will be added to the database every time you execute it, you need to avoid repeatedly executing the add command and changing my The login function in JS is changed as follows:
  login() {
    wx.getUserProfile({
      desc: 'Get user information',
      success: res => {
        // console.log(res.userInfo)
        var user = res.userInfo
        //Set global user information
        app.globalData.userInfo = user
        //Local user settings
        this.setData({
          userInfo: user
        })

        //Check whether the login has been authorized before
        wx.cloud.database().collection('userInfo').where({
          _openid: app.globalData.user_openid
        }).get({
          success: res => {
            //It was not added before. It is added here
            if (!res.data[0]) {
              //Add data to database
              wx.cloud.database().collection('userInfo').add({
                data: {
                  avatarUrl: user.avatarUrl,
                  nickName: user.nickName
                },
                success: res => {
                  wx.showToast({
                    title: 'Login succeeded',
                    icon: 'none'
                  })
                }
              })
            } else {
              //Already added
              this.setData({
                userInfo: res.data[0]
              })
            }
          }
        })
      }
    })
  },
7, Automatically log in and display user information
1. Find and save user information
First, on app JS to find out whether the user has logged in. If so, find the user information and save it. App JS code is as follows:
// app.js
App({
  onLaunch() {
    wx.cloud.init({
      //Cloud development environment id
      env: 'xzy-cloud-6gucjazc6ba57719'
    }),

    //Call cloud function
    wx.cloud.callFunction({
      name: 'get_openId',
      success: res => {
        //Get user openid
        this.globalData.user_openid = res.result.openid
        // console.log(this.globalData.user_openid)

        //Check whether the user has logged in in the database
        wx.cloud.database().collection('userInfo').where({
          _openid: res.result.openid
        }).get({
          success: result => {
            this.globalData.userInfo = result.data[0]
          }
        })
      }
    })
  },
  //Global data
  globalData: {
    //User openid
    user_openid: '',
    //User information
    userInfo: null
  }
})
Then store the user information in my JS, stored as follows:
onLoad: function (options) {
    this.setData({
      userInfo: app.globalData.userInfo
    })
  },
2. Change of compilation mode
Change the compilation mode to normal compilation mode

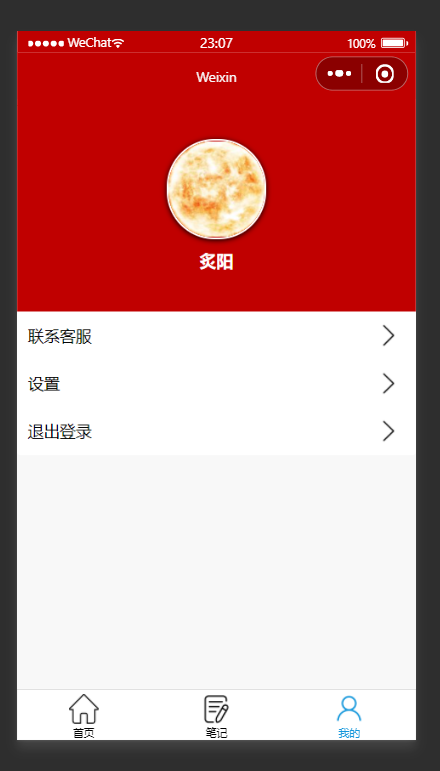
3. Display user information
my. The wxml page structure is as follows:
<block wx:if="{{!userInfo}}">
<!-- Login area -->
<view class="login-container">
<image src="/images/contact-filled.png" class="contact-filled" mode="widthFix"></image>
<button class="btn-login" bindtap="login">One click login</button>
<text class="tip-text">Enjoy more benefits after logging in</text>
</view>
</block>
<block wx:else>
<!-- Nickname area -->
<view class="top-box">
<image src="{{userInfo.avatarUrl}}" class="avatar"></image>
<view class="nickname">{{userInfo.nickName}}</view>
</view>
<!-- Panel area -->
<view class="panel">
<view class="panel-list-item">
<text>Contact customer service</text>
<image src="/images/arrow.png"></image>
</view>
<view class="panel-list-item">
<text>set up</text>
<image src="/images/arrow.png"></image>
</view>
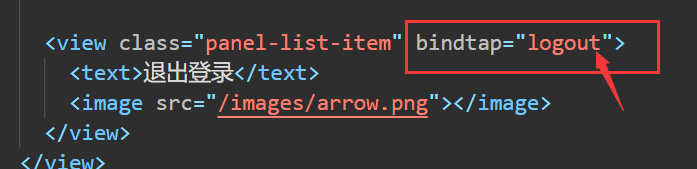
<view class="panel-list-item" bindtap="logout">
<text>Log out</text>
<image src="/images/arrow.png"></image>
</view>
</view>
</block>
my. The wxss style is as follows:
page {
  background-color: #f8f8f8;
}

.login-container {
  height: 900rpx;
  display: flex;
  flex-direction: column;
  align-items: center;
  justify-content: center;
  position: relative;
  overflow: hidden;
}

/* Style of Icon */
.contact-filled {
  width: 150rpx;
  margin-bottom: 16rpx;
}

/* Style of login button */
.btn-login {
  width: 90%;
  border-radius: 100px;
  margin: 15px 0;
  background-color: #c00000;
  color: #f8f8f8;
}

/* The style of the prompt message below the button */
.tips-text {
  font-size: 12px;
  color: gray;
}

/* User information style */
.top-box {
  height: 400rpx;
  background-color: #c00000;
  display: flex;
  flex-direction: column;
  align-items: center;
  justify-content: center;

}

/* User avatar style */
.top-box .avatar {
  display: block;
  width: 90px;
  height: 90px;
  border-radius: 45px;
  border: 2px solid white;
  box-shadow: 0 1px 5px black;
}

/* User nickname style */
.top-box .nickname {
  color: white;
  font-weight: bold;
  font-size: 16px;
  margin-top: 10px;
}

/* Panel style settings */
.panel {
  background-color: white;
  border-radius: 3px;
}

.panel-list-item {
  height: 45px;
  display: flex;
  justify-content: space-between;
  align-items: center;
  font-size: 15px;
  padding: 0 10px;
}

/* Arrow style */
.panel-list-item image {
  width: 60rpx;
  height: 60rpx;
}
8, Log out
Bind the event logout for logout and set it in my JS to write the corresponding event function

9, Renderings