Introduction to spring security
Spring security is a security framework for spring projects. It is also the default technology type of the underlying security module of spring boot. It can realize powerful Web security control. For security control, it provides Authentication,to grant authorization and Protection against common attacks . It has the function of protecting Imperative and Reaction formula First class support for application protection is the de facto standard for protecting Spring based applications. We only need to introduce the Spring boot start security module and make a small amount of configuration to realize powerful security management!
The two main goals of spring security are "authentication" and "authorization" (access control)
-
Certification (who are you)
-
Authorization (what can you do)
-
Attack protection (against identity forgery)
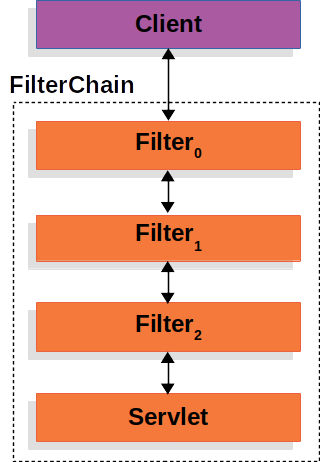
Its core is a set of filter chains, which will be automatically configured after the project is started. The core is the Basic Authentication Filter, which is used to authenticate the identity of users. One filter in spring security handles one authentication method.
Using spring security
directory structure

- SecurityController
@Controller
public class SecurityController {
@RequestMapping({"/","/index"})
public String Hello(){
return "index";
}
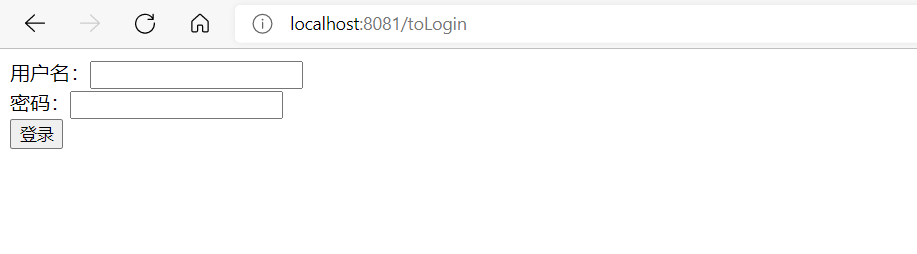
@RequestMapping("/toLogin")
public String toLogin(){
return "views/login";
}
@RequestMapping("/admin/test")
public String admin(){
return "views/admin/admin";
}
@RequestMapping("/user/test")
public String user(){
return "views/user/user";
}
}
1. Import dependency and start project
Create a new springboot project with web, and then POM Import dependencies in the XML configuration file. There is no need to specify the version number here. The version of security will follow the version of springboot
<dependency>
    <groupId>org.springframework.boot</groupId>
    <artifactId>spring-boot-starter-security</artifactId>
</dependency>
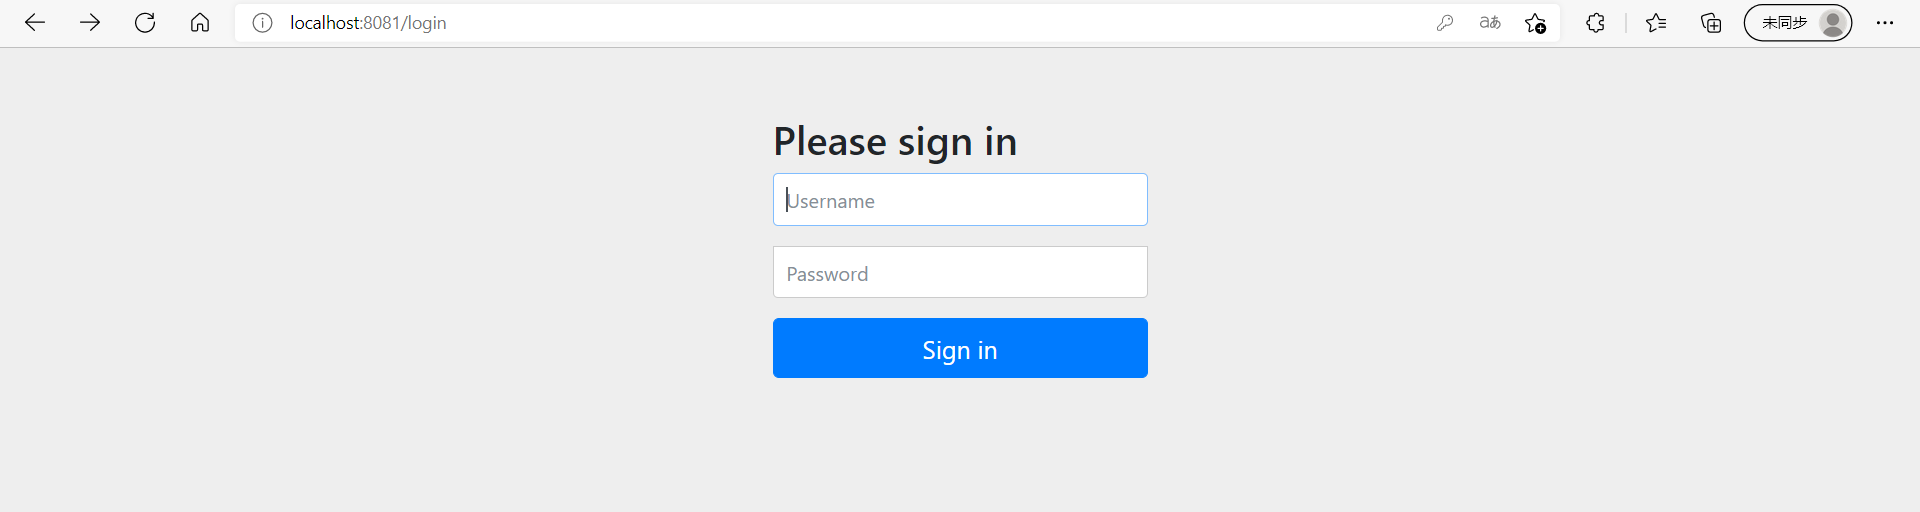
Start the main startup class and you will see a default login page of spring security. The default login name is user and the password is output on the console
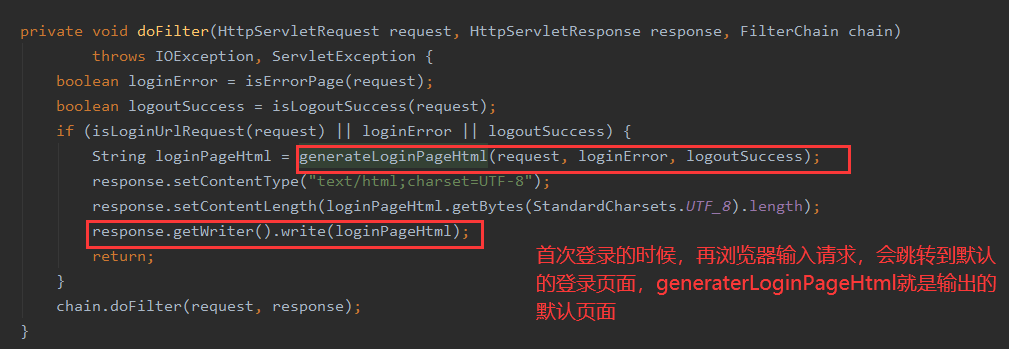
The spring security default login page is generated by generateLoginPageHtml in the DefaultLoginPageGeneratingFilter class
2. Customize the login page
To customize the login page, first we need to create a class to inherit the WebSecurityConfigureAdapter class, implement its configure(HttpSecurity http), set some settings related to web page requests, and add @ EnableWebSecurity to start web security annotation on the class
This aspect can use chain programming when setting parameters, which will be added later It can be configured continuously. We use the formLogin method under http to set our login page
@EnableWebSecurity
public class SecurityConfig extends WebSecurityConfigurerAdapter {
    @Override
    protected void configure(HttpSecurity http) throws Exception {
        http.csrf().disable(); //When csrf is turned off, it is turned on by default. After it is turned on, our login will be blocked, resulting in login failure
        http.formLogin()
                .loginPage("/toLogin") //Set default login page
                .usernameParameter("username") //Set the user name parameters submitted from the front end
                .passwordParameter("password") //Set the password parameters submitted from the front end
                .defaultSuccessUrl("/index") //Setting the default login page will jump to the path before login
//                . successForwardUrl("/index") / / after successful login, the page will jump to this path regardless of the previous request
                .failureForwardUrl("/toLogin") //Set the request after login failure
                .loginProcessingUrl("/login"); //Set login request path
    }
}
- Start project access
3. User authorization
In the web page, some specific pages can only be accessed with corresponding permissions. For example, you can view the corresponding pages only by opening vip, and only vip can skip advertisements when watching videos. Different access permissions can be set for different requests
Add code in front of the previous custom login page
//Multiple request paths can be entered in the brackets of ant matchers, separated by commas
http.authorizeRequests() //Set permissions for access requests
        .antMatchers("/") //The default home page allows all users to access it without logging in
            .permitAll()
        .antMatchers("/admin/*") //The page under admin can only be accessed by users with admin role
            .hasRole("admin")
        .antMatchers("/user/*") //The page under user can only be accessed by users with the user role
            .hasRole("user");
- Start the project to access index HTML, everyone can access it, but the test pages of admin and user below cannot be accessed without login, and will directly jump to the login page
4. User authentication
User authentication is that when users log in, they verify the user name and password and give them corresponding permissions, view the information of all users from the database, then authenticate all user information, and then log in users can obtain corresponding permissions to access the corresponding pages.
There is no connection to the database here. If the normal development needs to connect to the database, the user's information can be found through the database for authentication and authorization (Note: plaintext password authentication cannot be used during password authentication, which is unsafe, so encryption is required)
@Override
protected void configure(AuthenticationManagerBuilder auth) throws Exception {
    //Use BCryptPasswordEncoder to encrypt the password
    auth.inMemoryAuthentication().passwordEncoder(new BCryptPasswordEncoder())
            .withUser("zhu") //Add admin and user permissions to users
                .password(new BCryptPasswordEncoder().encode("123456")).roles("admin","user")
            .and()
            .withUser("admin") //Add admin permissions to admin users
                .password(new BCryptPasswordEncoder().encode("123456")).roles("admin")
            .and()
            .withUser("user") //Add user permission to user
                .password(new BCryptPasswordEncoder().encode("123456")).roles("user");
}
- After starting the project, we log in with the admin account and access the results of the admin test user and the user test user respectively
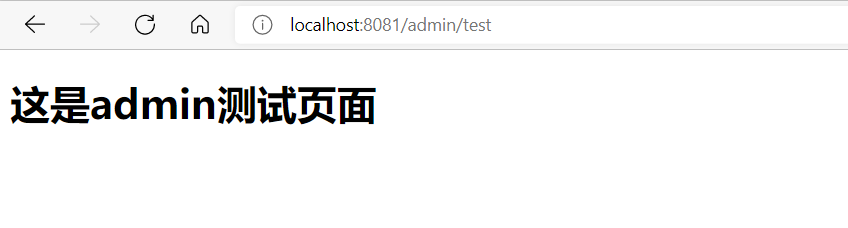
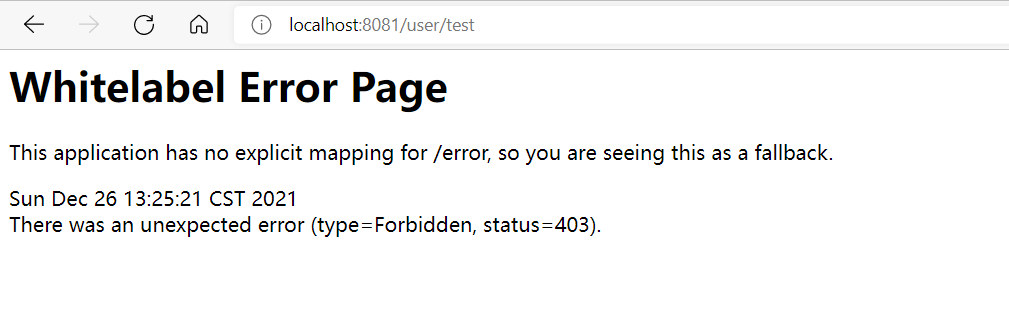
It can be seen that we can access the admin test page, but accessing the user test page shows that we have no permission, which indicates that the test is correct. You can also see the corresponding effect by logging in with user and zhu users
5. Logout and button display
Logoff is to delete the user's information from the cookie of the website, and the user has no permission. We don't need to log out. We just need to define an a tag, and then set the link path to '/ logout', and spring security will automatically help us log out
//Log off the user. After logging off successfully, jump to / request
http.logout().logoutSuccessUrl("/");
<a th:href="@{/logout}">cancellation</a>
- However, in our actual development, if the user does not log in, we will display the login button. If the user logs in, we will display the 'user name,' welcome and logout button. Moreover, the functional modules displayed by different roles are also different. We can use the Thymeleaf tag to complete it
Add xmlns: sec to the header of html=“ http://www.thymeleaf.org/thymeleaf-extras-springsecurity5 ", complete the corresponding display through the SEC tag
<h1>home page</h1>
<div id="container">
    <div>
        <!--Judge whether the user logs in. If not, the login button will be displayed-->
        <a sec:authorize="!isAuthenticated()" th:href="@{/toLogin}">
            Sign in
        </a>
        <span sec:authorize="isAuthenticated()">
            <span sec:authentication="name"></span>user,Welcome
        </span>
        <!--Judge whether the user logs in, and the logout button will be displayed after logging in-->
        <a sec:authorize="isAuthenticated()" th:href="@{/logout}">
            cancellation
        </a>
    </div>
    <div>
        <!--Judge the user's role and display the corresponding module-->
        <a sec:authorize="hasRole('admin')" th:href="@{/admin/test}">
            admin Test page
        </a>
        <a sec:authorize="hasRole('user')" th:href="@{/user/test}">
            user Test page
        </a>
    </div>
</div>
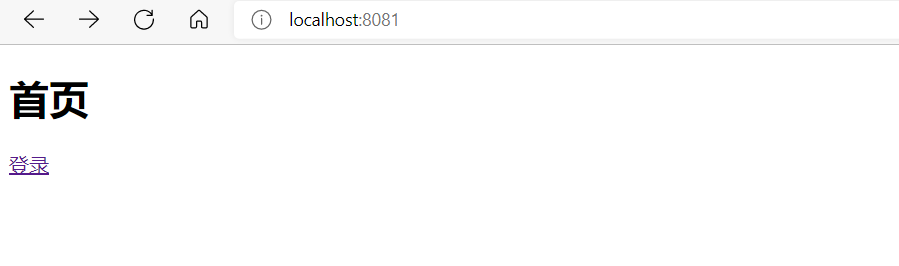
- After we start the project, visit index HTML. When we don't log in by default, there is only the login button
- Then we log in with the admin user, and you can see that the 'admin user, welcome' and the logout button and the corresponding module are displayed at the bottom of the home page. The interface function module displayed by logged in user is opposite to that of admin

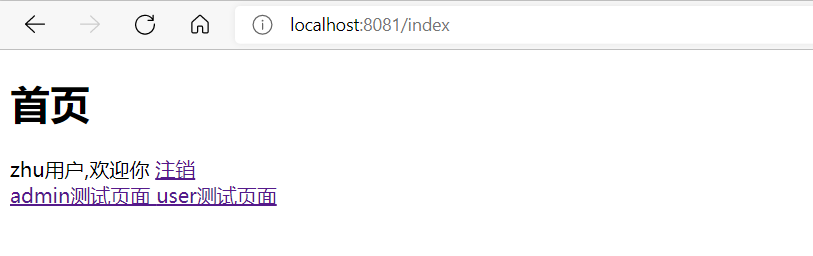
- After logging out, we logged in with zhu user and found that both function modules can be displayed
6. Remember me
In the login interface of the web page, there will be a function to remember me. Its purpose is to save our users in cookie s for a long time to avoid users logging in for a short time
The function of remembering me is very simple. Go to http to open the function of remembering me
//Turn on the remember me function and set the save time to one day
http.rememberMe().tokenValiditySeconds(60*60*24).rememberMeParameter("rememberMe");
- Next, you only need to add a check box in the front end, and then match the name with the parameter in the rememberMeParameter on the back end
<input type="checkbox" name="rememberMe">Remember me<br>
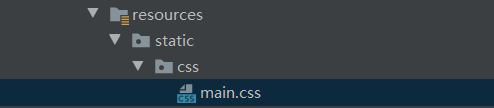
7. Release static resources
In the development of projects, we usually put static resources in static. For example, there is a main under the css package here css, we need to release it. We just need to rewrite the config method and release the corresponding static resources through ant matchers
@Override
public void configure(WebSecurity web) throws Exception {
    web.ignoring().antMatchers("/css/**");
}
Here is a simple integration of SpringSecurity and SpringBoot. For more detailed process and content, please refer to the official document: Spring Security After that, I will also share the use of spring security. Thank you for watching!!!