1, Introduction to DataBinding
DataBinding is a tool support library launched by Google in 2015. With the help of this library, the interface components in the layout can be bound to the data sources in the application in a declarative format. DataBinding supports two-way binding, which can greatly reduce setText, findViewById and other codes. Two way binding, that is, when the data changes, the interface changes, and conversely, the content of the interface will be updated to the data synchronously.
DataBinding is widely used in MVVM mode. The two-way binding mechanism realizes the synchronous update of View and Model.
2, DataBinding usage
DataBinding is generally used in conjunction with other frameworks such as LiveData and ViewModel. Here is a simple example to show how to use it alone.
public class User extends BaseObservable {

    private String name;
    private String age;

    public User(String name, String age) {
        this.name = name;
        this.age = age;
    }

    @Bindable // BR generate a name value tag
    public String getName() {
        return name;
    }

    public void setName(String name) {
        this.name = name;
        notifyPropertyChanged(BR.name); // BR file generated by APT
    }

    @Bindable // BR generate pwd value tag
    public String getAge() {
        return age;
    }

    public void setAge(String age) {
        this.age = age;
        notifyPropertyChanged(BR.age); // BR file generated by APT
    }
}
Modify the layout file and wrap the layout with layout. The data tag is used to define the User class above the data source. In the control, @ {} can be used for binding, @ {} is one-way binding and @ = {} is two-way binding.
<layout xmlns:android="http://schemas.android.com/apk/res/android"
    xmlns:app="http://schemas.android.com/apk/res-auto"
    xmlns:tools="http://schemas.android.com/tools">
    <data>
        <variable
            name="user"
            type="com.wyq.databinding_java.User" />
    </data>
    <!-- Above is DataBinding For internal use, note: Android View System does not know  -->
    <!-- Android View All the contents below the system will give Android draw  -->
    <LinearLayout
        android:layout_width="match_parent"
        android:layout_height="match_parent"
        android:orientation="vertical">

        <TextView
            android:id="@+id/tv1"
            android:layout_width="wrap_content"
            android:layout_height="wrap_content"
            android:text="@={user.name}"
            android:textSize="30sp" />

        <TextView
            android:id="@+id/tv2"
            android:layout_width="wrap_content"
            android:layout_height="wrap_content"
            android:text="@={user.age}"
            android:textSize="30sp" />
    </LinearLayout>

</layout>
Bind and simulate data update in Activity, so as to complete the two-way binding of data and UI.
public class MainActivity extends AppCompatActivity {

    @Override
    protected void onCreate(Bundle savedInstanceState) {
        super.onCreate(savedInstanceState);
        final ActivityMainBinding binding = DataBindingUtil.setContentView(this, R.layout.activity_main);
        User user = new User("jack", "25");
        binding.setUser(user); // The binding relationship must be established, otherwise it will have no effect
        // Modify the User's data -- > View (the UI control will refresh automatically)
        new Thread(new Runnable() {
            @Override
            public void run() {
                for (int i = 0; i < 10; i++) {
                    try {
                        Thread.sleep(1000);
                        user.setName(user.getName() + "Ha"); // view.setText(text);
                        user.setAge(user.getAge() + "Ha");
                    } catch (InterruptedException e) {
                        e.printStackTrace();
                    }
                }
            }
        }).start();
        user.setName("marry");
    }
}
DataBinding is very simple to use. The simpler it is, the more code the framework has completed for us. There is no doubt that the code completed by the framework is automatically generated through apt technology.
3, DataBinding source code
Layout change
First, look at the changes after the layout file is labeled with layout and other labels and processed by the framework?
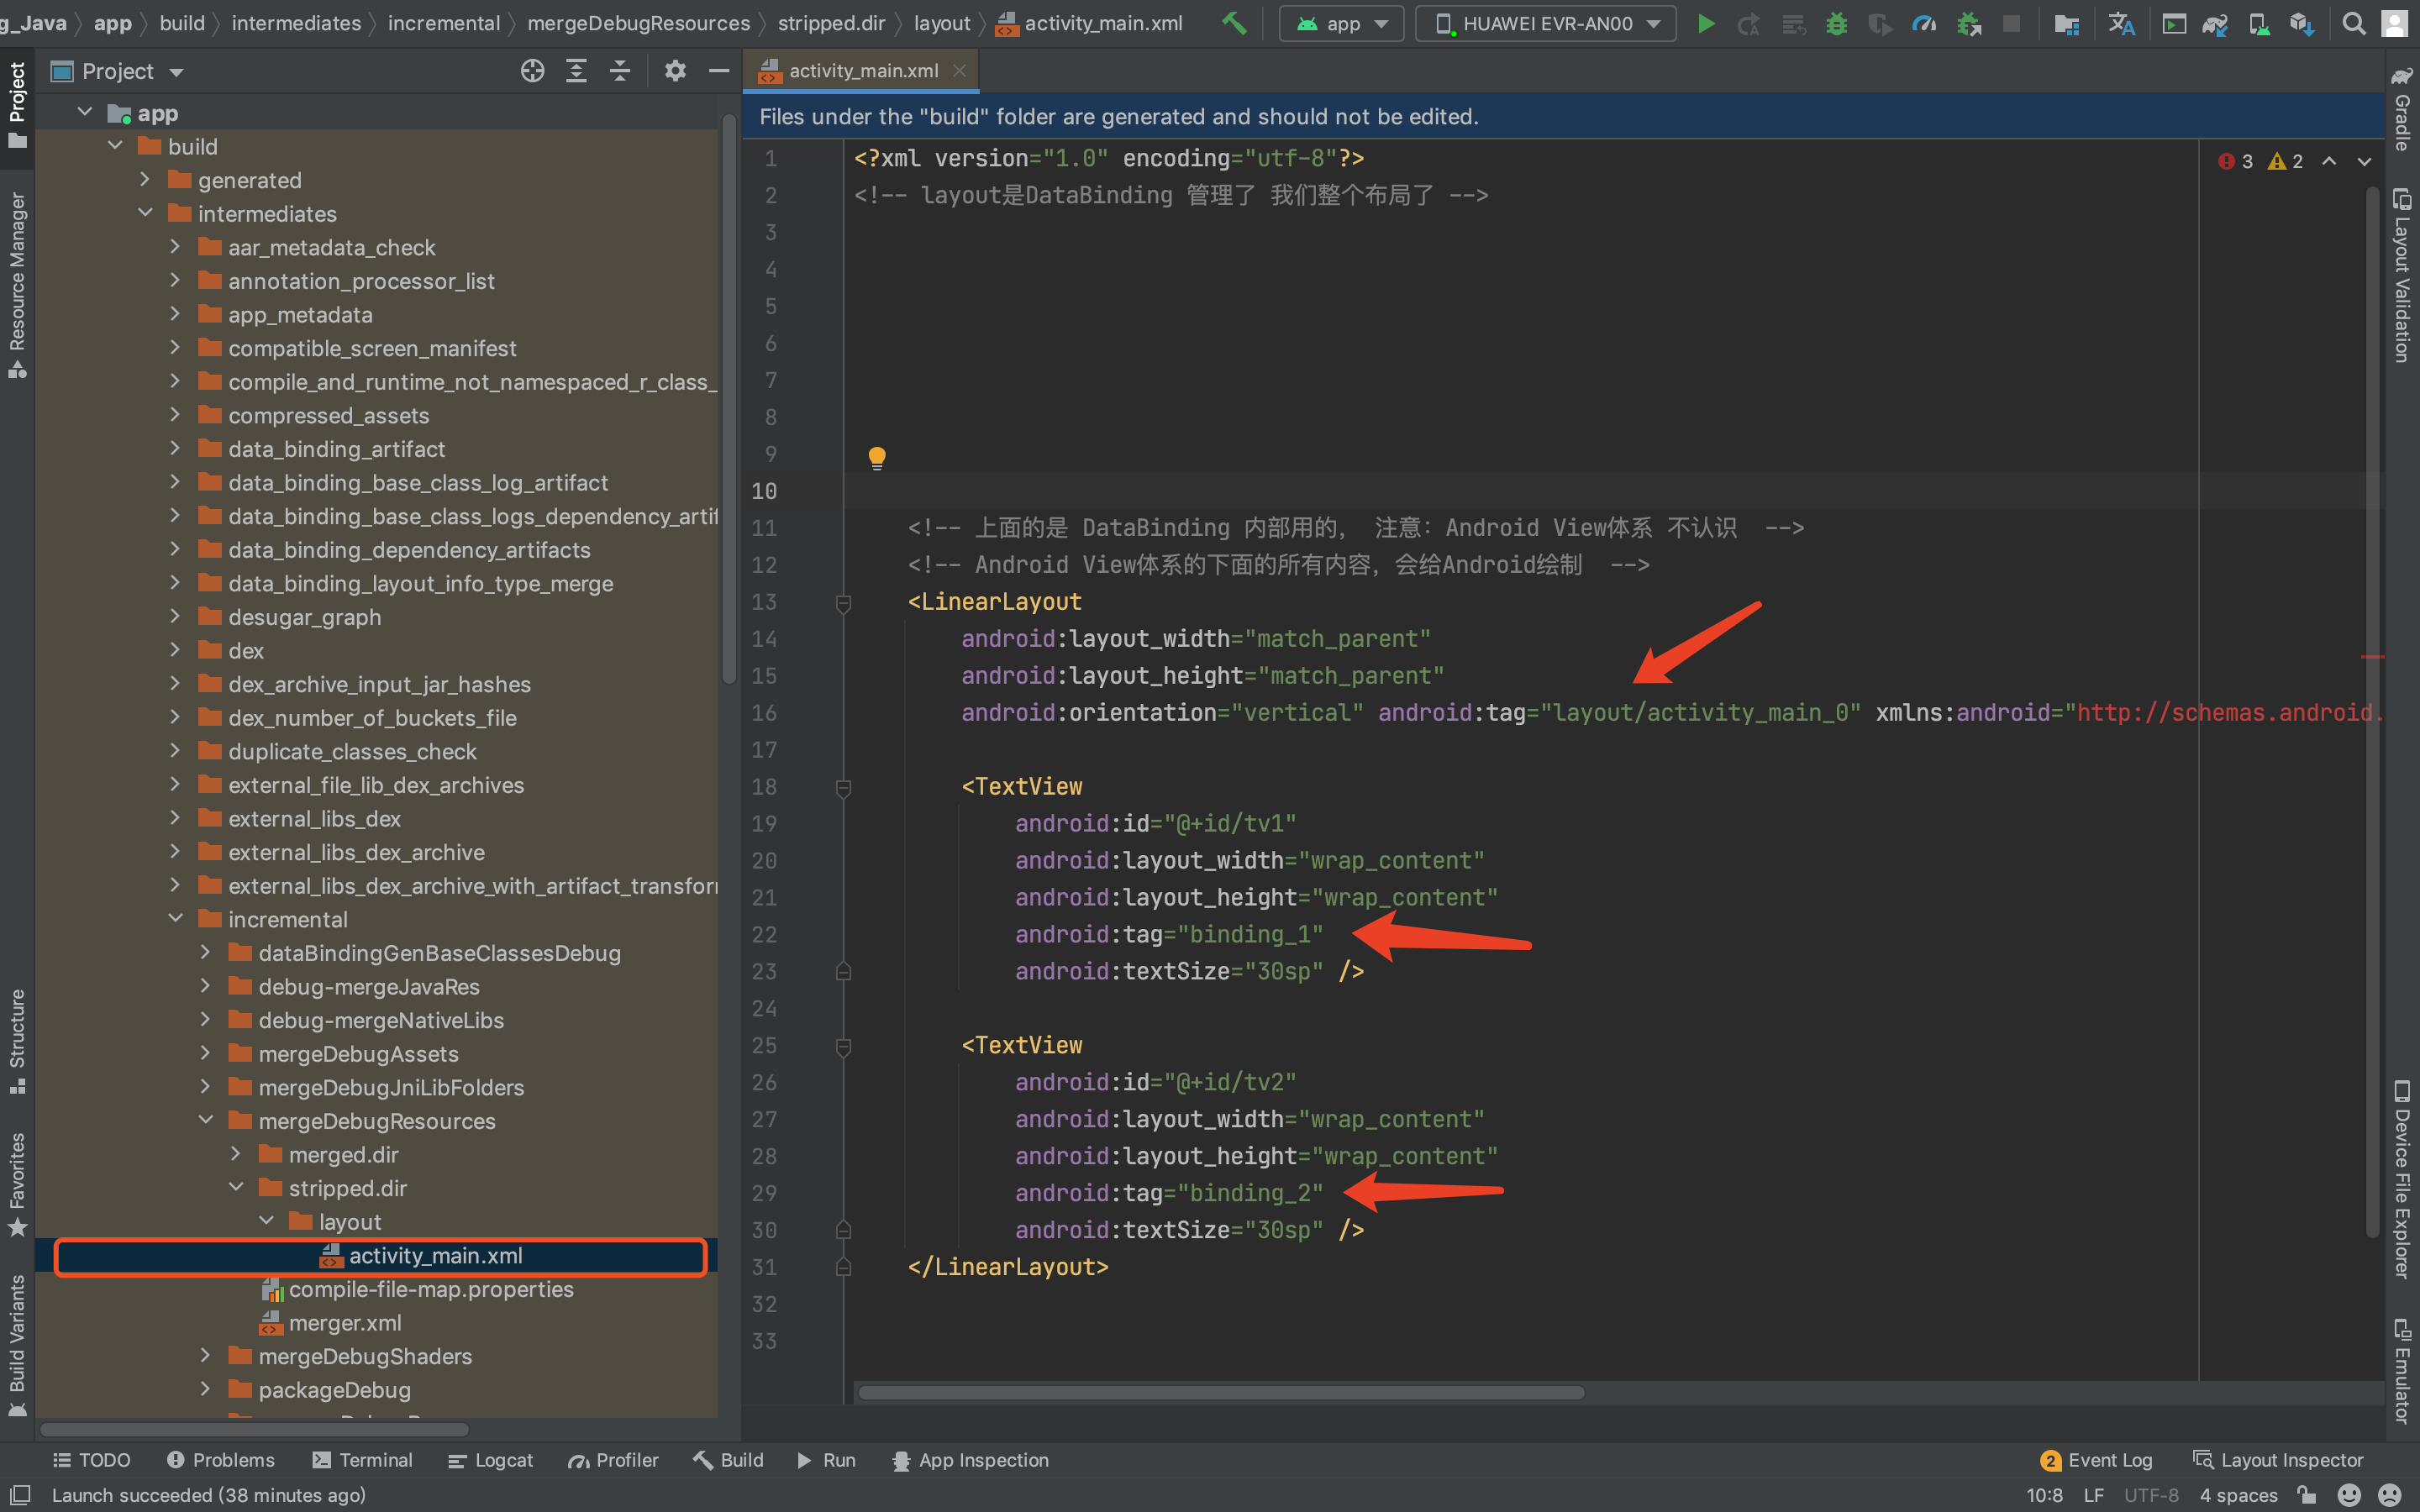
Path: app\build\intermediates\incremental\mergeDebugResources\stripped.dir\layout\activity_main.xml
Path: app\build\intermediates\data_binding_layout_info_type_merge\debug\out\activity_main-layout.xml
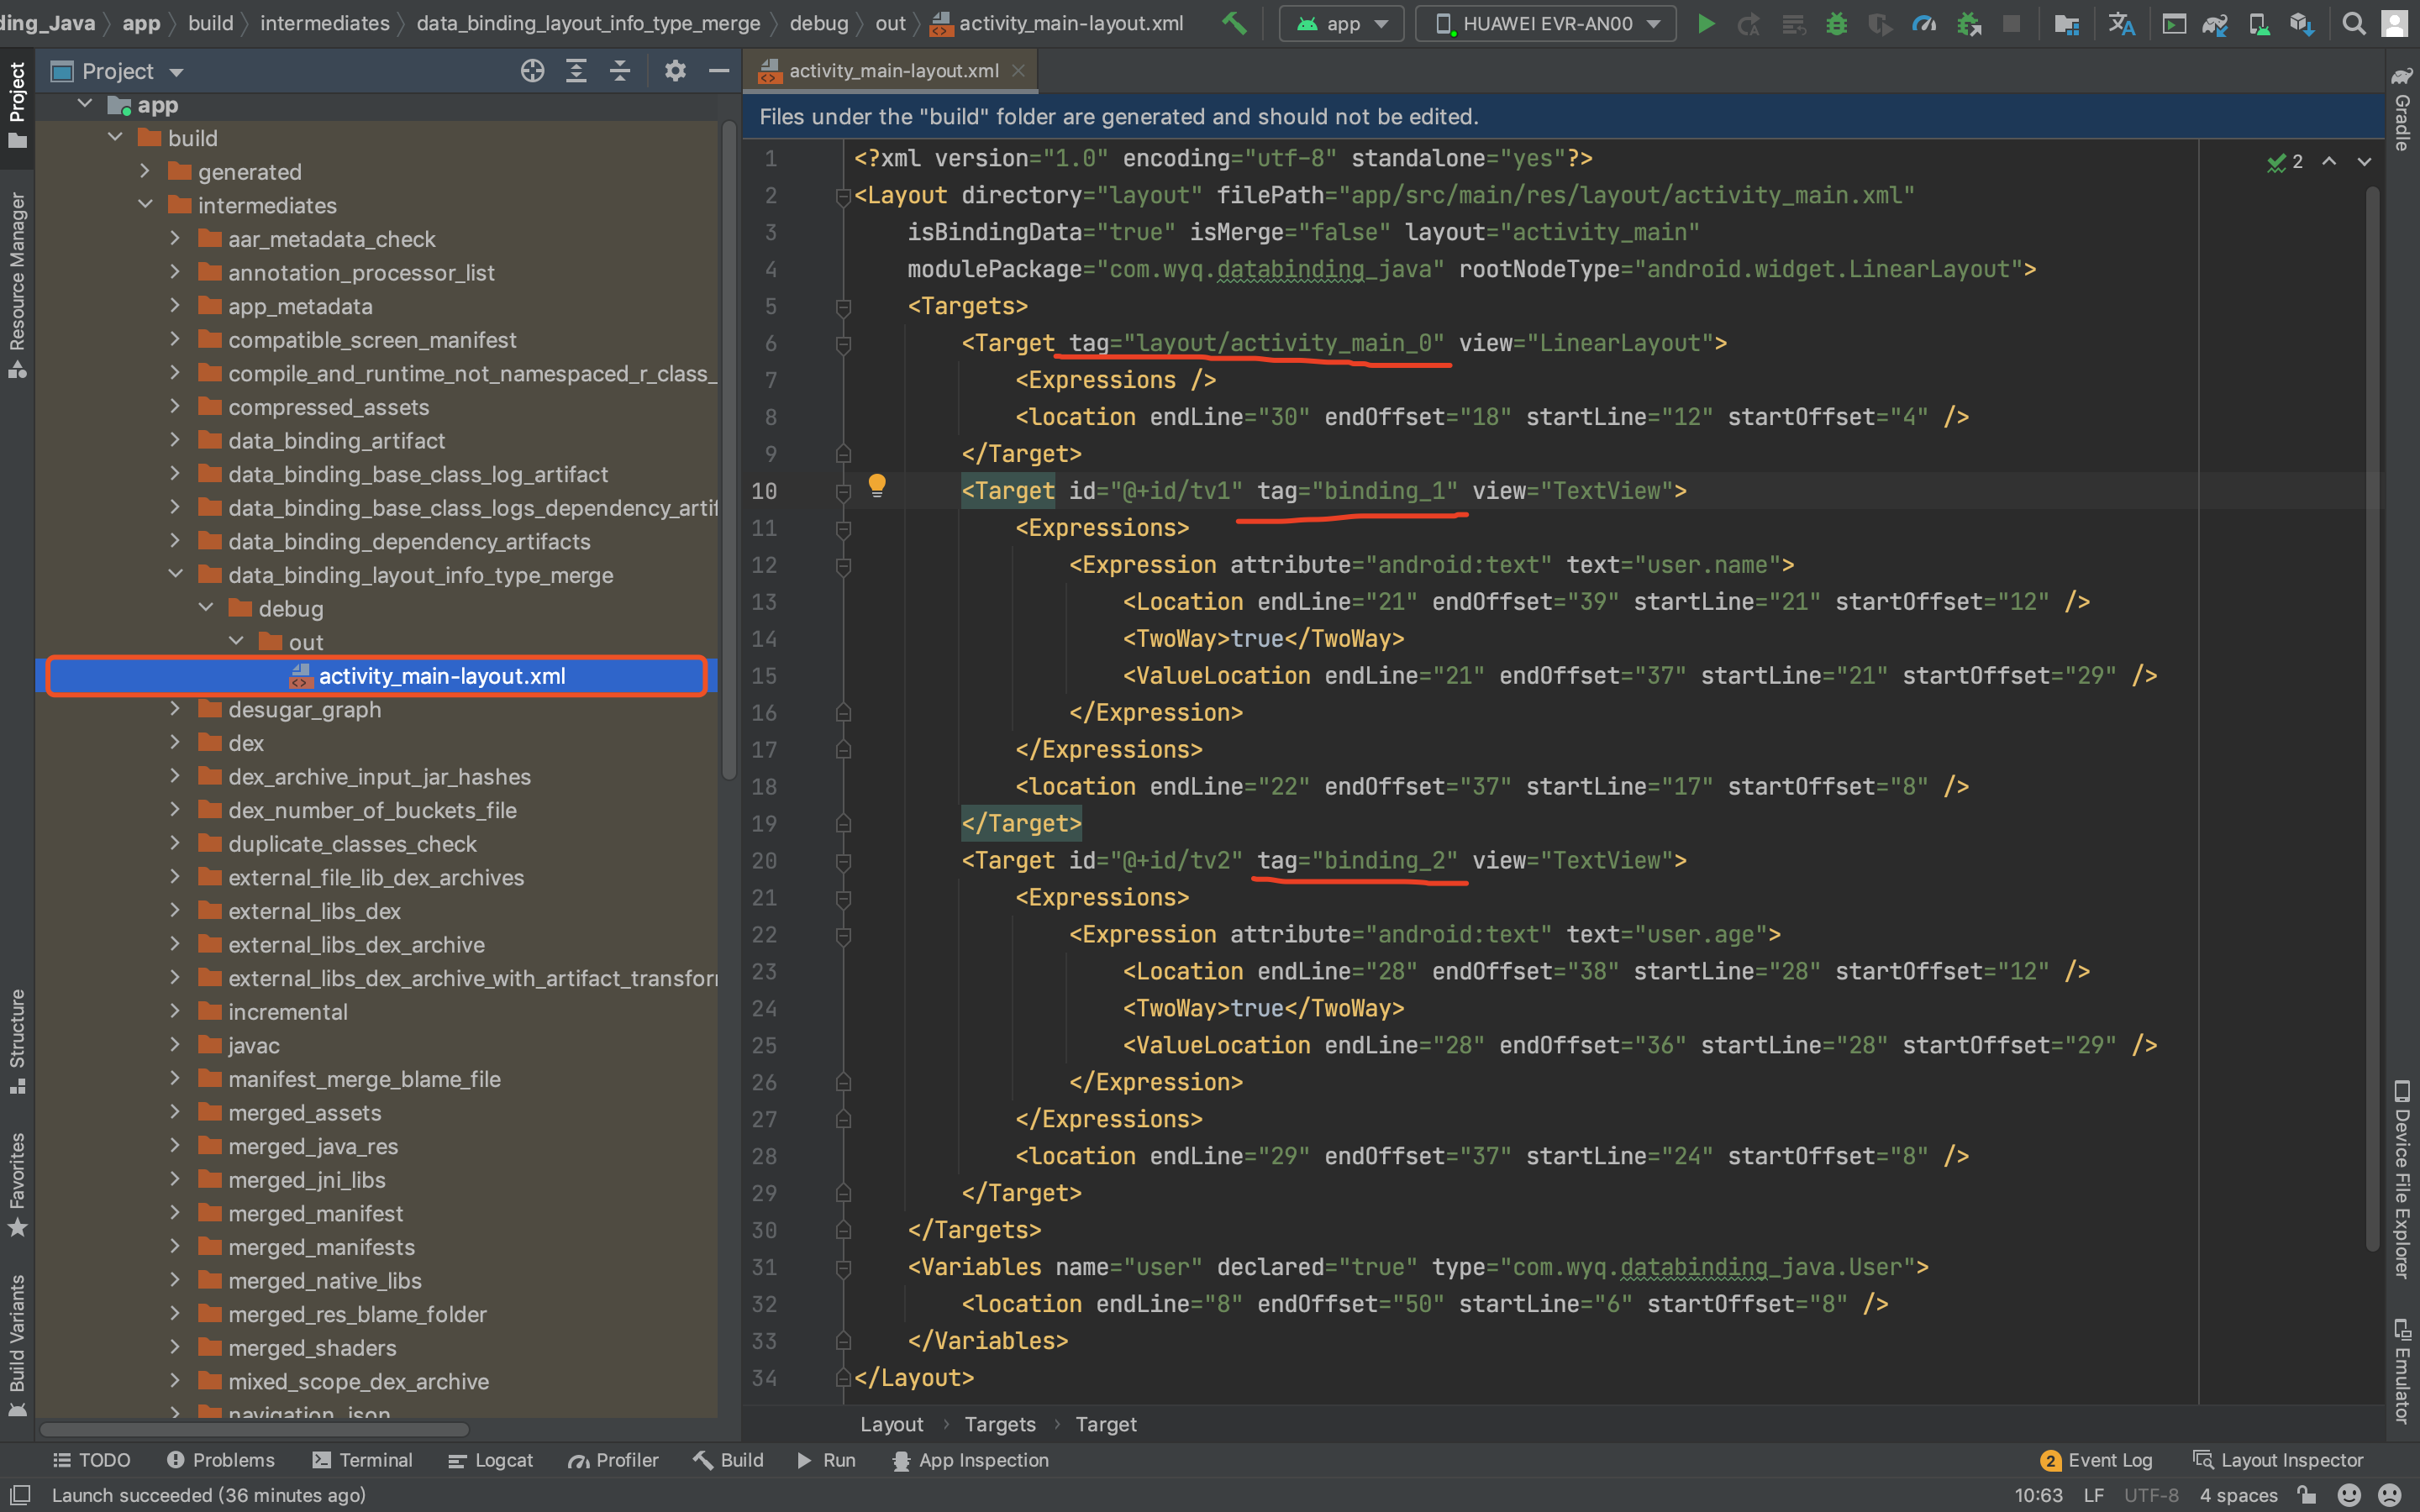
According to the above two figures, you can see that the original layout file is divided into activities_ Main-layout.xml and activity_main.xml.
activity_ Each control in main.xml adds a tag attribute.
activity_main-layout.xml defines multiple Target tags. In fact, the definition of these targets is to define the corresponding tag and associate the tag with activity_ Corresponding to the id of the corresponding View in the main.xml layout; The Expression tag marks the control properties and data types; TwoWay tag indicates whether to bind in both directions; The Variables tag marks the absolute path of the data type;
DataBindingUtil
When we use Activity, we call DataBindingUtil.setContentView() to bind the layout to see this method.
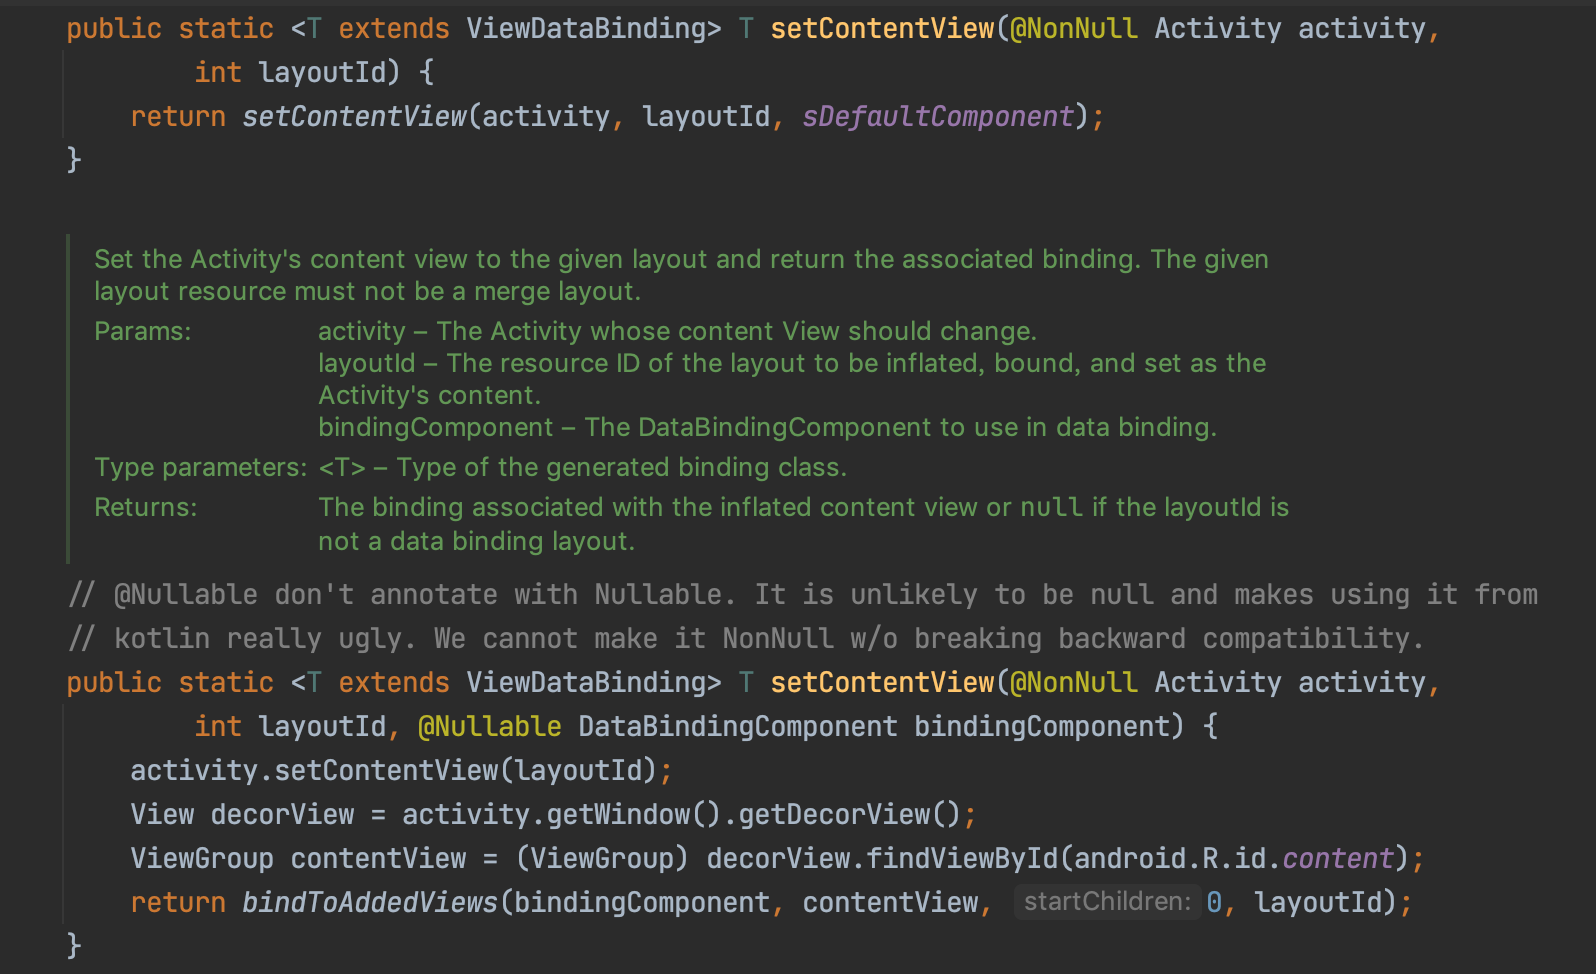
The setContentView() method of DataBindingUtil mainly calls the setContentView of the Activity to set the layout, and adds the corresponding View to the binding. Finally, bindToAddedViews() is called.
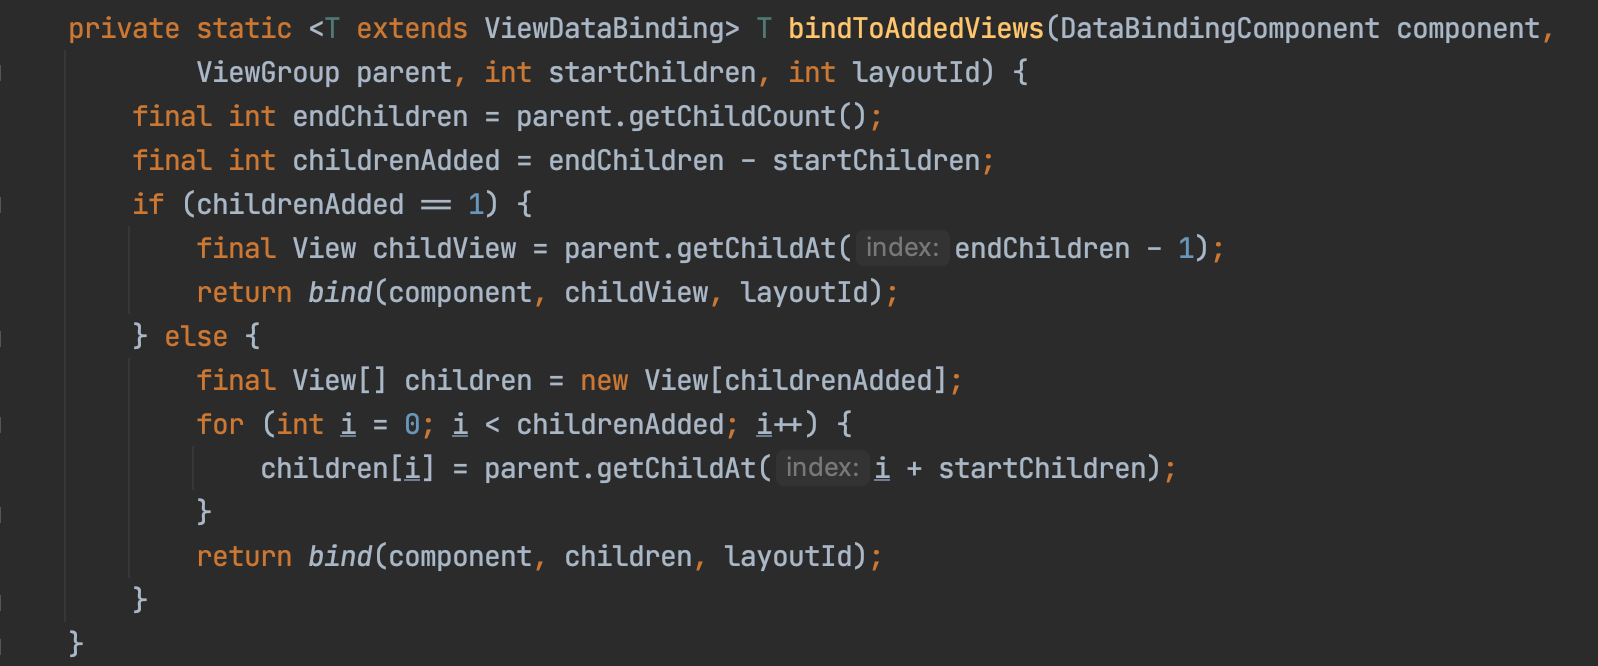
The child View obtained by parent.getChildCount is the LinearLayout in the above layout file, so there is only one child View. Finally, it will go to the bing() method in if.


The smapper here is the databindmapper object. Its implementation class is databindmapperimpl, which is generated by the annotation processor. The sMapper.getDataBinder() here is actually the getDataBinder() method of calling MergedDataBinderMapper, and the data in sMapper is actually the image added by the addMapper() method calling its parent class MergedDataBinderMapper in the constructor of DataBinderMapperImpl.
There are two databindidemapperimpl classes in DataBinding. One inherits mergeddatabindidemapper under the androidx.databinding package, and the other inherits mergeddatabindiermapper at com.wyq.databinding_java package, directly inherit databindmapper.

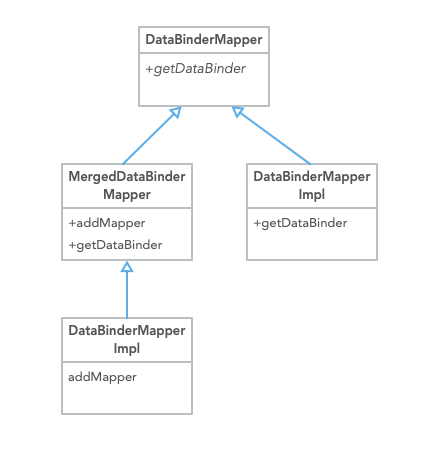
Next, let's look at mergeddatabinder mapper. Getdatabinder()
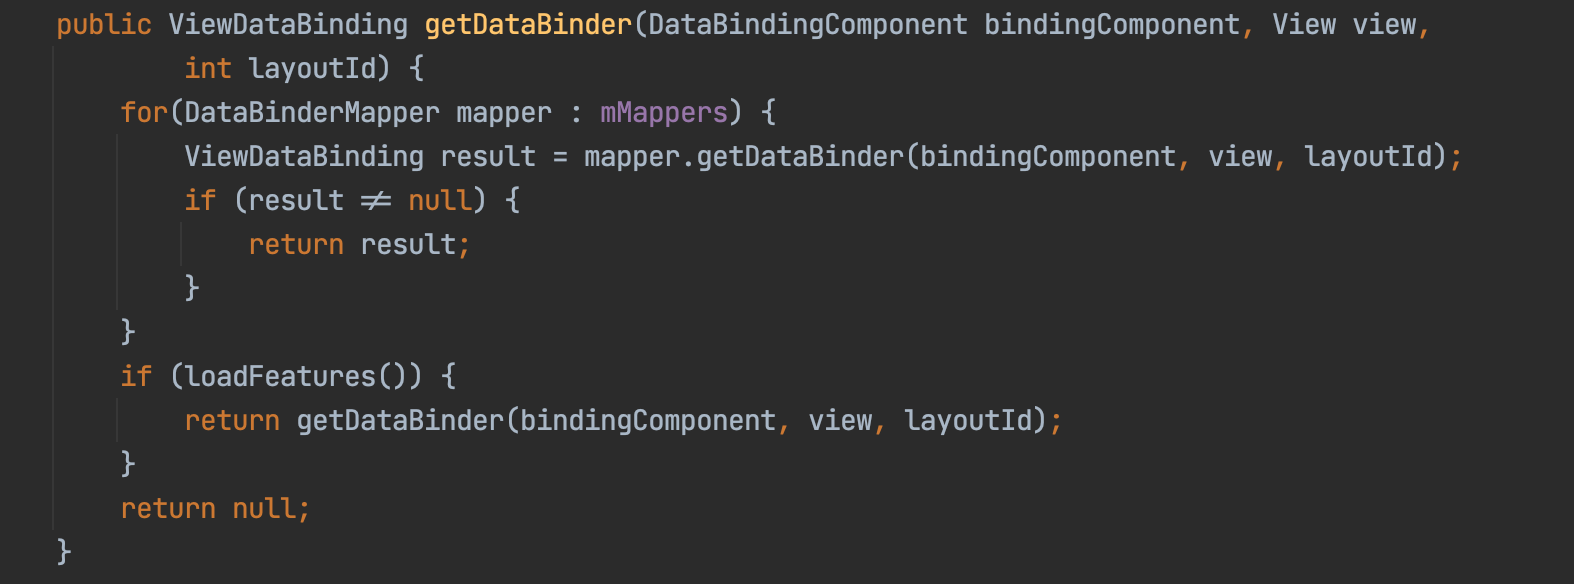
The data in the mMappers collection is the object added by the invocation of the addMapper method from the constructor of androidx.databinding.DataBinderMapperImpl, so the mapper here is com.wyq.databinding_. Java.databindremapperimpl object.
Next is com.wyq.databinding_java.DataBinderMapperImpl.getDataBinder()
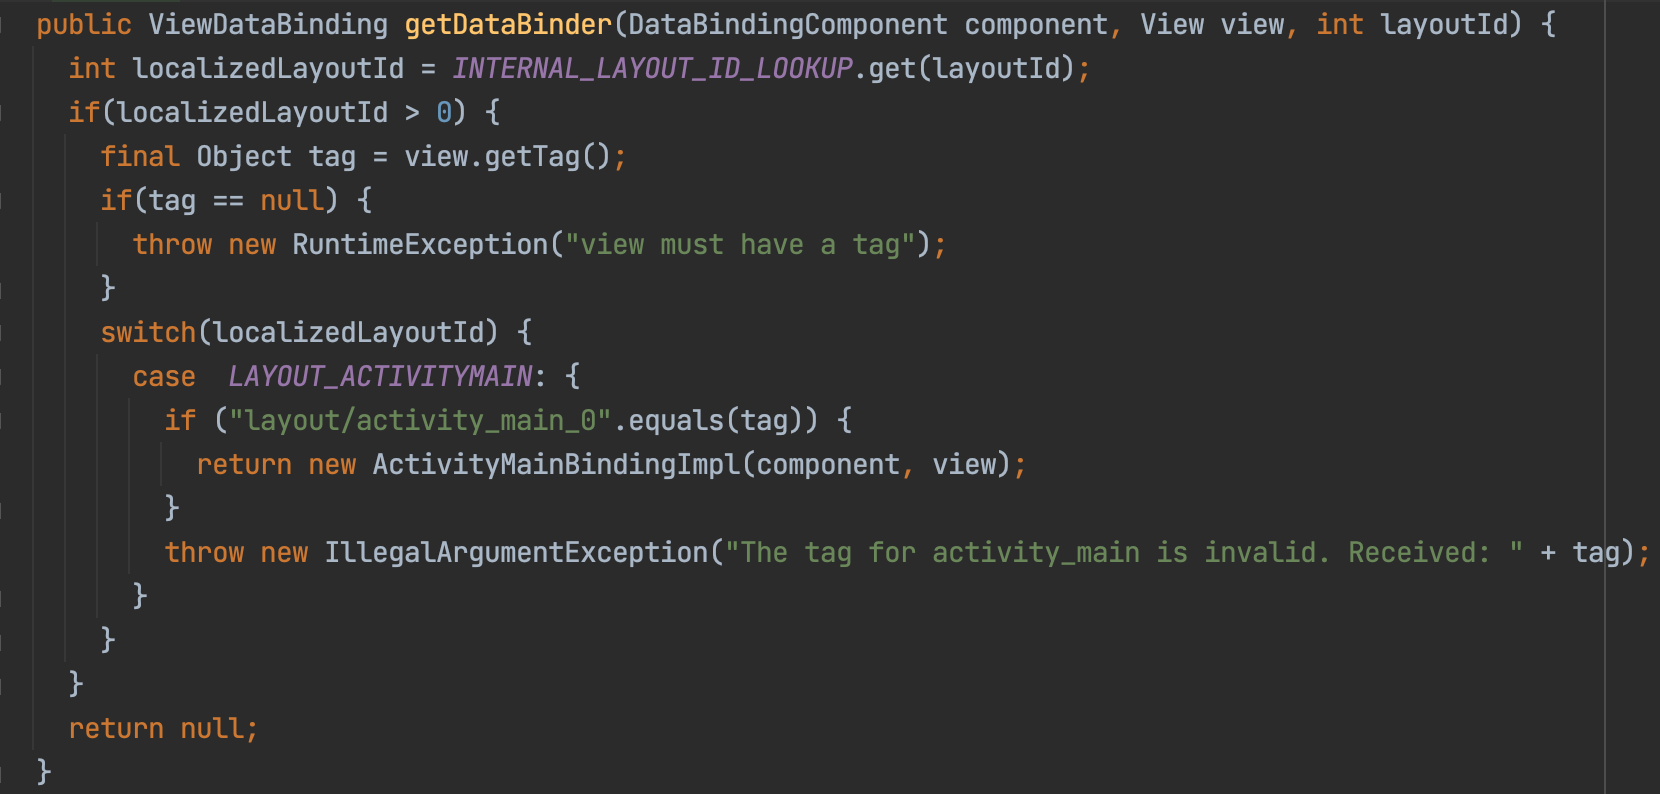
If this is the top-level View of the layout, for example, the tag is layout/activity_main_0, a new ActivityMainBindingImpl object will be created. In fact, this tag can be viewed from the front activity_ See the tag of LinearLayout in the main.xml layout.
Next is the ActivityMainBindingImpl object from new
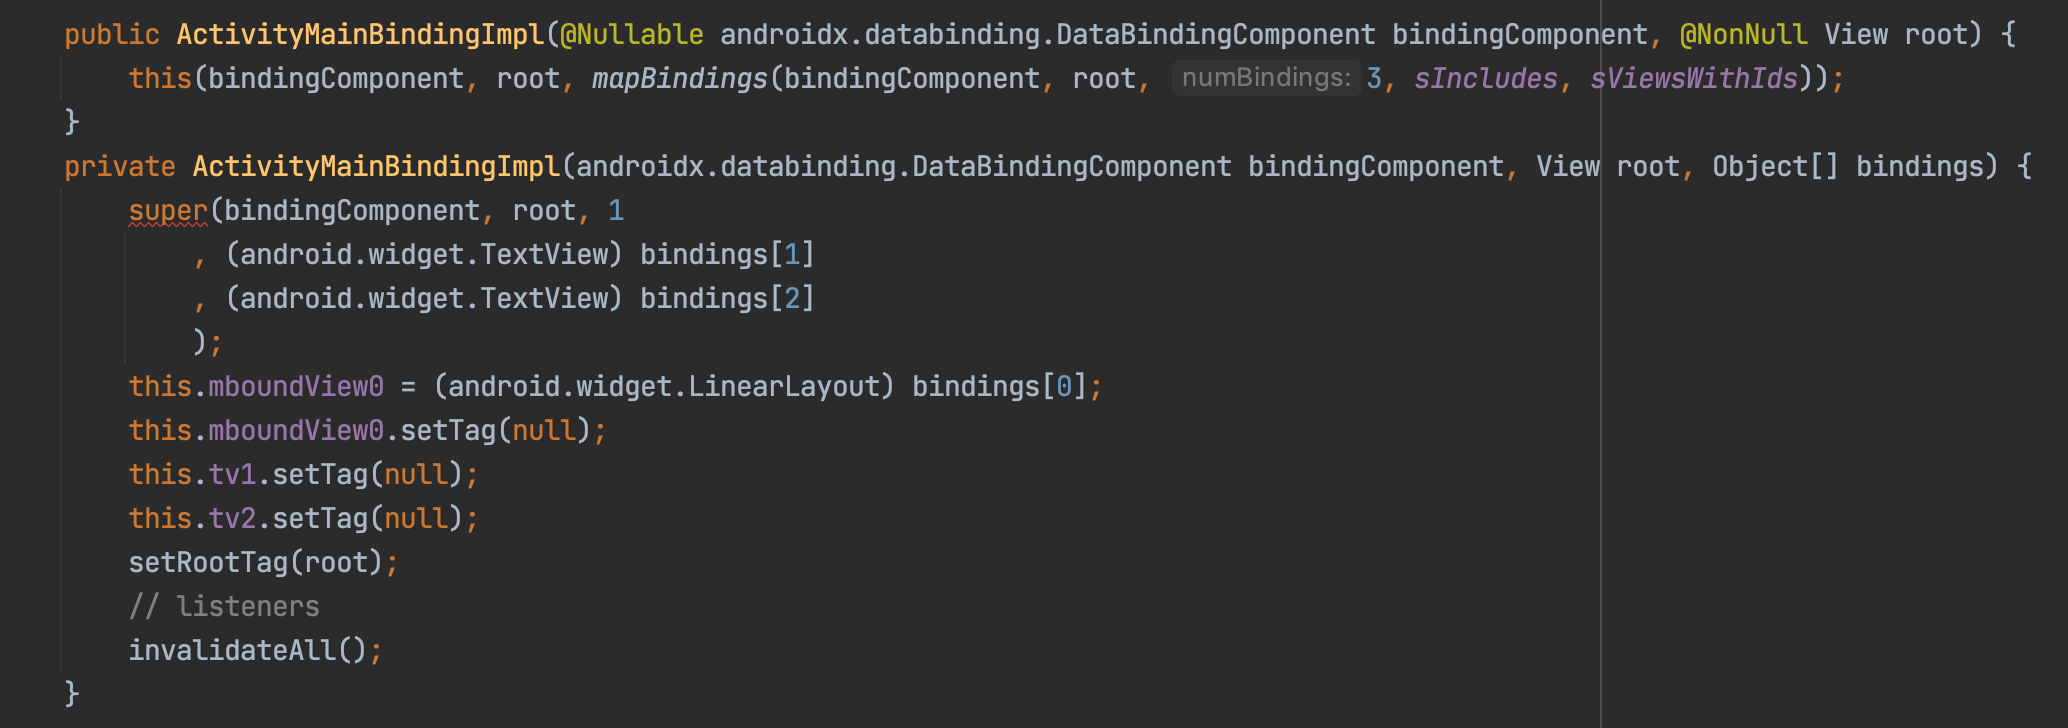
The constructor of ActivityMainBindingImpl will perform some View binding operations, and bind the View retrieved through the tag with the corresponding View property in ActivityMainBindingImpl.
Here, a mapBindings method will be called, and the third parameter is a 3, which refers to activity_ There are three nodes in the main.xml layout file. mapBindings will return an Object[]bindings array.

The main work of ViewDataBinding.mapBindings() is to save the View in the layout in the corresponding bindings array, and then take out the data in this array and assign it to the View in ActivityMainBindingImpl. In this way, the View is obtained to prepare for the next step of setting data.
Set data
In the above example, we use binding.setUser to create a binding to see how to implement it
ActivityMainBinding binding = DataBindingUtil.setContentView(this, R.layout.activity_main);
User user = new User("jack", "25");
binding.setUser(user);
ActivityMainBindingImpl.setUser

ViewDataBinding.updateRegistration()
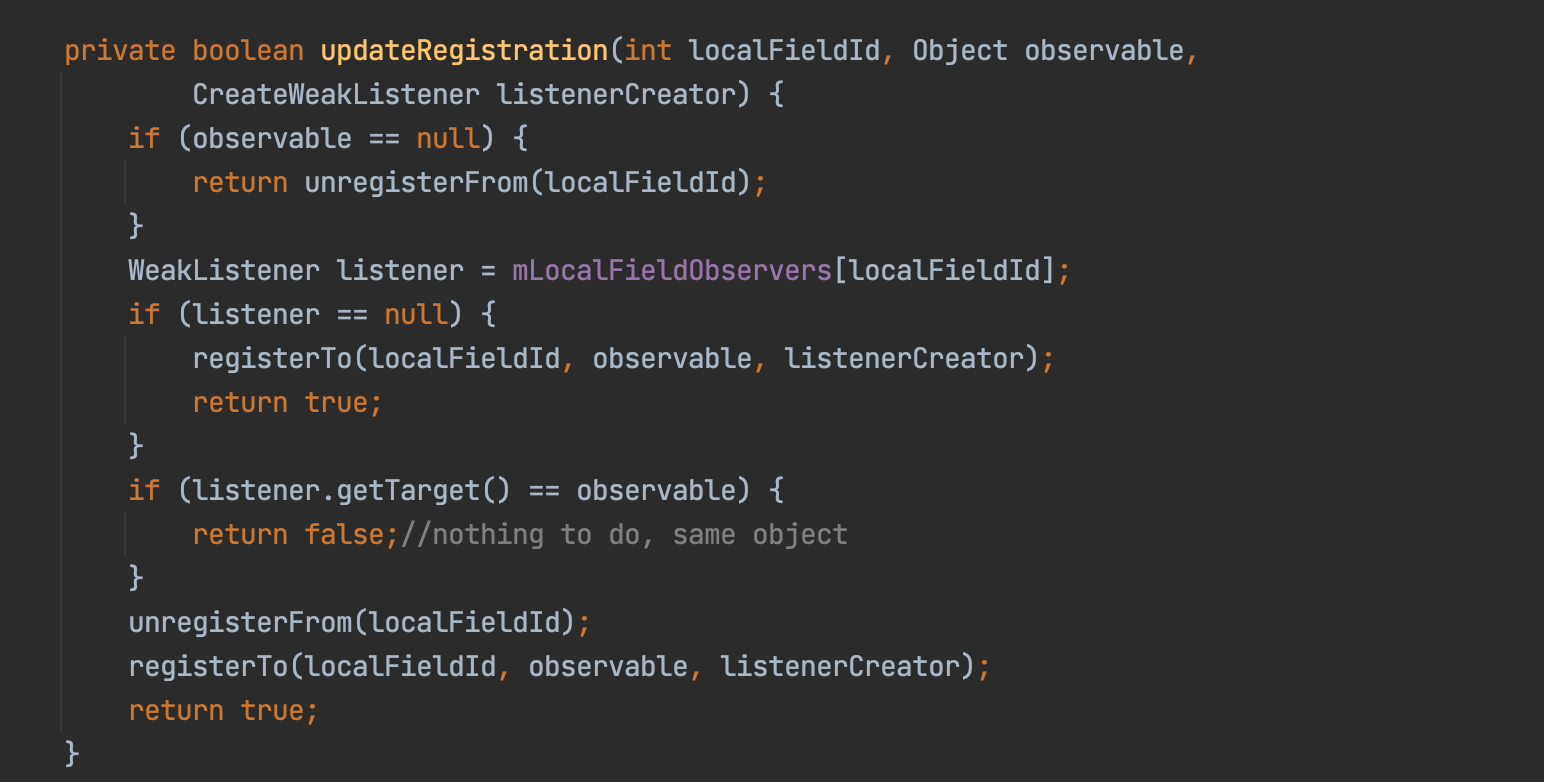
The localfieldid here is 0. This id is actually the id in the BR file, which is the corresponding static final attribute in the BR file. Make an index according to the attribute value of each attribute of BR and store the listener corresponding to each BR attribute. The second is the observer object, such as the passed in ViewModel object.
ViewDataBinding.registerTo()
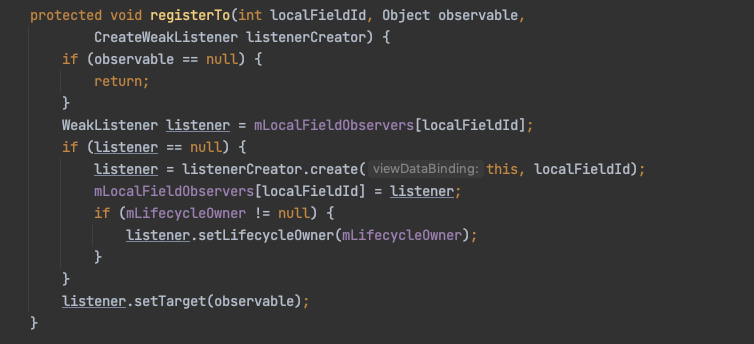
The registerTo method actually adds the observer of Activity and the observed of User to the ObservableReference.
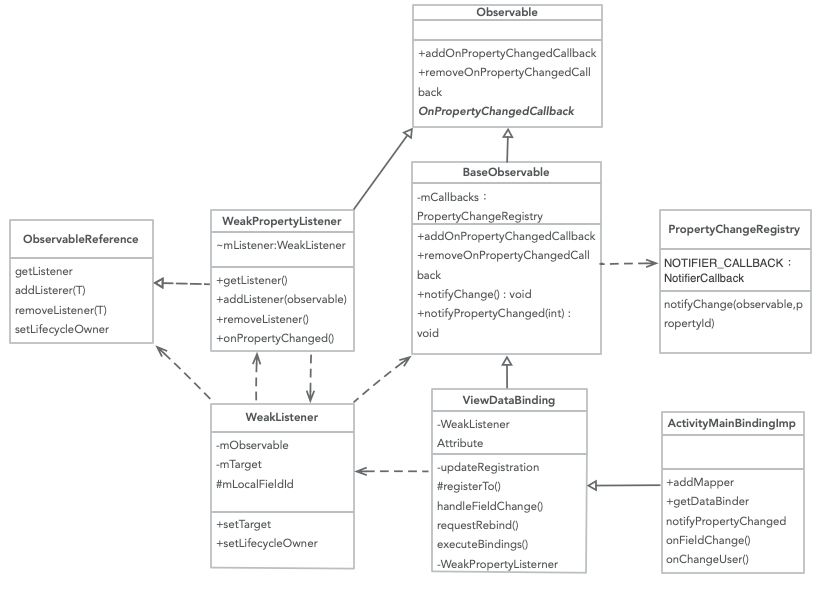
Here, the observer and the observed are saved through the ObservableReference object in the WeakListener listener listener. When the observed changes, the corresponding WeakListener listener will be found, and then the observer will be notified to make changes. There are several implementations of ObservableReference method, such as WeakPropertyListener. Here, the WeakListener.setTarget() actually adds a callback to the observer through the WeakPropertyListener. When the observer's data changes, the observer calls back by traversing the OnPropertyChangedCallback in its internal PropertyChangeRegistry (actually the WeakPropertyListener), Then listen and notify ViewDataBinding and its implementation class ActivityMainBindingImpl through the WeakPropertyListener to process and set the data. Class diagram is as follows:
ActivityMainBindingImpl.notifyPropertyChanged()

This is actually the notifyPropertyChanged() method of BaseObservable.
CallbackRegistry.notifyCallbacks()

In fact, the mNotifier.onNotifyCallback here will be called to the function defined in the following PropertyChangeRegistry
NOTIFIER_ The onNotifyCallback in the callback attribute is implemented, and the callback here is actually
WeakPropertyListener, because WeakPropertyListener is a subclass of OnPropertyChangedCallback, it will actually call back all the weaklisteners in the mLocalFieldObservers array.
WeakPropertyListener class in ViewDataBinding
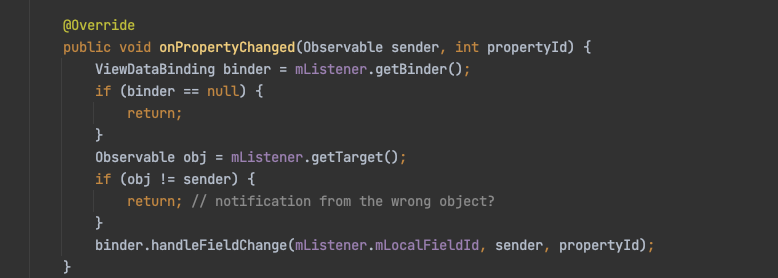
Take the target from the mListener. The mListener here is actually the WeakListener, and each observer actually has a corresponding LocalFieldId, which is defined in the BR file. In the process just now, 0 was passed in, so the mlocalfieldid here is 0. Continue to the handleFieldChange method.
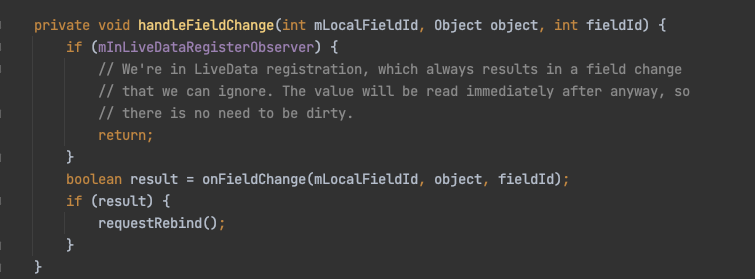
The implementation of the onFieldChange method here is in ActivityMainBindingImpl.java. We will return true here, so we will continue to execute requestbind().
Requestbind() will eventually execute the run() method of mRebindRunnable, but when the SDK version is greater than or equal to 16, it will be handled by Choreographer choreographer, while the previous version was executed by Handler. Finally, we will go to the executeBindings() method, which is also implemented in ActivityMainBindingImpl
    @Override
    protected void executeBindings() {
        long dirtyFlags = 0;
        synchronized(this) {
            dirtyFlags = mDirtyFlags;
            mDirtyFlags = 0;
        }
        java.lang.String userName = null;
        java.lang.String userAge = null;
        com.wyq.databinding_java.User user = mUser;

        if ((dirtyFlags & 0xfL) != 0) {
            if ((dirtyFlags & 0xbL) != 0) {
                    if (user != null) {
                        // read user.name
                        userName = user.getName();
                    }
            }
            if ((dirtyFlags & 0xdL) != 0) {
                    if (user != null) {
                        // read user.age
                        userAge = user.getAge();
                    }
            }
        }
        // batch finished
        if ((dirtyFlags & 0xbL) != 0) {
            // api target 1
            androidx.databinding.adapters.TextViewBindingAdapter.setText(this.tv1, userName);
        }
        //Finally, the setText operation is performed here, which actually calls the setText of the View of the page layout
        if ((dirtyFlags & 0x8L) != 0) {
            // api target 1       androidx.databinding.adapters.TextViewBindingAdapter.setTextWatcher(this.tv1, (androidx.databinding.adapters.TextViewBindingAdapter.BeforeTextChanged)null, (androidx.databinding.adapters.TextViewBindingAdapter.OnTextChanged)null, (androidx.databinding.adapters.TextViewBindingAdapter.AfterTextChanged)null, tv1androidTextAttrChanged);
            androidx.databinding.adapters.TextViewBindingAdapter.setTextWatcher(this.tv2, (androidx.databinding.adapters.TextViewBindingAdapter.BeforeTextChanged)null, (androidx.databinding.adapters.TextViewBindingAdapter.OnTextChanged)null, (androidx.databinding.adapters.TextViewBindingAdapter.AfterTextChanged)null, tv2androidTextAttrChanged);
        }
        if ((dirtyFlags & 0xdL) != 0) {
            // api target 1

            androidx.databinding.adapters.TextViewBindingAdapter.setText(this.tv2, userAge);
        }
    }