Article Navigation-readme
Red Dust Novel Network https://wap.zuxs.net/Configuring Spring Boot Hot Deployment
The development of technology is always because people want to be lazy. If we don't want to change the code every time, we have to restart the server and run the code again. Then you can configure the hot deployment. With it, you can see the effect by simply re build ing the modified code without restarting the server.
1. Configuring Hot Deployment
- Add the following dependencies to the pom.xml file:
        <dependency>
            <groupId>org.springframework.boot</groupId>
            <artifactId>spring-boot-devtools</artifactId>                                        <optional>true</optional>
</dependency>- Modify the pom.xml file
 <build>
        <plugins>
            <plugin>
                <groupId>org.springframework.boot</groupId>
                <artifactId>spring-boot-maven-plugin</artifactId>
                <configuration>
                    <!--Turn on hot deployment-->
                    <fork>true</fork>
                </configuration>
            </plugin>
        </plugins>
    </build>
After modifying the pom.xml file, idea pops up a file that lets you import the package automatically, and clicks Import Changes. The jar package is automatically downloaded to the dependency library.
In this way, the hot deployment of Spring Boot is implemented. At this time, we can modify our code by rebuilding it.
2. Configuration automatic build
Of course, if you're lazier, you don't want to practice build, or you can configure AutoBuild in Idea (AutoBuild only supports Spring Book projects).
- Open Idea - > File - > Settings... and you can see the following interface
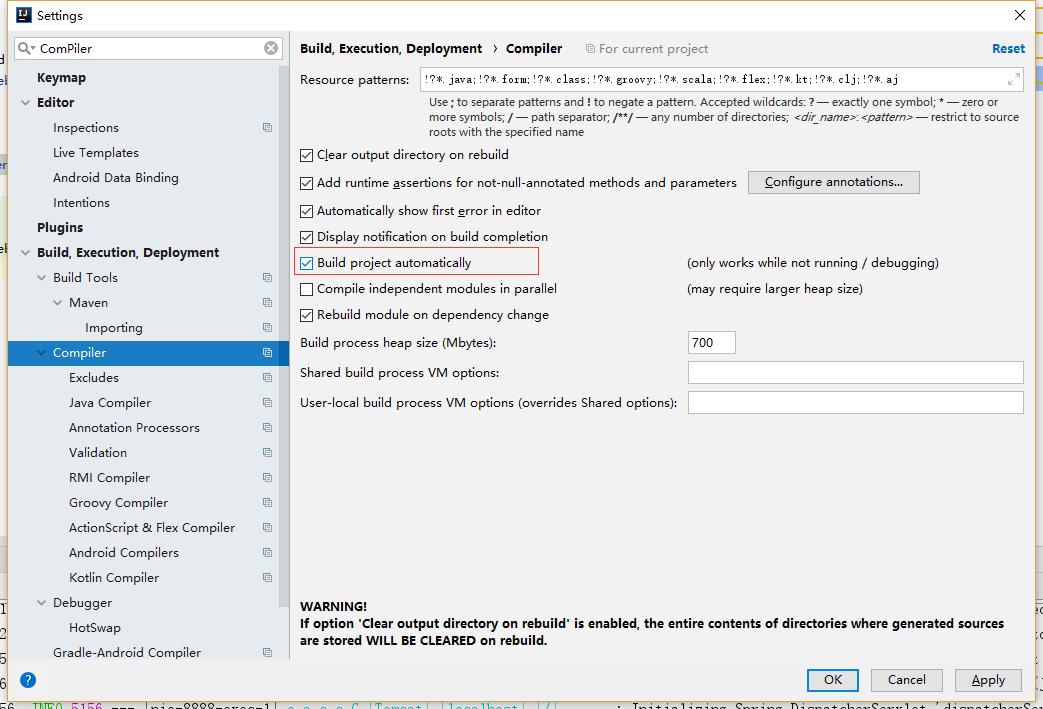
Select Build Project Automation in the figure above
- Press Shift+ALT+Ctrl+/Select Registry to see the following interface
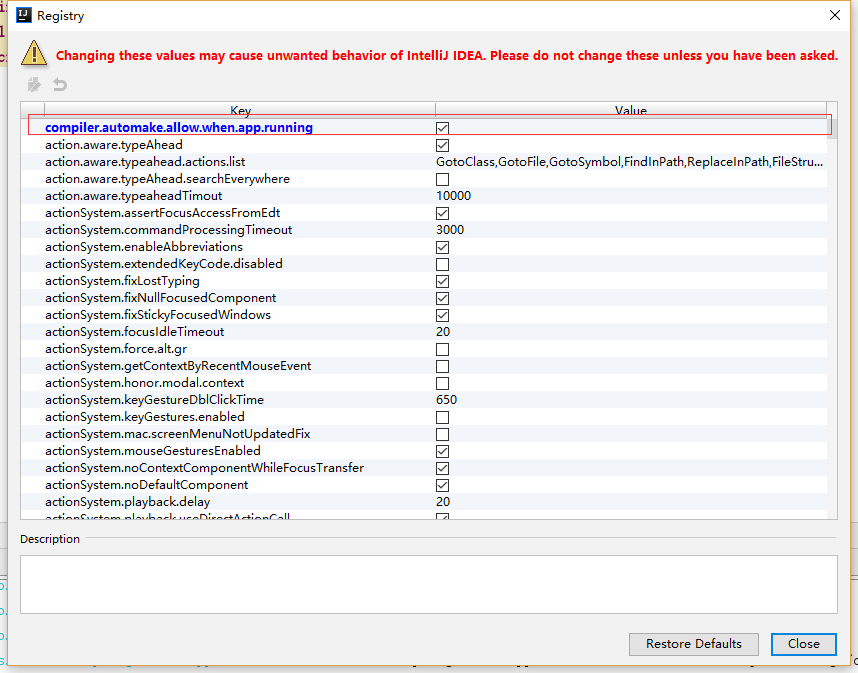
Select complier.automake.allow.when.app.running in the figure above.
In this way, after modifying our code, there is no need to re build or restart.
2. Spring Boot Read Configuration Files
- Modify our configuration file application.properties
server.port=8888

<!--Website configuration-->
website.name=Loading
website.domin=www.loading.ink
website.title=My blog site
website.description=Share my life and skills
- New configuration file class WebSiteConfig
package spring.boot.web.config;

import org.springframework.beans.factory.annotation.Value;
import org.springframework.boot.context.properties.ConfigurationProperties;
import org.springframework.context.annotation.Configuration;
import org.springframework.context.annotation.PropertySource;

import java.text.MessageFormat;

@Configuration
//@ConfigurationProperties(prefix = "website")
//Configuration file address to read
@PropertySource(value = "classpath:application.properties")
public class WebSiteConfig {
    @Value("${website.title}")
    private String title;
    @Value("${website.domain}")
    private String domain;
    @Value("${website.description}")
    private String description;

    public String getTitle() {
        return title;
    }

    public void setTitle(String title) {
        this.title = title;
    }

    public String getDomain() {
        return domain;
    }

    public void setDomain(String domain) {
        this.domain = domain;
    }

    public String getDescription() {
        return description;
    }

    public void setDescription(String description) {
        this.description = description;
    }

    @Override
    public String toString() {
        return MessageFormat.format("Title:{0} Domin:{1} Description:{2}", title, domain, description);
    }
}
There are two ways to read configuration files
1. @Configuration Properties (prefix = website) is used to bind attributes, where prefix represents the prefix of the bound attributes. This can be done if the configuration and attribute names in the configuration file are consistent
2.@Value("${website.title}") binds properties in the configuration file
Be careful:
Annotation @Configuration is used to define configuration classes
The annotation @PropertySource (value = classpath: application.properties) represents the path to read the configuration file. When the configuration file is application.properties, the annotation can be omitted from writing.
- New WebSiteController
package spring.boot.web.controller;

import org.springframework.beans.factory.annotation.Autowired;
import org.springframework.web.bind.annotation.RequestMapping;
import org.springframework.web.bind.annotation.RequestMethod;
import org.springframework.web.bind.annotation.RestController;
import spring.boot.web.config.WebSiteConfig;

@RequestMapping("/website")
@RestController
public class WebSiteController {

    //Injecting bean s through the @Autowire annotation
    @Autowired
    private WebSiteConfig webSiteConfig;

    @RequestMapping(method = RequestMethod.GET)
    public String get() {
        return webSiteConfig.toString();
    }
}
- test run
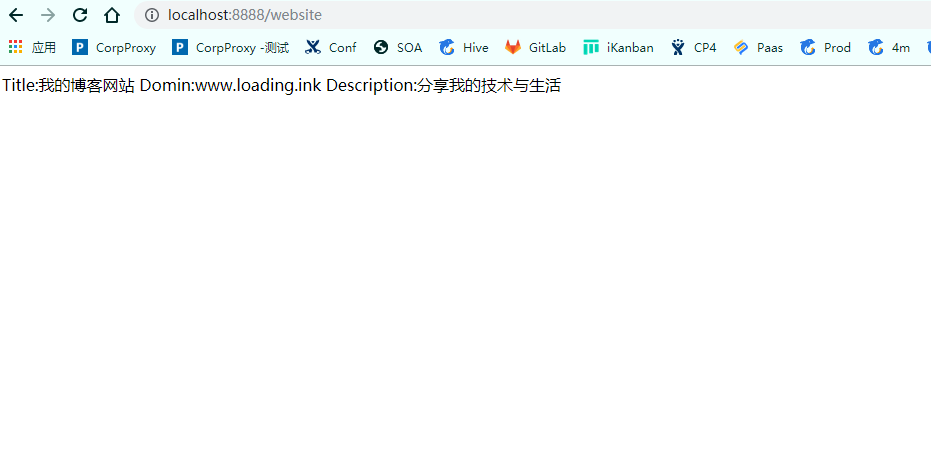
- Note that if you encounter the problem of reading the Chinese random code in the configuration file at the first run time. The main reason may be that the configuration file format is not utf-8 format. This can be set in idea.
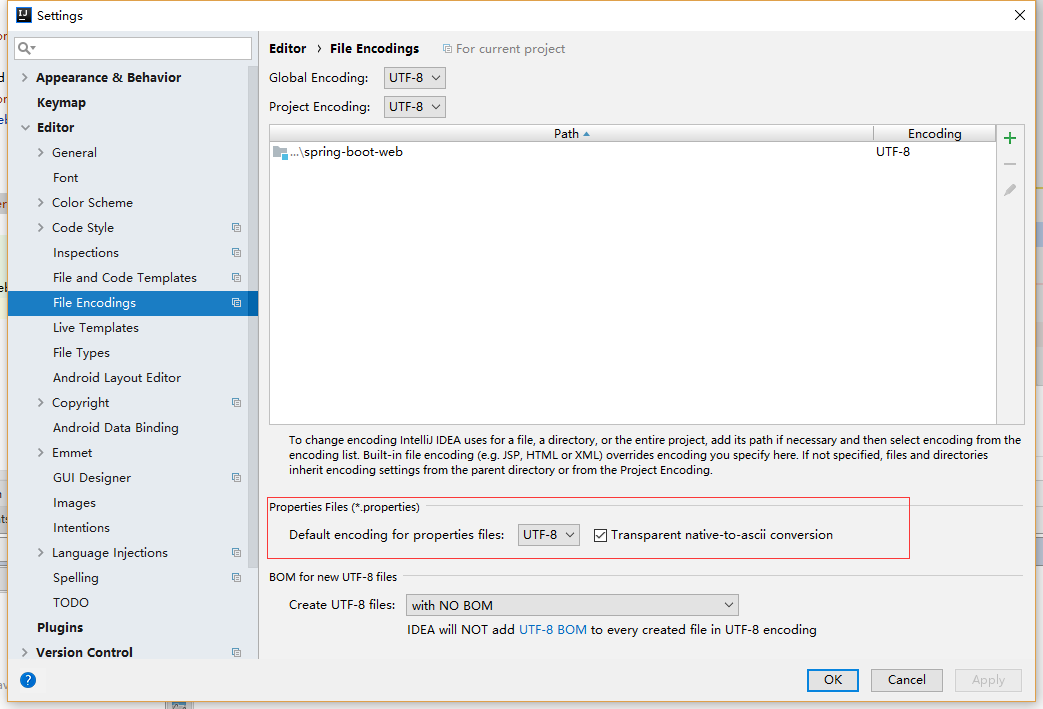
Change it to uft-8 as shown in the figure above. Note that you must check it later.
If the above configuration is not available, you can delete the configuration file and rebuild it, and the problem can be solved!
III. Spring Boot Profile
Spring Boot uses a global configuration file, application.properties. Spring Boot's global configuration file is used to modify the configuration values of some default configurations.
In daily development, we often encounter a problem. It's about using different configurations in different environments. For example, in three different environments of production, development and testing, our configuration is definitely different. At this point, we're going to use Profile.
Profile is used by Spring to support different configurations for different environments. Global Profile configurations use application-{profile}.properties (such as application-dev.properties). Specify the active Profile by setting spring.profiles.active = dev in application.properties.
- Then create three new configuration files under the directory, application-dev.properties, application-test.properties, application-prod.properties. They represent configuration files for development environment, test environment and production environment respectively.
server.port=8887

website.title=My blog site--Dev
website.domain=www.loading.ink
website.description=Share my technology and life
server.port=8886

website.title=My blog site--test
website.domain=www.loading.ink
website.description=Share my technology and life
server.port=8885

website.title=My blog site--prod
website.domain=www.loading.ink
website.description=Share my technology and life
- Next, modify application.properties: to indicate that the application-dev.properties configuration file will be used.
spring.profiles.active=dev
Test run we can see port 8887 that will start the development environment configuration file
Note: The configuration file takes precedence over the configuration in the Profile, and if there are no configuration items in the Profile, the configuration in application.properties is taken directly.
Sample code