Spring Boot (IX) -- employee management system
18. Employee management system
18.1 preparation
18.1.1 front page
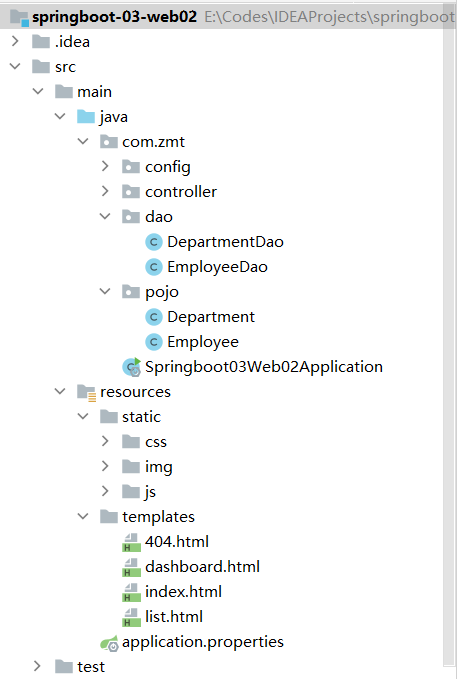
- Place the html page in the templates folder
- Put css, js and img into the static folder
18.1.2 entity class preparation
- Department
public class Department {
    private Integer id;
    private String departmentName;

    public Department() {}

    public Department(Integer id, String departmentName) {
        this.id = id;
        this.departmentName = departmentName;
    }

    public Integer getId() {
        return id;
    }

    public void setId(Integer id) {
        this.id = id;
    }

    public String getDepartmentName() {
        return departmentName;
    }

    public void setDepartmentName(String departmentName) {
        this.departmentName = departmentName;
    }

    @Override
    public String toString() {
        return "Department{" +
                "id=" + id +
                ", departmentName='" + departmentName + '\'' +
                '}';
    }
}
- Employee
import java.util.Date;

public class Employee {
    private Integer id;
    private String lastName;
    private String email;
    private Integer gender; //0 female 1 male
    private Department department;
    private Date birth;

    public Employee() {
    }

    public Employee(Integer id, String lastName, String email, Integer gender, Department department) {
        this.id = id;
        this.lastName = lastName;
        this.email = email;
        this.gender = gender;
        this.department = department;
        //Default creation date
        this.birth = new Date();
    }
 ...
}
18.1.3 Dao layer simulation database
- DepartmentDao
public class DepartmentDao {
    //Simulate data in database
    private static Map<Integer, Department> departments = null;

    static{
        //Create a department table
        departments = new HashMap<Integer, Department>();

        departments.put(101,new Department(101,"Teaching Department"));
        departments.put(102,new Department(102,"Marketing Department"));
        departments.put(103,new Department(103,"Teaching and Research Department"));
        departments.put(104,new Department(104,"Operation Department"));
        departments.put(105,new Department(105,"Logistics Department"));
    }

    //Get all department information
    public Collection<Department> getDepartments(){
        return departments.values();
    }

    //Get department according to id
    public Department getDepartmentById(Integer id){
        return departments.get(id);
    }
}
- EmployeeDao
public class EmployeeDao {
    //Simulate data in database
    private static Map<Integer, Employee> employees = null;
    //Employee's Department
    private DepartmentDao departmentDao;

    static {
        //Create an employee table
        employees = new HashMap<Integer, Employee>();

        employees.put(1001, new Employee(1001, "zzz", "23656@qq.com", 1, new Department(101, "Logistics Department")));
        employees.put(1002, new Employee(1002, "mmm", "12345@qq.com", 0, new Department(102, "Marketing Department")));
        employees.put(1003, new Employee(1003, "ttt", "67890@qq.com", 1, new Department(103, "Teaching and Research Department")));
        employees.put(1004, new Employee(1004, "aaa", "98765@qq.com", 0, new Department(101, "Logistics Department")));
        employees.put(1005, new Employee(1005, "bbb", "43210@qq.com", 1, new Department(102, "Marketing Department")));
        employees.put(1006, new Employee(1006, "ccc", "00000@qq.com", 0, new Department(101, "Logistics Department")));
    }
    //When an employee is added, the primary key is automatically added
    private static Integer initId = 1007;
    public void save(Employee employee){
        if(employee.getId()==null){
            employee.setId(initId++);
        }
        employee.setDepartment(departmentDao.getDepartmentById(employee.getDepartment().getId()));
        employees.put(employee.getId(),employee);
    }

    //Query all employee information
    public Collection<Employee> getAll(){
        return employees.values();
    }

    //Query employee by Id
    public Employee getEmployeeById(Integer id){
        return employees.get(id);
    }

    //Delete employee
    public void delete(Integer id){
        employees.remove(id);
    }
}
18.1.4 pom.xml
- Add the dependency of themeleaf
<?xml version="1.0" encoding="UTF-8"?>
<project xmlns="http://maven.apache.org/POM/4.0.0" xmlns:xsi="http://www.w3.org/2001/XMLSchema-instance"
         xsi:schemaLocation="http://maven.apache.org/POM/4.0.0 https://maven.apache.org/xsd/maven-4.0.0.xsd">
    <modelVersion>4.0.0</modelVersion>
    <parent>
        <groupId>org.springframework.boot</groupId>
        <artifactId>spring-boot-starter-parent</artifactId>
        <version>2.6.4</version>
        <relativePath/> <!-- lookup parent from repository -->
    </parent>
    <groupId>com.zmt</groupId>
    <artifactId>springboot-03-web02</artifactId>
    <version>0.0.1-SNAPSHOT</version>
    <name>springboot-03-web02</name>
    <description>Demo project for Spring Boot</description>
    <properties>
        <java.version>1.8</java.version>
    </properties>
    <dependencies>
        <dependency>
            <groupId>org.springframework.boot</groupId>
            <artifactId>spring-boot-starter-web</artifactId>
        </dependency>

        <dependency>
            <groupId>org.springframework.boot</groupId>
            <artifactId>spring-boot-starter-test</artifactId>
            <scope>test</scope>
        </dependency>

        <!--thymeleaf-->
        <dependency>
            <groupId>org.springframework.boot</groupId>
            <artifactId>spring-boot-starter-thymeleaf</artifactId>
        </dependency>
    </dependencies>

    <build>
        <plugins>
            <plugin>
                <groupId>org.springframework.boot</groupId>
                <artifactId>spring-boot-maven-plugin</artifactId>
            </plugin>
        </plugins>
    </build>

</project>
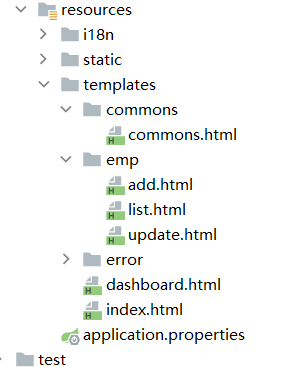
18.1.5 directory structure
18.2 home page implementation
18.2.1 the first method
- Creating an IndexController is not recommended
@Controller
public class IndexController {
    @RequestMapping({"/","/index.html"})
    public String index(){
        return "index";
    }
}
18.2.2 the second method
- Create config, create a new MyMvcConfig class, and override the addViewControllers() method
@Configuration
public class MyMvcConfig implements WebMvcConfigurer {
    @Override
    public void addViewControllers(ViewControllerRegistry registry) {
        registry.addViewController("/").setViewName("index");
        registry.addViewController("/index.html").setViewName("index");
    }
}
18.3 loading static resources
- Import thymeleaf package
<html lang="en" xmlns:th="http://www.thymeleaf.org">
- Use thymeleaf to take over the static resources of all pages
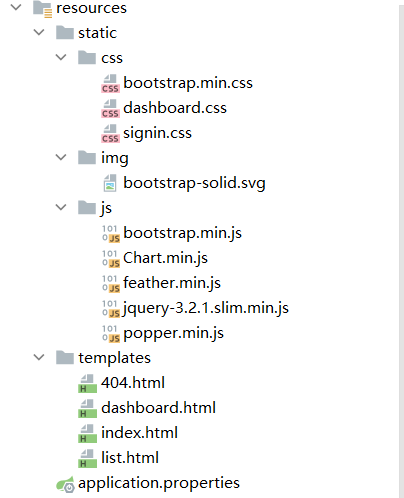
<!-- css Note that some pages are imported CSS Different files-->
<link th:href="@{/css/bootstrap.min.css}" rel="stylesheet">
<link th:href="@{/css/signin.css}" rel="stylesheet">

<!-- Import of pictures -->
<img class="mb-4" th:src="@{/img/bootstrap-solid.svg}" alt="" width="72" height="72">

<!-- js Import -->
<script type="text/javascript" th:src="@{/js/jquery-3.2.1.slim.min.js}"></script>
<script type="text/javascript" th:src="@{/js/popper.min.js}"></script>
<script type="text/javascript" th:src="@{/js/bootstrap.min.js}"></script>

<script type="text/javascript" th:src="@{/js/feather.min.js}"></script>

<script type="text/javascript" th:src="@{/js/Chart.min.js}"></script>
- Static resource directory
18.4 page internationalization
- Many times, websites will involve multi language switching, so you need to learn page internationalization
18.4.1 preparation
- Uniformly set the encoding of properties in IDEA

18.4.2 preparation of configuration file
-
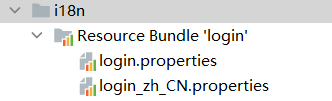
Create a new i18n folder under the resources folder to store internationalization configuration files
-
i18n: internationalization. There are 18 letters between the beginning letter i and the end letter n
-
Create a new login Properties file and login_zh_CN.properties. We found the IDEA automatic world. We need to do international operations. The folder changes and a folder is automatically generated
- You can continue to add configuration files in other languages and right-click the generated folder

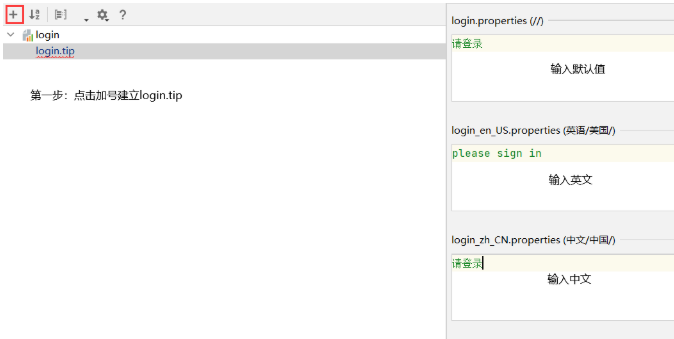
- Add step

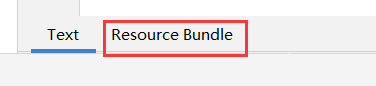
- There is a method in IDEA: Resource Bundle. Click it to make visual configuration, that is, configure the multilingual mode of all modes of the login page
- After adding, you can see login Login. Appears in the properties file Tip = please login
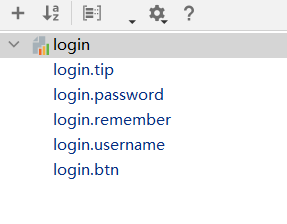
- Continue to add other content, including page tips, page buttons, etc
- View the configuration file login Properties, where is the default value of the open page
login.btn=Sign in
login.password=password
login.remember=Remember me
login.tip=Please login
login.username=user name
- View English configuration file login_en_US.properties
login.btn=Sign in
login.password=password
login.remember=remember me
login.tip=please sign in
login.username=username
- View Chinese configuration file login_zh_CN.properties
login.btn=Sign in
login.password=password
login.remember=Remember me
login.tip=Please login
login.username=user name
- Complete page internationalization configuration
18.4.3 research on the effectiveness of internationalization configuration file
-
View the automatic configuration of internationalization in the Spring Boot source code, and view the class MessageSourceAutoConfiguration
-
The messageSource() method gets the value passed from properties
@Bean
	public MessageSource messageSource(MessageSourceProperties properties) {
		ResourceBundleMessageSource messageSource = new ResourceBundleMessageSource();
		if (StringUtils.hasText(properties.getBasename())) {
			messageSource.setBasenames(StringUtils
					.commaDelimitedListToStringArray(StringUtils.trimAllWhitespace(properties.getBasename())));
		}
		if (properties.getEncoding() != null) {
			messageSource.setDefaultEncoding(properties.getEncoding().name());
		}
		messageSource.setFallbackToSystemLocale(properties.isFallbackToSystemLocale());
		Duration cacheDuration = properties.getCacheDuration();
		if (cacheDuration != null) {
			messageSource.setCacheMillis(cacheDuration.toMillis());
		}
		messageSource.setAlwaysUseMessageFormat(properties.isAlwaysUseMessageFormat());
		messageSource.setUseCodeAsDefaultMessage(properties.isUseCodeAsDefaultMessage());
		return messageSource;
	}
- We put it in the i18n directory, in application Configure the corresponding message path in the properties file
spring.messages.basename=i18n.login
18.4.5 configuration page internationalization
- View the page code, find the corresponding message value operation, and modify it to #{...}
- For example:
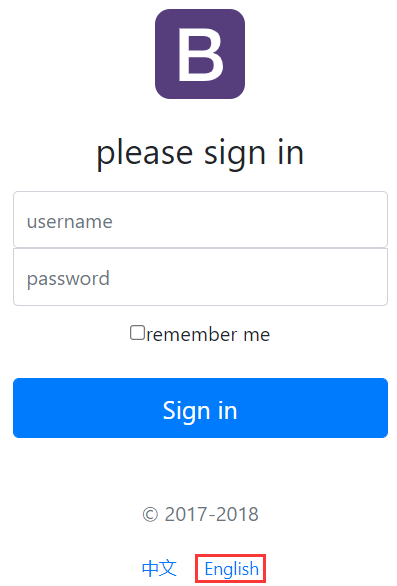
<h1 class="h3 mb-3 font-weight-normal" th:text="#{login.tip}">Please sign in</h1>
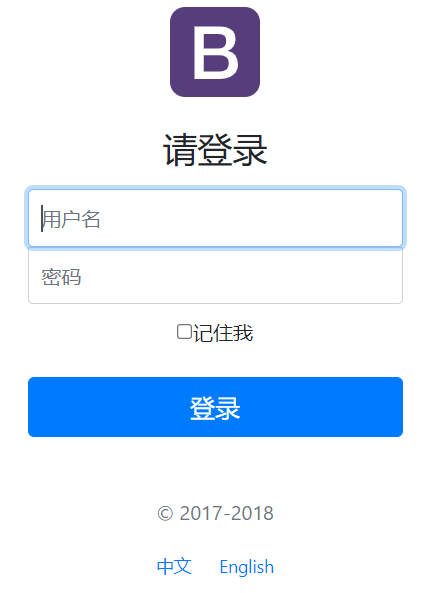
- The garbled code and multilingual problems of the modified page have been solved
18.4.6 research on international source code of configuration
- Now we need to explore how to click the button to realize bilingual switching
- Open the webmvcoautoconfig class and find the localeResolver() method
public LocaleResolver localeResolver() {
    if (this.webProperties.getLocaleResolver() == WebProperties.LocaleResolver.FIXED) {
        return new FixedLocaleResolver(this.webProperties.getLocale());
    }
    AcceptHeaderLocaleResolver localeResolver = new AcceptHeaderLocaleResolver();
    localeResolver.setDefaultLocale(this.webProperties.getLocale());
    return localeResolver;
}
- If local regionalization is manually configured, the user configuration information will be returned. If there is no manual configuration, the default configuration information will be returned. The default configuration information is in the AcceptHeaderLocaleResolver class, in which there is a resolveLocale() method
@Override
public Locale resolveLocale(HttpServletRequest request) {
    Locale defaultLocale = getDefaultLocale();
    if (defaultLocale != null && request.getHeader("Accept-Language") == null) {
        return defaultLocale;
    }
    Locale requestLocale = request.getLocale();
    List<Locale> supportedLocales = getSupportedLocales();
    if (supportedLocales.isEmpty() || supportedLocales.contains(requestLocale)) {
        return requestLocale;
    }
    Locale supportedLocale = findSupportedLocale(request, supportedLocales);
    if (supportedLocale != null) {
        return supportedLocale;
    }
    return (defaultLocale != null ? defaultLocale : requestLocale);
}
- Just now, you need to write an internationalization configuration file to make it take effect
- First modify the jump link of the front page
<!-- The parameter passed in here does not need to be used? Use( key=value)-->
<a class="btn btn-sm" th:href="@{/index.html(l='zh_CN')}">chinese</a>
<a class="btn btn-sm" th:href="@{/index.html(l='en_US')}">English</a>
- Create a new MyLocaleResolver component class
public class MyLocaleResolver implements LocaleResolver {
    //Parse request
    @Override
    public Locale resolveLocale(HttpServletRequest request) {
        //Gets the language parameter in the request
        String language = request.getParameter("l");
        //If it is blank, the default is used
        Locale locale = Locale.getDefault();
        //If the requested link carries international parameters, judge
        if(!StringUtils.isEmpty(language)){
            //zh_CN, adopted_ To split
            String[] split = language.split("_");
            //The array includes, country and region
            locale = new Locale(split[0],split[1]);
        }
        return locale;
    }

    @Override
    public void setLocale(HttpServletRequest request, HttpServletResponse response, Locale locale) {

    }
}
- Add bean s to MyMvcConfig written by ourselves to make this component effective
//Put the customized internationalization components in
@Bean
public LocaleResolver localeResolver(){
    return new MyLocaleResolver();
}
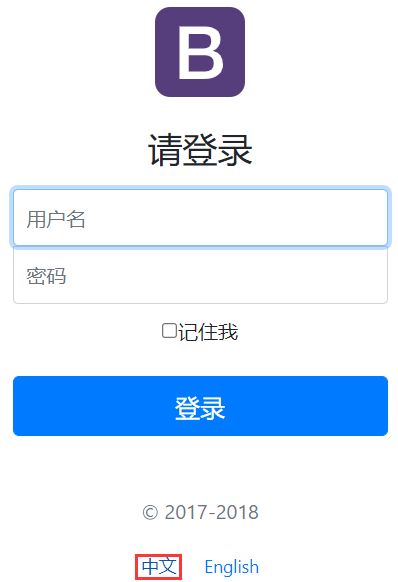
- It can switch between Chinese and English according to their own needs
18.4.7 summary
- Homepage configuration: note that all static resource pages need to be taken over with @ thymeleaf, url: @ {}
- Page internationalization
- Need to configure i18n folder
- If you need to automatically switch buttons in the project, you need to customize a component, LocaleResolver
- Configure the component written by yourself to the Spring container @ Bean
- #{}
18.5 login page
- New LoginController login authentication
@Controller
public class LoginController {
@RequestMapping("/user/login")
@ResponseBody
public String login(@RequestParam("username") String username, @RequestParam("password") String password, Model model){
//Specific business (judge whether the user name is empty, etc.)
//The user name is not empty and the password is 123456
if(!StringUtils.isEmpty(username) && "123456".equals(password)){
return "dashboard";
}else{
//Tell the user that your login failed
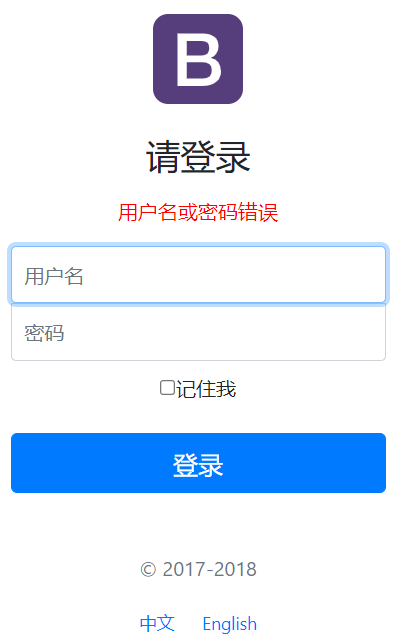
model.addAttribute("msg","Wrong user name or password");
return "index";
}
}
}
- Modify the home page form and add the information display in case of login failure, p tag
<form class="form-signin" th:action="@{/user/login}">
    ......
    <!--If msg If the message is not empty, this message will be displayed-->
    <p style="color: red" th:text="${msg}" th:if="${not #strings.isEmpty(msg)}"></p>
    <input type="text" name="username" class="form-control" th:placeholder="#{login.username}" required="" autofocus="">
    <input type="password" name="password" class="form-control" th:placeholder="#{login.password}" required="">
	......
</form>
-
At this time, the page is not friendly. You can see your account and password in the address bar to solve the problem of password disclosure
-
In the MyMvcConfig class, add the main mapping
@Override
public void addViewControllers(ViewControllerRegistry registry) {
    registry.addViewController("/").setViewName("index");
    registry.addViewController("/index.html").setViewName("index");

    registry.addViewController("/main.html").setViewName("dashboard");
}
- Modify the jump page of LoginController (redirect jump)
@Controller
public class LoginController {
    @RequestMapping("/user/login")
    public String login(@RequestParam("username") String username, @RequestParam("password") String password,
                        Model model){
        //Specific business (judge whether the user name is empty, etc.)
        //The user name is not empty and the password is 123456
        if(!StringUtils.isEmpty(username) && "123456".equals(password)){
            return "redirect:/main.html";
        }else{
            //Tell the user that your login failed
            model.addAttribute("msg","Wrong user name or password");
            return "index";
        }
    }
}
- Enter localhost: 8080 / main HTML can directly enter the page, and you need to use interceptors to prevent direct access
18.6 login interceptor
- Add a session in LoginController to judge
@Controller
public class LoginController {
    @RequestMapping("/user/login")
    public String login(@RequestParam("username") String username, @RequestParam("password") String password,
                        Model model, HttpSession session){
        //Specific business (judge whether the user name is empty, etc.)
        //The user name is not empty and the password is 123456
        if(!StringUtils.isEmpty(username) && "123456".equals(password)){
            session.setAttribute("loginUser",username);
            return "redirect:/main.html";
        }else{
            //Tell the user that your login failed
            model.addAttribute("msg","Wrong user name or password");
            return "index";
        }
    }
}
- Create a new LoginHandlerInterceptor interceptor under the config folder
public class LoginHandlerInterceptor implements HandlerInterceptor {
    @Override
    public boolean preHandle(HttpServletRequest request, HttpServletResponse response, Object handler) throws Exception {

        // After successful login, there should be a user's session
        Object loginUser = request.getSession().getAttribute("loginUser");

        if (loginUser == null) {
            request.setAttribute("msg","No permission, please login first");
            request.getRequestDispatcher("/index.html").forward(request,response);
            return false;
        } else {
            return true;
        }
    }
}
- Rewrite the interceptor method in MyMvcConfig and remember to filter static resources, otherwise the rendering effect will disappear
@Override
    public void addInterceptors(InterceptorRegistry registry) {
        registry.addInterceptor(new LoginHandlerInterceptor())
                .addPathPatterns("/**")
                .excludePathPatterns("/index.html","/","/user/login","/css/**","/js/**","/img/**");
    }
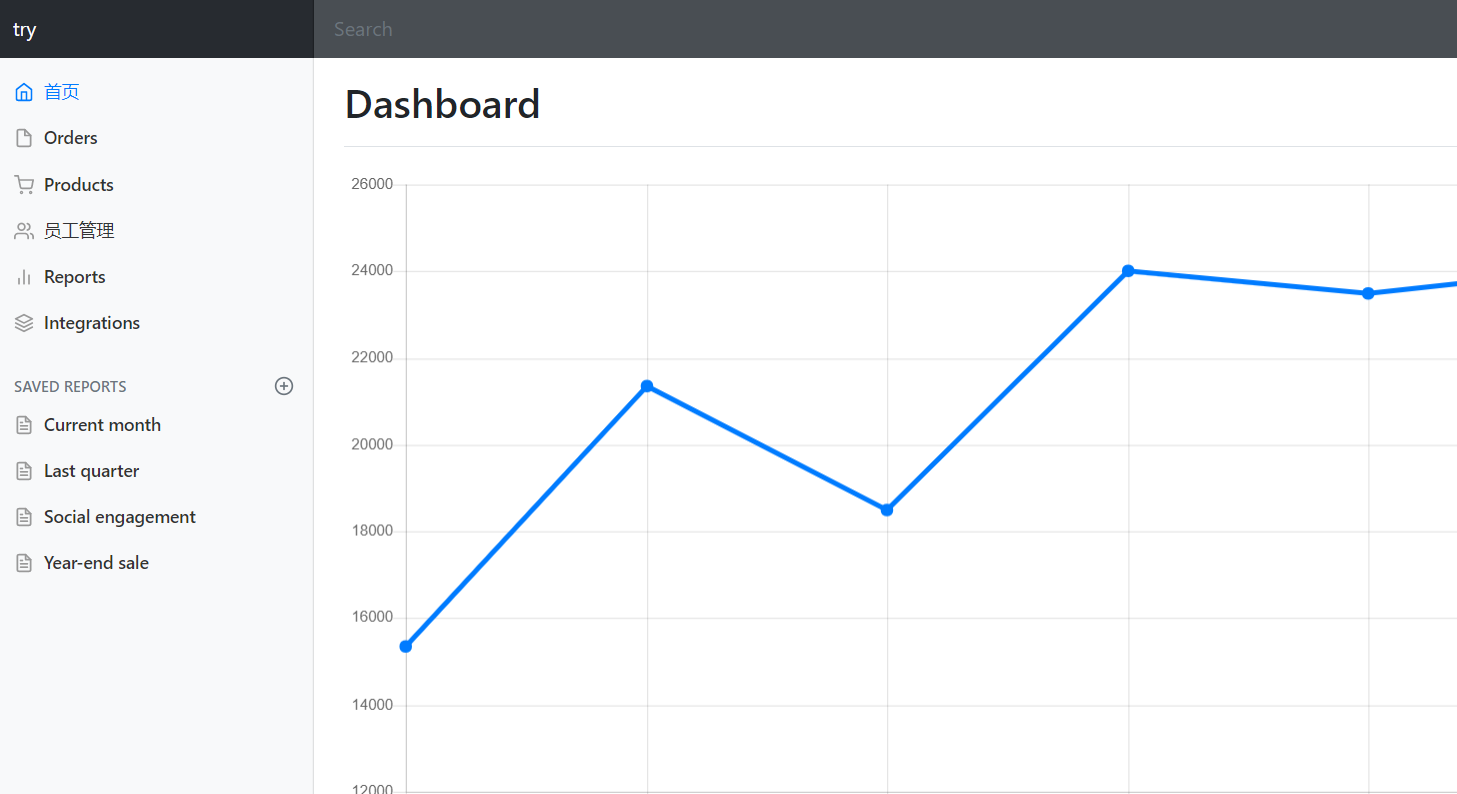
- On the dashboard In the HTML page, modify the login information to [${session.loginUser}]], so that the user name will be displayed after login
<a class="navbar-brand col-sm-3 col-md-2 mr-0" href="http://getbootstrap.com/docs/4.0/examples/dashboard/#">[[ ${session.loginUser} ]]</a>
- Log in successfully with the try user name. You can see that the user name is displayed in the upper left corner
- Password error when login fails
18.7 employee list display
18.7.1 extracting public pages
-
Some of the front-end pages are used by multiple pages in public. You can extract the public code for easy calling in the list HTML and dashboard Extract common part code from HTML
-
The common parts of the discovery page are the top navigation bar and the sidebar
<!--Top navigation bar-->
<nav class="navbar navbar-dark sticky-top bg-dark flex-md-nowrap p-0" th:fragment="topbar">
    <a class="navbar-brand col-sm-3 col-md-2 mr-0" href="http://getbootstrap.com/docs/4.0/examples/dashboard/#">[[ ${session.loginUser} ]]</a>
    <input class="form-control form-control-dark w-100" type="text" placeholder="Search" aria-label="Search">
    <ul class="navbar-nav px-3">
        <li class="nav-item text-nowrap">
            <a class="nav-link" th:href="@{/user/logout}">cancellation</a>
        </li>
    </ul>
</nav>

<!--sidebar -->
<nav class="col-md-2 d-none d-md-block bg-light sidebar" th:fragment="sidebar">
    ...
</nav>
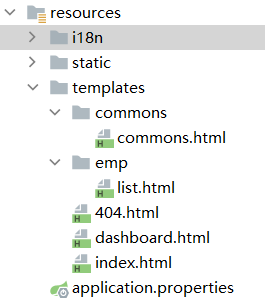
- Extract the public code, create the Commons directory in the templates directory, and create commons in this directory Html is used to store public page code
<!DOCTYPE html>
<html lang="en" xmlns:th="http://www.thymeleaf.org">

<!--Top navigation bar-->
<nav class="navbar navbar-dark sticky-top bg-dark flex-md-nowrap p-0" th:fragment="topbar">
   ...
</nav>

<!--sidebar -->
<nav class="col-md-2 d-none d-md-block bg-light sidebar" th:fragment="sidebar">
    ...
</nav>

</html>
- dashboard.html and list HTML can directly call the public part code to display the page
<!--Top navigation bar-->
<div th:replace="~{commons/commons::topbar}"></div>

<!--sidebar -->
<div th:replace="~{commons/commons::sidebar}"></div>
- Note: the effect of replace is the same as that of insert, but insert will set one more layer of div tags
18.7.2 add sidebar lighting
- On the dashboard HTML and list Transfer parameters from sidebar in HTML page
<!--sidebar -->
<div th:replace="~{commons/commons::sidebar(active='list.html')}"></div>
- In commons Receive parameters in HTML and judge
<!--sidebar -->
<nav class="col-md-2 d-none d-md-block bg-light sidebar" th:fragment="sidebar(active)">
    <div class="sidebar-sticky">
        <ul class="nav flex-column">
            <li class="nav-item">
               <a th:class="${active=='main.html'?'nav-link active':'nav-link'}" th:href="@{/main.html}">

                  	.............
                    home page <span class="sr-only">(current)</span>
                </a>
            </li>
            .............
            <li class="nav-item">
            	<a th:class="${active=='list.html'?'nav-link active':'nav-link'}" th:href="@{/employees}">

                    .............
                    Employee management
                </a>
            </li>
            .............
        </ul>
        .............
    </div>
</nav>
</html>
18.7.3 background compilation
- New employee management background of EmployController
@Controller
public class EmployeeController {
    @Autowired
    EmployeeDao employeeDao;

    @RequestMapping("/emps")
    public String list(Model model){
        Collection<Employee> employees = employeeDao.getAll();
        model.addAttribute("emps",employees);
        return "emp/list";
    }
}
-
Note: if employeedao is popular, go to the employeedao class and add the annotation @ Repository
-
Modify the link @ {/ emps} in the front-end public page`
<a th:class="${active=='list.html'?'nav-link active':'nav-link'}" th:href="@{/emps}">
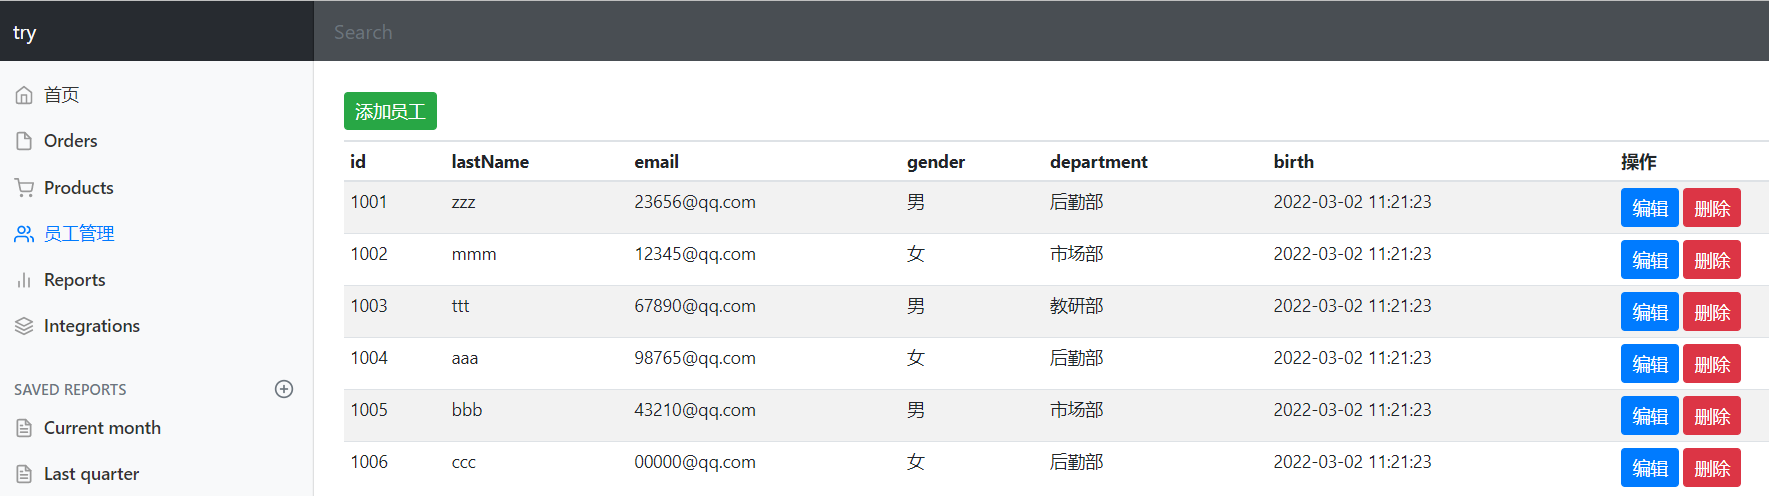
18.7.4 list circulation display
- On the list HTML add, own data loop
<!--sidebar -->
<div th:replace="~{commons/commons::sidebar(active='list.html')}"></div>

<main role="main" class="col-md-9 ml-sm-auto col-lg-10 pt-3 px-4">
    <h2>Section title</h2>
    <div class="table-responsive">
        <table class="table table-striped table-sm">
            <thead>
                <tr>
                    <th>id</th>
                    <th>lastName</th>
                    <th>email</th>
                    <th>gender</th>
                    <th>department</th>
                    <th>birth</th>
                    <th>operation</th>
                </tr>
            </thead>
            <tbody>
                <tr th:each="emp:${emps}">
                    <td th:text="${emp.getId()}"></td>
                    <td th:text="${emp.getLastName()}"></td>
                    <td th:text="${emp.getEmail()}"></td>
                    <td th:text="${emp.getGender()==0?'female':'male'}"></td>
                    <td th:text="${emp.department.getDepartmentName()}"></td>
                    <td th:text="${#dates.format(emp.getBirth(),'yyyy-MM-dd HH:mm:ss')}"></td>
                    <td>
                        <button class="btn btn-sm btn-primary">edit</button>
                        <button class="btn btn-sm btn-danger">delete</button>
                    </td>
                </tr>
            </tbody>
        </table>
    </div>
</main>
- At this point, the project structure
- Page display
18.8 adding employee information
18.8.1 submit button
- On the list Add submit button to HTML page
<h2><a class="btn btn-sm btn-success" th:href="@{/emp}">Add employee</a></h2>
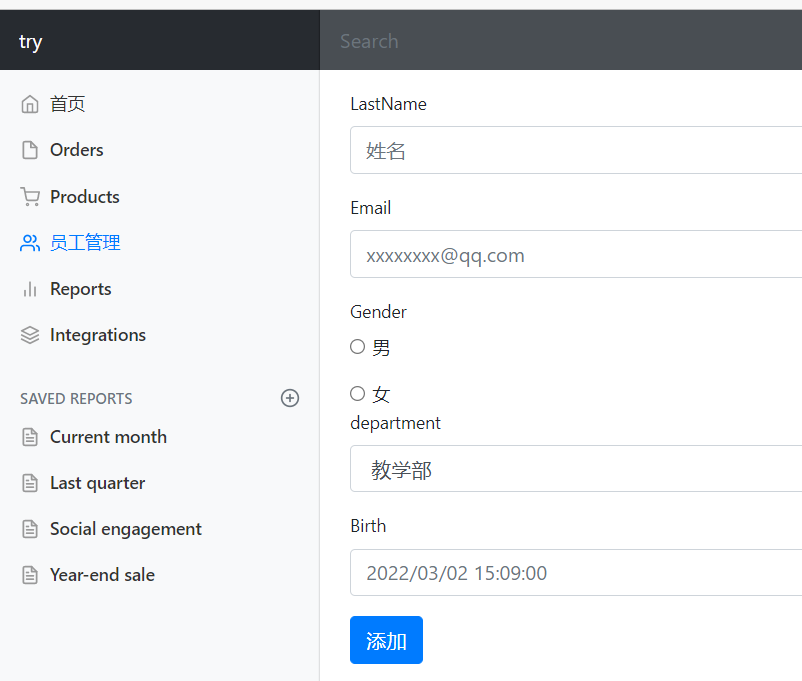
18.8.2 jump to add page
-
Click the Add button to jump to the add information page
-
add.html page, the rest of the code and list HTML, just modify the code in the main tag
<main role="main" class="col-md-9 ml-sm-auto col-lg-10 pt-3 px-4">
    <form th:action="@{/emp}" method="post">
        <div class="form-group">
            <label>LastName</label>
            <input type="text" name="lastName" class="form-control" placeholder="full name">
        </div>
        <div class="form-group">
            <label>Email</label>
            <input type="email" name="email" class="form-control" placeholder="xxxxxxxx@qq.com">
        </div>
        <div class="form-group">
            <label>Gender</label><br>
            <div class="form-check form-check-inline">
                <input class="form-check-input" type="radio" name="gender" value="1">
                <label class="form-check-label">male</label>
            </div>
        </div>
        <div class="form-check form-check-inline">
            <input class="form-check-input" type="radio" name="gender" value="0">
            <label class="form-check-label">female</label>
        </div>
        <div class="form-group">
            <label>department</label>
            <select class="form-control" name="department.id">
                <!--We are controller Receiving a Employee,So what we need to submit is one of the attributes-->
                <option th:each="dept:${departments}" th:text="${dept.getDepartmentName()}" th:value="${dept.getId()}">1</option>
            </select>
        </div>
        <div class="form-group">
            <label>Birth</label>
            <input type="text" name="birth" class="form-control" placeholder="2020/07/25 18:00:00">
        </div>
        <button type="submit" class="btn btn-primary">add to</button>
    </form>
</main>
- Write the toAddPage() method that jumps to the added page in EmployeeController
@GetMapping("/emp")
public String toAddPage(Model model){
    //Find out the information of all departments
    Collection<Department> department = departmentDao.getDepartments();
    model.addAttribute("departments",department);
    return "emp/add";
}
18.8.3 add operation
- Write the addEmp() method in EmployeeController
//Add employee
@PostMapping("/emp")
public String addEmp(Employee employee){
    //Add action
    employeeDao.save(employee);
    return "redirect:/emps";
}
- Add information page
- Added successfully

18.9 modify employee information
18.9.1 Modify button
- On the list Add edit button to HTML
<a class="btn btn-sm btn-primary" th:href="@{/emp/}+${emp.getId()}">edit</a>
18.9.2 jump to the modification page
- update.html, just modify the code in the main tag, others and list The HTML code is the same
<main role="main" class="col-md-9 ml-sm-auto col-lg-10 pt-3 px-4">
    <form th:action="@{/updateEmp}" method="post">
        <input type="hidden" name="id" th:value="${emp.getId()}">
        <div class="form-group">
            <label>LastName</label>
            <input th:value="${emp.getLastName()}" type="text" name="lastName" class="form-control" placeholder="Spongebob">
        </div>
        <div class="form-group">
            <label>Email</label>
            <input th:value="${emp.getEmail()}" type="email" name="email" class="form-control" placeholder="1176244270@qq.com">
        </div>
        <div class="form-group">
            <label>Gender</label><br>
            <div class="form-check form-check-inline">
                <input th:checked="${emp.getGender()==1}" class="form-check-input" type="radio" name="gender" value="1">
                <label class="form-check-label">male</label>
            </div>
        </div>
        <div class="form-check form-check-inline">
            <input th:checked="${emp.getGender()==0}" class="form-check-input" type="radio" name="gender" value="0">
            <label class="form-check-label">female</label>
        </div>
        <div class="form-group">
            <label>department</label>
            <select class="form-control" name="department.id">
                <!--We are controller Receiving a Employee,So what we need to submit is one of the attributes-->
                <option th:selected="${dept.getId()==emp.getDepartment().getId()}" th:each="dept:${departments}" th:text="${dept.getDepartmentName()}" th:value="${dept.getId()}"></option>
            </select>
        </div>
        <div class="form-group">
            <label>Birth</label>
            <input th:value="${#dates.format(emp.getBirth(),'yyyy-MM-dd HH:mm:ss')}" type="text" name="birth" class="form-control" placeholder="2020-07-25 00:00:00">
        </div>
        <button type="submit" class="btn btn-primary">modify</button>
    </form>
</main>
- Jump to update HTML page. Write the toUpdateEmp() method in EmployeeController
//Jump to the modification page
@GetMapping("/emp/{id}")
public String toUpdateEmp(@PathVariable("id") Integer id, Model model){
    //Find out the data before modification
    Employee employee = employeeDao.getEmployeeById(id);
    model.addAttribute("emp",employee);

    //Find out the information of all departments
    Collection<Department> department = departmentDao.getDepartments();
    model.addAttribute("departments",department);

    return "emp/update";
}
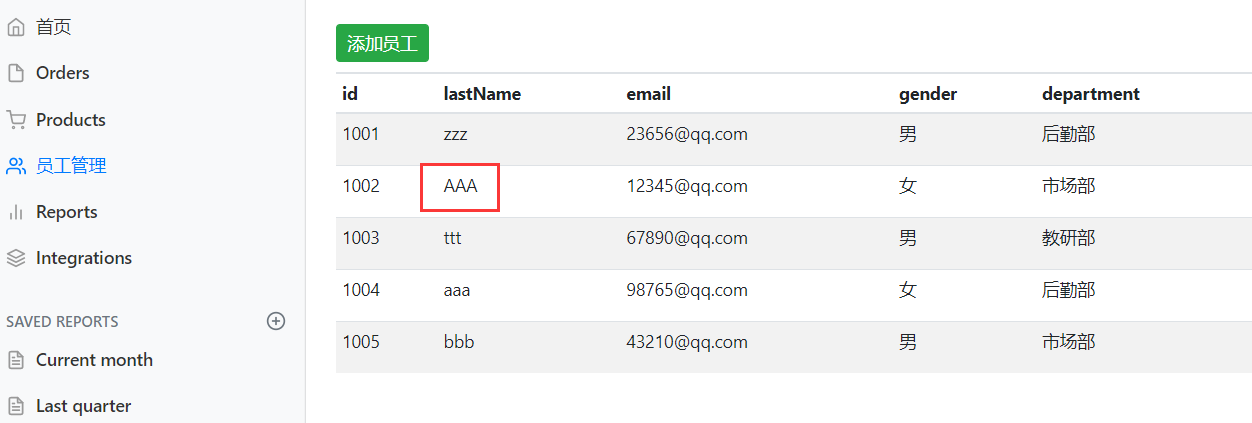
18.9.3 modification
- Write the updateEmp() method in EmployeeController
//Modification method
@RequestMapping("/updateEmp")
public String updateEmp(Employee employee){
    //Save the modified information again
    employeeDao.save(employee);
    return "redirect:/emps";
}
- Modified successfully
18.10 delete employee information
18.10.1 delete button
- On the list Add delete button in HTML
<a class="btn btn-sm btn-danger" th:href="@{/deleteEmp/}+${emp.getId()}">delete</a>
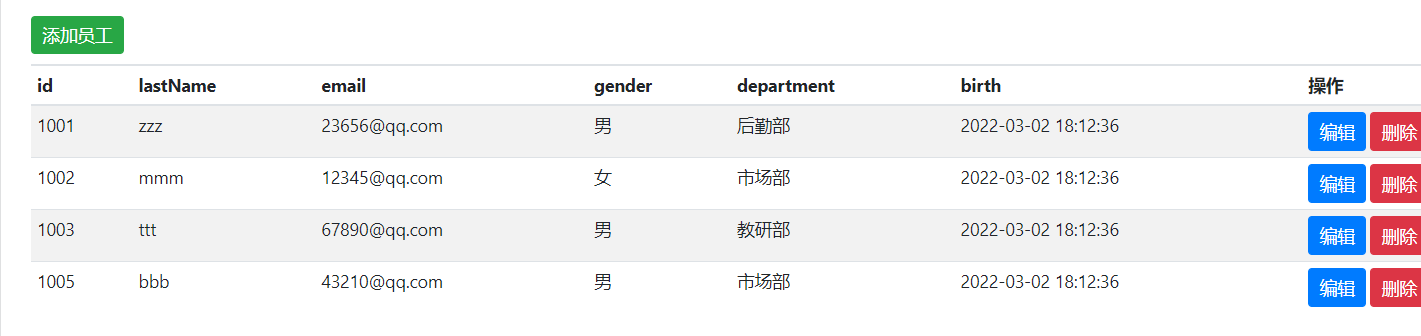
18.10.2 deletion
- Write the deleteEmp() method in EmployeeController
//Delete method
@GetMapping("/delemp/{id}")
public String deleteEmp(@PathVariable("id")int id){
    employeeDao.delete(id);
    return "redirect:/emps";
}
- Deletion succeeded. 1004 was deleted
18.11 page 404
-
404 The HTML page is placed in the error directory in the templates directory
-
directory structure
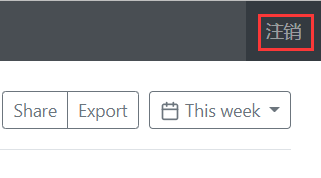
18.12 cancellation
- In commons Add logout button in HTML
<a class="nav-link" th:href="@{/user/logout}">cancellation</a>
- In logincontroller Write the code of logout page in Java
//cancellation
@RequestMapping("/user/logout")
public String logout(HttpSession session){
    session.invalidate();
    return "redirect:/index";
}
- Logoff implementation
18.13 how to develop a website
18.13.1 preparation
- Front end involves: page specific style
- Front end frame components: Bootstrap, Layui, semantic UI
- Design database
- The front end can operate independently and realize independent engineering
- How to connect data interfaces: json, object
- Front and rear end joint commissioning test
18.13.2 development
- Have a set of familiar background templates: work must! Recommended background framework: x-admin
- Front end page: at least they can combine a website page through the front-end framework
- Let this website run independently