Spring Boot implements common functions of the Web
Usually, in Web development, it involves the access support of static resources, the configuration of view parser, the customization of converter and formatter, file upload and download, and even the customization of Servlet related components associated with Web server. Spring Boot framework supports the integration of some common Web frameworks to realize Web development, and supports some general functions in Web development by default.
Spring MVC integration support
In order to realize and simplify Web development, Spring Boot provides integration support for some common Web development frameworks, such as Spring MVC, Spring WebFlux and so on. When using Spring Boot for Web development, you only need to introduce the dependent launcher of the corresponding Web development framework into the project.
Introduction to Spring MVC automatic configuration
In the Spring Boot project, once the Web dependency initiator Spring Boot starter Web is introduced, some xxxAutoConfiguration automatic configuration classes implemented by Spring Boot integration Spring MVC framework by default will take effect automatically, and Web development can be carried out almost without any additional configuration. In order to integrate Spring MVC framework to realize Web development, Spring Boot mainly provides the following automatic configuration features.
1) Two view parsers are built in: ContentNegotiatingViewResolver and BeanNameViewResolver.
2) Support static resources and WebJars
3) The converter and formatter are automatically registered.
4) Support Http message converter
5) The message code parser is automatically registered.
6) Support static project homepage index.html
7) Support custom application icon favicon.ico
8) Automatically initialize the Web data binder ConfigurableWebBindingInitializer
Spring Boot provides many default configurations when integrating Spring MVC for Web development, and most of the time, the default configuration can meet the development requirements. For example, when Spring Boot integrates Spring MVC for Web development, there is no need to configure the view parser.
Spring MVC function expansion and Implementation
Spring Boot provides a lot of automatic configuration when integrating Spring MVC for Web development, but developers need to extend and implement some functions in actual development.
1. Construction of basic environment of the project
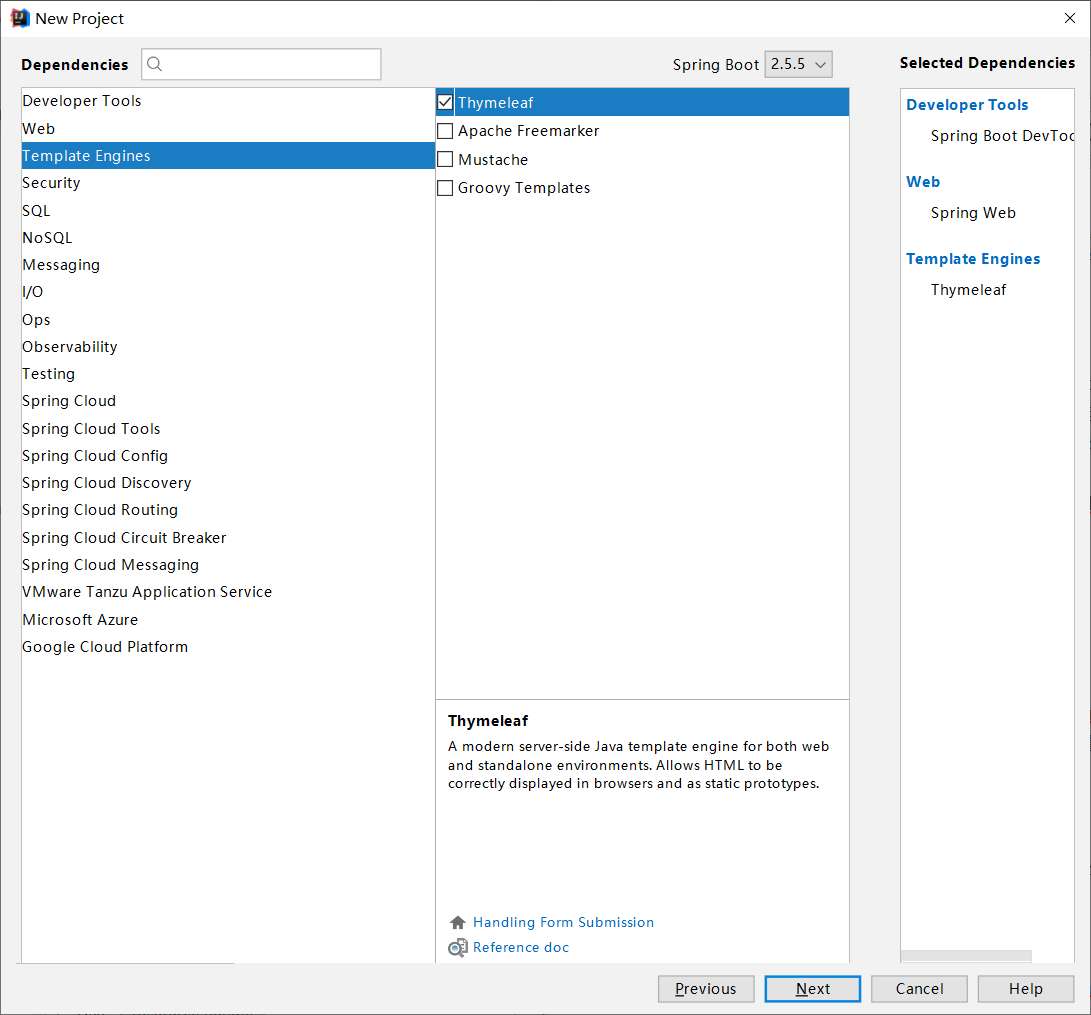
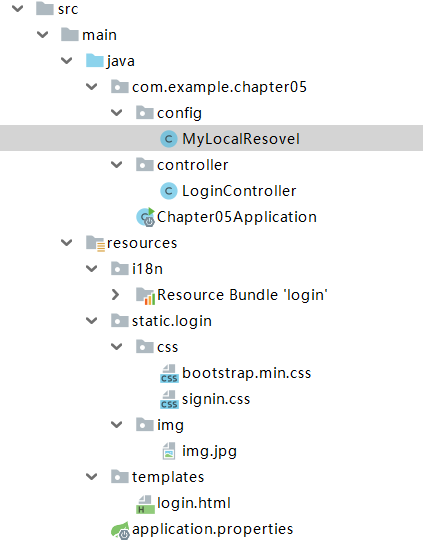
Use the spring initializer method to create a Spring Boot project named chapter05, and select the Web dependency launcher under the Web module and the Thymeleaf dependency launcher under the Template Engines module in the Dependencies dependency selection.
Copy all files under chapter04 project to chapter05
Function extension implementation
Next, we use Spring Boot to integrate Spring MVC for Web development and realize simple page jump function. Here, we will use the WebMvcConfigurer interface provided by Spring Boot to write custom configuration and appropriately extend the Web function.
1) Register the view manager. Create a configuration class MyMVCconfig that implements the WebMvcConfigurer interface under the com.example.chapter05.config package of chapter05 project to extend the MVC framework functions.
MyMVCconfig.java
package com.example.chapter05.config;
import org.springframework.web.servlet.config.annotation.ViewControllerRegistry;
import org.springframework.web.servlet.config.annotation.WebMvcConfigurer;
public class MyMVCconfig implements WebMvcConfigurer {
@Override
public void addViewControllers(ViewControllerRegistry registry){
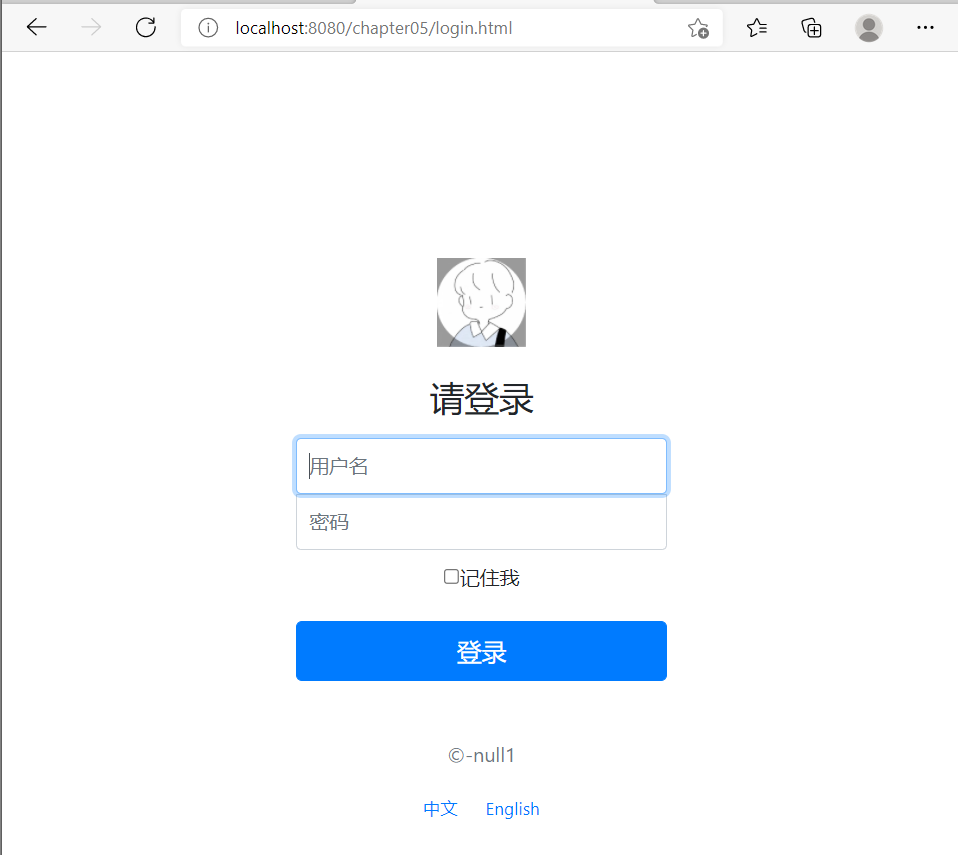
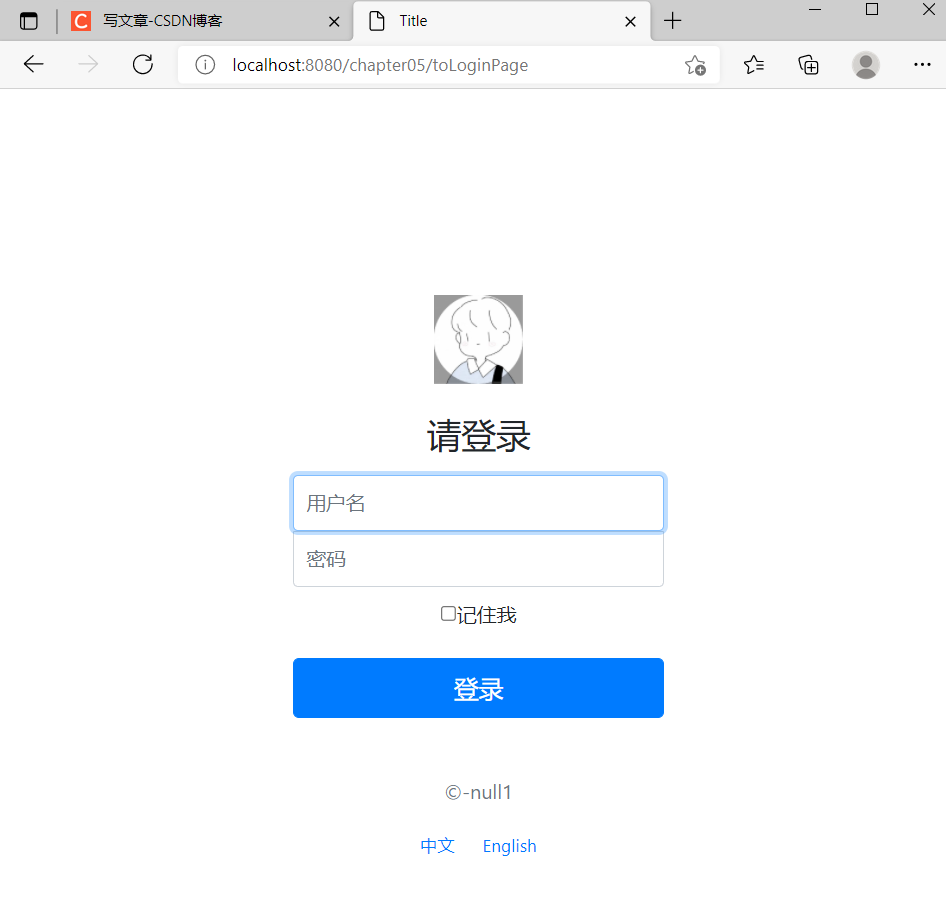
registry.addViewController("/toLoginPage").setViewName("login");
registry.addViewController("/login.html").setViewName("login");
}
}
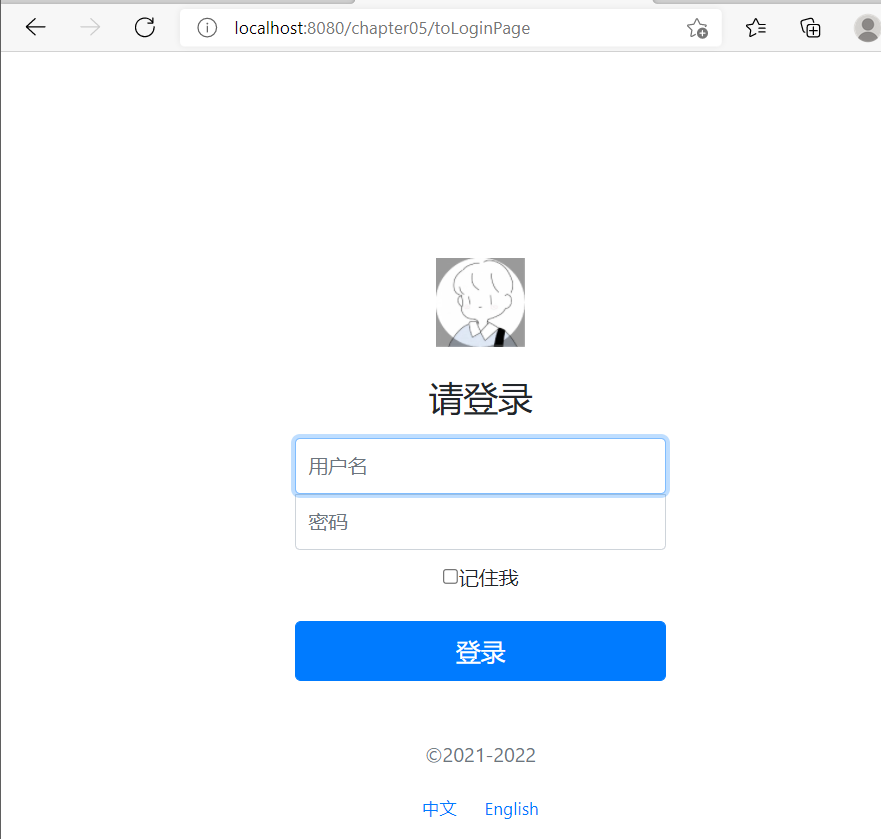
MyMVCconfig implements the addviewcontrollers (view controller Registry) method of the interface WebMvcConfigurer. Within the addViewControllers() method, the addViewController() method of ViewControllerRegistry is used to define the request control of "/ toLoginPage" and "/ login. HTML" respectively, and the setViewName("login") method is used to map the path to the login.html page.
After customizing the view management function of MVC, you can test the effect. To demonstrate this customization effect, we annotate all the previous user login controller LoginController code. Restart the chapter05 project. After the project is started, you can access it in two ways.
2) Register custom interceptors. WebMvcConfigurer interface provides many MVC development related methods, such as adding interceptor method addInterceptors(), adding formatter method addFormatters(), etc.
Create a custom interception class MyInterceptor under the project com.example.chapter05.config package, and write simple interception business code.
MyInterceptor.java
package com.example.chapter05.config;

import org.springframework.lang.Nullable;
import org.springframework.web.servlet.HandlerInterceptor;
import org.springframework.web.servlet.ModelAndView;

import javax.servlet.http.HttpServletRequest;
import javax.servlet.http.HttpServletResponse;
import java.util.Calendar;

public class MyInterceptor implements HandlerInterceptor {
    @Override
    public boolean preHandle(HttpServletRequest request, HttpServletResponse response, Object handler) throws Exception {
        String url=request.getRequestURI();
        Object loginUser=request.getSession().getAttribute("loginUser");
        if(url.startsWith("/admin")&&null==loginUser){
            response.sendRedirect("/toLoginPage");
            return false;
        }
        return true;
    }
    @Override
    public void postHandle(HttpServletRequest request, HttpServletResponse response, Object handler, @Nullable ModelAndView modelAndView) throws Exception{
        request.setAttribute("currentYear", Calendar.getInstance().get(Calendar.YEAR));
    }
    @Override
    public void afterCompletion(HttpServletRequest request, HttpServletResponse response, Object handler, @Nullable Exception ex) throws Exception{

    }
}
The custom interceptor class MyInterceptor implements the HamdlerInterceptor interface. In the preHandle() method, if the user request starts with "/ admin", judge whether the user logs in. If not, redirect to the login page corresponding to the "/ toLoginPage" request. In the postHandle() method, the request object is used to pass the currentYear data representing the year to the front page.
Then, in the custom configuration class MyMVCconfig, override the addInterceptors() method to register the custom interceptor
    @Autowired
    private MyInterceptor myInterceptor;
    @Override
    public void addInterceptors(InterceptorRegistry registry){
        registry.addInterceptor(myInterceptor)
                .addPathPatterns("/**")
                .excludePathPatterns("/login.html");
    }
In the above code, first use the @ Autowired annotation to introduce the custom MyInterceptor interceptor component, and then override the addInterceptors() method to register the custom interceptor. When registering a custom interceptor, use the addPathPatterns("/ * *") method to intercept all path requests, and the excludePathPatterns("/login.html") method releases the requests for the / login.html path.
Restart the chapter05 project and visit the browser http://localhost:8080/admin
After accessing, it automatically jumps to the user login page, and the current year is dynamically displayed in the page, which indicates that the customized interceptor has taken effect.
It should be noted that Spring Boot provides many default automatic configurations and features in the process of integrating Spring MVC. Developers can customize and extend MVC functions through the WebMvcConfigurer interface provided by Spring Boot. If developers do not want to use Spring Boot to integrate some of the default configurations provided by MVC, but want to use absolute custom management, they can write the @ Configuration annotation Configuration class and add the @ EnableWebMvc annotation to close all the default configurations about MVC functions provided by Spring Boot.
Spring Boot integrates the three components of Servlet
When developing servlets, you usually first customize the three components of Servlet, Filter and Listener, and then configure them in the file web.xml. Spring Boot uses an embedded Servlet container and does not provide an external configuration file web.xml. Let's learn how Spring Boot integrates the relevant components of servlets.
Component registration integrates the three components of Servlet
In Spring Boot, when using component registration to integrate the three components of Servlet, Filter and Listener embedded in Servlet container, you only need to register these custom components into the container through ServletRegistrationBean, FilterRegistrationBean and ServletListener RegistrationBean classes.
Integrate servlets using component registration
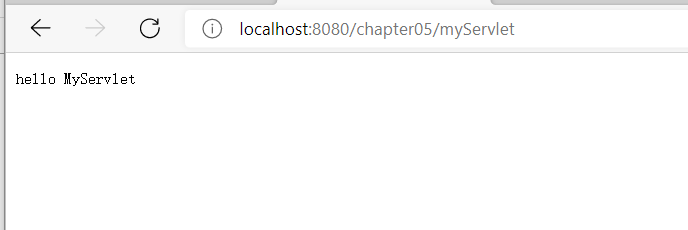
Create a custom Servlet class. Create a package named com.exmaple.chapter05.servletComponent in the chapter05 project, and create a class MyServlet that inherits HttpServlet under the package.
package com.example.chapter05.servletComponent;
import org.springframework.stereotype.Component;
import javax.servlet.ServletException;
import javax.servlet.http.HttpServlet;
import javax.servlet.http.HttpServletRequest;
import javax.servlet.http.HttpServletResponse;
import java.io.IOException;
@Component
public class MyServlet extends HttpServlet{
    @Override
    protected void doGet(HttpServletRequest req, HttpServletResponse resp) throws ServletException, IOException{
        this.doPost(req,resp);
    }
    @Override
    protected void doPost(HttpServletRequest req, HttpServletResponse resp) throws ServletException, IOException {
        resp.getWriter().write("hello MyServlet");
    }
}
Inject the MyServlet class as a component into the Spring container using the @ Component annotation. The MyServlet class inherits from HttpServlet and outputs "hello MyServlet" to the page through the HttpServletResponse object.
2) Create a Servlet component configuration class. Create a Servlet component configuration class ServletConfig under the project com.exmaple.chapter05.config package to register Servlet related components.
ServletConfig.java
package com.example.chapter05.config;

import com.example.chapter05.servletComponent.MyServlet;
import org.springframework.boot.web.servlet.ServletRegistrationBean;
import org.springframework.context.annotation.Bean;
import org.springframework.context.annotation.Configuration;

@Configuration
public class ServletConfig {
    @Bean
    public ServletRegistrationBean getServlet(MyServlet myServlet){
        ServletRegistrationBean registrationBean=new ServletRegistrationBean(myServlet,"/myServet");
        return registrationBean;
    }
}
Use the @ Configuration annotation to label ServletConfig as a Configuration class. The getServlet() method inside the ServletConfig class is used to register a custom MyServlet and return a Bean object of type ServletRegistrationBean.
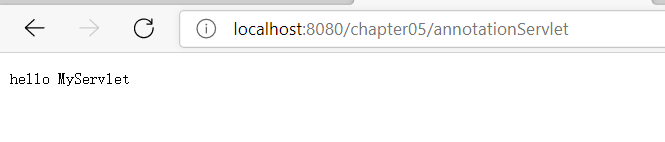
Start the project for testing. Browser access.
Integrate Filter using component registration
1) Create a custom Filter class. Create a class MyFilter under the com.example.servletComponent package
MyFilter.java
package com.example.chapter05.servletComponent;
import org.springframework.stereotype.Component;
import javax.servlet.*;
import java.io.IOException;
@Component
public class MyFilter implements Filter {
@Override
public void init(FilterConfig filterConfig) throws ServletException {
}
@Override
public void doFilter(ServletRequest servletRequest, ServletResponse servletResponse, FilterChain filterChain) throws IOException, ServletException {
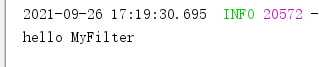
System.out.println("hello MyFilter");
filterChain.doFilter(servletRequest,servletResponse);
}
@Override
public void destroy() {
}
}
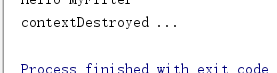
Use the @ Component annotation to inject the current MyFilter class into the Spring container as a component. The MyFilter class implements the Filter interface, rewrites the init(), doFilter(), destroy() methods, and prints the "hello MyFilter" string to the console in the doFilter() method.
2) Register the custom Filter class with the Servlet component configuration class. Open the Servlet component configuration class ServletConfig created earlier, and register the custom Filter class using the component registration method
    @Bean
    public FilterRegistrationBean<MyFilter> getFilter(MyFilter filter){
        FilterRegistrationBean<MyFilter> registrationBean=new FilterRegistrationBean<MyFilter>(filter);
        registrationBean.setUrlPatterns(Arrays.asList("toLoginpage","/myFilter"));
        return registrationBean;
    }
In the above code, use the component registration method to register the custom myFilter class. In the getFilter(MyFilter filter) method, use the setUrlPatterns(Arrays.asList("/toLoginPage","/myFilter")) method to define the request paths for filtering as "/ toLoginPage" and "/ myFilter". At the same time, use the @ Bean annotation to return the currently assembled FilterRegistrationBean object as a Bean component.
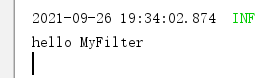
After completing the custom configuration of Filter, start the project. After the project is successfully started, access it in the browser“ http://localhost:8080/myFilter "View the console print effect.
Integrating listeners using component registration methods
1) Create a custom Listener class. Create a class MyListener under the com.example.servletComponent package
package com.example.chapter05.servletComponent;
import org.springframework.stereotype.Component;
import javax.servlet.ServletContextEvent;
import javax.servlet.ServletContextListener;
@Component
public class MyListener implements ServletContextListener {
@Override
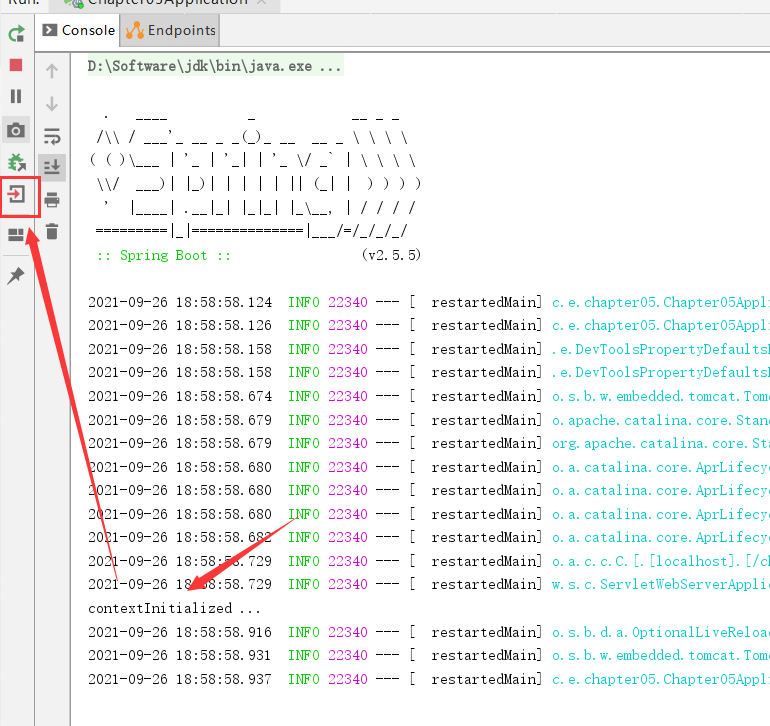
public void contextInitialized(ServletContextEvent servletContextEvent) {
System.out.println("contextInitialized ...");
}
public void contextDestroyed(ServletContextEvent servletContextEvent) {
System.out.println("contextDestroyed ...");
}
}
Register the MyListener class as a component in the Spring container using the @ Component annotation. The MyListener class implements the ServletContextListener interface and rewrites the contextInitialized() and contextDestroyed() methods.
It should be noted that the Servlet container provides many Listener interfaces, such as ServletRequestListener, httpsessionlister, ServletContextListener, etc. when customizing the Listener class, we should select and implement the corresponding interface according to our own needs.
2) Register the custom Listener class with the Servlet component configuration class. Open the Servlet component configuration class ServletConfig created earlier, and register the custom Listener class using the component registration method.
    @Bean
    public ServletListenerRegistrationBean<MyListener> getServletListener(MyListener myListener){
        return new ServletListenerRegistrationBean<MyListener>(myListener);
    }
After completing the custom Listener component, start the project. After the project is started successfully, view the print effect of the console.
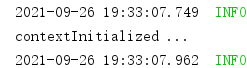
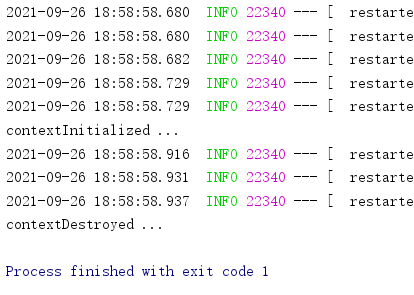
After the program is started successfully, the console will print out the output statement "contextInitialized..." defined in the custom Listener component
After all the comments of the custom Servlet component configuration class ServletConfig and restarting the project, the custom Servlet, Filter and Listener components can still take effect. The main reason for this is that the embedded Servlet container automatically identifies and configures the Servlet, Filter and Listener components, while the custom Servlet, Filter and Listener inherit / implement the corresponding classes / interfaces. At the same time, the custom Servlet, Filter and Listener components use @ Component annotation, and these components will be automatically scanned as Spring components.
The basic purpose of assembly configuration using ServletRegistrationBean, FilterRegistrationBean and ServletListenerRegistrationBean components is to initialize, set and assemble some request paths and parameters. Assuming that there is no component registered class, although the custom Servlet takes effect, it is impossible to determine which access path takes effect. The custom Filter will Filter all requests without selective filtering. The customized Listener has little impact, because the customized component basically does not need to set any parameters.
Path scanning integrates three components of Servlet
In Spring Boot, when using path scanning to integrate the servlet, Filter and Listener components of the embedded servlet container, you first need to add @ WebServlet, @ WebFilter and @ WebListener annotations on the custom components to declare and configure the relevant annotation properties, Then use the @ ServletComponentScan annotation on the project main program startup class to start component scanning.
Use path scanning to integrate servlets, filters and listeners
Comment out all the previously customized Servlet Component configuration classes, ServletConfig, and @ Component annotations on the three Component classes of custom Servlet, Filter and Listener.
MyServlet.java
package com.example.chapter05.servletComponent;

import org.springframework.stereotype.Component;

import javax.servlet.ServletException;
import javax.servlet.annotation.WebServlet;
import javax.servlet.http.HttpServlet;
import javax.servlet.http.HttpServletRequest;
import javax.servlet.http.HttpServletResponse;
import java.io.IOException;
@WebServlet("/annotationServlet")
//@Component
public class MyServlet extends HttpServlet{
    @Override
    protected void doGet(HttpServletRequest req, HttpServletResponse resp) throws ServletException, IOException{
        this.doPost(req,resp);
    }
    @Override
    protected void doPost(HttpServletRequest req, HttpServletResponse resp) throws ServletException, IOException {
        resp.getWriter().write("hello MyServlet");
    }
}
MyFilter.java
package com.example.chapter05.servletComponent;

import org.springframework.stereotype.Component;

import javax.servlet.*;
import javax.servlet.annotation.WebFilter;
import java.io.IOException;
@WebFilter(value = {"/antionLogin","/antionMyFilter"})
//@Component
public class MyFilter implements Filter {
    @Override
    public void init(FilterConfig filterConfig) throws ServletException {

    }

    @Override
    public void doFilter(ServletRequest servletRequest, ServletResponse servletResponse, FilterChain filterChain) throws IOException, ServletException {
        System.out.println("hello MyFilter");
        filterChain.doFilter(servletRequest,servletResponse);
    }

    @Override
    public void destroy() {

    }
}
MyListener.java
package com.example.chapter05.servletComponent;

import org.springframework.stereotype.Component;

import javax.servlet.ServletContextEvent;
import javax.servlet.ServletContextListener;
import javax.servlet.annotation.WebListener;

@WebListener
//@Component
public class MyListener implements ServletContextListener {
    @Override
    public void contextInitialized(ServletContextEvent servletContextEvent) {
        System.out.println("contextInitialized ...");
    }

    public void contextDestroyed(ServletContextEvent servletContextEvent) {
        System.out.println("contextDestroyed ...");
    }
}
Chapter05Application.java
package com.example.chapter05;

import org.springframework.boot.SpringApplication;
import org.springframework.boot.autoconfigure.SpringBootApplication;
import org.springframework.boot.web.servlet.ServletComponentScan;

@SpringBootApplication
@ServletComponentScan //Enable Servlet component scanning support based on annotation
public class Chapter05Application {

    public static void main(String[] args) {
        SpringApplication.run(Chapter05Application.class, args);
    }

}