History of Spring framework
Spring1.x Era
In spring 1 In the X era, bean s are configured through xml files. With the continuous expansion of projects, xml configuration needs to be divided into different configuration files, and frequent switching between java classes and xml configuration files is required.
Spring2.x Era
With the annotation support brought by JDK 1.5, spring 2 X can use annotations to declare and inject beans, which greatly reduces the xml configuration file and greatly simplifies the development of the project.
So, the question is, should we use xml or annotations?
Best practices:
- The basic configuration of the application uses xml, such as data source, resource file, etc;
- Annotations for business development, such as injecting bean s into Service;
Spring3.x to spring 4 X to spring 5 x
From spring 3 X began to provide Java configuration mode. Using java configuration mode can better understand the beans you configured. Now we are in this era, and spring 4 x,Spring5. Both X and Spring Boot recommend Java configuration.
Spring 5.X application zero configuration development
Spring framework from 5 In version x, it is recommended to use the annotation form to develop and configure java applications, and it can completely replace the development in the original XML + annotation form. When using the annotation form for project development and environment configuration, the spring framework provides relevant annotations for environment configuration and business bean development.
annotation
Declare Bean annotations
@Component:The role of the component is not clearly defined. The current class is declared as a business component at the class level and is Spring Ioc Container maintenance;

@Service:At the business logic layer( Service Layer) is declared at the class level;

@Repository:In the data access layer(dao layer) Class level declaration;

@Controller:In the presentation layer(MVC) Use annotation to label the current class as a controller
Inject Bean annotation
@AutoWired:Spring Official comments

@Inject:JSR-330 Provide notes (standard setter)

@Resource:JSR-250 Provide comments
The above three annotations are declared on Set methods or attributes. Generally, they are more used to declaring on attributes in general development, and the code is concise and clear. Based on 5 X annotation configuration simplifies xml configuration. Application development and xml environment configuration are realized through corresponding annotations.
Spring5. Configuring and obtaining Bean annotations in X
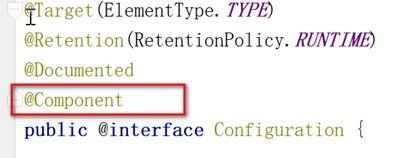
 @Configuration:On the function and class, declare the current class as a configuration class, which is equivalent to a configuration class xml configuration file
 @ComponentScan:Automatically scan the specified package marked with@Repository,@Service,@Controller
 @Component:Annotated class and by Ioc Instantiate and maintain containers
 @Bean::Act on method,amount to xml In the file<bean> Declare the return value of the current method as a bean
 @Value:obtain properties File assignment key value value
Instance 1 - instantiation and acquisition of beans in IOC
Create Spring general project and add coordinate related configuration
<dependencies>
    <dependency>
        <groupId>org.springframework</groupId>
        <artifactId>spring-context</artifactId>
        <version>5.2.3.RELEASE</version>
    </dependency>
</dependencies>
<build>
    <plugins>
        <plugin>
            <groupId>org.apache.maven.plugins</groupId>
            <artifactId>maven-compiler-plugin</artifactId>
            <version>2.3.2</version>
            <configuration>
                <source>1.8</source>
                <target>1.8</target>
                <encoding>utf-8</encoding>
            </configuration>
        </plugin>
    </plugins>
</build>
Add source code
Create userdao, userservice bean object
// UserDao.java
@Repository
public class UserDao {
    public  void test(){
        System.out.println("UserDao.test...");
    }
}


// UserService.java
@Service
public class UserService {
    @Resource
    private UserDao userDao;

    public  void test(){
        System.out.println("UserService.test...");
        userDao.test();
    }
}
Create IocConfig configuration class
// Ioc container configuration Java code implementation
@Configuration
@ComponentScan("com.xxxx.springboot")
public class IocConfig {
}
Create startup class to execute test
public class Starter {
    public static void main(String[] args) {
        AnnotationConfigApplicationContext ac=new AnnotationConfigApplicationContext(IocConfig.class);
        UserService userService= ac.getBean(UserService.class);
        userService.test();
    }
}
At this time, start the Spring Ioc container, instantiate the AnnotationConfigApplicationContext class, receive the configuration parameter class IocConfig, and obtain the UserService Bean implementation method call. At this time, there is no xml configuration file in the application environment, which simplifies the xml configuration of the application.
Use @ Bean annotation to declare that it is used to return the instantiated Bean object at the method (Note: the method name is generally the Bean object name) level.
@Bean annotation usage
Define the AccountDao object and give it to the Spring Ioc container for instantiation
// Note that the @ Repository annotation is not added at the class level at this time
public class AccountDao {
    public  void test(){
        System.out.println("AccountDao.test...");
    }
}
Modify the IocConfig configuration class and add a method to return the AccountDao Bean object
@Configuration
@ComponentScan("com.xxxx.springboot")
public class IocConfig {

    // Returns the instantiated singleton Bean object
    @Bean
    public AccountDao accountDao(){
        return new AccountDao();
    }
}
Inject AccountDao object into UserService
@Service
public class UserService {
    @Resource
    private UserDao userDao;

    @Resource
    private AccountDao accountDao;

    public  void test(){
        System.out.println("UserService.test...");
        userDao.test();
        accountDao.test();
    }
}
Perform test
public class Starter {
    public static void main(String[] args) {
        AnnotationConfigApplicationContext ac=new AnnotationConfigApplicationContext(IocConfig.class);
        UserService userService= ac.getBean(UserService.class);
        userService.test();
        System.out.println(ac.isSingleton("accountDao"));
    }
}
Instance 2 - reading external configuration files
When developing Java web applications, configuration files are common, such as xml,properties,yml and other files. Reading configuration files is also supported in Spring applications. For configuration file reading, we can specify to read relevant configuration by declaring @ PropertySource annotation to class level.
Spring El expression language supports the use of expressions in Xml and annotations, which is similar to the EL expression in JSP. The spring framework uses this expression to realize resource injection. It mainly uses the @ Value annotation to use the expression. Through the @ Value annotation, it can realize the injection of ordinary string, expression operation results, Bean property file content, property file and other parameters. The specific use is as follows:
Preparing the properties configuration file
Add user in src/main/resources directory properties jdbc. Properties file
# user.properties
user.userName=admin
user.password=admin

# jdbc.properties
jdbc.driver=com.mysql.jdbc.Driver
jdbc.url=jdbc:mysql://127.0.0.1:3306/hr?useUnicode=true&characterEncoding=utf8
jdbc.username=root
jdbc.password=root
@Load the ysource properties configuration file
@Configuration
@ComponentScan("com.shsxt")
@PropertySource(value = {"classpath:jdbc.properties","classpath:user.properties"})
public class IocConfig {
 @Value("${jdbc.driver}")
    private String url;
    @Value("${jdbc.url}")
    private String driver;
    @Value("${jdbc.username}")
    private String userName;
    @Value("${jdbc.password}")
    private String password;
    @Bean
    public AccountDao accountDao(){
        return new AccountDao();
    }
    // The console prints attribute value information
    public  void showConfigInfo(){
        System.out.println("driver:"+driver+":url:"+url);
        System.out.println(":userName:"+userName+":password:"+password);
    }
}
Get the contents of the properties file from other Bean objects
@Service
public class UserService {
    @Resource
    private UserDao userDao;

    @Resource
    private AccountDao accountDao;

    @Value("${user.userName}")
    private String userName;
    @Value("${user.password}")
    private String password;

    public  void test(){
        System.out.println("UserService.test...");
        userDao.test();
        accountDao.test();
        System.out.println("userName:"+userName+":password:"+password);
    }
}
Start Starter to view the effect of console output
Combined annotation and meta annotation
Spring from 2 Annotation support has been introduced in version x (the purpose is to introduce the annotation function in jdk1.5) to eliminate a large number of xml configurations by introducing annotations. The annotations introduced by spring are mainly used to inject bean and aop aspect related configurations. However, due to the extensive use of annotations, a large number of duplicate annotation codes will appear and the code will repeat. In order to eliminate duplicate annotations, The introduction of composite annotation in meta annotation can actually be understood as the reconstruction of code, which is equivalent to the annotation of annotation. It has the original function of meta annotation. For example, the @ Configuration annotation used in defining the Configuration class is composite annotation, which has the function of Component annotation, that is, the Configuration class itself is also a single bean maintained by Ioc.
Custom combination annotation
- Define MyCompScan annotation and have the annotation function of @ ComponentScan scanner
/**
 * Combined annotation MyCompScan definition
 *    It has the functions of meta annotation @ Configuration + @ComponentScan
 *    Override value attribute
 */
@Retention(RetentionPolicy.RUNTIME)
@Target(ElementType.TYPE)
@Configuration
@ComponentScan
public @interface MyCompScan {
    String[] value() default {};
}
Apply composite annotation
@MyCompScan("com.xxxx.springboot")
@PropertySource(value = {"classpath:jdbc.properties","classpath:user.properties"})
public class IocConfig02 {
    @Value("${jdbc.driver}")
    private String url;
    @Value("${jdbc.url}")
    private String driver;
    @Value("${jdbc.username}")
    private String userName;
    @Value("${jdbc.password}")
    private String password;
    @Bean
    public AccountDao accountDao(){
        return new AccountDao();
    }

    public  void showConfigInfo(){
        System.out.println("driver:"+driver+":url:"+url);
        System.out.println(":userName:"+userName+":password:"+password);
    }
}
Test combination annotation
public class Starter {
    public static void main(String[] args) {
        AnnotationConfigApplicationContext ac=new AnnotationConfigApplicationContext(IocConfig02.class);
        UserService userService= ac.getBean(UserService.class);
        userService.test();
        System.out.println(ac.isSingleton("accountDao"));
        IocConfig iocConfig=ac.getBean(IocConfig.class);
        iocConfig.showConfigInfo();
    }
}
Spring MVC zero configuration creation and deployment
Based on Spring MVC 5 X uses Maven to build the SpringMvc Web project, and creates and deploys the project through the annotations and related configurations provided by Spring.
Create Spring Mvc Web project
pom.xml add coordinate related configuration
   <!-- spring web -->
<dependency>
  <groupId>org.springframework</groupId>
  <artifactId>spring-web</artifactId>
  <version>5.2.3.RELEASE</version>
</dependency>

<!-- spring mvc -->
<dependency>
  <groupId>org.springframework</groupId>
  <artifactId>spring-webmvc</artifactId>
  <version>5.2.3.RELEASE</version>
</dependency>

<!-- web servlet -->
<dependency>
  <groupId>javax.servlet</groupId>
  <artifactId>javax.servlet-api</artifactId>
  <version>3.0.1</version>
</dependency>

<build>
<finalName>springmvc</finalName>
<plugins>
  <plugin>
    <groupId>org.apache.maven.plugins</groupId>
    <artifactId>maven-compiler-plugin</artifactId>
    <version>2.3.2</version>
    <configuration>
      <source>1.8</source>
      <target>1.8</target>
      <encoding>utf-8</encoding>
    </configuration>
  </plugin>
    <plugin>
        <groupId>org.eclipse.jetty</groupId>
        <artifactId>jetty-maven-plugin</artifactId>
        <version>9.4.27.v20200227</version>
      </plugin>
</plugins>
</build>
Add source code
@Controller
public class HelloController {
    @RequestMapping("/index")
    public  String index(){
        return "index";
    }
}
Add view
Create the index.xml file in the WEB-INF/views directory jsp (jsp is the template here)
<html>
<body>
<h2>test web mvc</h2>
</body>
</html>
Add spring MVC configuration class
The Spring Mvc configuration information MvcConfig file is added as the MVC framework environment. Originally, it is configured through xml (view parser, Json converter, file upload parser, etc.). Here, based on the annotation, it is configured by inheriting the WebMvcConfigurerAdapter class and rewriting relevant methods (note that the MVC environment is started through the @ EnableWebMvc annotation).
/**
 * mvc Basic configuration
 */
@Configuration
@EnableWebMvc
@ComponentScan("com.xxxx.springboot")
public class MvcConfig{


    @Bean
    public InternalResourceViewResolver viewResolver(){
        InternalResourceViewResolver viewResolver=new InternalResourceViewResolver();
        viewResolver.setPrefix("/WEB-INF/views/");
        viewResolver.setSuffix(".jsp");
        return viewResolver;
    }
}
After the MvcConfig class is defined, the problem is how to load the MvcConfig class. It turns out that when building the Mvc application, you load the web when you start the application through the container XML file realizes the loading of configuration file, and the current environment is web The XML file does not exist. At this time, the Mvc application built based on annotation defines WebInitializer to implement the WebApplicationInitializer interface (this interface is used to configure the interface of Servlet3.0 + configuration and replace the web.xml configuration). When the servlet container starts the Mvc application, it will be loaded through the SpringServletContainerInitializer interface to load the Mvc application information configuration. Implement the onStartup method of the interface and load the application information configuration.
Add entry file code
public class WebInitializer implements WebApplicationInitializer {
    @Override
    public void onStartup(ServletContext servletContext) throws ServletException {
        AnnotationConfigWebApplicationContext ctx=new AnnotationConfigWebApplicationContext();
        // Register Mvc configuration information
        ctx.register(MvcConfig.class);
        // Set ServletContext context information
        ctx.setServletContext(servletContext);
        // Configure forwarder Dispatcher
        ServletRegistration.Dynamic servlet=servletContext.addServlet("dispatcher",new DispatcherServlet(ctx));
        servlet.addMapping("/");
        // Instantiate beans at startup
        servlet.setLoadOnStartup(1);
    }
}
Deployment and testing
Start the project through tomcat and access
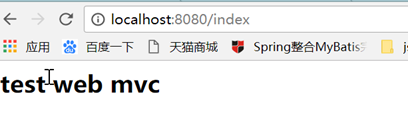
At this time, the address access is successful.
When the project is accessed successfully, the problem arises. If there is a static resource file in the project, how to configure the Handler release processing and how to apply the defined interceptor. At this time, pay attention to the WebMvcConfigurationSupport parent class method and rewrite the relevant methods.
// The static resource handler responds directly to the client without processing
@Override
public void configureDefaultServletHandling(DefaultServletHandlerConfigurer configurer) {
    configurer.enable();
}

// Configuring Interceptors
@Bean
public LoginInterceptor loginInterceptor(){
    return new LoginInterceptor();
}
// Add interceptor to mvc environment
@Override
public void addInterceptors(InterceptorRegistry registry) {
    registry.addInterceptor(loginInterceptor());
}
Spring Boot concept & Features
<img src="https://nuibi.oss-cn-beijing.aliyuncs.com/img/image-20200229103633024.png" alt="image-20200229103633024" style="zoom:80%;" />
Frame concept
With the popularity of dynamic languages (Ruby,Scala,NodeJs, etc.), Java development has become relatively cumbersome, cumbersome configuration, low development efficiency, complex deployment process, and relatively difficult third-party integration. For this environment, Spring Boot has been developed. Its use habit is greater than the configuration goal. With the help of Spring Boot, the project can run quickly, At the same time, with the help of Spring Boot, we can quickly create web applications and deploy them independently (jar package, war package, embedded servlet container). At the same time, with the help of Spring Boot, we can not or rarely configure the relevant xml environment when developing applications, which simplifies the development and greatly improves the development efficiency of the project.
Spring Boot is a new framework provided by pivot team. It is designed to simplify the initial construction and development process of new spring applications. The framework uses a specific way to configure, so that developers no longer need to define a templated configuration. In this way, Spring Boot has become a leader in the booming field of rapid application development
Frame features
Create independent Spring applications, embedded Tomcat, Jetty containers, no need to deploy WAR packages, simplify Maven and Gradle configuration, configure Spring as automatically as possible, and directly implant practical functions in the product environment, such as metrics, health check and extension configuration, no need for code generation and XML configuration. At the same time, Spring Boot not only simplifies web applications, It also provides a series of dependency packages to make other work out of the box.
Spring Boot quick start
Environment: Idea, Maven, Jdk 1.8 +, spring boot 2 x
Create Maven common project
Add dependent coordinates
<parent>
    <groupId>org.springframework.boot</groupId>
    <artifactId>spring-boot-starter-parent</artifactId>
    <version>2.2.2.RELEASE</version>
</parent>
<dependencies>
    <dependency>
        <groupId>org.springframework.boot</groupId>
        <artifactId>spring-boot-starter-web</artifactId>
    </dependency>
</dependencies>
The project of Spring Boot must set the parent as the parent of Spring Boot, which contains a large number of default configurations to simplify the development of the program.
Import web coordinates and related plug-ins of Spring Boot
<plugin>
    <groupId>org.springframework.boot</groupId>
    <artifactId>spring-boot-maven-plugin</artifactId>
</plugin>
Add source code
@Controller
public class HelloController {
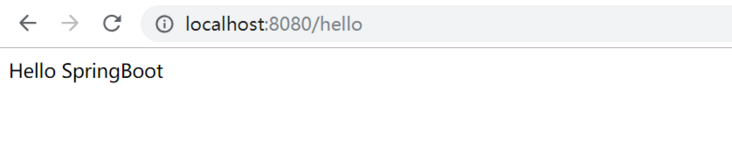
@RequestMapping("hello")
@ResponseBody
public String hello(){
return "Hello Spring Boot";
}
}Create launcher
In hellocontroller Create StarterApplication.java package java
@SpringBootApplication
public class StarterApplication
{
    public static void main(String[] args) {
        SpringApplication.run(Starter.class);
    }
}
Start the Spring Boot application and test it
Here, run the main method to access localhost:8080/hello through the browser. The effect is as follows:
Spring Boot core configuration
Custom Banner and Banner off
<img src="https://nuibi.oss-cn-beijing.aliyuncs.com/img/image-20200216162710816.png" alt="image-20200216162710816" style="zoom:80%;" />
When building the Spring Boot project environment, after the program starts, a striking Spring Boot icon will be printed on the console. The icon describes the version information of Spring Boot. This is a big difference between Spring Boot project and spring project startup. Spring Boot displays the application startup icon when the program starts through the default Banner. Of course, the icon can also be customized.
Banner icon customization
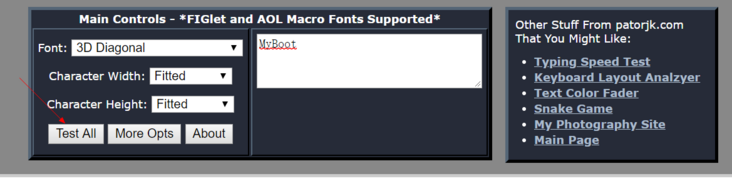
When the Spring Boot project starts, the banner.exe in src/main/resources directory is loaded by default Txt icon file. If the directory file is not provided, use the Spring Boot default icon to print, create a new resources resource directory under the main directory, and create a new banner TXT text file.
Open web address: http://patorjk.com/software/taag/#p=display&f=Graffiti&t=Type%20Something%20
Generate the text corresponding to the icon online and copy the text content to banner Txt
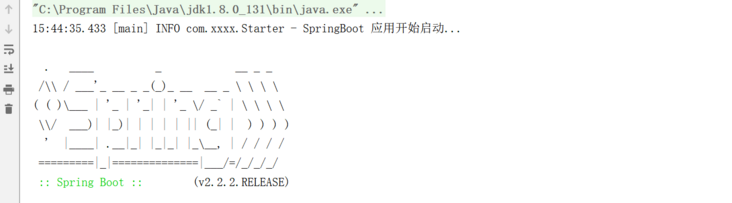
Start the Spring Boot application and print as follows:

Banner icon off
If you don't want to see the startup icon during startup, you can also close it through code, modify the StarterApplication and set the BannerMode value to banner Mode. Off, start the Spring Boot application and turn off the icon output function
@SpringBootApplication
public class StarterApplication  {

    public static void main(String[] args) {
        SpringApplication springApplication=new SpringApplication(StarterApplication .class);
        // Set banner icon off
        springApplication.setBannerMode(Banner.Mode.OFF);
        springApplication.run();
    }
}
Spring Boot configuration file
Spring Boot will read the global configuration file by default, and the configuration file name is fixed as: application Properties or application YML, which is placed in the src/main/resources resource directory. Use the configuration file to modify the default value of SpringBoot automatic configuration;
Add application. In the resources directory Properties file. The configuration information is as follows:
## Project startup port number configuration
server.port=8989
## Project access context path
server.servlet-path=/mvc

## Data source configuration
spring.datasource.driver-class-name=com.mysql.cj.jdbc.Driver
spring.datasource.url=jdbc:mysql://127.0.0.1:3306/hr?useUnicode=true&characterEncoding=utf8
spring.datasource.username=root
spring.datasource.password=root
Or application YML file
## Port number context path
server:
  port: 8989
  servlet:
    context-path: /mvc

## Data source configuration
spring:
  datasource:
    type: com.mchange.v2.c3p0.ComboPooledDataSource
    driver-class-name: com.mysql.cj.jdbc.Driver
    url: jdbc:mysql://127.0.0.1:3306/hr
    username: root
    password: root
Starter coordinates & automated configuration
Starter coordinate configuration
Spring Boot introduces a new Starter coordinate system to simplify the Starter pom of most scenarios of enterprise project development. The application can eliminate the related configuration of the Start pom of the specified scenario, and the automatically configured Bean can be obtained through Spring Boot.
Web starter
Use Spring MVC to build RESTful Web applications, and use Tomcat as the default embedded container
<dependency>
  <groupId>org.springframework.boot</groupId>
  <artifactId>spring-boot-starter-web</artifactId>
</dependency>
Freemarker Starter & Thymeleaf starter
Integrated view technology, introducing FreeMarker starter and thymeleaf starter
<dependency>
  <groupId>org.springframework.boot</groupId>
  <artifactId>spring-boot-starter-freemarker</artifactId>
</dependency>
<dependency>
    <groupId>org.springframework.boot</groupId>
    <artifactId>spring-boot-starter-thymeleaf</artifactId>
</dependency>
JavaMail mail sending Starter
<dependency>
  <groupId>org.springframework.boot</groupId>
  <artifactId>spring-boot-starter-mail</artifactId>
</dependency>
Introducing AOP environment
<dependency>
  <groupId>org.springframework.boot</groupId>
  <artifactId>spring-boot-starter-aop</artifactId>
</dependency>
- [] coordinate reference of relevant starter series
| name | describe |
|---|---|
| spring-boot-starter | Core Spring Boot starter, including automatic configuration support, log and YAML |
| spring-boot-starter-actuator | Production preparation features are used to help us monitor and manage applications |
| spring-boot-starter-amqp | Support for "advanced message queuing Protocol" is realized through spring rabbit |
| spring-boot-starter-aop | Support for aspect oriented programming, including spring AOP and AspectJ |
| spring-boot-starter-batch | Support for Spring Batch, including HSQLDB database |
| spring-boot-starter-cloud-connectors | The support for Spring Cloud Connectors simplifies the connection of services under the cloud platform (for example, Cloud Foundry and Heroku) |
| spring-boot-starter-data-elasticsearch | Support for Elasticsearch search search and analysis engine, including spring data Elasticsearch |
| spring-boot-starter-data-gemfire | Support for GemFire distributed data storage, including spring data GemFire |
| spring-boot-starter-data-jpa | Support for "Java persistence API", including spring data JPA, spring ORM and Hibernate |
| spring-boot-starter-data-mongodb | Support for MongoDB NOSQL database, including spring data mongodb |
| spring-boot-starter-data-rest | The support for exposing Spring Data warehouse through REST is realized through Spring Data REST webmvc |
| spring-boot-starter-data-solr | Support for Apache Solr search platform, including spring data Solr |
| spring-boot-starter-freemarker | Support for FreeMarker template engine |
| spring-boot-starter-groovy-templates | Support for Groovy template engine |
| spring-boot-starter-hateoas | Support for RESTful services based on HATEOAS is realized through spring HATEOAS |
| spring-boot-starter-hornetq | Support for "Java Message Service API" is realized through HornetQ |
| spring-boot-starter-integration | Support for common spring integration modules |
| spring-boot-starter-jdbc | Support for JDBC database |
| spring-boot-starter-jersey | Support for Jersey RESTful Web Services Framework |
| spring-boot-starter-jta-atomikos | Support for JTA distributed transactions is realized through Atomikos |
| spring-boot-starter-jta-bitronix | Support for JTA distributed transactions is realized through Bitronix |
| spring-boot-starter-mail | For javax Mail Support |
| spring-boot-starter-mobile | Support for spring Mobile |
| spring-boot-starter-mustache | Support for Mustache template engine |
| spring-boot-starter-redis | Support for REDIS key value data storage, including spring REDIS |
| spring-boot-starter-security | Support for spring security |
| spring-boot-starter-social-facebook | Support for spring social Facebook |
| spring-boot-starter-social-linkedin | Support for spring social LinkedIn |
| spring-boot-starter-social-twitter | Support for spring social twitter |
| spring-boot-starter-test | Support for common test dependencies, including JUnit, Hamcrest and Mockito, as well as the spring test module |
| spring-boot-starter-thymeleaf | Support for Thymeleaf template engine, including integration with Spring |
| spring-boot-starter-velocity | Support for Velocity template engine |
| spring-boot-starter-web | Support for full stack web development, including Tomcat and spring webmvc |
| spring-boot-starter-websocket | Support for WebSocket development |
| spring-boot-starter-ws | Support for Spring Web Services |
Traditional maven coordinates are also applicable here. If you introduce traditional maven coordinates, you need to consider the preparation of relevant configuration classes
If the relevant starter coordinates do not exist here, you can go to here Search.
Automatic configuration
View the coordinate version of SpringBoot Starter
The related coordinates of SpringBoot Starter were introduced earlier, and the Starter coordinates were introduced to simplify the configuration of the application environment. Here, spring boot Starter web coordinates are built in the environment to briefly analyze the automatic configuration process of spring boot.
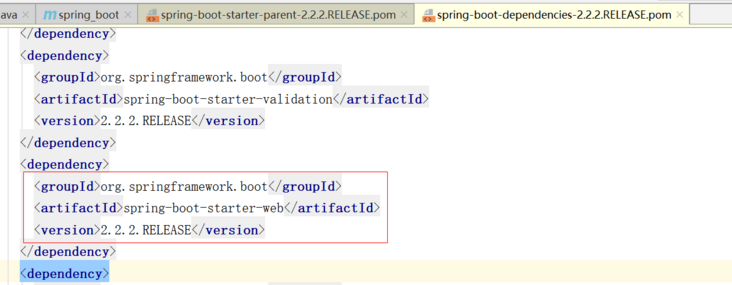
<dependency>
  <groupId>org.springframework.boot</groupId>
  <artifactId>spring-boot-starter-web</artifactId>
</dependency>
The web environment coordinates introduced here do not contain the version number of coordinates like the traditional maven coordinates. The version library corresponding to the starter series coordinates introduced in the project is uniformly controlled by the parent project coordinates, that is, the parent tag introduced in the project.
<parent>
  <groupId>org.springframework.boot</groupId>
  <artifactId>spring-boot-starter-parent</artifactId>
  <!--
     The parent project uniformly controls the dependent version of the project!
  -->
  <version>2.2.2.RELEASE</version>
</parent>
Here, the spring boot starter parent inherits the spring boot dependencies project, and the spring boot starter web coordinate version is defined in the spring boot dependencies project! (the spring boot dependencies project defines each starter coordinate version under the current spring boot version and other coordinate versions that it depends on)
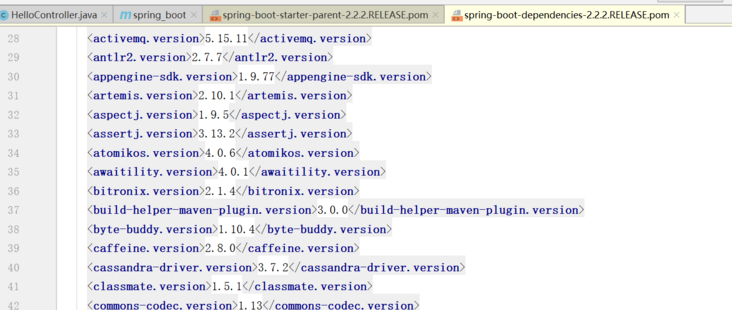
There are many dependent coordinates here, which are not shown in the screenshot. You can pay attention to spring-boot-dependencies-2.2.2 RELEASE. POM file.
Spring Boot automated configuration
Spring Boot projects generally have an entry class of * Application, which provides the main method, which is the entry method of a standard Java Application@ SpringBootApplication annotation is the core annotation of Spring Boot. It is actually a combined annotation:
- @SpringBootApplication
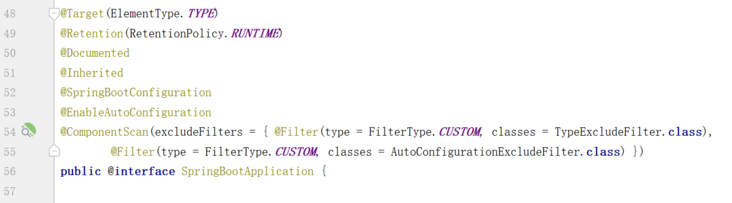
It can be seen that this annotation is also a combined annotation, which combines the @ Configuration annotation. For Spring Boot applications, the @ SpringBootConfiguration annotation belongs to the Configuration annotation of the Boot project, which also belongs to a combined annotation. It is recommended to use the @ SpringBootConfiguration annotation in the Spring Boot project because it combines the @ Configuration annotation.
- @EnableAutoConfiguration
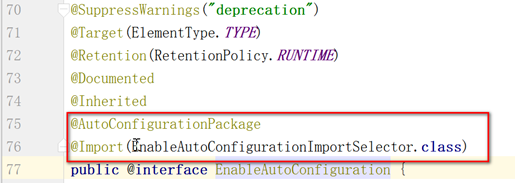
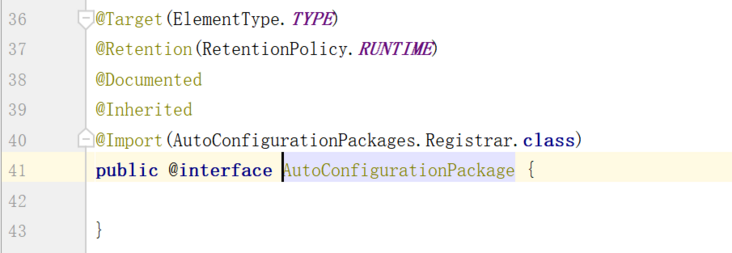
@The EnableAutoConfiguration annotation combines the @ AutoConfigurationPackage and @ Import(AutoConfigurationImportSelector.class) annotations.
The bottom layer of @ AutoConfigurationPackage is also a @ Import(AutoConfigurationPackages.Registrar.class), which will scan the components under the package of the startup class into the Spring container.
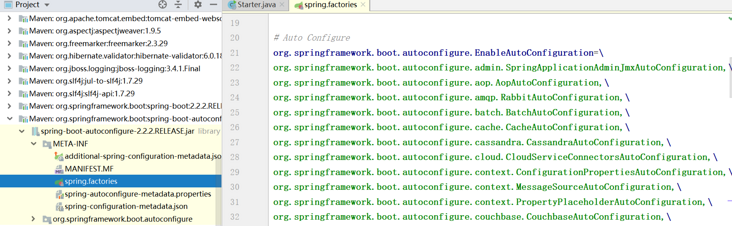
@ Import(AutoConfigurationImportSelector.class) the core class of autoconfigurationimportselector Class, which imports a large number of automatic configuration classes. debug can find that it reads meta-inf / spring under the classpath Configure files under factories.
Taking webmvcoautoconfiguration as an example, we can see that this class is marked as a Configuration class with @ Configuration annotation.

Of course, spring The configuration classes in the factories file will not take effect by default. The specific configuration classes that take effect are determined by the @ ConditionalOnClass annotation marked on the configuration class. Here is the meaning of the @ ConditionalOnClass annotation
@ConditionalOnBean         //   When a given bean exists, instantiate the current bean
@ConditionalOnMissingBean  //   When the given bean does not exist, instantiate the current bean
@ConditionalOnClass        //   When the given class name exists on the classpath, instantiate the current Bean
@ConditionalOnMissingClass //   When the given class name does not exist on the classpath, instantiate the current Bean
This means that the webmvceautoconfiguration configuration class takes effect and requires the existence of servlets in the environment class,DispatcherServlet.class,WebMvcConfigurer.class instance, the configuration class will take effect.
From the above analysis, we can draw the following conclusions:
`Spring Boot adopt maven Medium starter Imported the required scene jar Package, and through the@SpringBootApplication Medium@EnableAutoConfiguration Read the under the classpath META-INF/spring.factories lower EnableAutoConfiguration Configuration classes that use@ConditionalOnClass To mark, according to@ConditionalOnClass Dimension constraints to introduce automated environment configuration.`
Profile configuration
Profile yes Spring It is used to support different configurations for different environments Profile Configuration use application-{profile}.yml,such as application-dev.yml ,application-test.yml.
Through the application Set spring.com in YML profiles. Active = test|dev|prod to dynamically switch different environments. The specific configuration is as follows:
- Application dev.yml development environment configuration file
server:
  port: 8989
- application-test.yml test environment configuration file
server:
  port: 9999
- application-prod.yml production environment configuration file
server:
  port: 8686
- application.yml master profile
## Environment selection configuration
spring:
  profiles:
    active: dev
Start Starter to view the console input effect

Modify application YML sets the active value to prod
## Environment selection configuration
spring:
  profiles:
    active: prod
Start Starter and check the console input effect again

Log configuration
When developing enterprise projects, the output of logs is undoubtedly a more effective way to locate system bug s. It is also an effective means to quickly find and solve errors after the project enters the production environment. Therefore, the use of logs is also an important function for the project.
Spring Boot uses the LogBack logging system by default. If you do not need to change to other logging systems, such as Log4j2, there is no need for redundant configuration. LogBack prints logs to the console by default. If you want to use LogBack, you need to add dependency dependency in principle
<dependency>
    <groupId>org.springframework.boot</groupId>
    <artifactId>spring-boot-starter-logging</artifactId>
</dependency>
<img src="https://nuibi.oss-cn-beijing.aliyuncs.com/img/image-20200229153940293.png" alt="image-20200229153940293" style="zoom:80%;" />
Because new Spring Boot projects generally refer to Spring Boot starter or Spring Boot starter web, and these two start dependencies already include the dependency on Spring Boot starter logging, so there is no need to add additional dependencies.
Log information output in the project
Add the Log class to the Starter startup class and print the Log information on the console.
package com.xxxx;

import org.slf4j.Logger;
import org.slf4j.LoggerFactory;
import org.springframework.boot.SpringApplication;
import org.springframework.boot.autoconfigure.SpringBootApplication;

@SpringBootApplication
public class Starter {
    private static Logger logger = LoggerFactory.getLogger(Starter.class);

    public static void main(String[] args) {
        logger.info("SpringBoot App start...");
        SpringApplication.run(Starter.class);
    }
}
Log output format configuration
Modify application Add the log output format information configuration to the YML file, and you can modify the application YML file to control the console log output format, and set the log information output to external files.
logging:
  pattern:
    console: "%d{yyyy-MM-dd HH:mm:ss} [%thread] %-5level %logger- %msg%n"
    level: debug
  file:
    path: "."
    name: "springboot.log"
For more log output, refer to Official website
FreeMarker & thymeleaf view technology integration
Freemarker view integration
SpringBoot internally supports the integration of Freemarker view technology and provides an automatic configuration class FreeMarkerAutoConfiguration. With the help of automatic configuration, it is convenient to integrate Freemarker foundation into SpringBoot environment. Here, the Freemarker environment configuration is introduced with the help of the entry project.
- starter coordinate introduction
<dependency>
    <groupId>org.springframework.boot</groupId>
    <artifactId>spring-boot-starter-freemarker</artifactId>
</dependency>
Add Freemarker configuration information
Freemarker default view path document resources/templates directory (determined by the automation configuration class FreemarkerProperties class), which can be used in application Modify in YML.

Modify application The basic configuration of freemaker added to YML is as follows:
spring:
  freemarker:
    suffix: .ftl
    content-type: text/html
    charset: UTF-8
template-loader-path: classpath:/views/- Write IndexController controller forwarding view
package com.xxxx.controller;

import org.springframework.stereotype.Controller;
import org.springframework.web.bind.annotation.RequestMapping;

@Controller
public class IndexController {

    @RequestMapping("index")
    public String index(){
        return "index";
    }
}- Add index. In the views directory FTL view

- Start Starter access

Thymeleaf view integration
SpringBoot supports multiple view technology integration, and the official website of SpringBoot recommends using Thymeleaf as the front-end view page. Here, Thymeleaf view integration is realized, and Thymeleaf environment configuration is introduced with the help of the entry project.
- starter coordinate introduction
<dependency>
    <groupId>org.springframework.boot</groupId>
    <artifactId>spring-boot-starter-thymeleaf</artifactId>
</dependency>
Add Thymeleaf configuration information
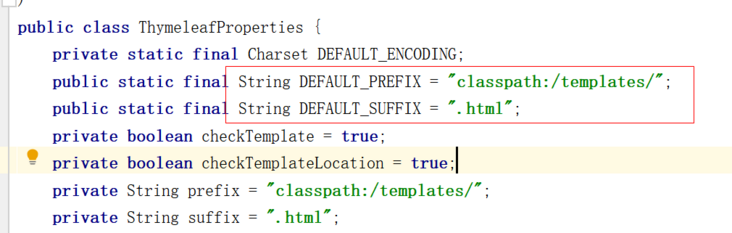
Thymeleaf default view path document resources/templates directory (determined by the automation configuration class FreemarkerProperties class), which can be implemented in application Modify in YML.
## Environment selection configuration
spring:
  thymeleaf:
    prefix: classpath:/html/
    ## Turn off thymeleaf page caching
cache: false- Write IndexController controller forwarding view
@Controller
public class IndexController {

    @RequestMapping("index")
    public String index(Model model){
        model.addAttribute("msg","hello SpringBoot ");
        return "index";
    }
}- Add index.html directory html view
Modify the default storage path of Thymeleaf template (create html folder under resources directory)
<!DOCTYPE html>
<html lang="en" xmlns:th="http://www.thymeleaf.org">
<head>
  <meta charset="UTF-8">
  <title>Title</title>
</head>
<body>
 <h1 th:text="${msg}"></h1>
</body>
</html>- Start Starter access

SpringBoot static resource access
From the entry project, we can see that the interception rule of Spring Mvc request is' / ', and the default static resource path of Spring Boot is as follows:
public class ResourceProperties {
    private static final String[] CLASSPATH_RESOURCE_LOCATIONS = new String[]{"classpath:/META-INF/resources/", "classpath:/resources/", "classpath:/static/", "classpath:/public/"};
    private String[] staticLocations;
    private boolean addMappings;
    private final ResourceProperties.Chain chain;
    private final ResourceProperties.Cache cache;
That is, we can store the static resource files of web applications in the resources resource directory.
Create static or public in the resources directory to store static resource files such as images, js and css
Browser access:
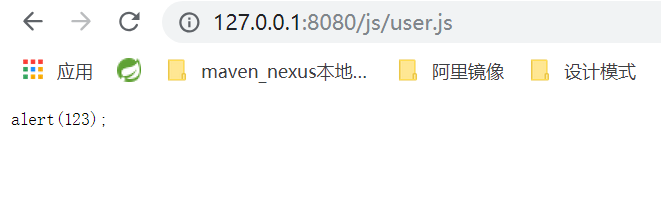
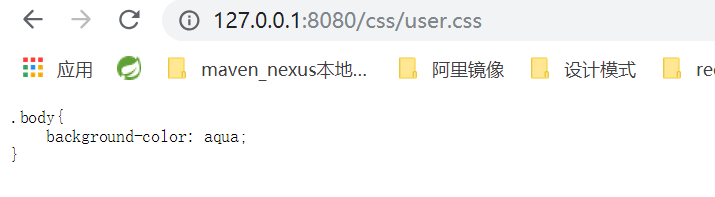
<img src="https://nuibi.oss-cn-beijing.aliyuncs.com/img/1564045973581.png" alt="1564045973581" style="zoom: 40%;" />
Spring boot application packaging and deployment
When the project is developed and deployed online, the project needs to be packaged. The project built in the introduction is a common application. Because the Tomcat container is embedded in SpringBoot, all packaged jar packages can run by default.
Jar package deployment
Configure packaging commands
Under idea, configure clean compile package - dmaven test. Skip = true execute the package command, and get the project file to be deployed from the target directory.
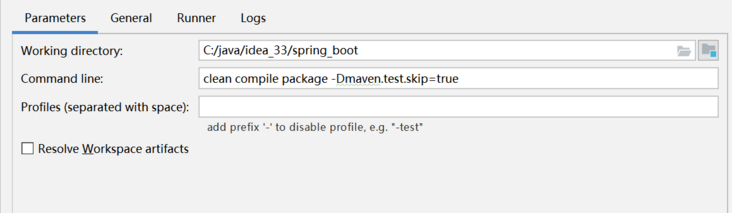
<img src="https://nuibi.oss-cn-beijing.aliyuncs.com/img/image-20200229222952894.png" alt="image-20200229222952894" style="zoom:50%;" />
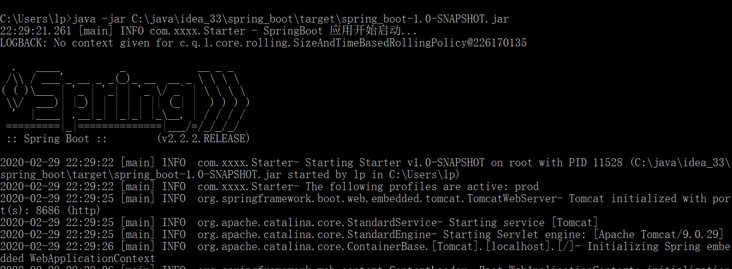
Deploy and access
Open the local dos window and execute the Java jar command to deploy the jar package file that has been printed
Browser access
<img src="images\image-20200229223320543.png" alt="image-20200229223320543" style="zoom:50%;" />
war package deployment
Deploying web projects in the form of War package is a common deployment method in the production environment, and it is also the deployment scheme of most web applications at present. Here, the steps of packaging and deploying Spring Boot Web projects are as follows
pom.xml modification
- Application type modification
Since the project built by the entry project is a jar application by default, the following modifications need to be made to hit war here
<img src="https://nuibi.oss-cn-beijing.aliyuncs.com/img/image-20200229224431677.png" alt="image-20200229224431677" style="zoom:80%;" />
- Embedded tomcat ignored
When constructing the sprigboot application, the introduced spring boot starter web introduces the tomcat container by default. The content tomcat is ignored here
<dependency>
    <groupId>org.springframework.boot</groupId>
    <artifactId>spring-boot-starter-tomcat</artifactId>
    <scope>provided</scope>
</dependency>

  <build>
    <!--
       Configure generated war file name
    -->
    <finalName>springboot</finalName>
    <plugins>
      <plugin>
        <groupId>org.springframework.boot</groupId>
        <artifactId>spring-boot-maven-plugin</artifactId>
      </plugin>
    </plugins>
  </build>
Starter modification
Add the container startup load file (similar to reading web.xml). This is implemented by inheriting the SpringBootServletInitializer class and overriding the configure method. When deploying the project, specify the external tomcat to read the project entry method.
@SpringBootApplication
public class Starter  extends SpringBootServletInitializer {
    private static Logger logger = LoggerFactory.getLogger(Starter.class);

    public static void main(String[] args) {
        logger.info("SpringBoot App start...");
        SpringApplication.run(Starter.class);
    }

    @Override
    protected SpringApplicationBuilder configure(SpringApplicationBuilder builder) {
        return  builder.sources(Starter.class);
    }
}
Deploy and access
- External tomcat deployment and access
<img src="https://nuibi.oss-cn-beijing.aliyuncs.com/img/image-20200229225119792.png" alt="image-20200229225119792" style="zoom: 70%;" />

<dependency>
  <groupId>junit</groupId>
  <artifactId>junit</artifactId>
  <version>4.11</version>
  <scope>test</scope>
</dependency>