This blog is originally created by the author. It is forbidden to reprint without permission. Please respect the originality! If you have any questions, please contact QQ509961766.
Due to the lack of routing support in Vue development, Vue-router plug-in is officially supplemented. The single page application of Vue is based on Routing and component. Routing is used to set access paths and map paths and components. Traditional page applications use some hyperlinks to achieve page switching and jumping. In the vue-router single page application, it is the switch between paths, in fact, the switch between components. Routing is the path manager of SPA. In general, vue-router is our WebApp link path management system.
Some small partners have doubts. Why can't we write links directly with tag a as before? Because we usually use Vue to do single-page applications, only one home page index.html, so you write Labels don't work, so use vue-router to manage them.
Vue Router Vue.js is the official routing manager. It is deeply integrated with the core of Vue.js, making it easy to build single-page applications. The functions included are:
- Nested Route/View Table
- Modular Component-based Routing Configuration
- Routing parameters, queries, wildcards
- View Transition Effect Based on Vue.js Transition System
- Fine-grained navigation control
- Links to CSS class es with automatic activation
- HTML5 history mode or hash mode, automatically downgraded in IE9
- Customized scrollbar behavior
(1) Installing router
Because the author uses vue-cli scaffolding to build the project, it is necessary to choose whether to use routing or not in the process of project configuration.
(See Spring Boot Vue Element Initial Practical Warfare (I) Construction of VUE Development Environment ),
If y is selected, the subsequent download dependencies will automatically download vue-router. Here is the installation:
cnpm install vue-router --save-dev
(2) New router components
Create a new router folder under the src directory, and then create index.js
//Introducing router
import Vue from 'vue'
import Router from 'vue-router'
Vue.use(Router)

//New routing file, if not add
import Main from '@/pages/Main'
import Dashboard from '@/pages/Dashboard'
import User from '@/pages/User'
import Log from '@/pages/Log'

//Define routing, each routing is a component, each component consists of path, component name, nested subcomponents, etc.
let routes = [
  {
    path: '/',
    component: Main,
    hidden: true,
    children: [{
      path: '/',
      component: Dashboard,
      name: 'system management'
    }]
  },
  {
    path: '/',
    name: 'system management',
    component: Main,
    iconCls: 'fa fa-cog fa-fw',
    children: [
      {
        path: '/user',
        component: User,
        name: 'user management',
        iconCls: 'fa fa-user-o fa-fw'
      },
      {
        path: '/log',
        component: Log,
        name: 'Log Management',
        iconCls: 'fa fa-file-text-o fa-fw'
      }
    ]
  }
]

const router = new Router({
  mode: 'history',//History record model, get rid of#
  base: '/user/',
  routes: routes
})

export default router
(3) Introducing in main.js
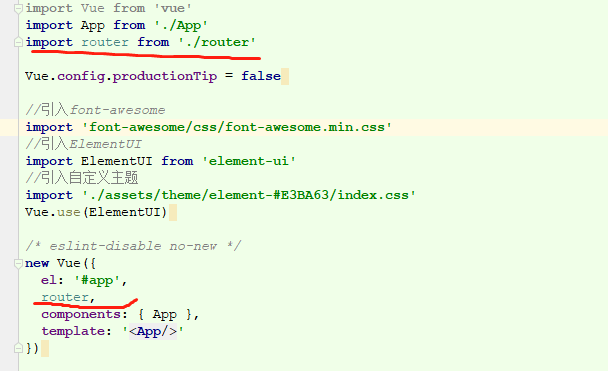
(4) Initialization menu in main.vue
We need to traverse the routing dynamically so that we can only change the router later, without changing the page menu.
1. First, we need to write a method to traverse router and initialize a variable to put menu data.
let data = () => {
    return {
      collapsed: false,
      systemName: 'User Management System',
      userName: 'admin',
      menus: []
    }
  }
  //This method is the variable menu method, and then put it into the menus collection.
  let initMenu = function() {
    for (let i in this.$router.options.routes) {
      let root = this.$router.options.routes[i]
      if (root.hidden)
        continue
      let children = []
      for (let j in root.children) {
        let item = root.children[j]
        if (item.hidden)
          continue
        children.push(item)
      }

      if (children.length < 1)
        continue

      this.menus.push(root)
      root.children = children
    }
  }

  export default {
    data: data,
    methods: {
      initMenu
    },
    mounted: function() {
      this.initMenu()
    }
  }
2. Then, menus are looped out and menus are generated.
<el-menu :default-active="$route.path" :collapse="collapsed">
 <template v-for="(item,index) in menus">
    <el-submenu :index="index+''" v-if="!item.leaf">
      <template slot="title">
        <i :class="item.iconCls" style="margin-left: -20px;margin-right: 10px;"></i>
        <span>{{item.name}}</span>
      </template>
      <el-menu-item
        v-for="child in item.children"
        :index="child.path"
        :key="child.path"
        @click="$router.push(child.path)">
        <i :class="child.iconCls" style="margin-left: -20px;margin-right: 10px;"></i>{{child.name}}
      </el-menu-item>
    </el-submenu>
    <el-menu-item v-if="item.leaf&&item.children.length>0" :index="item.children[0].path">
      <i :class="item.iconCls" style="margin-left: -20px;margin-right: 10px;"></i>{{item.children[0].name}}
    </el-menu-item>
  </template>
</el-menu>
The following figure is the final page. You can click on the menu to switch pages.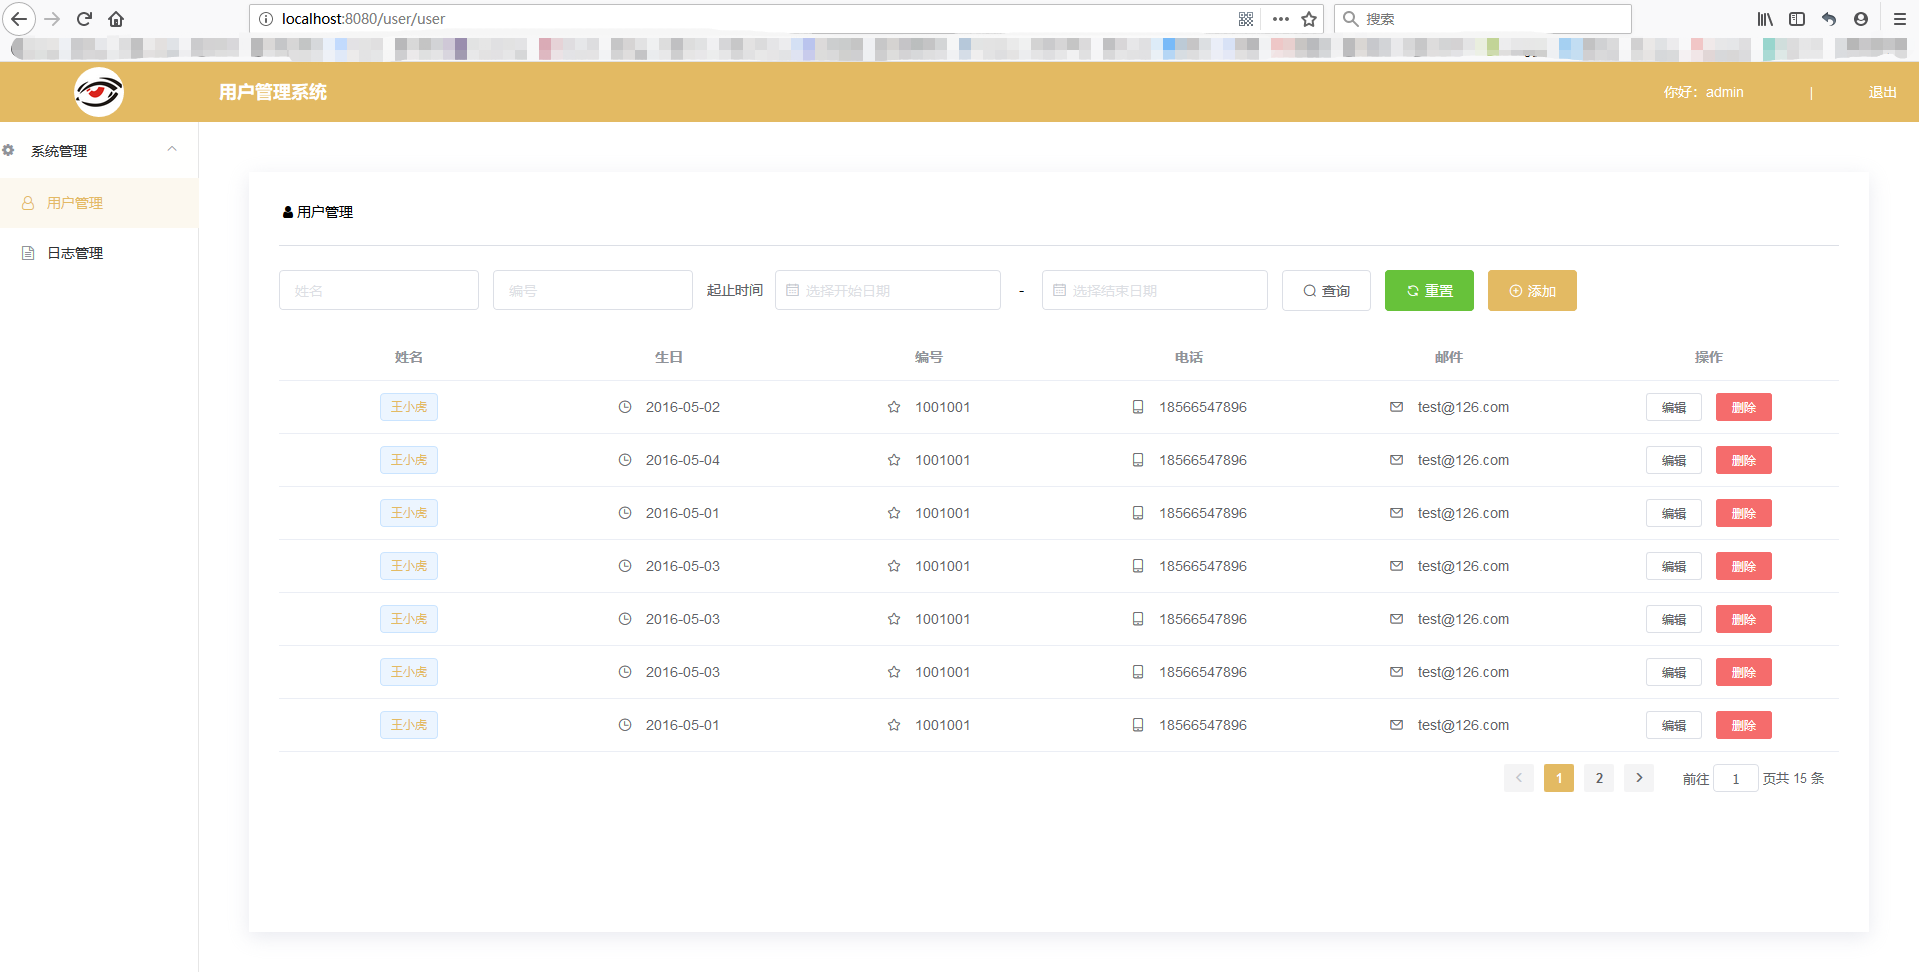
(5) Routing Switching Animation
When switching routes, the page has no effect but straight-in, straight-out and no force at all. So in order to achieve the special effect of switching pages like native app, some excessive effects are added to beautify the effect of switching routes, such as left-right sliding, gradual entry and gradual exit.
<transition :name="transitionName" mode="out-in">
  <router-view></router-view>
</transition>

//Use watch to monitor changes in $router
watch: {
  $route(to, from) {
  	//Here you can switch routes according to specific scenarios
    this.transitionName = 'slide-right';
  }
}

//css Style
@keyframes slideInLeft {
  from {
    transform: translate3d(100%, 0, 0);
    opacity: 1;
  }
  to {
    transform: translate3d(0, 0, 0);
    opacity: 1;
  }
}
@keyframes slideInRight {
  from {
    transform: translate3d(-100%, 0, 0);
    opacity: 1;
  }
  to {
    transform: translate3d(0, 0, 0);
    opacity: 1;
  }
}
@keyframes slideLeftOut {
  from {
    transform: translate3d(0, 0, 0);
    opacity: 0;
  }
  to {
    transform: translate3d(100%, 0, 0);
    opacity: 0;
  }
}
@keyframes slideRightOut {
  from {
    transform: translate3d(0, 0, 0);
    opacity: 0;
  }
  to {
    transform: translate3d(-100%, 0, 0);
    opacity: 0;
  }
}
.slide-left-enter-active {
  animation: slideInLeft .3s forwards;
  z-index:5;
}

.slide-left-leave-active {
  animation: slideLeftOut .3s forwards;
  z-index:3;
}
.slide-right-enter-active {
  animation: slideInRight .3s forwards;
  z-index:5;
}

.slide-right-leave-active {
  animation: slideRightOut .3s forwards;
  z-index:3;
}
Last article: Spring Boot Vue Element Getting Started Actual Warfare (8) Static List Page
Next article: Spring Boot Vue Element Initial Practical Warfare (10) Vue Life Cycle
Click here to return to the directory
Source code download
Github:
https://github.com/Iamoldwang/spring-boot-vue.git
Gitee:
https://gitee.com/Iamoldwang/spring-boot-vue.git