Crazy God says spring MVC video link:
Station B video
The link of the official account of the gods.
official account
1. What is spring MVC
1.1 review MVC
1.1.1 what is MVC
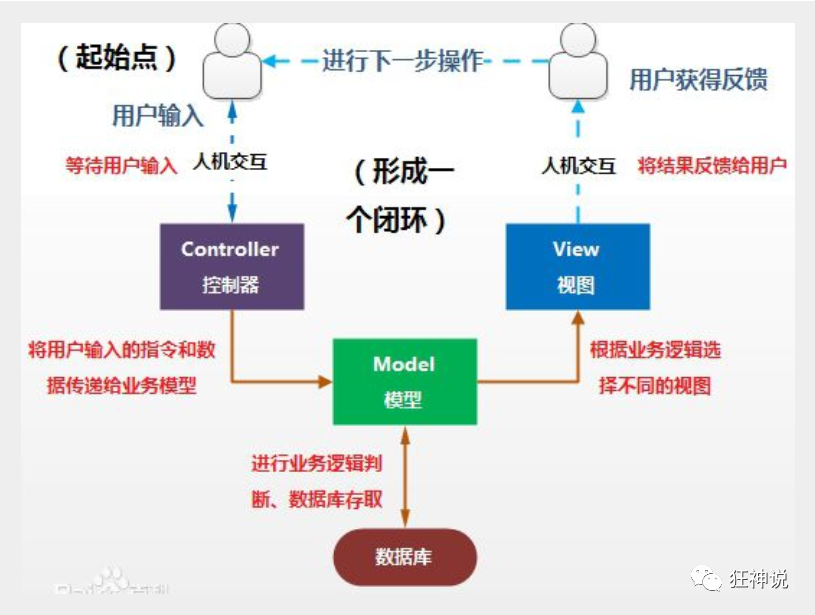
- MVC is the abbreviation of model, view and controller. It is a software design specification.
- It is a method to organize code by separating business logic, data and display.
- The main function of MVC is to reduce the two-way coupling between view and business logic.
- MVC is not a design pattern, MVC is an architecture pattern. Of course, there are differences between different MVCs.
**Model: * * data model, which provides data to be displayed, contains data and behavior. It can be considered as domain model or JavaBean component (including data and behavior), but now it is generally separated: Value Object (data Dao) and Service layer (behavior Service). That is, the model provides functions such as model data query and model data status update, including data and business.
**View: * * is responsible for displaying the model, which is generally the user interface we see and what customers want to see.
**Controller: * * receives the user's request and delegates it to the model for processing (state change). After processing, the returned model data is returned to the view, which is responsible for displaying it. In other words, the controller does the work of a dispatcher.
The most typical MVC is the pattern of JSP + servlet + javabean.
1.1.2 Model1 Era
- In the early development of web, model 1 is usually used.
- Model1 is mainly divided into two layers: view layer and model layer.
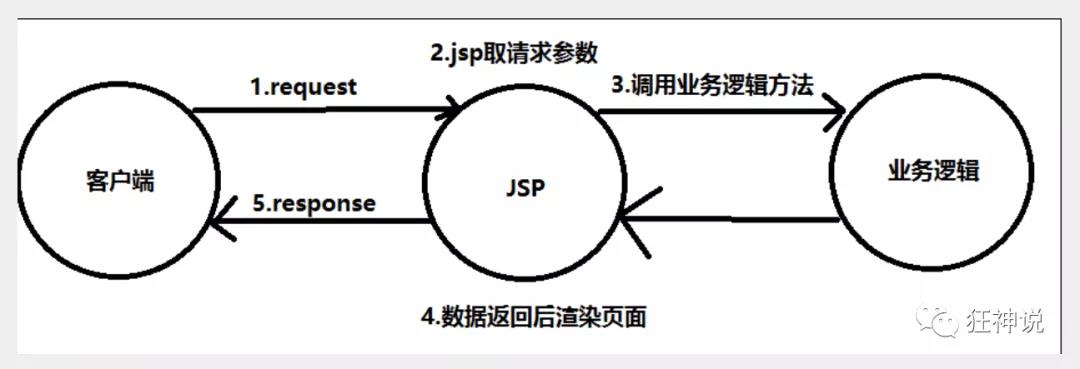
Advantages of Model1: simple architecture, more suitable for small project development;
Model1 disadvantages: JSP responsibilities are not single, responsibilities are too heavy, and it is not easy to maintain;
1.1.3 Model2 Era
Model 2 divides a project into three parts, including view, control and model.
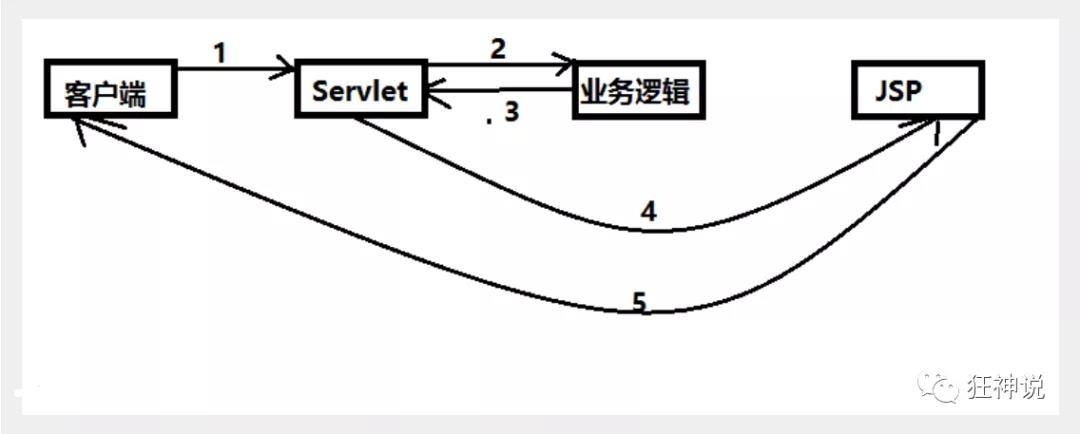
- User sends request
- The Servlet receives the request data and calls the corresponding business logic method
- After the business is processed, the updated data is returned to the servlet
- servlet turns to JSP, which renders the page
- Respond to the front-end updated page
Responsibility analysis:
Controller: controller
- Get form data
- Call business logic
- Go to the specified page
Model: Model
- Business logic
- Status of saved data
View: View
- Display page
Model2 not only improves the reuse rate of code and the scalability of the project, but also greatly reduces the maintenance cost of the project. The implementation of Model 1 mode is relatively simple and suitable for rapid development of small-scale projects. The JSP page in Model 1 plays both the roles of View and Controller, mixing the control logic and presentation logic, resulting in very low code reusability and increasing the scalability of the application and the difficulty of maintenance. Model 2 eliminates the disadvantages of Model 1.
1.1.4 review Servlet
-
Create a Maven project as the parent project! pom dependency!
<dependencies> <dependency> <groupId>junit</groupId> <artifactId>junit</artifactId> <version>4.12</version> </dependency> <dependency> <groupId>org.springframework</groupId> <artifactId>spring-webmvc</artifactId> <version>5.1.9.RELEASE</version> </dependency> <dependency> <groupId>javax.servlet</groupId> <artifactId>servlet-api</artifactId> <version>2.5</version> </dependency> <dependency> <groupId>javax.servlet.jsp</groupId> <artifactId>jsp-api</artifactId> <version>2.2</version> </dependency> <dependency> <groupId>javax.servlet</groupId> <artifactId>jstl</artifactId> <version>1.2</version> </dependency> </dependencies> -
Establish a Moudle: springmvc-01-servlet and add Web app support!
-
Import jar dependencies for servlet s and JSPS
<dependency>
   <groupId>javax.servlet</groupId>
   <artifactId>servlet-api</artifactId>
   <version>2.5</version>
</dependency>
<dependency>
   <groupId>javax.servlet.jsp</groupId>
   <artifactId>jsp-api</artifactId>
   <version>2.2</version>
</dependency>
-
Write a Servlet class to handle user requests
package com.kuang.servlet; //Implement Servlet interface public class HelloServlet extends HttpServlet { @Override protected void doGet(HttpServletRequest req, HttpServletResponse resp) throwsServletException, IOException { //Get parameters String method = req.getParameter("method"); if (method.equals("add")){ req.getSession().setAttribute("msg","Yes add method"); } if (method.equals("delete")){ req.getSession().setAttribute("msg","Yes delete method"); } //Business logic //View jump req.getRequestDispatcher("/WEB-INF/jsp/hello.jsp").forward(req,resp); } @Override protected void doPost(HttpServletRequest req, HttpServletResponse resp) throwsServletException, IOException { doGet(req,resp); } } -
Write hello JSP, create a JSP folder under the WEB-INF directory, and create hello jsp
<%@ page contentType="text/html;charset=UTF-8" language="java" %> <html> <head> <title>Kuangshen</title> </head> <body> ${msg} </body> </html> -
On the web Registering servlets in XML
<?xml version="1.0" encoding="UTF-8"?> <web-app xmlns="http://xmlns.jcp.org/xml/ns/javaee" xmlns:xsi="http://www.w3.org/2001/XMLSchema-instance" xsi:schemaLocation="http://xmlns.jcp.org/xml/ns/javaee http://xmlns.jcp.org/xml/ns/javaee/web-app_4_0.xsd" version="4.0"> <servlet> <servlet-name>HelloServlet</servlet-name> <servlet-class>com.kuang.servlet.HelloServlet</servlet-class> </servlet> <servlet-mapping> <servlet-name>HelloServlet</servlet-name> <url-pattern>/user</url-pattern> </servlet-mapping> </web-app> -
Configure Tomcat and start the test
-
- localhost:8080/user?method=add
- localhost:8080/user?method=delete
What does the MVC framework do
- Mapping URLs to java classes or methods of java classes
- Encapsulates data submitted by users
- Processing request - calling related business processing - encapsulating response data
- Render the response data jsp / html and other presentation layer data
explain:
Common server-side MVC frameworks include Struts, Spring MVC and ASP NET MVC,Zend Framework,JSF; Common front-end MVC frameworks: vue, angularjs, react, backbone; Other patterns evolved from MVC, such as MVP, MVVM and so on
1.2 what is spring MVC
1.2.1 general
Spring MVC is a part of the Spring Framework and a lightweight Web framework based on Java to implement MVC.
View official documents: https://docs.spring.io/spring/docs/5.2.0.RELEASE/spring-framework-reference/web.html#spring-web
Why should we learn spring MVC?
Features of Spring MVC:
- Lightweight, easy to learn
- Efficient, request response based MVC framework
- Good compatibility with Spring and seamless combination
- Convention over configuration
- Powerful functions: RESTful, data validation, formatting, localization, theme, etc
- Concise and flexible
Spring's web framework is designed around the dispatcher Servlet.
The dispatcher servlet is used to distribute requests to different processors. Starting from Spring 2.5, users using Java 5 or above can develop based on annotations, which is very concise;
Because Spring MVC is good, simple, convenient and easy to learn, it is naturally seamlessly integrated with Spring (using Spring IOC and Aop), and the use convention is better than configuration Can carry out simple junit test Support Restful style Exception handling, localization, internationalization, data validation, type conversion, interceptors and so on... So we need to learn
The most important point is that there are many people and companies
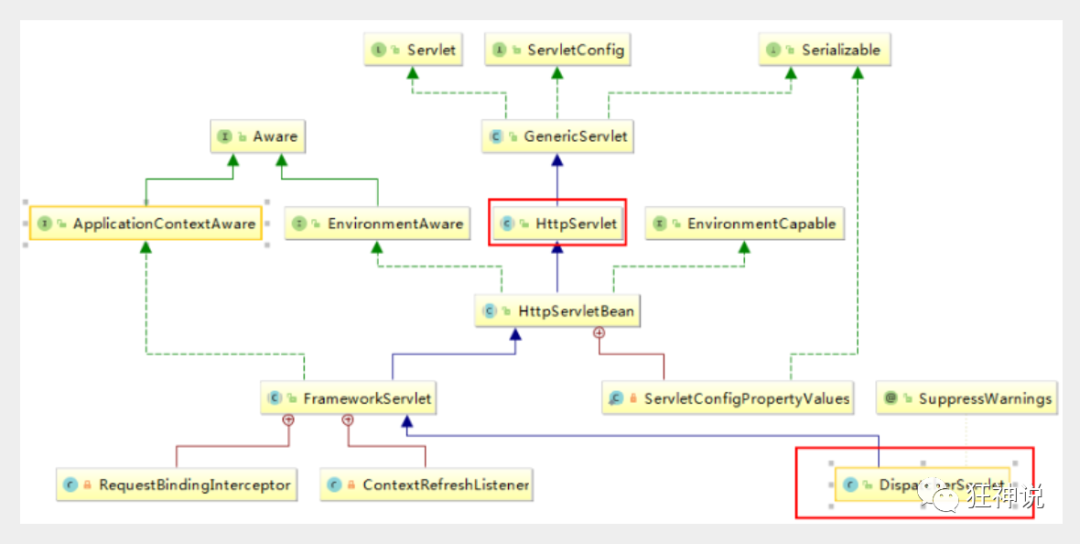
1.2.2 central controller
Spring's web framework is designed around dispatcher servlet. The dispatcher servlet is used to distribute requests to different processors. Starting from Spring 2.5, users using Java 5 or above can adopt annotation based controller declaration.
Like many other MVC frameworks, the Spring MVC framework is request driven. It distributes requests and provides other functions around a central Servlet. The dispatcher Servlet is an actual Servlet (it inherits from the HttpServlet base class).
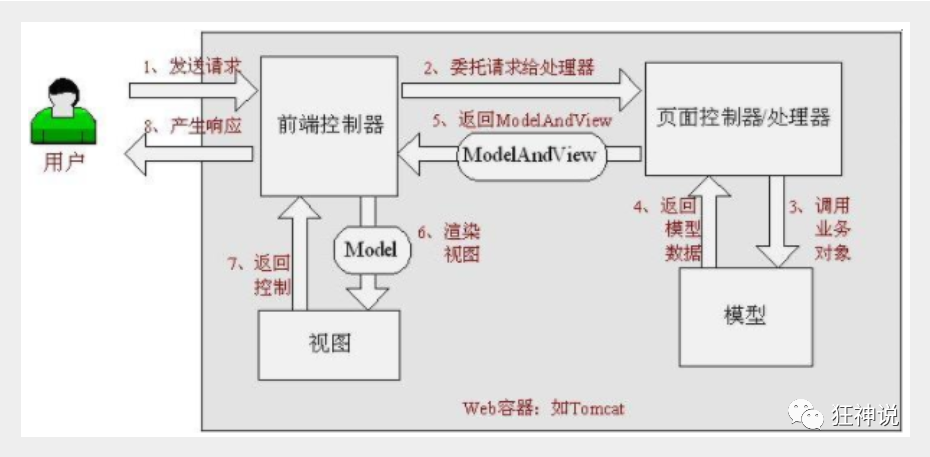
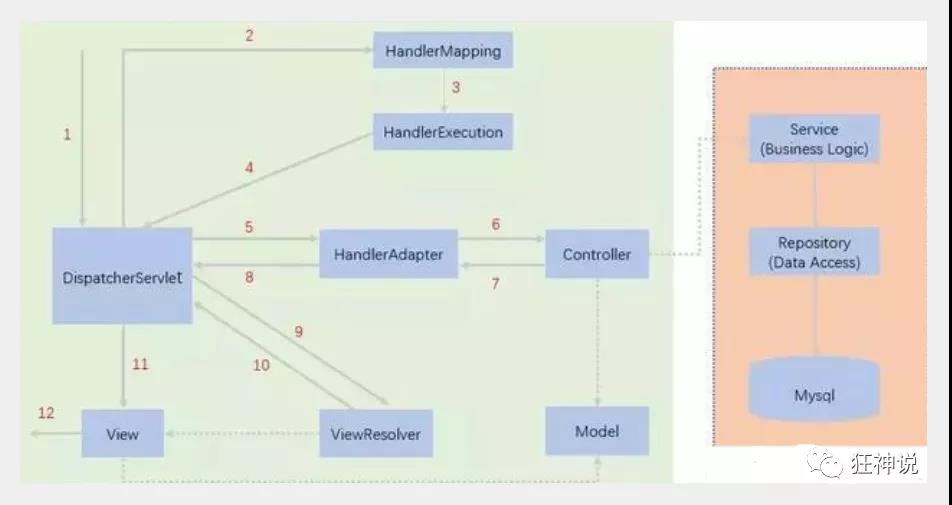
The principle of spring MVC is shown in the following figure:
When a request is initiated, the front controller intercepts the request, generates a proxy request according to the request parameters, finds the actual controller corresponding to the request, processes the request, creates a data model, accesses the database, and responds to the model to the central controller. The controller renders the view result using the model and view, and returns the result to the central controller, The result is then returned to the requester.
1.2.3 spring MVC implementation principle
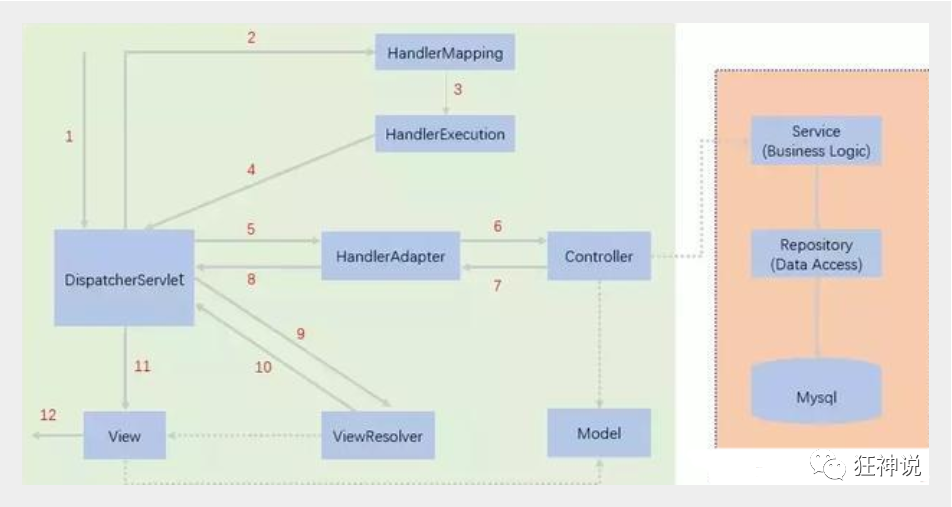
The figure shows a relatively complete flow chart of spring MVC. The solid line indicates the technology provided by the spring MVC framework, which does not need to be implemented by developers, and the dotted line indicates that it needs to be implemented by developers.
Briefly analyze the implementation process
-
Dispatcher servlet represents the front controller and is the control center of the whole spring MVC. When the user sends a request, the dispatcher servlet receives the request and intercepts the request.
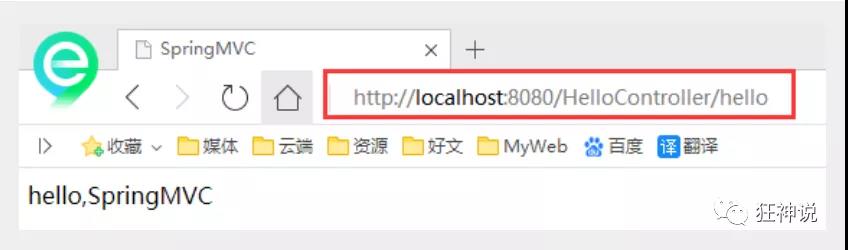
We assume that the requested url is: http://localhost:8080/SpringMVC/hello
As above, the url is divided into three parts:
http://localhost:8080 Server domain name
Spring MVC is a web site deployed on the server
hello indicates the controller
Through analysis, the above url is expressed as: request the hello controller of the spring MVC site located on the server localhost:8080.
-
HandlerMapping is processor mapping. DispatcherServlet calls HandlerMapping, which looks up the Handler according to the request url.
-
HandlerExecution refers to a specific Handler. Its main function is to find the controller according to the url. The controller found by the url above is: hello.
-
HandlerExecution passes the parsed information to DispatcherServlet, such as parsing controller mapping.
-
The HandlerAdapter represents a processor adapter that executes the Handler according to specific rules.
-
The Handler lets the specific Controller execute.
-
The Controller returns the specific execution information to the HandlerAdapter, such as ModelAndView.
-
The HandlerAdapter passes the view logical name or model to the dispatcher servlet.
-
DispatcherServlet calls the view resolver to resolve the logical view name passed by the HandlerAdapter.
-
The view parser passes the parsed logical view name to the dispatcher servlet.
-
DispatcherServlet calls a specific view according to the view result parsed by the view parser.
-
The final view is presented to the user.
Listen to the principle here first. It doesn't matter if you don't understand it. We'll write a corresponding code implementation right away, and everyone will understand it. If you don't understand it, write it 10 times. There are no stupid people, only lazy people!
Now we are ready to write our introductory program!
2. The first MVC program
2.1 Hello,SpringMVC
2.1.1 configuration version
1. Create a new Moudle, springmvc-02-hello, and add web support!
2. Confirm that the dependency of spring MVC is imported!
3. Configure web XML, register DispatcherServlet
<?xml version="1.0" encoding="UTF-8"?>
<web-app xmlns="http://xmlns.jcp.org/xml/ns/javaee"
        xmlns:xsi="http://www.w3.org/2001/XMLSchema-instance"
        xsi:schemaLocation="http://xmlns.jcp.org/xml/ns/javaee http://xmlns.jcp.org/xml/ns/javaee/web-app_4_0.xsd"
        version="4.0">

   <!--1.register DispatcherServlet-->
   <servlet>
       <servlet-name>springmvc</servlet-name>
       <servlet-class>org.springframework.web.servlet.DispatcherServlet</servlet-class>
       <!--Associate a springmvc Configuration file for:[servlet-name]-servlet.xml-->
       <init-param>
           <param-name>contextConfigLocation</param-name>
           <param-value>classpath:springmvc-servlet.xml</param-value>
       </init-param>
       <!--Startup level-1-->
       <load-on-startup>1</load-on-startup>
   </servlet>

   <!--/ Match all requests; (excluding.jsp)-->
   <!--/* Match all requests; (including.jsp)-->
   <servlet-mapping>
       <servlet-name>springmvc</servlet-name>
       <url-pattern>/</url-pattern>
   </servlet-mapping>

</web-app>
4. Write the configuration file of spring MVC! Name: SpringMVC servlet xml : [servletname]-servlet. xml
Note that the name requirements here are in accordance with the official
<?xml version="1.0" encoding="UTF-8"?>
<beans xmlns="http://www.springframework.org/schema/beans"
      xmlns:xsi="http://www.w3.org/2001/XMLSchema-instance"
     xsi:schemaLocation="http://www.springframework.org/schema/beans
       http://www.springframework.org/schema/beans/spring-beans.xsd">

</beans>
5. Add process mapper
<bean class="org.springframework.web.servlet.handler.BeanNameUrlHandlerMapping"/>
6. Add processor adapter
<bean class="org.springframework.web.servlet.mvc.SimpleControllerHandlerAdapter"/>
7. Add view parser
<!--view resolver :DispatcherServlet Give it to him ModelAndView-->
<bean class="org.springframework.web.servlet.view.InternalResourceViewResolver" id="InternalResourceViewResolver">
   <!--prefix-->
   <property name="prefix" value="/WEB-INF/jsp/"/>
   <!--suffix-->
   <property name="suffix" value=".jsp"/>
</bean>
8. Write the business Controller that we want to operate, either implement the Controller interface or add annotations; You need to return a ModelAndView to load data and seal the view;
package com.kuang.controller;

import org.springframework.web.servlet.ModelAndView;
import org.springframework.web.servlet.mvc.Controller;

import javax.servlet.http.HttpServletRequest;
import javax.servlet.http.HttpServletResponse;

//Note: let's import the Controller interface first
public class HelloController implements Controller {

   public ModelAndView handleRequest(HttpServletRequest request, HttpServletResponse response) throws Exception {
       //ModelAndView models and views
       ModelAndView mv = new ModelAndView();

       //Encapsulate the object and place it in ModelAndView. Model
       mv.addObject("msg","HelloSpringMVC!");
       //Encapsulate the view to jump to and put it in ModelAndView
       mv.setViewName("hello"); //: /WEB-INF/jsp/hello.jsp
       return mv;
  }

}
9. Give your class to the spring IOC container and register the bean
<!--Handler-->
<bean id="/hello" class="com.kuang.controller.HelloController"/>
10. Write the jsp page to jump to, display the data stored in ModelandView, and our normal page;
<%@ page contentType="text/html;charset=UTF-8" language="java" %>
<html>
<head>
   <title>Kuangshen</title>
</head>
<body>
${msg}
</body>
</html>
11. Configure Tomcat startup test!

Possible problems: visit 404, troubleshooting steps:
- Check the console output to see if there is any missing jar package.
- If the jar package exists and the display cannot be output, add lib dependency in the project release of IDEA!
- Restart Tomcat to solve the problem!
Summary: looking at this, it is estimated that most students can understand the principle, but we won't write it in actual development, otherwise we will be crazy. Why do you still learn this thing! Let's take a look at the annotation version implementation. This is the essence of spring MVC. Just look at this figure.
2.1.2 annotated version
1. Create a new Moudle, spring mvc-03-hello-annotation. Add web support!
2. Since Maven may have the problem of resource filtering, we will improve the configuration
<build>
   <resources>
       <resource>
           <directory>src/main/java</directory>
           <includes>
               <include>**/*.properties</include>
               <include>**/*.xml</include>
           </includes>
           <filtering>false</filtering>
       </resource>
       <resource>
           <directory>src/main/resources</directory>
           <includes>
               <include>**/*.properties</include>
               <include>**/*.xml</include>
           </includes>
           <filtering>false</filtering>
       </resource>
   </resources>
</build>
3. In POM XML file introduces related dependencies: mainly Spring framework core library, Spring MVC, servlet, JSTL, etc. We have already introduced in parent dependency!
4. Configure web xml
Note:
<?xml version="1.0" encoding="UTF-8"?>
<web-app xmlns="http://xmlns.jcp.org/xml/ns/javaee"
        xmlns:xsi="http://www.w3.org/2001/XMLSchema-instance"
        xsi:schemaLocation="http://xmlns.jcp.org/xml/ns/javaee http://xmlns.jcp.org/xml/ns/javaee/web-app_4_0.xsd"
        version="4.0">

   <!--1.register servlet-->
   <servlet>
       <servlet-name>SpringMVC</servlet-name>
       <servlet-class>org.springframework.web.servlet.DispatcherServlet</servlet-class>
       <!--Specified by initialization parameters SpringMVC The location of the configuration file is associated-->
       <init-param>
           <param-name>contextConfigLocation</param-name>
           <param-value>classpath:springmvc-servlet.xml</param-value>
       </init-param>
       <!-- Start sequence: the smaller the number, the earlier the start -->
       <load-on-startup>1</load-on-startup>
   </servlet>

   <!--All requests will be rejected springmvc intercept -->
   <servlet-mapping>
       <servlet-name>SpringMVC</servlet-name>
       <url-pattern>/</url-pattern>
   </servlet-mapping>

</web-app>
/Difference between and / *: < URL pattern > / < / url pattern > will not match jsp, only for the requests we write; Namely: jsp does not enter the DispatcherServlet class of spring< URL pattern > / * < / url pattern > will match * jsp, when the jsp view is returned, the dispatcher servlet class of spring will be entered again, resulting in no corresponding controller, so a 404 error will be reported.
-
-
Note web XML version problem, to the latest version!
-
Register DispatcherServlet
-
Associated spring MVC configuration file
-
The startup level is 1
-
The mapping path is / [do not use / *, it will 404]
-
-
5. Add Spring MVC configuration file
-
Add springmvc - servlet. In the resource directory XML configuration file. The configuration form is basically similar to the Spring container configuration. In order to support annotation based IOC, the function of automatic package scanning is set. The specific configuration information is as follows:
-
<?xml version="1.0" encoding="UTF-8"?> <beans xmlns="http://www.springframework.org/schema/beans" xmlns:xsi="http://www.w3.org/2001/XMLSchema-instance" xmlns:context="http://www.springframework.org/schema/context" xmlns:mvc="http://www.springframework.org/schema/mvc" xsi:schemaLocation="http://www.springframework.org/schema/beans http://www.springframework.org/schema/beans/spring-beans.xsd http://www.springframework.org/schema/context https://www.springframework.org/schema/context/spring-context.xsd http://www.springframework.org/schema/mvc https://www.springframework.org/schema/mvc/spring-mvc.xsd"> <!-- Automatically scan the package to make the annotations under the specified package effective,from IOC Unified container management --> <context:component-scan base-package="com.kuang.controller"/> <!-- Give Way Spring MVC Do not process static resources --> <mvc:default-servlet-handler /> <!-- support mvc Annotation driven stay spring Generally used in@RequestMapping Annotation to complete the mapping relationship To make@RequestMapping Note effective You must register with the context DefaultAnnotationHandlerMapping And one AnnotationMethodHandlerAdapter example These two instances are handled at the class level and method level, respectively. and annotation-driven Configuration helps us automatically complete the injection of the above two instances. --> <mvc:annotation-driven /> <!-- view resolver --> <bean class="org.springframework.web.servlet.view.InternalResourceViewResolver" id="internalResourceViewResolver"> <!-- prefix --> <property name="prefix" value="/WEB-INF/jsp/" /> <!-- suffix --> <property name="suffix" value=".jsp" /> </bean> </beans> -
In the view parser, we store all views in the / WEB-INF / directory, which can ensure the view security, because the files in this directory cannot be accessed directly by the client.
-
-
Make IOC comments effective
-
Static resource filtering: HTML JS . CSS . Pictures, videos
-
Annotation driven MVC
-
Configure view parser
-
-
6. Create Controller
-
Write a Java control class: com kuang. controller. Hellocontroller, pay attention to the coding specification
-
package com.kuang.controller; import org.springframework.stereotype.Controller; import org.springframework.ui.Model; import org.springframework.web.bind.annotation.RequestMapping; @Controller @RequestMapping("/HelloController") public class HelloController { //Real access address: project name / HelloController/hello @RequestMapping("/hello") public String sayHello(Model model){ //Add attributes msg and values to the model, which can be taken out and rendered in the JSP page model.addAttribute("msg","hello,SpringMVC"); //web-inf/jsp/hello.jsp return "hello"; } } -
- @The Controller is used to automatically scan the Spring IOC container during initialization;
- @RequestMapping is to map the request path. Here, because there are mappings on classes and methods, the access should be / HelloController/hello;
- The purpose of declaring Model type parameters in the method is to bring the data in the Action to the view;
- The result returned by the method is the name hello of the view, and the prefix and suffix in the configuration file become WEB-INF / JSP / hello jsp.
-
7. Create view layer
-
Create hello.jsp in the WEB-INF/ jsp directory JSP, the view can directly take out and display the information brought back from the Controller;
-
The value or object stored in the Model can be retrieved through EL representation;
-
<%@ page contentType="text/html;charset=UTF-8" language="java" %>
<html>
<head>
   <title>SpringMVC</title>
</head>
<body>
${msg}
</body>
</html>
8. Configure Tomcat run
Configure Tomcat, start the server and access the corresponding request path!
OK, run successfully!
2.1.3 summary
The implementation steps are actually very simple:
- Create a new web project
- Import related jar packages
- Write web XML, register DispatcherServlet
- Writing spring MVC configuration files
- The next step is to create the corresponding control class, controller
- Finally, improve the correspondence between the front-end view and the controller
- Test run commissioning
Three major components that must be configured to use spring MVC:
Processor mapper, processor adapter, view parser
Usually, we only need to manually configure the view parser, while the processor mapper and processor adapter only need to turn on the annotation driver, eliminating a large section of xml configuration
Let's review the principle~
Now we are going to study the Controller and RestFul style!
3. RestFul and controller
3.1 Controller
3.1.1 Controller
- The complex controller provides the behavior of accessing the application program, which is usually implemented by interface definition or annotation definition.
- The controller is responsible for parsing the user's request and transforming it into a model.
- In Spring MVC, a controller class can contain multiple methods
- In Spring MVC, there are many ways to configure the Controller
3.1.2 implementation of Controller interface
Controller is an interface, which is located at org.com springframework. web. servlet. Under MVC package, there is only one method in the interface;
//The class implementing the interface obtains the controller function
public interface Controller {
   //Process the request and return a model and view object
   ModelAndView handleRequest(HttpServletRequest var1, HttpServletResponsevar2) throws Exception;
}
test
-
Create a new Moudle, spring mvc-04-controller. Make a copy of 03 just now and let's operate!
-
- Delete HelloController
- mvc's configuration file leaves only the view parser!
-
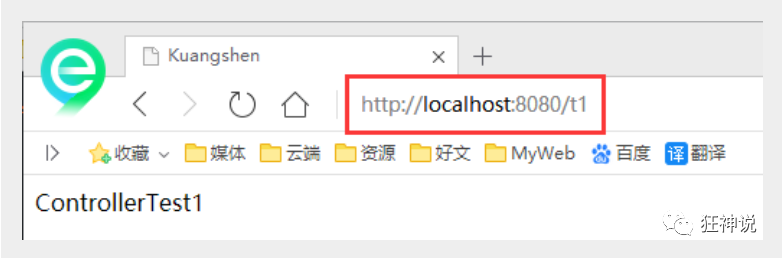
Write a Controller class, ControllerTest1
//Define controller //Note: do not import the wrong package, implement the Controller interface and rewrite the method; public class ControllerTest1 implements Controller { public ModelAndView handleRequest(HttpServletRequest httpServletRequest,HttpServletResponse httpServletResponse) throws Exception { //Returns a model view object ModelAndView mv = new ModelAndView(); mv.addObject("msg","Test1Controller"); mv.setViewName("test"); return mv; } } -
After writing, register the requested bean in the Spring configuration file; name corresponds to the request path, and class corresponds to the class that handles the request
<bean name="/t1" class="com.kuang.controller.ControllerTest1"/>
-
Write front-end test JSP. Note that it is written in the WEB-INF/jsp directory, corresponding to our view parser
<%@ page contentType="text/html;charset=UTF-8" language="java" %> <html> <head> <title>Kuangshen</title> </head> <body> ${msg} </body> </html> -
Configure Tomcat to run the test. I don't have a project release name here. I configure a /, so the request doesn't need to add a project name. OK!
explain:
-
It is an old method to implement the interface Controller and define the Controller
-
The disadvantages are: there is only one method in a Controller. If you want multiple methods, you need to define multiple controllers; The way of definition is troublesome;
3.1.2 use annotation @ Controller
-
@The Controller annotation type is used to declare that the instance of the Spring class is a Controller (another three annotations were mentioned when talking about IOC);
-
Spring can use the scanning mechanism to find all annotation based controller classes in the application. In order to ensure that spring can find your controller, you need to declare component scanning in the configuration file.
<!-- Automatically scan the specified package, and submit all the following annotation classes to IOC Container management -->
<context:component-scan base-package="com.kuang.controller"/>
-
Add a ControllerTest2 class and implement it with annotations;
//@The class annotated by the Controller is automatically added to the Spring context @Controller public class ControllerTest2{ //Map access path @RequestMapping("/t2") public String index(Model model){ //Spring MVC will automatically instantiate a Model object to pass values to the view model.addAttribute("msg", "ControllerTest2"); //Return to view location return "test"; } } -
Run tomcat test
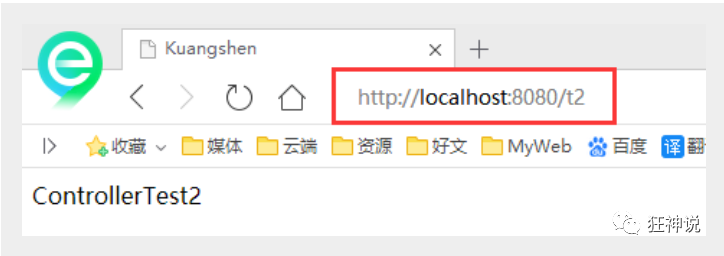
It can be found that both of our requests can point to a view, but the results of the page results are different. It can be seen from here that the view is reused, and there is a weak coupling relationship between the controller and the view.
Annotation is the most commonly used method!
3.1.3 RequestMapping
@RequestMapping
-
@The RequestMapping annotation is used to map URLs to a controller class or a specific handler method. Can be used on classes or methods. Used on a class to indicate that all methods in the class that respond to requests take this address as the parent path.
-
In order to test the conclusion more accurately, we can add a project name to test myweb
-
Annotate only on Methods
@Controller
public class TestController {
   @RequestMapping("/h1")
   public String test(){
       return "test";
  }
}
Access path: http://localhost:8080 /Project name / h1
-
Annotate classes and methods at the same time
@Controller
@RequestMapping("/admin")
public class TestController {
   @RequestMapping("/h1")
   public String test(){
       return "test";
  }
}
Access path: http://localhost:8080 /Project name / admin /h1, you need to specify the path of the class first, and then the path of the method;
3.1.4 RestFul style
concept
Restful is a style of resource location and resource operation. It's not a standard or agreement, it's just a style. The software designed based on this style can be more concise, more hierarchical, and easier to implement caching and other mechanisms.
function
Resources: all things on the Internet can be abstracted as resources
Resource operation: use POST, DELETE, PUT and GET to operate resources using different methods.
Add, delete, modify and query respectively.
Operate resources in the traditional way: achieve different effects through different parameters! Single method, post and get
http://127.0.0.1/item/queryItem.action?id=1 Query, GET
http://127.0.0.1/item/saveItem.action New, POST
http://127.0.0.1/item/updateItem.action Update, POST
http://127.0.0.1/item/deleteItem.action?id=1 Delete, GET or POST
Using RESTful operation resources: different effects can be achieved through different request methods! As follows: the request address is the same, but the function can be different!
http://127.0.0.1/item/1 Query, GET
http://127.0.0.1/item New, POST
http://127.0.0.1/item Update, PUT
http://127.0.0.1/item/1 DELETE
Learning test
-
Create a new class RestFulController
@Controller public class RestFulController { } -
In Spring MVC, you can use the @ PathVariable annotation to bind the value of the method parameter to a URI template variable.
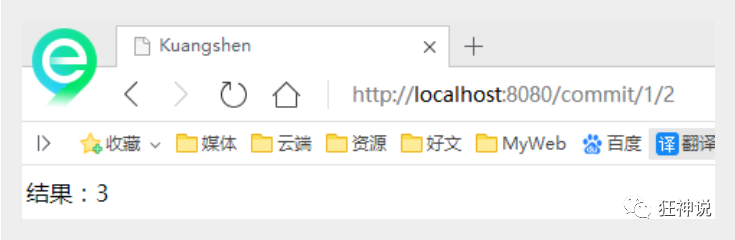
@Controller public class RestFulController { //Map access path @RequestMapping("/commit/{p1}/{p2}") public String index(@PathVariable int p1, @PathVariable int p2, Model model){ int result = p1+p2; //Spring MVC will automatically instantiate a Model object to pass values to the view model.addAttribute("msg", "result:"+result); //Return to view location return "test"; } } -
Let's test the request and check it out
-
Think: what are the benefits of using path variables?
-
-
Make the path more concise;
-
It is more convenient to obtain parameters, and the framework will automatically perform type conversion.
-
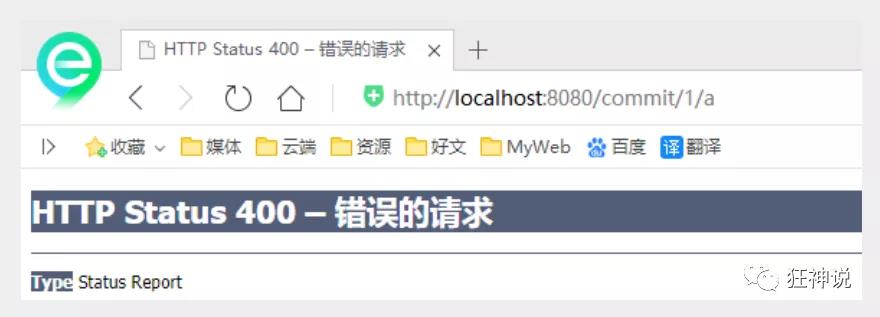
Access parameters can be constrained by the type of path variables. If the types are different, the corresponding request method cannot be accessed. For example, if the access path here is / commit/1/a, the path does not match the method, rather than parameter conversion failure.
-
-
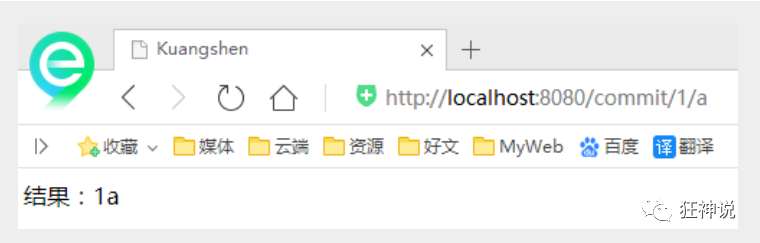
Let's modify the corresponding parameter type and test again
//Map access path
@RequestMapping("/commit/{p1}/{p2}")
public String index(@PathVariable int p1, @PathVariable String p2, Model model){

   String result = p1+p2;
   //Spring MVC will automatically instantiate a Model object to pass values to the view
   model.addAttribute("msg", "result:"+result);
   //Return to view location
   return "test";

}
Use the method property to specify the request type
It is used to constrain the type of request and narrow the request range. Specify the type of request predicate, such as GET, POST, HEAD, OPTIONS, PUT, PATCH, DELETE, TRACE, etc
Let's test:
-
Add a method
//The mapped access path must be a POST request @RequestMapping(value = "/hello",method = {RequestMethod.POST}) public String index2(Model model){ model.addAttribute("msg", "hello!"); return "test"; } -
We use the browser address bar to access. By default, it is a Get request, and an error 405 will be reported:

-
If you change POST to GET, it is normal;
//Map access path, must be a Get request
@RequestMapping(value = "/hello",method = {RequestMethod.GET})
public String index2(Model model){
   model.addAttribute("msg", "hello!");
   return "test";
}

Summary:
The @ RequestMapping annotation of Spring MVC can handle HTTP requests, such as GET, PUT, POST, DELETE and PATCH.
All address bar requests will be of HTTP GET type by default.
Method level annotation variants are as follows: combined annotation
@GetMapping
@PostMapping
@PutMapping
@DeleteMapping
@PatchMapping
@GetMapping is a combined annotation, which is often used!
It acts as a shortcut to @ RequestMapping(method =RequestMethod.GET).
3.1.5 extension: little yellow duck debugging method
Scenario 1: we all have the experience of asking questions and explaining programming problems to others (or even people who can't program at all), but many times we think of solutions to problems in the process of explanation, and then the other party looks at a loss.
Scene 2: your colleague comes to ask you a question, but when he finishes the question or is halfway there, he comes up with the answer and leaves, leaving you with a blank face.
In fact, the above two scene phenomena are the so-called rubber duck debugging, also known as rubber duck debugging, which is one of the most commonly used debugging methods in our software engineering.
This concept is said to come from a story in the book "the way of programmer cultivation". It is said that the program master carries a little yellow duck with him. When debugging the code, he will put the little yellow duck on the table, explain each line of code to the duck in detail, and then fix the problem quickly.
Now we are ready to study parameter acceptance and result jump!
4. Data processing and jump
4.1 result jump method
4.1.1 ModelAndView
Set the ModelAndView object and jump to the specified page according to the name of the view and the view parser
Page: {view parser prefix} + viewName + {view parser suffix}
<!-- view resolver  -->
<bean class="org.springframework.web.servlet.view.InternalResourceViewResolver"
     id="internalResourceViewResolver">
   <!-- prefix -->
   <property name="prefix" value="/WEB-INF/jsp/" />
   <!-- suffix -->
   <property name="suffix" value=".jsp" />
</bean>
Corresponding controller class
public class ControllerTest1 implements Controller {

   public ModelAndView handleRequest(HttpServletRequest httpServletRequest,HttpServletResponse httpServletResponse) throws Exception {
       //Returns a model view object
       ModelAndView mv = new ModelAndView();
       mv.addObject("msg","ControllerTest1");
       mv.setViewName("test");
       return mv;
  }
}
4.1.2 ServletAPI
By setting the servlet API, no view parser is required
1. Output through HttpServletResponse
2. Redirection via HttpServletResponse
3. Forwarding through HttpServletResponse
@Controller
public class ResultGo {

   @RequestMapping("/result/t1")
   public void test1(HttpServletRequest req, HttpServletResponse rsp) throwsIOException {
       rsp.getWriter().println("Hello,Spring BY servlet API");
  }

   @RequestMapping("/result/t2")
   public void test2(HttpServletRequest req, HttpServletResponse rsp) throwsIOException {
       rsp.sendRedirect("/index.jsp");
  }

   @RequestMapping("/result/t3")
   public void test3(HttpServletRequest req, HttpServletResponse rsp) throwsException {
       //forward
       req.setAttribute("msg","/result/t3");
       req.getRequestDispatcher("/WEB-INF/jsp/test.jsp").forward(req,rsp);
  }

}
4.1.3 SpringMVC
Forward and redirect through spring MVC - no view parser is required;
Before testing, you need to comment out the view parser
@Controller
public class ResultSpringMVC {
   @RequestMapping("/rsm/t1")
   public String test1(){
       //forward
       return "/index.jsp";
  }

   @RequestMapping("/rsm/t2")
   public String test2(){
       //Forward two
       return "forward:/index.jsp";
  }

   @RequestMapping("/rsm/t3")
   public String test3(){
       //redirect
       return "redirect:/index.jsp";
  }
}
Forward and redirect through spring MVC - view parser;
Redirection does not require a view parser. Its essence is to re request a new place, so pay attention to the path problem
You can redirect to another request implementation
@Controller
public class ResultSpringMVC2 {
   @RequestMapping("/rsm2/t1")
   public String test1(){
       //forward
       return "test";
  }

   @RequestMapping("/rsm2/t2")
   public String test2(){
       //redirect
       return "redirect:/index.jsp";
       //return "redirect:hello.do"; //hello.do is another request/
  }

}
4.2 data processing
4.2.1 processing submitted data
1. The submitted domain name is consistent with the parameter name of the processing method
Submit data: http://localhost:8080/hello?name=kuangshen
Treatment method:
@RequestMapping("/hello")
public String hello(String name){
   System.out.println(name);
   return "hello";
}
Background output: kuangshen
2. The submitted domain name is inconsistent with the parameter name of the processing method
Submit data: http://localhost:8080/hello?username=kuangshen
Treatment method:
//@Requestparam ("username"): the name of the domain submitted by username
@RequestMapping("/hello")
public String hello(@RequestParam("username") String name){
   System.out.println(name);
   return "hello";
}
Background output: kuangshen
3. Submitted is an object
It is required that the submitted form field and the attribute name of the object are consistent, and the parameter can use the object
1. Entity class
public class User {
   private int id;
   private String name;
   private int age;
   //structure
   //get/set
   //tostring()
}
2. Submit data: http://localhost:8080/mvc04/user?name=kuangshen&id=1&age=15
3. Treatment method:
@RequestMapping("/user")
public String user(User user){
   System.out.println(user);
   return "hello";
}
Background output: user {id = 1, name = 'kuangshen', age=15}
Note: if an object is used, the parameter name passed by the front end must be consistent with the object name, otherwise it is null.
4.2.2 data display to front end
First: through ModelAndView
This has always been the case before us Just explain more
public class ControllerTest1 implements Controller {

   public ModelAndView handleRequest(HttpServletRequest httpServletRequest,HttpServletResponse httpServletResponse) throws Exception {
       //Returns a model view object
       ModelAndView mv = new ModelAndView();
       mv.addObject("msg","ControllerTest1");
       mv.setViewName("test");
       return mv;
  }
}
The second is through ModelMap
ModelMap
@RequestMapping("/hello")
public String hello(@RequestParam("username") String name, ModelMap model){
   //Encapsulates the data to be displayed in the view
   //Equivalent to req setAttribute("name",name);
   model.addAttribute("name",name);
   System.out.println(name);
   return "hello";
}
Third: through Model
Model
@RequestMapping("/ct2/hello")
public String hello(@RequestParam("username") String name, Model model){
   //Encapsulates the data to be displayed in the view
   //Equivalent to req setAttribute("name",name);
   model.addAttribute("msg",name);
   System.out.println(name);
   return "test";
}
4.2.3 comparison
For novices, the simple difference is:
Model There are only a few methods that are only suitable for storing data, which simplifies novices' understanding of data Model Operation and understanding of objects;

ModelMap Inherited LinkedMap ,In addition to implementing some of its own methods, the same inheritance LinkedMap Methods and characteristics of;

ModelAndView While storing data, you can set the returned logical view to control the jump of the display layer.
Of course, more future development is more about performance and optimization, so it can't be limited to this understanding.
Please use 80% of your time to lay a solid foundation, the remaining 18% to study the framework and 2% to learn some English. The official document of the framework is always the best tutorial.
4.2.4 garbled code
Test steps:
1. We can write a submission form on the home page
<form action="/e/t" method="post">
 <input type="text" name="name">
 <input type="submit">
</form>
2. Write the corresponding processing class in the background
@Controller
public class Encoding {
   @RequestMapping("/e/t")
   public String test(Model model,String name){
       model.addAttribute("msg",name); //Gets the value of the form submission
       return "test"; //Jump to the test page and display the entered value
  }
}
3. Input Chinese test, found garbled code
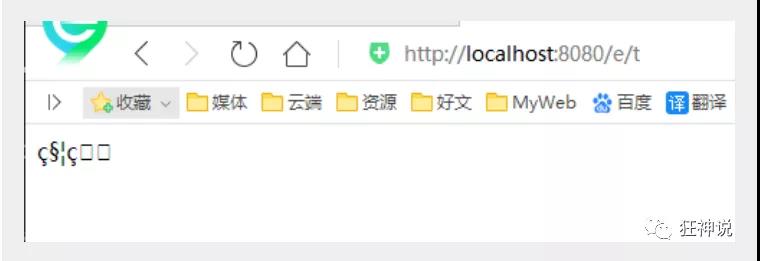
It has to be said that the problem of garbled code is very common in our development, and it is also a big problem for our program ape!
In the past, the problem of garbled code was solved through filters, and spring MVC provided us with a filter, which can be found on the web Configuration in XML
The xml file has been modified. You need to restart the server!
<filter>
   <filter-name>encoding</filter-name>
   <filter-class>org.springframework.web.filter.CharacterEncodingFilter</filter-class>
   <init-param>
       <param-name>encoding</param-name>
       <param-value>utf-8</param-value>
   </init-param>
</filter>
<filter-mapping>
   <filter-name>encoding</filter-name>
   <url-pattern>/*</url-pattern>
</filter-mapping>
But we found that in some extreme cases This filter does not support get well
Treatment method:
1. Modify tomcat configuration file: set code!
<Connector URIEncoding="utf-8" port="8080" protocol="HTTP/1.1"
          connectionTimeout="20000"
          redirectPort="8443" />
2. Custom filter
package com.kuang.filter;

import javax.servlet.*;
import javax.servlet.http.HttpServletRequest;
import javax.servlet.http.HttpServletRequestWrapper;
import javax.servlet.http.HttpServletResponse;
import java.io.IOException;
import java.io.UnsupportedEncodingException;
import java.util.Map;

/**
* Filter to solve all the garbled codes of get and post requests
*/
public class GenericEncodingFilter implements Filter {

   @Override
   public void destroy() {
  }

   @Override
   public void doFilter(ServletRequest request, ServletResponse response, FilterChainchain) throws IOException, ServletException {
       //Handle the character encoding of the response
       HttpServletResponse myResponse=(HttpServletResponse) response;
       myResponse.setContentType("text/html;charset=UTF-8");

       // Transformation into agreement related objects
       HttpServletRequest httpServletRequest = (HttpServletRequest) request;
       // Enhanced request packaging
       HttpServletRequest myrequest = new MyRequest(httpServletRequest);
       chain.doFilter(myrequest, response);
  }

   @Override
   public void init(FilterConfig filterConfig) throws ServletException {
  }

}

//Custom request object, wrapper class of HttpServletRequest
class MyRequest extends HttpServletRequestWrapper {

   private HttpServletRequest request;
   //Coded flag
   private boolean hasEncode;
   //Define a constructor that can be passed into the HttpServletRequest object to decorate it
   public MyRequest(HttpServletRequest request) {
       super(request);// super must write
       this.request = request;
  }

   // Override methods that need to be enhanced
   @Override
   public Map getParameterMap() {
       // Get request method first
       String method = request.getMethod();
       if (method.equalsIgnoreCase("post")) {
           // post request
           try {
               // Handle post garbled code
               request.setCharacterEncoding("utf-8");
               return request.getParameterMap();
          } catch (UnsupportedEncodingException e) {
               e.printStackTrace();
          }
      } else if (method.equalsIgnoreCase("get")) {
           // get request
           Map<String, String[]> parameterMap = request.getParameterMap();
           if (!hasEncode) { // Ensure that the get manual encoding logic runs only once
               for (String parameterName : parameterMap.keySet()) {
                   String[] values = parameterMap.get(parameterName);
                   if (values != null) {
                       for (int i = 0; i < values.length; i++) {
                           try {
                               // Handle get garbled code
                               values[i] = new String(values[i]
                                      .getBytes("ISO-8859-1"), "utf-8");
                          } catch (UnsupportedEncodingException e) {
                               e.printStackTrace();
                          }
                      }
                  }
              }
               hasEncode = true;
          }
           return parameterMap;
      }
       return super.getParameterMap();
  }

   //Take a value
   @Override
   public String getParameter(String name) {
       Map<String, String[]> parameterMap = getParameterMap();
       String[] values = parameterMap.get(name);
       if (values == null) {
           return null;
      }
       return values[0]; // Retrieve the first value of the parameter
  }

   //Take all values
   @Override
   public String[] getParameterValues(String name) {
       Map<String, String[]> parameterMap = getParameterMap();
       String[] values = parameterMap.get(name);
       return values;
  }
}
This is also written by some great gods I found on the Internet. Generally, the default garbled code processing of spring MVC can be well solved!
Then on the web Configure this filter in XML!
The problem of garbled code needs more attention at ordinary times. The unified coding UTF-8 should be set wherever possible!
With this knowledge, we can integrate SSM immediately!
5. Integrate SSM framework
5.1 integration of SSM
Environmental requirements
Environmental Science:
- IDEA
- MySQL 5.7.19
- Tomcat 9
- Maven 3.6
requirement:
- Need to master MySQL database, Spring, JavaWeb and MyBatis knowledge, simple front-end knowledge;
Database environment
Create a database table for storing book data
CREATE DATABASE `ssmbuild`;

USE `ssmbuild`;

DROP TABLE IF EXISTS `books`;

CREATE TABLE `books` (
`bookID` INT(10) NOT NULL AUTO_INCREMENT COMMENT 'book id',
`bookName` VARCHAR(100) NOT NULL COMMENT 'title',
`bookCounts` INT(11) NOT NULL COMMENT 'quantity',
`detail` VARCHAR(200) NOT NULL COMMENT 'describe',
KEY `bookID` (`bookID`)
) ENGINE=INNODB DEFAULT CHARSET=utf8

INSERT  INTO `books`(`bookID`,`bookName`,`bookCounts`,`detail`)VALUES
(1,'Java',1,'From getting started to giving up'),
(2,'MySQL',10,'From deleting the library to running away'),
(3,'Linux',5,'From entering the door to entering the prison');
Basic environment construction
1. Create a new Maven project! ssmbuild, add web support
2. Import related pom dependencies!
<dependencies>
   <!--Junit-->
   <dependency>
       <groupId>junit</groupId>
       <artifactId>junit</artifactId>
       <version>4.12</version>
   </dependency>
   <!--Database driven-->
   <dependency>
       <groupId>mysql</groupId>
       <artifactId>mysql-connector-java</artifactId>
       <version>5.1.47</version>
   </dependency>
   <!-- Database connection pool -->
   <dependency>
       <groupId>com.mchange</groupId>
       <artifactId>c3p0</artifactId>
       <version>0.9.5.2</version>
   </dependency>

   <!--Servlet - JSP -->
   <dependency>
       <groupId>javax.servlet</groupId>
       <artifactId>servlet-api</artifactId>
       <version>2.5</version>
   </dependency>
   <dependency>
       <groupId>javax.servlet.jsp</groupId>
       <artifactId>jsp-api</artifactId>
       <version>2.2</version>
   </dependency>
   <dependency>
       <groupId>javax.servlet</groupId>
       <artifactId>jstl</artifactId>
       <version>1.2</version>
   </dependency>

   <!--Mybatis-->
   <dependency>
       <groupId>org.mybatis</groupId>
       <artifactId>mybatis</artifactId>
       <version>3.5.2</version>
   </dependency>
   <dependency>
       <groupId>org.mybatis</groupId>
       <artifactId>mybatis-spring</artifactId>
       <version>2.0.2</version>
   </dependency>

   <!--Spring-->
   <dependency>
       <groupId>org.springframework</groupId>
       <artifactId>spring-webmvc</artifactId>
       <version>5.1.9.RELEASE</version>
   </dependency>
   <dependency>
       <groupId>org.springframework</groupId>
       <artifactId>spring-jdbc</artifactId>
       <version>5.1.9.RELEASE</version>
   </dependency>
</dependencies>
3. Maven resource filtering settings
<build>
   <resources>
       <resource>
           <directory>src/main/java</directory>
           <includes>
               <include>**/*.properties</include>
               <include>**/*.xml</include>
           </includes>
           <filtering>false</filtering>
       </resource>
       <resource>
           <directory>src/main/resources</directory>
           <includes>
               <include>**/*.properties</include>
               <include>**/*.xml</include>
           </includes>
           <filtering>false</filtering>
       </resource>
   </resources>
</build>
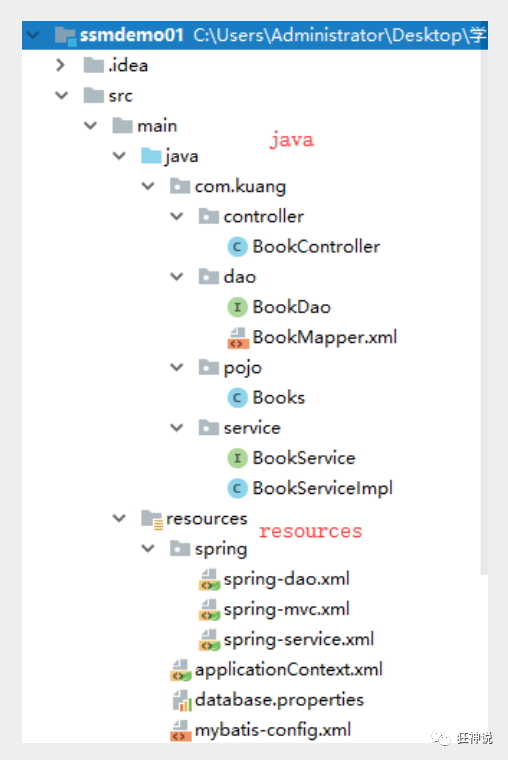
4. Establish the basic structure and configuration framework!
-
com.kuang.pojo
-
com.kuang.dao
-
com.kuang.service
-
com.kuang.controller
-
mybatis-config.xml
<?xml version="1.0" encoding="UTF-8" ?> <!DOCTYPE configuration PUBLIC "-//mybatis.org//DTD Config 3.0//EN" "http://mybatis.org/dtd/mybatis-3-config.dtd"> <configuration> </configuration> -
applicationContext.xml
<?xml version="1.0" encoding="UTF-8"?>
<beans xmlns="http://www.springframework.org/schema/beans"
      xmlns:xsi="http://www.w3.org/2001/XMLSchema-instance"
      xsi:schemaLocation="http://www.springframework.org/schema/beans
       http://www.springframework.org/schema/beans/spring-beans.xsd">

</beans>
Written by Mybatis layer
1. Database configuration file database properties
jdbc.driver=com.mysql.jdbc.Driver
jdbc.url=jdbc:mysql://localhost:3306/ssmbuild?useSSL=true&useUnicode=true&characterEncoding=utf8
jdbc.username=root
jdbc.password=123456
2. IDEA associated database
3. Write the core configuration file for MyBatis
<?xml version="1.0" encoding="UTF-8" ?>
<!DOCTYPE configuration
       PUBLIC "-//mybatis.org//DTD Config 3.0//EN"
       "http://mybatis.org/dtd/mybatis-3-config.dtd">
<configuration>

   <typeAliases>
       <package name="com.kuang.pojo"/>
   </typeAliases>
   <mappers>
       <mapper resource="com/kuang/dao/BookMapper.xml"/>
   </mappers>

</configuration>
4. Write the entity class corresponding to the database com kuang. pojo. Books
Use the lombok plug-in!
package com.kuang.pojo;

import lombok.AllArgsConstructor;
import lombok.Data;
import lombok.NoArgsConstructor;

@Data
@AllArgsConstructor
@NoArgsConstructor
public class Books {

   private int bookID;
   private String bookName;
   private int bookCounts;
   private String detail;

}
5. Write Mapper interface of Dao layer!
package com.kuang.dao;

import com.kuang.pojo.Books;
import java.util.List;

public interface BookMapper {

   //Add a Book
   int addBook(Books book);

   //Delete a Book by id
   int deleteBookById(int id);

   //Update Book
   int updateBook(Books books);

   //According to the id query, a Book is returned
   Books queryBookById(int id);

   //Query all books and return the list set
   List<Books> queryAllBook();

}
6. Write mapper corresponding to the interface XML file. The package of MyBatis needs to be imported;
<?xml version="1.0" encoding="UTF-8" ?>
<!DOCTYPE mapper
       PUBLIC "-//mybatis.org//DTD Mapper 3.0//EN"
       "http://mybatis.org/dtd/mybatis-3-mapper.dtd">

<mapper namespace="com.kuang.dao.BookMapper">

   <!--Add one Book-->
   <insert id="addBook" parameterType="Books">
      insert into ssmbuild.books(bookName,bookCounts,detail)
      values (#{bookName}, #{bookCounts}, #{detail})
   </insert>

   <!--according to id Delete a Book-->
   <delete id="deleteBookById" parameterType="int">
      delete from ssmbuild.books where bookID=#{bookID}
   </delete>

   <!--to update Book-->
   <update id="updateBook" parameterType="Books">
      update ssmbuild.books
      set bookName = #{bookName},bookCounts = #{bookCounts},detail = #{detail}
      where bookID = #{bookID}
   </update>

   <!--according to id query,Return a Book-->
   <select id="queryBookById" resultType="Books">
      select * from ssmbuild.books
      where bookID = #{bookID}
   </select>

   <!--Query all Book-->
   <select id="queryAllBook" resultType="Books">
      SELECT * from ssmbuild.books
   </select>

</mapper>
7. Write the interface and implementation class of the Service layer
Interface:
package com.kuang.service;

import com.kuang.pojo.Books;

import java.util.List;

//BookService: you need to implement it and call the dao layer
public interface BookService {
   //Add a Book
   int addBook(Books book);
   //Delete a Book by id
   int deleteBookById(int id);
   //Update Book
   int updateBook(Books books);
   //According to the id query, a Book is returned
   Books queryBookById(int id);
   //Query all books and return the list set
   List<Books> queryAllBook();
}
Implementation class:
package com.kuang.service;

import com.kuang.dao.BookMapper;
import com.kuang.pojo.Books;
import java.util.List;

public class BookServiceImpl implements BookService {

   //Call the operation of dao layer and set a set interface to facilitate Spring management
   private BookMapper bookMapper;

   public void setBookMapper(BookMapper bookMapper) {
       this.bookMapper = bookMapper;
  }

   public int addBook(Books book) {
       return bookMapper.addBook(book);
  }

   public int deleteBookById(int id) {
       return bookMapper.deleteBookById(id);
  }

   public int updateBook(Books books) {
       return bookMapper.updateBook(books);
  }

   public Books queryBookById(int id) {
       return bookMapper.queryBookById(id);
  }

   public List<Books> queryAllBook() {
       return bookMapper.queryAllBook();
  }
}
OK, here, the bottom requirement operation is written!
Spring layer
1. Configure Spring to integrate MyBatis. Here, the data source uses c3p0 connection pool;
2. Let's write the configuration file related to Spring integration Mybatis; spring-dao.xml
<?xml version="1.0" encoding="UTF-8"?>
<beans xmlns="http://www.springframework.org/schema/beans"
      xmlns:xsi="http://www.w3.org/2001/XMLSchema-instance"
      xmlns:context="http://www.springframework.org/schema/context"
      xsi:schemaLocation="http://www.springframework.org/schema/beans
       http://www.springframework.org/schema/beans/spring-beans.xsd
       http://www.springframework.org/schema/context
       https://www.springframework.org/schema/context/spring-context.xsd">

   <!-- Configuration integration mybatis -->
   <!-- 1.Associated database file -->
   <context:property-placeholder location="classpath:database.properties"/>

   <!-- 2.Database connection pool -->
   <!--Database connection pool
       dbcp Semi automatic operation cannot be connected automatically
       c3p0 Automatic operation (automatically load the configuration file and set it into the object)
   -->
   <bean id="dataSource" class="com.mchange.v2.c3p0.ComboPooledDataSource">
       <!-- Configure connection pool properties -->
       <property name="driverClass" value="${jdbc.driver}"/>
       <property name="jdbcUrl" value="${jdbc.url}"/>
       <property name="user" value="${jdbc.username}"/>
       <property name="password" value="${jdbc.password}"/>

       <!-- c3p0 Private properties of connection pool -->
       <property name="maxPoolSize" value="30"/>
       <property name="minPoolSize" value="10"/>
       <!-- Not automatically after closing the connection commit -->
       <property name="autoCommitOnClose" value="false"/>
       <!-- Get connection timeout -->
       <property name="checkoutTimeout" value="10000"/>
       <!-- Number of retries when getting connection failed -->
       <property name="acquireRetryAttempts" value="2"/>
   </bean>

   <!-- 3.to configure SqlSessionFactory object -->
   <bean id="sqlSessionFactory" class="org.mybatis.spring.SqlSessionFactoryBean">
       <!-- Inject database connection pool -->
       <property name="dataSource" ref="dataSource"/>
       <!-- to configure MyBaties Global profile:mybatis-config.xml -->
       <property name="configLocation" value="classpath:mybatis-config.xml"/>
   </bean>

   <!-- 4.Configure scan Dao Interface package, dynamic implementation Dao Interface injection into spring In container -->
   <!--Explanation: https://www.cnblogs.com/jpfss/p/7799806.html-->
   <bean class="org.mybatis.spring.mapper.MapperScannerConfigurer">
       <!-- injection sqlSessionFactory -->
       <property name="sqlSessionFactoryBeanName" value="sqlSessionFactory"/>
       <!-- Give the information that needs to be scanned Dao Interface package -->
       <property name="basePackage" value="com.kuang.dao"/>
   </bean>

</beans>
3. Spring integration service layer
<?xml version="1.0" encoding="UTF-8"?>
<beans xmlns="http://www.springframework.org/schema/beans"
      xmlns:xsi="http://www.w3.org/2001/XMLSchema-instance"
      xmlns:context="http://www.springframework.org/schema/context"
      xsi:schemaLocation="http://www.springframework.org/schema/beans
   http://www.springframework.org/schema/beans/spring-beans.xsd
   http://www.springframework.org/schema/context
   http://www.springframework.org/schema/context/spring-context.xsd">

   <!-- scanning service dependent bean -->
   <context:component-scan base-package="com.kuang.service" />

   <!--BookServiceImpl Inject into IOC In container-->
   <bean id="BookServiceImpl" class="com.kuang.service.BookServiceImpl">
       <property name="bookMapper" ref="bookMapper"/>
   </bean>

   <!-- Configure transaction manager -->
   <bean id="transactionManager"class="org.springframework.jdbc.datasource.DataSourceTransactionManager">
       <!-- Inject database connection pool -->
       <property name="dataSource" ref="dataSource" />
   </bean>

</beans>
Spring layer done! Once again, spring is a hodgepodge, a container! Right!
Spring MVC layer
1,web.xml
<?xml version="1.0" encoding="UTF-8"?>
<web-app xmlns="http://xmlns.jcp.org/xml/ns/javaee"
        xmlns:xsi="http://www.w3.org/2001/XMLSchema-instance"
        xsi:schemaLocation="http://xmlns.jcp.org/xml/ns/javaee http://xmlns.jcp.org/xml/ns/javaee/web-app_4_0.xsd"
        version="4.0">

   <!--DispatcherServlet-->
   <servlet>
       <servlet-name>DispatcherServlet</servlet-name>
       <servlet-class>org.springframework.web.servlet.DispatcherServlet</servlet-class>
       <init-param>
           <param-name>contextConfigLocation</param-name>
           <!--Be careful:What we load here is the total configuration file, which was previously damaged here!-->
           <param-value>classpath:applicationContext.xml</param-value>
       </init-param>
       <load-on-startup>1</load-on-startup>
   </servlet>
   <servlet-mapping>
       <servlet-name>DispatcherServlet</servlet-name>
       <url-pattern>/</url-pattern>
   </servlet-mapping>

   <!--encodingFilter-->
   <filter>
       <filter-name>encodingFilter</filter-name>
       <filter-class>
          org.springframework.web.filter.CharacterEncodingFilter
       </filter-class>
       <init-param>
           <param-name>encoding</param-name>
           <param-value>utf-8</param-value>
       </init-param>
   </filter>
   <filter-mapping>
       <filter-name>encodingFilter</filter-name>
       <url-pattern>/*</url-pattern>
   </filter-mapping>

   <!--Session Expiration time-->
   <session-config>
       <session-timeout>15</session-timeout>
   </session-config>

</web-app>
2,spring-mvc.xml
<?xml version="1.0" encoding="UTF-8"?>
<beans xmlns="http://www.springframework.org/schema/beans"
      xmlns:xsi="http://www.w3.org/2001/XMLSchema-instance"
      xmlns:context="http://www.springframework.org/schema/context"
      xmlns:mvc="http://www.springframework.org/schema/mvc"
      xsi:schemaLocation="http://www.springframework.org/schema/beans
   http://www.springframework.org/schema/beans/spring-beans.xsd
   http://www.springframework.org/schema/context
   http://www.springframework.org/schema/context/spring-context.xsd
   http://www.springframework.org/schema/mvc
   https://www.springframework.org/schema/mvc/spring-mvc.xsd">

   <!-- to configure SpringMVC -->
   <!-- 1.open SpringMVC Annotation driven -->
   <mvc:annotation-driven />
   <!-- 2.Static resource default servlet to configure-->
   <mvc:default-servlet-handler/>

   <!-- 3.to configure jsp display ViewResolver view resolver  -->
   <beanclass="org.springframework.web.servlet.view.InternalResourceViewResolver">
       <property name="viewClass"value="org.springframework.web.servlet.view.JstlView" />
       <property name="prefix" value="/WEB-INF/jsp/" />
       <property name="suffix" value=".jsp" />
   </bean>

   <!-- 4.scanning web dependent bean -->
   <context:component-scan base-package="com.kuang.controller" />

</beans>
3. Spring configuration integration file, ApplicationContext xml
<?xml version="1.0" encoding="UTF-8"?>
<beans xmlns="http://www.springframework.org/schema/beans"
      xmlns:xsi="http://www.w3.org/2001/XMLSchema-instance"
      xsi:schemaLocation="http://www.springframework.org/schema/beans
       http://www.springframework.org/schema/beans/spring-beans.xsd">

   <import resource="spring-dao.xml"/>
   <import resource="spring-service.xml"/>
   <import resource="spring-mvc.xml"/>

</beans>
Configuration file, end temporarily! Controller and view layer writing
1. BookController class, method 1: query all books
@Controller
@RequestMapping("/book")
public class BookController {

   @Autowired
   @Qualifier("BookServiceImpl")
   private BookService bookService;

   @RequestMapping("/allBook")
   public String list(Model model) {
       List<Books> list = bookService.queryAllBook();
       model.addAttribute("list", list);
       return "allBook";
  }
}
2. Write home page index jsp
<%@ page language="java" contentType="text/html; charset=UTF-8"pageEncoding="UTF-8" %>
<!DOCTYPE HTML>
<html>
<head>
   <title>home page</title>
   <style type="text/css">
       a {
           text-decoration: none;
           color: black;
           font-size: 18px;
      }
       h3 {
           width: 180px;
           height: 38px;
           margin: 100px auto;
           text-align: center;
           line-height: 38px;
           background: deepskyblue;
           border-radius: 4px;
      }
   </style>
</head>
<body>

<h3>
   <a href="${pageContext.request.contextPath}/book/allBook">Click to enter the list page</a>
</h3>
</body>
</html>
3. Book list page allbook jsp
<%@ taglib prefix="c" uri="http://java.sun.com/jsp/jstl/core" %>
<%@ page contentType="text/html;charset=UTF-8" language="java" %>
<html>
<head>
   <title>Book list</title>
   <meta name="viewport" content="width=device-width, initial-scale=1.0">
   <!-- introduce Bootstrap -->
   <link href="https://cdn.bootcss.com/bootstrap/3.3.7/css/bootstrap.min.css"rel="stylesheet">
</head>
<body>

<div class="container">

   <div class="row clearfix">
       <div class="col-md-12 column">
           <div class="page-header">
               <h1>
                   <small>Book list - displays all books</small>
               </h1>
           </div>
       </div>
   </div>

   <div class="row">
       <div class="col-md-4 column">
           <a class="btn btn-primary"href="${pageContext.request.contextPath}/book/toAddBook">newly added</a>
       </div>
   </div>

   <div class="row clearfix">
       <div class="col-md-12 column">
           <table class="table table-hover table-striped">
               <thead>
               <tr>
                   <th>Book number</th>
                   <th>Book name</th>
                   <th>Number of books</th>
                   <th>Book details</th>
                   <th>operation</th>
               </tr>
               </thead>

               <tbody>
               <c:forEach var="book" items="${requestScope.get('list')}">
                   <tr>
                       <td>${book.getBookID()}</td>
                       <td>${book.getBookName()}</td>
                       <td>${book.getBookCounts()}</td>
                       <td>${book.getDetail()}</td>
                       <td>
                           <ahref="${pageContext.request.contextPath}/book/toUpdateBook?id=${book.getBookID()}">change</a> |
                           <ahref="${pageContext.request.contextPath}/book/del/${book.getBookID()}">delete</a>
                       </td>
                   </tr>
               </c:forEach>
               </tbody>
           </table>
       </div>
   </div>
</div>
4. BookController class, method 2: add books
@RequestMapping("/toAddBook")
public String toAddPaper() {
   return "addBook";
}

@RequestMapping("/addBook")
public String addPaper(Books books) {
   System.out.println(books);
   bookService.addBook(books);
   return "redirect:/book/allBook";
}
5. Add book page: addbook jsp
<%@ taglib prefix="c" uri="http://java.sun.com/jsp/jstl/core" %>
<%@ page contentType="text/html;charset=UTF-8" language="java" %>

<html>
<head>
   <title>New books</title>
   <meta name="viewport" content="width=device-width, initial-scale=1.0">
   <!-- introduce Bootstrap -->
   <link href="https://cdn.bootcss.com/bootstrap/3.3.7/css/bootstrap.min.css"rel="stylesheet">
</head>
<body>
<div class="container">

   <div class="row clearfix">
       <div class="col-md-12 column">
           <div class="page-header">
               <h1>
                   <small>New books</small>
               </h1>
           </div>
       </div>
   </div>
   <form action="${pageContext.request.contextPath}/book/addBook"method="post">
      Book Name:<input type="text" name="bookName"><br><br><br>
      Number of books:<input type="text" name="bookCounts"><br><br><br>
      Book details:<input type="text" name="detail"><br><br><br>
       <input type="submit" value="add to">
   </form>

</div>
6. BookController class, method 3: modify books
@RequestMapping("/toUpdateBook")
public String toUpdateBook(Model model, int id) {
   Books books = bookService.queryBookById(id);
   System.out.println(books);
   model.addAttribute("book",books );
   return "updateBook";
}

@RequestMapping("/updateBook")
public String updateBook(Model model, Books book) {
   System.out.println(book);
   bookService.updateBook(book);
   Books books = bookService.queryBookById(book.getBookID());
   model.addAttribute("books", books);
   return "redirect:/book/allBook";
}
7. Modify the book page updatebook jsp
<%@ taglib prefix="c" uri="http://java.sun.com/jsp/jstl/core" %>
<%@ page contentType="text/html;charset=UTF-8" language="java" %>
<html>
<head>
   <title>Modify information</title>
   <meta name="viewport" content="width=device-width, initial-scale=1.0">
   <!-- introduce Bootstrap -->
   <link href="https://cdn.bootcss.com/bootstrap/3.3.7/css/bootstrap.min.css"rel="stylesheet">
</head>
<body>
<div class="container">

   <div class="row clearfix">
       <div class="col-md-12 column">
           <div class="page-header">
               <h1>
                   <small>Modify information</small>
               </h1>
           </div>
       </div>
   </div>

   <form action="${pageContext.request.contextPath}/book/updateBook"method="post">
       <input type="hidden" name="bookID" value="${book.getBookID()}"/>
      Book Name:<input type="text" name="bookName"value="${book.getBookName()}"/>
      Number of books:<input type="text" name="bookCounts"value="${book.getBookCounts()}"/>
      Book details:<input type="text" name="detail" value="${book.getDetail() }"/>
       <input type="submit" value="Submit"/>
   </form>

</div>
8. BookController class, method 4: delete books
@RequestMapping("/del/{bookId}")
public String deleteBook(@PathVariable("bookId") int id) {
   bookService.deleteBookById(id);
   return "redirect:/book/allBook";
}
Configure Tomcat and run it!
So far, the integration of this SSM project has been completely OK and can be run directly for testing! This exercise is very important. You need to ensure that you can realize it completely without looking at anything!
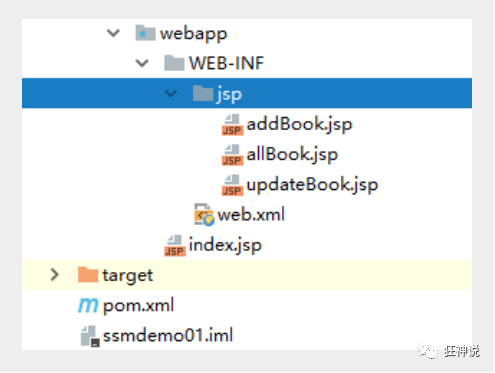
Project structure diagram
Summary and Prospect
This is the first SSM integration case of students. We must be familiar with it!
The importance of SSM framework is self-evident. After learning here, you can develop the basic website separately. However, this is only the basic operation of adding, deleting, modifying and querying. It can be said that after learning here, we can really step into the door of background development. That is the bottom line of finding a background related job.
Maybe many people do these things at work, but it's not enough for personal improvement!
We will learn some knowledge of spring MVC later!
- Ajax and Json
- File upload and download
- Interceptor
There is a long way to go. It's important to stick to it carefully!
6. Json interactive processing
6.1 Json
What is JSON?
- JSON (JavaScript object notation) is a lightweight data exchange format, which is widely used at present.
- Data is stored and represented in a text format completely independent of the programming language.
- The concise and clear hierarchy makes JSON an ideal data exchange language.
- It is easy for people to read and write, but also easy for machine analysis and generation, and effectively improves the network transmission efficiency.
In the JavaScript language, everything is an object. Therefore, any type supported by JavaScript can be represented by JSON, such as string, number, object, array, etc. Look at his requirements and syntax format:
- Objects are represented as key value pairs, and data is separated by commas
- Curly braces save objects
- Square brackets hold the array
JSON key value pairs are a way to save JavaScript objects, and the writing method is similar to that of JavaScript objects. The key name in the key / value pair combination is written in front and wrapped in double quotation marks "", separated by colon: and then followed by the value:
{"name": "QinJiang"}
{"age": "3"}
{"sex": "male"}
Many people don't know the relationship between JSON and JavaScript objects, even who is who. In fact, it can be understood as follows:
JSON is a string representation of JavaScript objects. It uses text to represent the information of a JS object, which is essentially a string.
var obj = {a: 'Hello', b: 'World'}; //This is an object. Note that the key name can also be wrapped in quotation marks
var json = '{"a": "Hello", "b": "World"}'; //This is a JSON string, which is essentially a string
JSON and JavaScript objects interoperate
To convert from a JSON string to a JavaScript object, use JSON Parse() method:
var obj = JSON.parse('{"a": "Hello", "b": "World"}');
//The result is {a: 'Hello', b: 'World'}
To convert from a JavaScript object to a JSON string, use JSON Stringify() method:
var json = JSON.stringify({a: 'Hello', b: 'World'});
//The result is' {"a": "Hello", "b": "World"} '
Code test
1. Create a new module, spring mvc-05-json, and add web support
2. Create a new json-1.0 in the web directory HTML, write test content
<!DOCTYPE html>
<html lang="en">
<head>
<meta charset="UTF-8">
<title>JSON_Qin Jiang</title>
</head>
<body>
<script type="text/javascript">
//Write a js object
var user = {
name:"Qin Jiang",
age:3,
sex:"male"
};
//Convert js object to json string
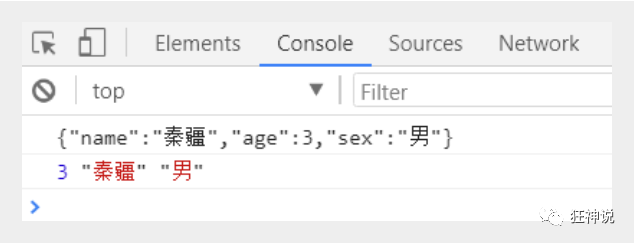
var str = JSON.stringify(user);
console.log(str);
//Convert json string to js object
var user2 = JSON.parse(str);
console.log(user2.age,user2.name,user2.sex);
</script>
</body>
</html>
3. In IDEA, open it with a browser and view the console output!
JSON data returned by Controller
Jackson should be a better json parsing tool at present
Of course, there are more than one tool, such as Alibaba's fastjson and so on.
We use Jackson here. To use Jackson, we need to import its jar package;
<!-- https://mvnrepository.com/artifact/com.fasterxml.jackson.core/jackson-core -->
<dependency>
   <groupId>com.fasterxml.jackson.core</groupId>
   <artifactId>jackson-databind</artifactId>
   <version>2.9.8</version>
</dependency>
Configuration required to configure spring MVC
web.xml
<?xml version="1.0" encoding="UTF-8"?>
<web-app xmlns="http://xmlns.jcp.org/xml/ns/javaee"
        xmlns:xsi="http://www.w3.org/2001/XMLSchema-instance"
        xsi:schemaLocation="http://xmlns.jcp.org/xml/ns/javaee http://xmlns.jcp.org/xml/ns/javaee/web-app_4_0.xsd"
        version="4.0">

   <!--1.register servlet-->
   <servlet>
       <servlet-name>SpringMVC</servlet-name>
       <servlet-class>org.springframework.web.servlet.DispatcherServlet</servlet-class>
       <!--Specified by initialization parameters SpringMVC The location of the configuration file is associated-->
       <init-param>
           <param-name>contextConfigLocation</param-name>
           <param-value>classpath:springmvc-servlet.xml</param-value>
       </init-param>
       <!-- Start sequence: the smaller the number, the earlier the start -->
       <load-on-startup>1</load-on-startup>
   </servlet>

   <!--All requests will be rejected springmvc intercept -->
   <servlet-mapping>
       <servlet-name>SpringMVC</servlet-name>
       <url-pattern>/</url-pattern>
   </servlet-mapping>

   <filter>
       <filter-name>encoding</filter-name>
       <filter-class>org.springframework.web.filter.CharacterEncodingFilter</filter-class>
       <init-param>
           <param-name>encoding</param-name>
           <param-value>utf-8</param-value>
       </init-param>
   </filter>
   <filter-mapping>
       <filter-name>encoding</filter-name>
       <url-pattern>/</url-pattern>
   </filter-mapping>

</web-app>
springmvc-servlet.xml
<?xml version="1.0" encoding="UTF-8"?>
<beans xmlns="http://www.springframework.org/schema/beans"
      xmlns:xsi="http://www.w3.org/2001/XMLSchema-instance"
      xmlns:context="http://www.springframework.org/schema/context"
      xmlns:mvc="http://www.springframework.org/schema/mvc"
      xsi:schemaLocation="http://www.springframework.org/schema/beans
       http://www.springframework.org/schema/beans/spring-beans.xsd
       http://www.springframework.org/schema/context
       https://www.springframework.org/schema/context/spring-context.xsd
       http://www.springframework.org/schema/mvc
       https://www.springframework.org/schema/mvc/spring-mvc.xsd">

   <!-- Automatically scan the specified package, and submit all the following annotation classes to IOC Container management -->
   <context:component-scan base-package="com.kuang.controller"/>

   <!-- view resolver  -->
   <beanclass="org.springframework.web.servlet.view.InternalResourceViewResolver"
         id="internalResourceViewResolver">
       <!-- prefix -->
       <property name="prefix" value="/WEB-INF/jsp/" />
       <!-- suffix -->
       <property name="suffix" value=".jsp" />
   </bean>

</beans>
We randomly write a User entity class, and then we write our test Controller;
package com.kuang.pojo;

import lombok.AllArgsConstructor;
import lombok.Data;
import lombok.NoArgsConstructor;

//lombok needs to be imported
@Data
@AllArgsConstructor
@NoArgsConstructor
public class User {

   private String name;
   private int age;
   private String sex;

}
Here we need two new things, one is @ ResponseBody and the other is ObjectMapper object. Let's see the specific usage
Write a Controller;
@Controller
public class UserController {
@RequestMapping("/json1")
@ResponseBody
public String json1() throws JsonProcessingException {
//Create an object mapper for jackson to parse the data
ObjectMapper mapper = new ObjectMapper();
//Create an object
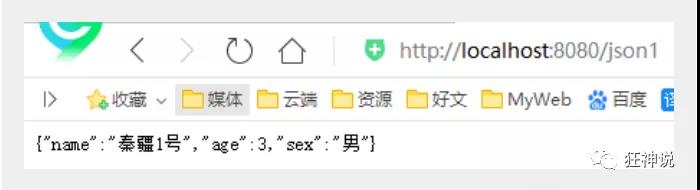
User user = new User("Qinjiang 1", 3, "male");
//Parse our object into json format
String str = mapper.writeValueAsString(user);
//Due to the @ ResponseBody annotation, str will be converted to json format and returned here; Very convenient
return str;
}
}
Configure Tomcat and start the test!
http://localhost:8080/json1
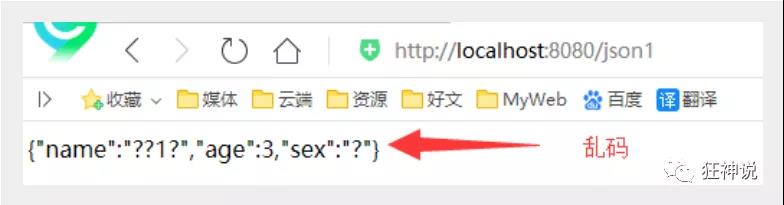
It is found that there is a garbled code problem. We need to set its encoding format to utf-8 and its return type;
This is implemented through the @ requestmapping products attribute. Modify the following code
//produces: Specifies the return type and encoding of the response body
@RequestMapping(value = "/json1",produces = "application/json;charset=utf-8")
Test again, http://localhost:8080/json1 , garbled code problem OK!
[Note: remember to deal with garbled code when using json]
Code optimization
Unified solution of garbled code
The previous method is troublesome. If there are many requests in the project, each one should be added, which can be specified uniformly through Spring configuration, so you don't have to deal with them every time!
We can add a message StringHttpMessageConverter conversion configuration to the configuration file of spring MVC!
<mvc:annotation-driven>
   <mvc:message-converters register-defaults="true">
       <beanclass="org.springframework.http.converter.StringHttpMessageConverter">
           <constructor-arg value="UTF-8"/>
       </bean>
       <beanclass="org.springframework.http.converter.json.MappingJackson2HttpMessageConverter">
           <property name="objectMapper">
               <beanclass="org.springframework.http.converter.json.Jackson2ObjectMapperFactoryBean">
                   <property name="failOnEmptyBeans" value="false"/>
               </bean>
           </property>
       </bean>
   </mvc:message-converters>
</mvc:annotation-driven>
Unified solution for returning json strings
Use @ RestController directly on the class. In this way, all the methods in it will only return json strings. There is no need to add @ ResponseBody to each one! We generally use @ RestController in front and back-end separation development, which is very convenient!
@RestController
public class UserController {

   //produces: Specifies the return type and encoding of the response body
   @RequestMapping(value = "/json1")
   public String json1() throws JsonProcessingException {
       //Create an object mapper for jackson to parse the data
       ObjectMapper mapper = new ObjectMapper();
       //Create an object
       User user = new User("Qinjiang 1", 3, "male");
       //Parse our object into json format
       String str = mapper.writeValueAsString(user);
       //Due to the @ ResponseBody annotation, str will be converted to json format and returned here; Very convenient
       return str;
  }

}
Start the tomcat test, and the results are output normally!
Test set output
Add a new method
@RequestMapping("/json2")
public String json2() throws JsonProcessingException {

   //Create an object mapper for jackson to parse the data
   ObjectMapper mapper = new ObjectMapper();
   //Create an object
   User user1 = new User("Qinjiang 1", 3, "male");
   User user2 = new User("Qinjiang 2", 3, "male");
   User user3 = new User("Qinjiang 3", 3, "male");
   User user4 = new User("Qinjiang 4", 3, "male");
   List<User> list = new ArrayList<User>();
   list.add(user1);
   list.add(user2);
   list.add(user3);
   list.add(user4);

   //Parse our object into json format
   String str = mapper.writeValueAsString(list);
   return str;
}
Running result: perfect, no problem!

Output time object
Add a new method
@RequestMapping("/json3")
public String json3() throws JsonProcessingException {

   ObjectMapper mapper = new ObjectMapper();

   //Create a time object, Java util. Date
   Date date = new Date();
   //Parse our object into json format
   String str = mapper.writeValueAsString(date);
   return str;
}
Operation results:
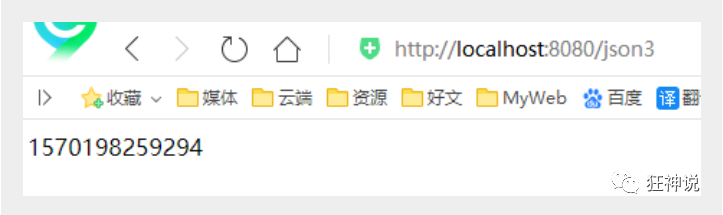
- The default date format will become a number, which is the number of milliseconds from January 1, 1970 to the current date!
- Jackson will convert the time into timestamps by default
Solution: cancel the timestamps format and customize the time format
@RequestMapping("/json4")
public String json4() throws JsonProcessingException {

   ObjectMapper mapper = new ObjectMapper();

   //Without timestamp
   mapper.configure(SerializationFeature.WRITE_DATES_AS_TIMESTAMPS, false);
   //Custom date format object
   SimpleDateFormat sdf = new SimpleDateFormat("yyyy-MM-dd HH:mm:ss");
   //Specify date format
   mapper.setDateFormat(sdf);

   Date date = new Date();
   String str = mapper.writeValueAsString(date);

   return str;
}
Running result: the time was successfully output!

Extract as tool class
If you want to use it frequently, it is troublesome. We can encapsulate these codes into a tool class; Let's write it
package com.kuang.utils;

import com.fasterxml.jackson.core.JsonProcessingException;
import com.fasterxml.jackson.databind.ObjectMapper;
import com.fasterxml.jackson.databind.SerializationFeature;

import java.text.SimpleDateFormat;

public class JsonUtils {

   public static String getJson(Object object) {
       return getJson(object,"yyyy-MM-dd HH:mm:ss");
  }

   public static String getJson(Object object,String dateFormat) {
       ObjectMapper mapper = new ObjectMapper();
       //Do not use time difference
       mapper.configure(SerializationFeature.WRITE_DATES_AS_TIMESTAMPS, false);
       //Custom date format object
       SimpleDateFormat sdf = new SimpleDateFormat(dateFormat);
       //Specify date format
       mapper.setDateFormat(sdf);
       try {
           return mapper.writeValueAsString(object);
      } catch (JsonProcessingException e) {
           e.printStackTrace();
      }
       return null;
  }
}
When we use tool classes, the code is more concise!
@RequestMapping("/json5")
public String json5() throws JsonProcessingException {
   Date date = new Date();
   String json = JsonUtils.getJson(date);
   return json;
}
be accomplished! Perfect!
FastJson
fastjson.jar is a package specially developed by Ali for Java development. It can easily realize the conversion between json objects and JavaBean objects, between JavaBean objects and json strings, and between json objects and json strings. There are many conversion methods to implement json, and the final implementation results are the same.
fastjson's pom dependency!
<dependency>
   <groupId>com.alibaba</groupId>
   <artifactId>fastjson</artifactId>
   <version>1.2.60</version>
</dependency>
fastjson has three main classes:
JSONObject represents a json object
- JSONObject implements the Map interface. I guess the underlying operation of JSONObject is implemented by Map.
- JSONObject corresponds to the json object. You can obtain the data in the json object through various forms of get() methods. You can also use methods such as size(), isEmpty() to obtain the number of "key: value" pairs and judge whether they are empty. Its essence is accomplished by implementing the Map interface and calling the methods in the interface.
JSONArray represents an array of json objects
- Internally, there are methods in the List interface to complete the operation.
JSON represents the conversion of JSONObject and JSONArray
- Analysis and use of JSON class source code
- Carefully observe these methods, mainly to realize the mutual transformation between json objects, json object arrays, javabean objects and json strings.
For code testing, we create a new FastJsonDemo class
package com.kuang.controller;

import com.alibaba.fastjson.JSON;
import com.alibaba.fastjson.JSONObject;
import com.kuang.pojo.User;

import java.util.ArrayList;
import java.util.List;

public class FastJsonDemo {
   public static void main(String[] args) {
       //Create an object
       User user1 = new User("Qinjiang 1", 3, "male");
       User user2 = new User("Qinjiang 2", 3, "male");
       User user3 = new User("Qinjiang 3", 3, "male");
       User user4 = new User("Qinjiang 4", 3, "male");
       List<User> list = new ArrayList<User>();
       list.add(user1);
       list.add(user2);
       list.add(user3);
       list.add(user4);

       System.out.println("*******Java Object rotation JSON character string*******");
       String str1 = JSON.toJSONString(list);
       System.out.println("JSON.toJSONString(list)==>"+str1);
       String str2 = JSON.toJSONString(user1);
       System.out.println("JSON.toJSONString(user1)==>"+str2);

       System.out.println("\n****** JSON String conversion Java object*******");
       User jp_user1=JSON.parseObject(str2,User.class);
       System.out.println("JSON.parseObject(str2,User.class)==>"+jp_user1);

       System.out.println("\n****** Java Object rotation JSON object ******");
       JSONObject jsonObject1 = (JSONObject) JSON.toJSON(user2);
       System.out.println("(JSONObject) JSON.toJSON(user2)==>"+jsonObject1.getString("name"));

       System.out.println("\n****** JSON Object rotation Java object ******");
       User to_java_user = JSON.toJavaObject(jsonObject1, User.class);
       System.out.println("JSON.toJavaObject(jsonObject1, User.class)==>"+to_java_user);
  }
}
We only need to master the use of this tool class, and find the corresponding implementation according to the specific business when using it. Like the previous commons IO toolkit, just use it!
Jason is very important in our data transmission. We must learn to use it!
7. Ajax research
7.1 Ajax research
brief introduction
-
AJAX = Asynchronous JavaScript and XML.
-
AJAX is a technology that can update some web pages without reloading the whole web page.
-
Ajax is not a new programming language, but a technology for creating better, faster and more interactive Web applications.
-
In 2005, Google made AJAX popular through its Google suggest. Google Suggest can automatically help you search for words.
-
Google Suggest uses AJAX to create a highly dynamic web interface: when you enter keywords in Google's search box, JavaScript will send these characters to the server, and then the server will return a list of search suggestions.
-
Just like the domestic Baidu search box!
-
Traditional web pages (that is, web pages without ajax Technology) need to reload the whole web page if they want to update the content or submit a form.
-
Web pages using ajax technology can realize asynchronous local update through a small amount of data exchange in the background server.
-
With Ajax, users can create a direct, highly available, richer and more dynamic Web user interface close to local desktop applications.
Fake Ajax
We can use a tag on the front end to fake an ajax look. iframe tag
1. Create a new module: sspring mvc-06-ajax and import web support!
2. Write an Ajax - frame HTML use iframe test to feel the effect
<!DOCTYPE html>
<html>
<head lang="en">
   <meta charset="UTF-8">
   <title>kuangshen</title>
</head>
<body>

<script type="text/javascript">
   window.onload = function(){
       var myDate = new Date();
       document.getElementById('currentTime').innerText = myDate.getTime();
  };

   function LoadPage(){
       var targetUrl =  document.getElementById('url').value;
       console.log(targetUrl);
       document.getElementById("iframePosition").src = targetUrl;
  }

</script>

<div>
   <p>Please enter the address to load:<span id="currentTime"></span></p>
   <p>
       <input id="url" type="text" value="https://www.baidu.com/"/>
       <input type="button" value="Submit" onclick="LoadPage()">
   </p>
</div>

<div>
   <h3>Load page location:</h3>
   <iframe id="iframePosition" style="width: 100%;height: 500px;"></iframe>
</div>

</body>
</html>
3. Use IDEA to open the browser to test!
With AJAX, you can:
- When registering, enter the user name to automatically detect whether the user already exists.
- When logging in, you will be prompted that the user name and password are incorrect
- When deleting a data row, the row ID is sent to the background, and the background deletes it in the database. After the database is deleted successfully, the data row is also deleted in the page DOM.
- ... wait
jQuery.ajax
We will not explain the pure JS native implementation of Ajax here, but directly use the one provided by jquery to facilitate learning and use and avoid repeated wheel building. Interested students can learn about JS native XMLHttpRequest!
The core of Ajax is the XMLHttpRequest object (XHR). XHR provides an interface for sending requests to the server and parsing server responses. The ability to obtain new data from the server asynchronously.
jQuery provides several AJAX related methods.
Through the jQuery AJAX method, you can use HTTP Get and HTTP Post to request text, HTML, XML or JSON from a remote server - and you can load these external data directly into the selected elements of the web page.
jQuery is not a producer, but a nature porter.
The essence of jQuery Ajax is XMLHttpRequest, which is encapsulated and easy to call!
jQuery.ajax(...)
      Some parameters:
            url: Request address
            type: Request method, GET,POST(1.9.0 Later use method)
        headers: Request header
            data: Data to send
    contentType: The content encoding type of the message to be sent to the server(default: "application/x-www-form-urlencoded; charset=UTF-8")
          async: Asynchronous
        timeout: Set request timeout (MS)
      beforeSend: Function executed before sending the request(overall situation)
        complete: Callback function executed after completion(overall situation)
        success: Callback function executed after success(overall situation)
          error: Callback function executed after failure(overall situation)
        accepts: Send the request to the server and tell the server the data type acceptable to the current client
        dataType: Converts the data returned by the server to the specified type
          "xml": Convert the content returned by the server into xml format
          "text": Convert the content returned by the server to normal text format
          "html": Convert the content returned by the server into normal text format and insert DOM If it contains JavaScript Tag, it will try to execute.
        "script": Try to treat the return value as JavaScript To execute, and then convert the content returned by the server into normal text format
          "json": Convert the content returned by the server into the corresponding JavaScript object
        "jsonp": JSONP Format use JSONP When calling a function as "myurl?callback=?" jQuery Will automatically replace ? Give the correct function name to execute the callback function
Let's do a simple test, using the most primitive HttpServletResponse processing The simplest and most versatile
1. Configure web XML and spring MVC configuration files, just copy the above case [remember static resource filtering and annotation driven configuration]
<?xml version="1.0" encoding="UTF-8"?>
<beans xmlns="http://www.springframework.org/schema/beans"
      xmlns:xsi="http://www.w3.org/2001/XMLSchema-instance"
      xmlns:context="http://www.springframework.org/schema/context"
      xmlns:mvc="http://www.springframework.org/schema/mvc"
      xsi:schemaLocation="http://www.springframework.org/schema/beans
       http://www.springframework.org/schema/beans/spring-beans.xsd
       http://www.springframework.org/schema/context
       https://www.springframework.org/schema/context/spring-context.xsd
       http://www.springframework.org/schema/mvc
       https://www.springframework.org/schema/mvc/spring-mvc.xsd">

   <!-- Automatically scan the specified package, and submit all the following annotation classes to IOC Container management -->
   <context:component-scan base-package="com.kuang.controller"/>
   <mvc:default-servlet-handler />
   <mvc:annotation-driven />

   <!-- view resolver  -->
   <beanclass="org.springframework.web.servlet.view.InternalResourceViewResolver"
         id="internalResourceViewResolver">
       <!-- prefix -->
       <property name="prefix" value="/WEB-INF/jsp/" />
       <!-- suffix -->
       <property name="suffix" value=".jsp" />
   </bean>

</beans>
2. Write an Ajax controller
@Controller
public class AjaxController {

   @RequestMapping("/a1")
   public void ajax1(String name , HttpServletResponse response) throws IOException{
       if ("admin".equals(name)){
           response.getWriter().print("true");
      }else{
           response.getWriter().print("false");
      }
  }

}
3. To import jquery, you can use the online CDN or download the import
<script src="https://code.jquery.com/jquery-3.1.1.min.js"></script>
<script src="${pageContext.request.contextPath}/statics/js/jquery-3.1.1.min.js"></script>
4. Write index JSP test
<%@ page contentType="text/html;charset=UTF-8" language="java" %>
<html>
 <head>
   <title>$Title$</title>
  <%--<script src="https://code.jquery.com/jquery-3.1.1.min.js"></script>--%>
   <script src="${pageContext.request.contextPath}/statics/js/jquery-3.1.1.min.js"></script>
   <script>
       function a1(){
           $.post({
               url:"${pageContext.request.contextPath}/a1",
               data:{'name':$("#txtName").val()},
               success:function (data,status) {
                   alert(data);
                   alert(status);
              }
          });
      }
   </script>
 </head>
 <body>

<%--onblur: Loss of focus trigger event--%>
user name:<input type="text" id="txtName" οnblur="a1()"/>

 </body>
</html>
5. Start tomcat test! Open the browser console. When we leave the input box with the mouse, we can see that an ajax request has been issued! It is the result returned to us by the background! Test successful!
Spring MVC implementation
Entity class user
@Data
@AllArgsConstructor
@NoArgsConstructor
public class User {

   private String name;
   private int age;
   private String sex;

}
Let's get a collection object and show it to the front page
@RequestMapping("/a2")
public List<User> ajax2(){
   List<User> list = new ArrayList<User>();
   list.add(new User("Qinjiang 1",3,"male"));
   list.add(new User("Qinjiang 2",3,"male"));
   list.add(new User("Qinjiang 3",3,"male"));
   return list; //Due to the @ RestController annotation, convert the list to json format and return
}
Front page
<%@ page contentType="text/html;charset=UTF-8" language="java" %>
<html>
<head>
   <title>Title</title>
</head>
<body>
<input type="button" id="btn" value="get data"/>
<table width="80%" align="center">
   <tr>
       <td>full name</td>
       <td>Age</td>
       <td>Gender</td>
   </tr>
   <tbody id="content">
   </tbody>
</table>

<script src="${pageContext.request.contextPath}/statics/js/jquery-3.1.1.min.js"></script>
<script>

   $(function () {
       $("#btn").click(function () {
           $.post("${pageContext.request.contextPath}/a2",function (data) {
               console.log(data)
               var html="";
               for (var i = 0; i <data.length ; i++) {
                   html+= "<tr>" +
                       "<td>" + data[i].name + "</td>" +
                       "<td>" + data[i].age + "</td>" +
                       "<td>" + data[i].sex + "</td>" +
                       "</tr>"
              }
               $("#content").html(html);
          });
      })
  })
</script>
</body>
</html>
Successfully realized the data echo! You can experience the benefits of Ajax!
Registration prompt effect
Let's test a small Demo and think about how to do the real-time prompt behind the input box when we usually register; How to optimize
Let's write a Controller
@RequestMapping("/a3")
public String ajax3(String name,String pwd){
   String msg = "";
   //There is data in the simulation database
   if (name!=null){
       if ("admin".equals(name)){
           msg = "OK";
      }else {
           msg = "User name input error";
      }
  }
   if (pwd!=null){
       if ("123456".equals(pwd)){
           msg = "OK";
      }else {
           msg = "Incorrect password input";
      }
  }
   return msg; //Due to the @ RestController annotation, msg is converted to json format and returned
}
Front page login jsp
<%@ page contentType="text/html;charset=UTF-8" language="java" %>
<html>
<head>
   <title>ajax</title>
   <script src="${pageContext.request.contextPath}/statics/js/jquery-3.1.1.min.js"></script>
   <script>

       function a1(){
           $.post({
               url:"${pageContext.request.contextPath}/a3",
               data:{'name':$("#name").val()},
               success:function (data) {
                   if (data.toString()=='OK'){
                       $("#userInfo").css("color","green");
                  }else {
                       $("#userInfo").css("color","red");
                  }
                   $("#userInfo").html(data);
              }
          });
      }
       function a2(){
           $.post({
               url:"${pageContext.request.contextPath}/a3",
               data:{'pwd':$("#pwd").val()},
               success:function (data) {
                   if (data.toString()=='OK'){
                       $("#pwdInfo").css("color","green");
                  }else {
                       $("#pwdInfo").css("color","red");
                  }
                   $("#pwdInfo").html(data);
              }
          });
      }

   </script>
</head>
<body>
<p>
  user name:<input type="text" id="name" οnblur="a1()"/>
   <span id="userInfo"></span>
</p>
<p>
  password:<input type="text" id="pwd" οnblur="a2()"/>
   <span id="pwdInfo"></span>
</p>
</body>
</html>
[remember to deal with json garbled code]
Test the effect, dynamic request response, local refresh, that's it!
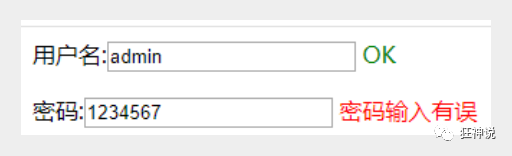
Get baidu interface Demo
<!DOCTYPE HTML>
<html>
<head>
   <meta http-equiv="Content-Type" content="text/html; charset=utf-8">
   <title>JSONP Baidu search</title>
   <style>
       #q{
           width: 500px;
           height: 30px;
           border:1px solid #ddd;
           line-height: 30px;
           display: block;
           margin: 0 auto;
           padding: 0 10px;
           font-size: 14px;
      }
       #ul{
           width: 520px;
           list-style: none;
           margin: 0 auto;
           padding: 0;
           border:1px solid #ddd;
           margin-top: -1px;
           display: none;
      }
       #ul li{
           line-height: 30px;
           padding: 0 10px;
      }
       #ul li:hover{
           background-color: #f60;
           color: #fff;
      }
   </style>
   <script>

       // 2. Step 2
       // Define demo function (analysis interface, data)
       function demo(data){
           var Ul = document.getElementById('ul');
           var html = '';
           // If the search data exists, add the content
           if (data.s.length) {
               // The hidden ul is displayed
               Ul.style.display = 'block';
               // The searched data is circularly appended to li
               for(var i = 0;i<data.s.length;i++){
                   html += '<li>'+data.s[i]+'</li>';
              }
               // Cyclic li write ul
               Ul.innerHTML = html;
          }
      }

       // 1. Step 1
       window.onload = function(){
           // Get input box and ul
           var Q = document.getElementById('q');
           var Ul = document.getElementById('ul');

           // When the event mouse is raised
           Q.onkeyup = function(){
               // If the input box is not equal to empty
               if (this.value != '') {
                   // ☆☆☆☆☆☆☆☆☆☆☆☆☆☆☆☆☆☆☆☆☆☆☆☆☆☆☆☆☆☆☆☆☆☆☆☆☆☆☆☆☆☆☆☆☆☆☆☆☆☆☆☆☆☆☆☆
                   // create label
                   var script = document.createElement('script');
                   //Given the address to cross domain, assign it to src
                   //Here is the cross domain address to be requested. What I wrote is the cross domain address of Baidu search
                   script.src ='https://sp0.baidu.com/5a1Fazu8AA54nxGko9WTAnF6hhy/su?wd='+this.value+'&cb=demo';
                   // Append the combined script tag with src to the body
                   document.body.appendChild(script);
              }
          }
      }
   </script>
</head>

<body>
<input type="text" id="q" />
<ul id="ul">

</ul>
</body>
</html>
Ajax is very important in our development. We must learn to use it!
8. Interceptor + file upload and download
8.1 interceptor
summary
The processor interceptor of spring MVC is similar to the Filter in Servlet development, which is used to preprocess and post process the processor. Developers can define some interceptors to implement specific functions.
**Difference between filter and Interceptor: * * interceptor is a specific application of AOP idea.
filter
- Part of the servlet specification that can be used by any java web project
- After / * is configured in URL pattern, all resources to be accessed can be intercepted
Interceptor
- The interceptor is the spring MVC framework's own. It can only be used by projects that use the spring MVC framework
- The interceptor will only intercept the accessed controller methods. If the accessed is jsp/html/css/image/js, it will not intercept
custom interceptor
How to implement the interceptor?
To customize the interceptor, you must implement the HandlerInterceptor interface.
1. Create a Moudule, springmvc-07-Interceptor, and add web support
2. Configure web XML and spring MVC servlet XML file
3. Write an interceptor
package com.kuang.interceptor;

import org.springframework.web.servlet.HandlerInterceptor;
import org.springframework.web.servlet.ModelAndView;

import javax.servlet.http.HttpServletRequest;
import javax.servlet.http.HttpServletResponse;

public class MyInterceptor implements HandlerInterceptor {

   //Execute before the method of request processing
   //If true is returned, execute the next interceptor
   //If false is returned, the next interceptor is not executed
   public boolean preHandle(HttpServletRequest httpServletRequest,HttpServletResponse httpServletResponse, Object o) throws Exception {
       System.out.println("------------Before treatment------------");
       return true;
  }

   //Executed after the request processing method is executed
   public void postHandle(HttpServletRequest httpServletRequest,HttpServletResponse httpServletResponse, Object o, ModelAndView modelAndView)throws Exception {
       System.out.println("------------After treatment------------");
  }

   //After the dispatcher servlet is processed, it is executed and cleaned up
   public void afterCompletion(HttpServletRequest httpServletRequest,HttpServletResponse httpServletResponse, Object o, Exception e) throws Exception {
       System.out.println("------------clear------------");
  }
}
4. Configure the interceptor in the configuration file of spring MVC
<!--About interceptor configuration-->
<mvc:interceptors>
   <mvc:interceptor>
       <!--/** Include paths and their sub paths-->
       <!--/admin/* Intercepting is/admin/add Wait, this , /admin/add/user Will not be intercepted-->
       <!--/admin/** Intercepting is/admin/All under-->
       <mvc:mapping path="/**"/>
       <!--bean The interceptor is configured-->
       <bean class="com.kuang.interceptor.MyInterceptor"/>
   </mvc:interceptor>
</mvc:interceptors>
5. Write a Controller to receive requests
package com.kuang.controller;

import org.springframework.stereotype.Controller;
import org.springframework.web.bind.annotation.RequestMapping;
import org.springframework.web.bind.annotation.ResponseBody;

//Test interceptor controller
@Controller
public class InterceptorController {

   @RequestMapping("/interceptor")
   @ResponseBody
   public String testFunction() {
       System.out.println("The method in the controller is executed");
       return "hello";
  }
}
6. Front end index jsp
<a href="${pageContext.request.contextPath}/interceptor">Interceptor test</a>
7. Start tomcat test!
Verify that the user is logged in (authenticated user)
Realization idea
1. There is a login page. You need to write a controller access page.
2. The login page has an action to submit a form. It needs to be processed in the controller. Determine whether the user name and password are correct. If correct, write user information to the session. Return to login success.
3. Intercept the user's request and judge whether the user logs in. If the user has logged in. Release. If the user does not log in, jump to the login page
Test:
1. Write a login page login jsp
<%@ page contentType="text/html;charset=UTF-8" language="java" %>
<html>
<head>
   <title>Title</title>
</head>

<h1>Login page</h1>
<hr>

<body>
<form action="${pageContext.request.contextPath}/user/login">
  user name:<input type="text" name="username"> <br>
  password:<input type="password" name="pwd"> <br>
   <input type="submit" value="Submit">
</form>
</body>
</html>
2. Write a Controller to process the request
package com.kuang.controller;

import org.springframework.stereotype.Controller;
import org.springframework.web.bind.annotation.RequestMapping;

import javax.servlet.http.HttpSession;

@Controller
@RequestMapping("/user")
public class UserController {

   //Jump to landing page
   @RequestMapping("/jumplogin")
   public String jumpLogin() throws Exception {
       return "login";
  }

   //Jump to success page
   @RequestMapping("/jumpSuccess")
   public String jumpSuccess() throws Exception {
       return "success";
  }

   //Login submission
   @RequestMapping("/login")
   public String login(HttpSession session, String username, String pwd) throwsException {
       // Record user identity information to session
       System.out.println("Receiving front end==="+username);
       session.setAttribute("user", username);
       return "success";
  }

   //Exit login
   @RequestMapping("logout")
   public String logout(HttpSession session) throws Exception {
       // session expired
       session.invalidate();
       return "login";
  }
}
3. Write a successful login page success jsp
<%@ page contentType="text/html;charset=UTF-8" language="java" %>
<html>
<head>
   <title>Title</title>
</head>
<body>

<h1>Login success page</h1>
<hr>

${user}
<a href="${pageContext.request.contextPath}/user/logout">cancellation</a>
</body>
</html>
4. Test jump on the index page! Start Tomcat test. You can enter the home page without logging in!
<%@ page contentType="text/html;charset=UTF-8" language="java" %>
<html>
 <head>
   <title>$Title$</title>
 </head>
 <body>
 <h1>home page</h1>
 <hr>
<%--Sign in--%>
 <a href="${pageContext.request.contextPath}/user/jumplogin">Sign in</a>
 <a href="${pageContext.request.contextPath}/user/jumpSuccess">Success page</a>
 </body>
</html>
5. Write user login interceptor
package com.kuang.interceptor;

import org.springframework.web.servlet.HandlerInterceptor;
import org.springframework.web.servlet.ModelAndView;

import javax.servlet.ServletException;
import javax.servlet.http.HttpServletRequest;
import javax.servlet.http.HttpServletResponse;
import javax.servlet.http.HttpSession;
import java.io.IOException;

public class LoginInterceptor implements HandlerInterceptor {

   public boolean preHandle(HttpServletRequest request, HttpServletResponseresponse, Object handler) throws ServletException, IOException {
       // If it is a landing page, release it
       System.out.println("uri: " + request.getRequestURI());
       if (request.getRequestURI().contains("login")) {
           return true;
      }

       HttpSession session = request.getSession();

       // Release if the user has logged in
       if(session.getAttribute("user") != null) {
           return true;
      }

       // The user does not log in and jumps to the login page
       request.getRequestDispatcher("/WEB-INF/jsp/login.jsp").forward(request,response);
       return false;
  }

   public void postHandle(HttpServletRequest httpServletRequest,HttpServletResponse httpServletResponse, Object o, ModelAndView modelAndView)throws Exception {

  }

   public void afterCompletion(HttpServletRequest httpServletRequest,HttpServletResponse httpServletResponse, Object o, Exception e) throws Exception {

  }
}
6. Register the interceptor in the spring MVC configuration file
<!--About interceptor configuration-->
<mvc:interceptors>
   <mvc:interceptor>
       <mvc:mapping path="/**"/>
       <bean id="loginInterceptor" class="com.kuang.interceptor.LoginInterceptor"/>
   </mvc:interceptor>
</mvc:interceptors>
7. Restart Tomcat test again!
OK, test the login interception function
8.2 file upload and download
preparation
File upload is one of the most common functions in project development. Spring MVC can well support file upload, but MultipartResolver is not installed in the spring MVC context by default, so it cannot handle file upload by default. If you want to use spring's file upload function, you need to configure MultipartResolver in the context.
Front end form requirements: in order to upload files, the method of the form must be set to POST and the enctype must be set to multipart / form data. Only in this case, the browser will send the file selected by the user to the server as binary data;
Give a detailed description of the enctype attribute in the form:
- Application / x-www = form urlencoded: by default, only the value attribute value in the form field is processed. Forms with this encoding method will process the value in the form field into URL encoding.
- Multipart / form data: this encoding method will process form data in the form of binary stream. This encoding method will also encapsulate the contents of the file specified in the file field into the request parameters, and will not encode characters.
- text/plain: except for converting spaces into "+" signs, other characters are not encoded. This method is applicable to sending mail directly through forms.
<form action="" enctype="multipart/form-data" method="post">
   <input type="file" name="file"/>
   <input type="submit">
</form>
Once the enctype is set to multipart / form data, the browser will process the form data in the form of binary stream, and the processing of file upload involves parsing the original HTTP response on the server side. In 2003, the Apache Software Foundation released the open source Commons FileUpload component, which soon became the best choice for Servlet/JSP programmers to upload files.
- Servlet3. The 0 specification has provided a method to handle file upload, but this upload needs to be completed in the servlet.
- Spring MVC provides a simpler encapsulation.
- Spring MVC provides direct support for file upload, which is implemented with the plug and play MultipartResolver.
- Spring MVC implements a MultipartResolver implementation class using Apache Commons FileUpload Technology:
- CommonsMultipartResolver. Therefore, the file upload of spring MVC also depends on the component of Apache Commons FileUpload.
File upload
1. Import the jar package uploaded by the file, commons file upload, and Maven will automatically help us import his dependent package commons IO package;
<!--File upload-->
<dependency>
   <groupId>commons-fileupload</groupId>
   <artifactId>commons-fileupload</artifactId>
   <version>1.3.3</version>
</dependency>
<!--servlet-api Import a later version of-->
<dependency>
   <groupId>javax.servlet</groupId>
   <artifactId>javax.servlet-api</artifactId>
   <version>4.0.1</version>
</dependency>
2. Configuration bean: multipartResolver
[note!!! The id of this bena must be: multipartResolver, otherwise an error of 400 will be reported when uploading the file! I've planted a pit here, and I'll teach you a lesson!]
<!--File upload configuration-->
<bean id="multipartResolver" class="org.springframework.web.multipart.commons.CommonsMultipartResolver">
   <!-- The encoding format of the request must be and jSP of pageEncoding Property is consistent so that the contents of the form can be read correctly. The default is ISO-8859-1 -->
   <property name="defaultEncoding" value="utf-8"/>
   <!-- Maximum upload file size, in bytes (10485760)=10M) -->
   <property name="maxUploadSize" value="10485760"/>
   <property name="maxInMemorySize" value="40960"/>
</bean>
Common methods of CommonsMultipartFile:
- String getOriginalFilename(): get the original name of the uploaded file
- InputStream getInputStream(): get file stream
- void transferTo(File dest): save the uploaded file to a directory file
Let's actually test it
3. Write front page
<form action="/upload" enctype="multipart/form-data" method="post">
 <input type="file" name="file"/>
 <input type="submit" value="upload">
</form>
4,Controller
package com.kuang.controller;

import org.springframework.stereotype.Controller;
import org.springframework.web.bind.annotation.RequestMapping;
import org.springframework.web.bind.annotation.RequestParam;
import org.springframework.web.multipart.commons.CommonsMultipartFile;

import javax.servlet.http.HttpServletRequest;
import java.io.*;

@Controller
public class FileController {
   //@RequestParam("file") encapsulates the file obtained by the name=file control into a CommonsMultipartFile object
   //If you upload CommonsMultipartFile in batch, it can be an array
   @RequestMapping("/upload")
   public String fileUpload(@RequestParam("file") CommonsMultipartFile file ,HttpServletRequest request) throws IOException {

       //Get file name: file getOriginalFilename();
       String uploadFileName = file.getOriginalFilename();

       //If the file name is empty, go back to the home page directly!
       if ("".equals(uploadFileName)){
           return "redirect:/index.jsp";
      }
       System.out.println("Upload file name : "+uploadFileName);

       //Upload path save settings
       String path = request.getServletContext().getRealPath("/upload");
       //If the path does not exist, create one
       File realPath = new File(path);
       if (!realPath.exists()){
           realPath.mkdir();
      }
       System.out.println("Upload file storage address:"+realPath);

       InputStream is = file.getInputStream(); //File input stream
       OutputStream os = new FileOutputStream(new File(realPath,uploadFileName));//File output stream

       //Read write
       int len=0;
       byte[] buffer = new byte[1024];
       while ((len=is.read(buffer))!=-1){
           os.write(buffer,0,len);
           os.flush();
      }
       os.close();
       is.close();
       return "redirect:/index.jsp";
  }
}
5. Test upload file, OK!
Use file To save the uploaded file
1. Write Controller
/*
* Use file To save the uploaded file
*/
@RequestMapping("/upload2")
public String  fileUpload2(@RequestParam("file") CommonsMultipartFile file,HttpServletRequest request) throws IOException {

   //Upload path save settings
   String path = request.getServletContext().getRealPath("/upload");
   File realPath = new File(path);
   if (!realPath.exists()){
       realPath.mkdir();
  }
   //Upload file address
   System.out.println("Upload file storage address:"+realPath);

   //Write the file directly through the CommonsMultipartFile method (note this time)
   file.transferTo(new File(realPath +"/"+ file.getOriginalFilename()));

   return "redirect:/index.jsp";
}
2. Front end form submission address modification
3. Visit submit test, OK!
File download
File download steps:
1. Set response header
2. Read file – InputStream
3. Write out file – OutputStream
4. Perform operation
5. Close flow (first on then off)
Code implementation:
@RequestMapping(value="/download")
public String downloads(HttpServletResponse response ,HttpServletRequest request)throws Exception{
   //Address of the picture to download
   String  path = request.getServletContext().getRealPath("/upload");
   String  fileName = "Basic grammar.jpg";

   //1. Set response header
   response.reset(); //Set the page not to be cached, and clear the buffer
   response.setCharacterEncoding("UTF-8"); //Character encoding
   response.setContentType("multipart/form-data"); //Binary transmission data
   //Set response header
   response.setHeader("Content-Disposition",
           "attachment;fileName="+URLEncoder.encode(fileName, "UTF-8"));

   File file = new File(path,fileName);
   //2. Read file -- input stream
   InputStream input=new FileInputStream(file);
   //3. Write out file -- output stream
   OutputStream out = response.getOutputStream();

   byte[] buff =new byte[1024];
   int index=0;
   //4. Perform a write out operation
   while((index= input.read(buff))!= -1){
       out.write(buff, 0, index);
       out.flush();
  }
   out.close();
   input.close();
   return null;
}
front end
<a href="/download">Click download</a>
Test, file download OK, you can compare with the Java Web native way we learned before, and you can know that this is much more convenient!
Interceptors and file operations are very important in our development. We must learn to use them!