Controller controller
-
The controller is responsible for providing the behavior of accessing the application, which is usually implemented by interface definition or annotation definition.
-
The controller is responsible for parsing the user's request and transforming it into a model.
-
A spring controller can be contained in more than one spring controller class
-
In Spring MVC, there are many ways to configure the Controller
Implement Controller interface
Controller is an interface, which is located at org springframework. web. servlet. Under MVC package, there is only one method in the interface;
//The class that implements the interface obtains the controller function
public interface Controller {
   //Process the request and return a model and view object
   ModelAndView handleRequest(HttpServletRequest var1, HttpServletResponse var2) throws Exception;
}
test
-
Create a new Moudle, springmvc-04-controller. Make a copy of 03 just now and let's operate!
-
Delete HelloController
-
mvc's configuration file only leaves the view parser!
-
-
Write a Controller class, ControllerTest1
//Define controller
//Note: do not import the wrong package, implement the Controller interface and rewrite the method;
public class ControllerTest1 implements Controller {

   public ModelAndView handleRequest(HttpServletRequest httpServletRequest, HttpServletResponse httpServletResponse) throws Exception {
       //Returns a model view object
       ModelAndView mv = new ModelAndView();
       mv.addObject("msg","Test1Controller");
       mv.setViewName("test");
       return mv;
  }
}
3. After writing, register the requested bean in the Spring configuration file; name corresponds to the request path, and class corresponds to the class that handles the request
<bean name="/t1" class="com.kuang.controller.ControllerTest1"/>
4. Write front-end test JSP. Note that it is written in the WEB-INF/jsp directory, which corresponds to our view parser
<%@ page contentType="text/html;charset=UTF-8" language="java" %>
<html>
<head>
   <title>Kuangshen</title>
</head>
<body>
${msg}
</body>
</html>
5. Configure Tomcat to run the test. I don't have a project release name here. The configuration is a /, so the request doesn't need to add the project name. OK!

explain:
-
The older way to implement the Controller is to define the interface
-
Disadvantages: there is only one method in a Controller. If you want multiple methods, you need to define multiple controllers; The way of definition is troublesome;
Use annotation @ Controller
-
@The Controller annotation type is used to declare that the instance of Spring class is a Controller (another three annotations were mentioned when talking about IOC);
-
Spring can use the scanning mechanism to find all annotation based controller classes in the application. In order to ensure that spring can find your controller, you need to declare component scanning in the configuration file.
<!-- Automatically scan the specified package and submit all the following annotation classes to IOC Container management -->
<context:component-scan base-package="com.kuang.controller"/>
Add a ControllerTest2 class and implement it with annotations;
//@The class annotated by the Controller is automatically added to the Spring context
@Controller
public class ControllerTest2{

   //Map access path
   @RequestMapping("/t2")
   public String index(Model model){
       //Spring MVC will automatically instantiate a Model object to pass values to the view
       model.addAttribute("msg", "ControllerTest2");
       //Return to view location
       return "test";
  }

}
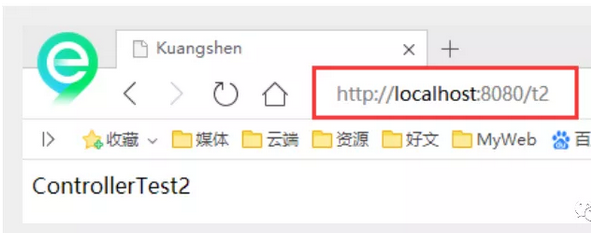
Run tomcat test

It can be found that both of our requests can point to a view, but the results of the page results are different. From here, we can see that the view is reused, and there is a weak coupling relationship between the controller and the view.
Annotation is the most commonly used method!
RequestMapping
@RequestMapping
-
@The RequestMapping annotation is used to map URLs to a controller class or a specific handler method. Can be used on classes or methods. Used on a class, indicating that all methods in the class that respond to requests take this address as the parent path.
-
In order to test the conclusion more accurately, we can add a project name to test myweb
-
Only annotate on Methods
@Controller
public class TestController {
   @RequestMapping("/h1")
   public String test(){
       return "test";
  }
}-
Access path: http://localhost:8080 /Project name / h1
-
Annotate classes and methods at the same time
@Controller
@RequestMapping("/admin")
public class TestController {
   @RequestMapping("/h1")
   public String test(){
       return "test";
  }
}
Access path: http://localhost:8080 /Project name / admin /h1, you need to specify the path of the class first and then the path of the method;
RestFul style
concept
Restful is a style of resource positioning and resource operation. It's not a standard or agreement, it's just a style. The software designed based on this style can be more concise, more hierarchical, and easier to implement caching and other mechanisms.
function
Resources: all things on the Internet can be abstracted as resources
Resource operation: use POST, DELETE, PUT and GET to operate resources with different methods.
Add, delete, modify and query respectively.
Operate resources in traditional way: achieve different effects through different parameters! Single method, post and get
http://127.0.0.1/item/queryItem.action?id=1 Query, GET
http://127.0.0.1/item/saveItem.action New, POST
http://127.0.0.1/item/updateItem.action Update, POST
http://127.0.0.1/item/deleteItem.action?id=1 Delete, GET or POST
Using RESTful operation resources: different effects can be achieved through different request methods! As follows: the request address is the same, but the function can be different!
http://127.0.0.1/item/1 Query, GET
http://127.0.0.1/item New, POST
http://127.0.0.1/item Update, PUT
http://127.0.0.1/item/1 DELETE
Learning test
-
Create a new class RestFulController
@Controller
public class RestFulController {
}
2. In Spring MVC, you can use the @ PathVariable annotation to bind the value of the method parameter to a URI template variable.
@Controller
public class RestFulController {

   //Map access path
   @RequestMapping("/commit/{p1}/{p2}")
   public String index(@PathVariable int p1, @PathVariable int p2, Model model){

       int result = p1+p2;
       //Spring MVC will automatically instantiate a Model object to pass values to the view
       model.addAttribute("msg", "result:"+result);
       //Return to view location
       return "test";

  }

}
3. Let's check the test request

4. Think: what are the benefits of using path variables?
-
Make the path more concise;
-
It is more convenient to obtain parameters, and the framework will automatically perform type conversion.
-
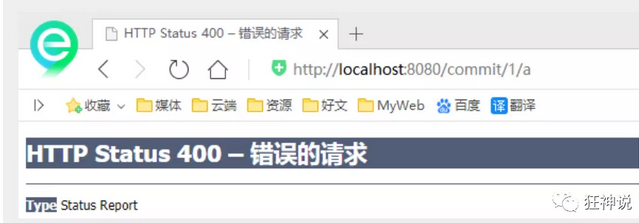
Access parameters can be constrained by the type of path variable. If the type is different, the corresponding request method cannot be accessed. For example, if the access path here is / commit/1/a, the path does not match the method, rather than parameter conversion failure.

5. Let's modify the corresponding parameter type and test again
//Map access path
@RequestMapping("/commit/{p1}/{p2}")
public String index(@PathVariable int p1, @PathVariable String p2, Model model){

   String result = p1+p2;
   //Spring MVC will automatically instantiate a Model object to pass values to the view
   model.addAttribute("msg", "result:"+result);
   //Return to view location
   return "test";

}
Use the method property to specify the request type
It is used to restrict the type of request and narrow the request range. Specify the type of request predicate, such as GET, POST, HEAD, OPTIONS, PUT, PATCH, DELETE, TRACE, etc
Let's test:
-
Add a method
//The mapped access path must be a POST request
@RequestMapping(value = "/hello",method = {RequestMethod.POST})
public String index2(Model model){
   model.addAttribute("msg", "hello!");
   return "test";
}
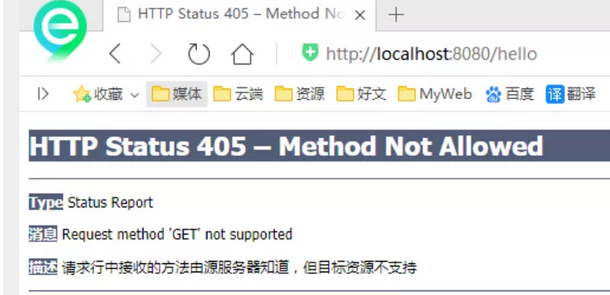
We use the browser address bar to access. By default, it is a Get request, and an error 405 will be reported:

If you change POST to GET, it is normal;
//The mapped access path must be a Get request
@RequestMapping(value = "/hello",method = {RequestMethod.GET})
public String index2(Model model){
   model.addAttribute("msg", "hello!");
   return "test";
}
Summary:
The @ RequestMapping annotation of Spring MVC can handle HTTP requests, such as GET, PUT, POST, DELETE and PATCH.
All address bar requests will be of HTTP GET type by default.
Method level annotation variants are as follows: combined annotation
@GetMapping
@PostMapping
@PutMapping
@DeleteMapping
@PatchMapping
Extension: little yellow duck debugging method
Scenario 1: we all have the experience of asking and explaining programming problems to others (or even to people who can't program at all), but most of the time, in the process of our explanation, we think of the solution to the problem, and then the other party looks at a loss.
Scene 2: your colleague comes to ask you a question, but when he finishes the question or is halfway there, he comes up with the answer and leaves, leaving you with a blank face.
In fact, the above two scene phenomena are the so-called rubber duck debugging, also known as rubber duck debugging, which is one of the most commonly used debugging methods in our software engineering.

This concept is said to come from a story in the book "the way of programmer cultivation". It is said that the program master carries a little yellow duck with him. When debugging the code, he will put the little yellow duck on the table, explain each line of code to the duck in detail, and then fix the problem quickly.