Spring security (I) -- Introduction and project construction
preface
The spring security framework is a permission management framework, and a Shiro framework with the same function (later, this series only describes spring security). This note will first explain the concept of permission, and then explain the construction of the most basic project integrating the spring security framework.
Authority management
Permission management belongs to the category of system security, which limits the setting of system access permission. Users must access resources through some kind of authentication or users can access authorized resources after authentication, that is, permission management includes two parts, authentication and authorization.
Authentication can be simply understood as the login of the system. We need to show our legal identity in the system to obtain the permission to enter the system, that is, the previous login operation;
Authorization is the further operation after authentication. Even if we have been authenticated as the legal user of the system, it is impossible for us to operate all resources in the system. It is well known that the user's identity or the level of authorization of resources can be divided into different levels in the user's operation or system.
Framework technology of authority management
In Java enterprise development, there are few technologies about permission management, which can be divided into two technologies and one direction:
- Shiro: the older generation of Java permission management framework is a lightweight and easy to integrate technology, but it can't give full play to its advantages in the micro service architecture, but it has some weaknesses;
- Spring security: this framework is very popular now, because observing the development trend of Java framework at this stage, spring security is an overall trend, and the integrated use of spring security in SpringBoot framework has greater advantages;
- Custom rules: it's good for everyone to understand this, because the development of a permission management framework is not only the authentication and authorization issues mentioned above, but also many security issues, such as data security and data encryption. More importantly, the framework should be innovated based on the existing technology, but the existing technology is not very secure, For example, we often use slf4j tools (who would have thought there were such disgusting vulnerabilities). Therefore, only large manufacturers will develop their own permission framework.
Spring security project setup
Introduce dependency
        <!--introduce SpringSecurity rely on-->
        <!--After the dependency is introduced, all interfaces can be protected, and simple functions can be completed without corresponding configuration-->
        <!--All interfaces must be authenticated before they can continue to be accessed-->
        <!--At the same time, after the dependency is introduced, the system will enter the login page regardless of any path requested, and accessing nonexistent resources will also enter the login page-->
        <dependency>
            <groupId>org.springframework.boot</groupId>
            <artifactId>spring-boot-starter-security</artifactId>
        </dependency>
Define the controller (write one at random to facilitate testing)
@RestController
public class TestController{
    @RequestMapping("test")
    public String test(){
        return "Successfully accessed the interface";
    }
}
Form of expression
After introducing dependencies into the SpringBoot project, our project will protect all interfaces, pages and other resources by default. Only after authentication and authorization can we successfully access resources (the setting of authorization is not defined by default, so we will only explain authentication for the time being).
After the project is started, we will see the following data in the console:
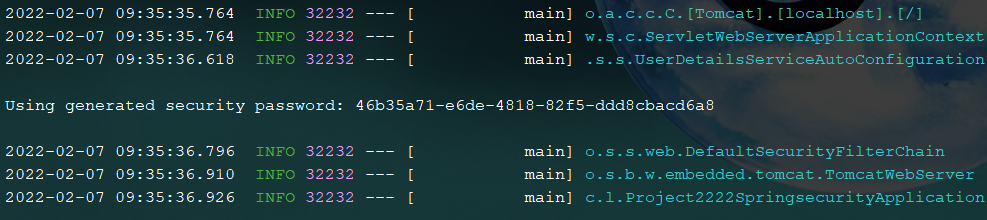
The password in the figure is the user password automatically generated by spring security for us. The default user name is user. At this time, when we visit the test interface, an authentication page requiring login will appear. We can access the corresponding resources only by entering user in the user name and the password automatically generated in the console in the password.
How to modify the default user name and resource authentication
configuration file
This part is divided into two files, one is application YML, and the other is our custom configuration class (used to modify the authentication method, etc.).
application.yml
spring:
  security:
    user:
      name: root
      password: 123123
This part of the configuration means that we change the user name and password generated by default in spring security to a user-defined password. At this time, when we restart the project, the default password will not be generated for us in the console.
Custom configuration class (configure authentication rules)
In our actual development, many resources can be accessed without authentication, such as login interface, website home page, registration page, etc. However, after the introduction of spring security dependency, all resources in the project will be automatically protected. At this time, we can modify these resources through custom configuration classes.
// The configuration class must be annotated with this annotation
@Configuration
// Custom authentication and other configurations need to inherit this class and override the following methods
public class WebSecurityConfig extends WebSecurityConfigurerAdapter {
    @Override
    protected void configure(HttpSecurity http) throws Exception {
        // Indicates that request permission management is enabled
        http.authorizeRequests().
                mvcMatchers("/index")   // Represents all resources of the index
                .permitAll() // Indicates a request to release a specified
                .mvcMatchers("/loginPage")  // Resource representing login
                .permitAll()
                .mvcMatchers("/mainPage")
                .permitAll()
                .anyRequest()   // Indicates the remaining resources
                .authenticated()
                .and()  //  If the configuration continues, the method will return an HttpSecurity object
                .formLogin()    // Indicates that resources requiring authentication use form authentication
                .loginPage("/loginPage")
                .loginProcessingUrl("/loginRequest")   // Specify the path of the login request. The default is login
                .usernameParameter("name") // Modify the field name of user authentication, that is, notify the authenticator which field name in the front end is used for authentication
                .passwordParameter("pwd")
                .successForwardUrl("/mainPage")   // Page Jump path (forwarding) after successful authentication
//                . failureForwardUrl("/loginPage") / / page to which authentication fails (forwarding)
//                . failureUrl("/loginPage") / / authentication fails, jump to the page (redirect)
                .failureHandler(new MyAuthenticationFailureHandler()) // Logoff failure interceptor
                // The default authentication success path (redirection). This method will record the resources requested for the first time. After successful authentication, it will give priority to redirecting to the resource path before authentication
                // The second parameter is false by default. If it is manually defined as true, the same operation as the successForward method will be completed by redirection
//                .defaultSuccessUrl("/main",true)
                // Successful authentication of front and rear end separation
//                . successHandler(new MyAuthenticationSuccessHandler()) / / processing after successful authentication
                .and()
                .logout()
//                . logoutUrl("/logout") / / logout URL. The default submission method is GET
                // Specify the path and method of multiple logout requests
                .logoutRequestMatcher(new OrRequestMatcher(
                        new AntPathRequestMatcher("/logoutGet","GET"),
                        new AntPathRequestMatcher("/logoutPost","POST")
                        )
                )
                // In the front and rear end separation project, the cancellation processing
                .logoutSuccessHandler(new MyLogoutSuccessHandler()) // Logoff interceptor
                .invalidateHttpSession(true)  // Clear Session domain
                .clearAuthentication(true)  // Clear authentication information
                .logoutSuccessUrl("/loginPage")  // Page to jump after successful logout
                .and()
                .csrf().disable()   // Disable csrf cross site request protection
                ;
    }
}
We are too lazy to add the above configuration step by step. All configuration methods are annotated, and the configurations of the same type and different processing methods are put together, which can be set by ourselves.
In this configuration class, the login authentication page configured by us must be added to the reassurance policy after customization, and all released resources must be written before all resources.
custom interceptor
In the above custom configuration class, we have some custom interceptors for login authentication, logout authentication, etc. the corresponding custom interceptors are as follows:
Authentication successful interceptor
// Customize the processing after successful authentication
public class MyAuthenticationSuccessHandler implements AuthenticationSuccessHandler {
    @Override
    public void onAuthenticationSuccess(HttpServletRequest request, HttpServletResponse response, Authentication authentication) throws IOException, ServletException {
        Map<String,Object> result = new HashMap<>();
        result.put("result","Login successful");
        result.put("msg",200);
        result.put("authentication",authentication);
        response.setContentType("application/json;charset=UTF-8");
        String resultStr = new ObjectMapper().writeValueAsString(result);
        response.getWriter().println(resultStr);
    }
}
Authentication failure interceptor
/**
 * User defined authentication failure handling scheme
 */
public class MyAuthenticationFailureHandler implements AuthenticationFailureHandler {
    @Override
    public void onAuthenticationFailure(HttpServletRequest request, HttpServletResponse response, AuthenticationException exception) throws IOException, ServletException {
        Map<String,Object> result = new HashMap<>();
        result.put("msg","Login failed: "+exception.getMessage());
        result.put("status",500);
        response.setContentType("application/json;charset=UTF-8");
        String resultStr = new ObjectMapper().writeValueAsString(result);
        response.getWriter().println(resultStr);
    }
}
Log off interceptor successfully
public class MyLogoutSuccessHandler implements LogoutSuccessHandler {
    @Override
    public void onLogoutSuccess(HttpServletRequest request, HttpServletResponse response, Authentication authentication) throws IOException, ServletException {
        Map<String,Object> result = new HashMap<>();
        result.put("msg","Logout succeeded. The current authentication object is:" + authentication);
        result.put("status",200);
        response.setContentType("application/json;charset=UTF-8");
        String resultStr = new ObjectMapper().writeValueAsString(result);
        response.getWriter().println(resultStr);
    }
}
How to obtain user authentication information
Back end code
Authentication authentication = SecurityContextHolder.getContext().getAuthentication();
// Get identity information
Object principal = authentication.getPrincipal();
// Get permission information
Object authorities = authentication.getAuthorities();
log.info("Get identity information:" + principal);
log.info("Get permission information:" + authorities);
After the user authentication is successful, we can obtain the authenticated user information through this code.
Front end code
The front-end engine used in this project is thymeleaf, which is not compatible with spring security, so we need to introduce extension dependency
<!--introduce thymeleaf yes SpringSecurity Dependence of-->
<!--The dependency can be introduced in thymeleaf Used in Security Operation registration information-->
<dependency>
    <groupId>org.thymeleaf.extras</groupId>
    <artifactId>thymeleaf-extras-springsecurity5</artifactId>
</dependency>
After importing this dependency, you need to import the header file in the front page before using it:
<html lang="en" xmlns:th="http://www.thymeleaf.org"
  xmlns:sec="http://themeleaf.org/extras/spring-securiry">
<h1>Obtain user authentication information</h1>
<li sec:authentication="principal.username"></li>
<li sec:authentication="principal.authorities"></li>
<li sec:authentication="principal.accountNonExpired"></li>
<li sec:authentication="principal.accountNonLocked"></li>
summary
The above is the basic construction of spring security architecture. It should be noted that we are using page Jump and manually adding some parameters to the corresponding domain objects in the front end. However, in today's popular front-end and back-end separation architecture, we usually use a custom interceptor to transmit json format data for the front-end, so that the front-end system can complete the next work according to the transmission results.