SpringSecurity
1, Overview
- Official website: https://spring.io/projects/spring-security SpringSecurity official website
- Spring security is a security framework based on authentication and authorization developed by spring company
- Authentication: login process
- Authorization: grant corresponding operation permissions during login
- General permission management is RBAC
- RBAC: role based access control

2, Quick start
1. Implementation steps
- Create a SpringBoot project
- Import dependency
- controller
- Start project
- access controller
2. Concrete realization
2.1 import dependency
<dependency>
    <groupId>org.springframework.boot</groupId>
    <artifactId>spring-boot-starter-web</artifactId>
</dependency>

<dependency>
    <groupId>org.springframework.boot</groupId>
    <artifactId>spring-boot-starter-security</artifactId>
</dependency>
2.2 interface
@RestController
public class HelloController {

    @RequestMapping("/hello")
    public String hello(){
        return "Hello,Success!";
    }

}
2.3 testing
-
Access interface
If blocked, jump back to the login page
If the login is successful, jump to the previously accessed resources
User name: user
Password: randomly generated by console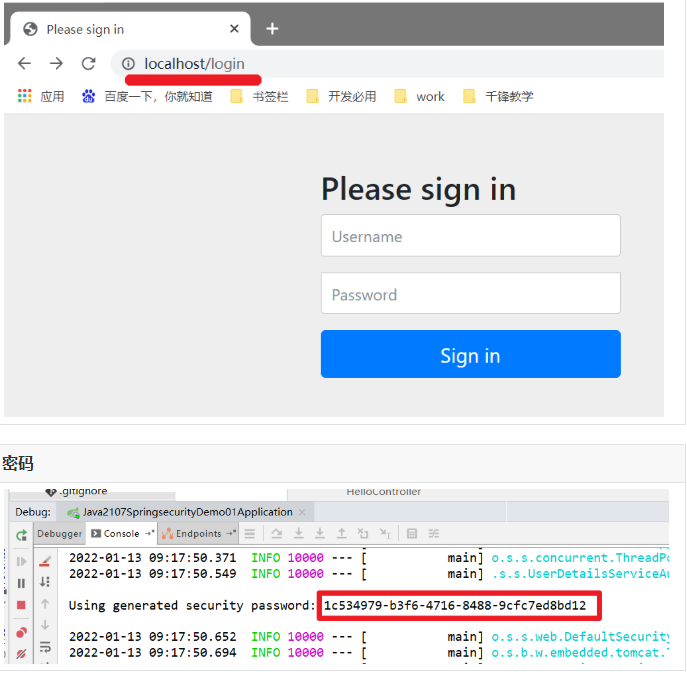
3, Configure user name and password
1. SpringBoot configuration file
spring:
  #Specify user name and password
  security:
    user:
      name: java2107
      password: java2107
2. Configuration class
2.1 memory based [understand]
- Annotation profile
- The boot class adds an encrypted Bean
@Bean
public PasswordEncoder passwordEncoder(){
    return new BCryptPasswordEncoder();
}
- Add configuration class
@Configuration
public class SecurityConfig extends WebSecurityConfigurerAdapter {

    @Autowired
    PasswordEncoder passwordEncoder;

    @Override
    protected void configure(AuthenticationManagerBuilder auth) throws Exception {

        String newPwd = passwordEncoder.encode("java2107");

        //Configure user name and password based on memory
        auth.inMemoryAuthentication()
                .withUser("java2107")
                //This password must be encrypted. You need to specify an encryptor
                .password(newPwd)
                //Specify the role. The specific role can not be specified
                .roles("");
    }

}
- test
2.2 user defined authentication class
- The memory based configuration should be commented out
- Implement interface UserDetailsService
@Service
public class MyUserDetailsService implements UserDetailsService {

    @Override
    public UserDetails loadUserByUsername(String username) throws UsernameNotFoundException {

        if(null != username && "java2107".equals(username)) {
            //Comparing passwords, the security framework will automatically compare passwords
            //Parameter 1: user name of database
            //Parameter 2: password of database $2A $10 $mfcvabmb7imtus0vuv / sxusikseb / evam8xqekj0pewmo9m23umfs -- > java2107
            //Parameter 3: role permission list
            Collection<? extends GrantedAuthority> authorities =
                    AuthorityUtils.commaSeparatedStringToAuthorityList("");
            return new User(username,
                    "$2a$10$mFcvAbMb7iMtuS0vuv/sXuSiKSeb/EVAM8xQekJ0PEWmo9M23UMfS",
                    authorities);
        }

        //Certification failed
        return null;
    }
}
- Configuration class based on authentication class
    @Override
    protected void configure(AuthenticationManagerBuilder auth) throws Exception {
        //Based on authentication class
        //Which authentication class to pass for authentication. When comparing passwords, ciphertext passwords shall be compared with plaintext passwords [encryptor needs to be specified]
        auth.userDetailsService(myUserDetailsService).passwordEncoder(passwordEncoder);
    }
4, Connect to database
1. Database table
CREATE TABLE `tb_user` (
  `id` int(11) NOT NULL AUTO_INCREMENT,
  `username` varchar(30) DEFAULT NULL,
  `password` varchar(60) DEFAULT NULL,
  PRIMARY KEY (`id`)
) ENGINE=InnoDB AUTO_INCREMENT=3 DEFAULT CHARSET=utf8;

insert  into `tb_user`(`id`,`username`,`password`) values (1,'zhangsan','123456');
#The password needs to be encrypted. Encrypt it yourself
2. Import dependency
<dependency>
    <groupId>com.baomidou</groupId>
    <artifactId>mybatis-plus-boot-starter</artifactId>
    <version>3.1.1</version>
</dependency>
<dependency>
    <groupId>mysql</groupId>
    <artifactId>mysql-connector-java</artifactId>
</dependency>
<dependency>
    <groupId>com.alibaba</groupId>
    <artifactId>druid-spring-boot-starter</artifactId>
    <version>1.1.10</version>
</dependency>

<dependency>
    <groupId>org.projectlombok</groupId>
    <artifactId>lombok</artifactId>
</dependency>

<dependency>
    <groupId>com.github.pagehelper</groupId>
    <artifactId>pagehelper-spring-boot-starter</artifactId>
    <version>1.3.0</version>
</dependency>
3. Entity class
@Data
@NoArgsConstructor
@AllArgsConstructor
@TableName("tb_user")
public class TbUser implements Serializable {

    @TableId
    private Integer id;
    private String username;
    private String password;

}
4. Mapper interface
public interface TbUserMapper extends BaseMapper<TbUser> {
}
5. Guide class annotation
@MapperScan(basePackages = {"com.qf.java2107.springsecurity.demo01.mapper"})
Boot class
6. Transformation certification
Query user data by user name
package com.qf.java2107.springsecurity.demo01.service;

import com.baomidou.mybatisplus.core.conditions.query.QueryWrapper;
import com.qf.java2107.springsecurity.demo01.mapper.TbUserMapper;
import com.qf.java2107.springsecurity.demo01.pojo.TbUser;
import org.springframework.beans.factory.annotation.Autowired;
import org.springframework.security.core.GrantedAuthority;
import org.springframework.security.core.authority.AuthorityUtils;
import org.springframework.security.core.userdetails.User;
import org.springframework.security.core.userdetails.UserDetails;
import org.springframework.security.core.userdetails.UserDetailsService;
import org.springframework.security.core.userdetails.UsernameNotFoundException;
import org.springframework.security.crypto.password.PasswordEncoder;
import org.springframework.stereotype.Service;

import java.util.Collection;

/**
 * Custom authentication class
 * @author ghy
 * @version 1.0
 * @date 2022-01-13
 **/
@Service
public class MyUserDetailsService implements UserDetailsService {

    @Autowired
    TbUserMapper tbUserMapper;

    @Override
    public UserDetails loadUserByUsername(String username) throws UsernameNotFoundException {

        QueryWrapper<TbUser> wrapper = new QueryWrapper<>();
        wrapper.eq("username", username);
        //Query user table by user name
        TbUser tbUser = tbUserMapper.selectOne(wrapper);

        if(null != tbUser) {
            Collection<? extends GrantedAuthority> authorities =
                    AuthorityUtils.commaSeparatedStringToAuthorityList("");
            return new User(tbUser.getUsername(), tbUser.getPassword(), authorities);
        }

        //Certification failed
        return null;
    }

}
7. Test
Enter the user name and password for the database
8. Get user name
- The Security framework will allocate an anonymous account for the resources filtered by the framework. The account has not been authenticated, but Security will allocate a temporary account anonymous user for unauthenticated users to access some resources
@GetMapping("/show/name")
public String name(){
    //Authentication object: after the resource passes through the Security framework, it will not be empty. The Security framework assigns an anonymous account to unauthenticated users to access some resources
    Object principal = SecurityContextHolder.getContext().getAuthentication().getPrincipal();
    if(null == principal) {
        return "anonymous";
    }
    //Certified
    if(principal instanceof User) {
        User user = (User) principal;
        return user.getUsername();
    }

    return principal.toString();
}
5, Security configuration
1. User defined login form
- By default, Security automatically generates a login form for unauthenticated users
- If it is our own project, the login form may not match the static resources of our project
1.1 implementation
Custom login form:
- User name: username
- Password: password
- Login request URL: / login
- Front page
<!-- use security After that, the login request is handled by it without writing it yourself Controller -->
<form action="/user/login" method="post">
    user name:<input type="text" name="username"/><br>
    password:<input type="text" name="password"/><br>
    <input type="submit" value="Sign in"/><br>
</form>
- Configuration class [close cross site forgery request]
/**
 * Configuration of authentication resources
 * @param http
 * @throws Exception
 */
@Override
protected void configure(HttpSecurity http) throws Exception {

    http.formLogin()
            .loginPage("/login.html")
            .loginProcessingUrl("/user/login")
            //The name value of the user name and password in the login form
            //.usernameParameter("username").passwordParameter("password")
            //If you directly access the login page and do not specify a target resource, skip to / success
            .defaultSuccessUrl("/success")
            //Release
            .permitAll()
            //Open another configuration and use and to separate
            .and()
            //Specify rules to intercept resources
            //All requests can be accessed as long as they are authenticated
            .authorizeRequests().anyRequest().authenticated()
            //Turn off cross site forgery request
            .and().csrf().disable();
}
2. Configure interception rules
2.1 configure resources that have passed the Security framework but do not require authentication
- For example: Welcome page, registration page
- Add test interface
@RestController
public class HelloController {

	//Add test interface
    @RequestMapping({"/","/index"})
    public String index(){
        return "Hello,index!!";
    }
}
- Security configuration class
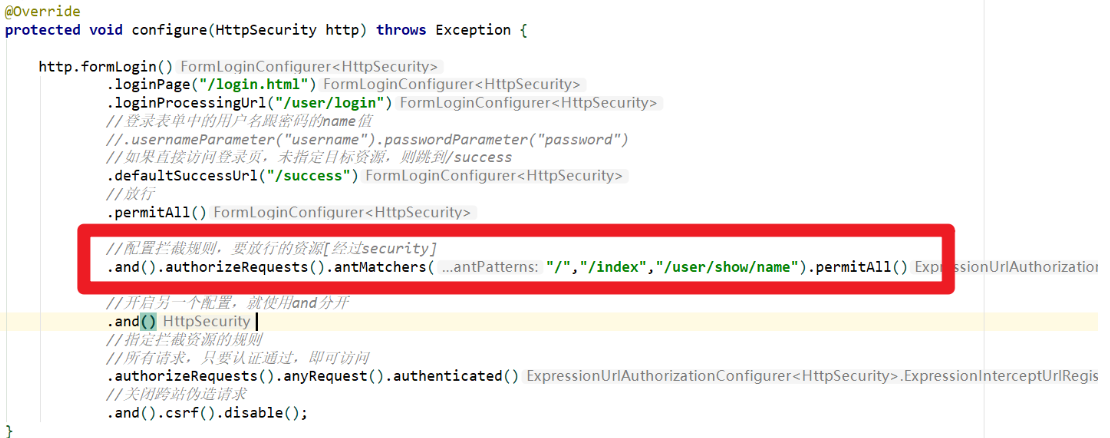
//Configure the interception rules and the resources to be released [through security]
.and().authorizeRequests().antMatchers("/","/index","/user/show/name").permitAll()
@Override
protected void configure(HttpSecurity http) throws Exception {

    http.formLogin()
            .loginPage("/login.html")
            .loginProcessingUrl("/user/login")
            //The name value of the user name and password in the login form
            //.usernameParameter("username").passwordParameter("password")
            //If you directly access the login page and do not specify a target resource, skip to / success
            .defaultSuccessUrl("/success")
            //Release
            .permitAll()

            //Configure the interception rules and the resources to be released [through security]
            .and().authorizeRequests().antMatchers("/","/index","/user/show/name").permitAll()

            //Open another configuration and use and to separate
            .and()
            //Specify rules to intercept resources
            //All requests can be accessed as long as they are authenticated
            .authorizeRequests().anyRequest().authenticated()
            //Turn off cross site forgery request
            .and().csrf().disable();
}
3. Role based permission interception
How does Security determine whether it is currently given a role or permission
- ROLE: in ROLE_ start
- Permission: either role or permission, and ordinary string is permission
- Add test interface
@RestController
@RequestMapping("/order")
public class OrderController {

    @GetMapping("/list")
    public String list(){
        return "order list";
    }

}
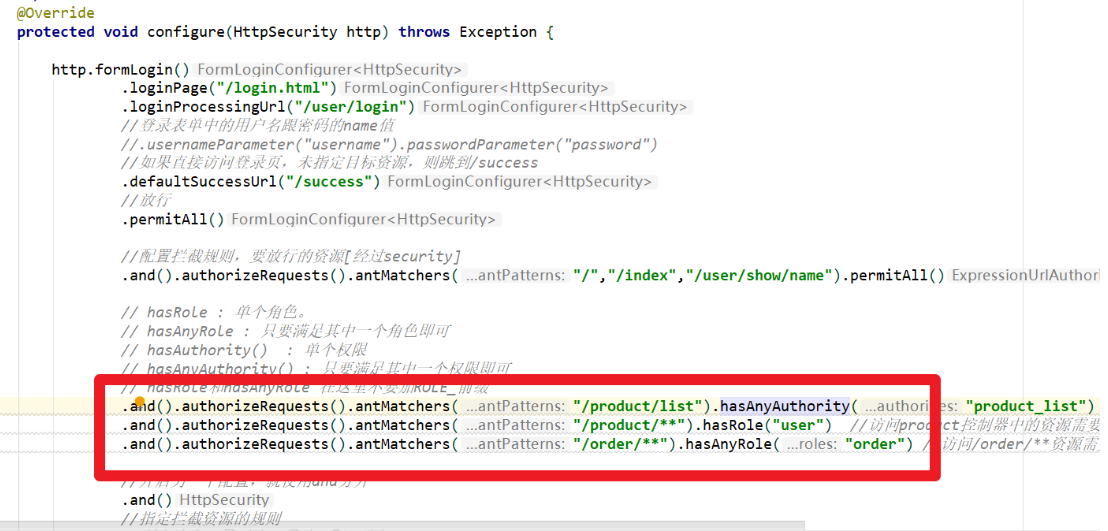
- Security configuration class
// hasRole: single role.
// hasAnyRole: just meet one of the roles
// hasAuthority(): single authority
// hasAnyAuthority(): as long as one of the permissions is satisfied
// hasRole and hasAnyRole do not add ROLE here_ prefix

//When intercepting resources, write exact matching first, and then fuzzy matching
//Access to the product/list resource requires product_list permissions
.and().authorizeRequests().antMatchers("/product/list").hasAnyAuthority("product_list")
//The user role is required to access resources in the product controller
.and().authorizeRequests().antMatchers("/product/**").hasRole("user")
//The order role is required to access the / order / * * resource
.and().authorizeRequests().antMatchers("/order/**").hasAnyRole("order")
- Testing (giving roles or permissions during authentication for testing)

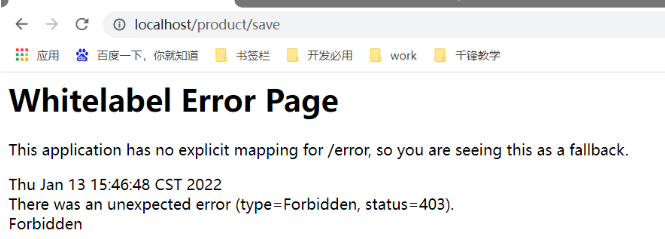
- If there is no corresponding role or permission, 403 error [insufficient permission] will appear
- Insufficient custom permissions page
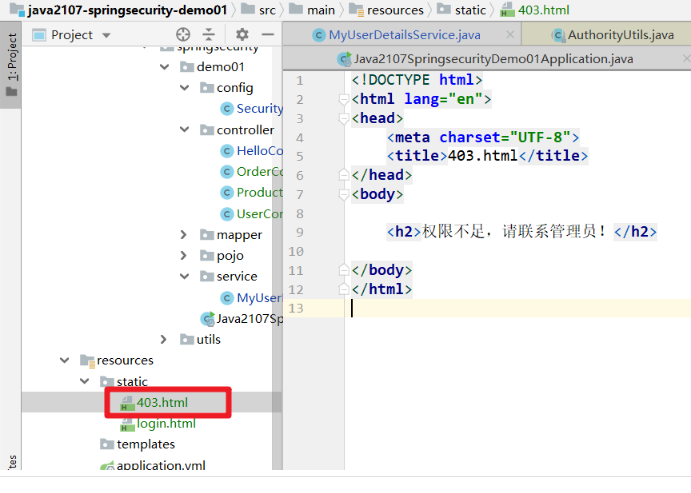
- Security configuration class add configuration

4. Method level based interception
4.1 note global interception configuration

4.2 implementation annotation (common)
4.2.1 @Secured
Role based access control: whether there is permission to access the target method
-
Processor annotation

-
Enable annotation to take effect
@EnableGlobalMethodSecurity(securedEnabled = true)
Boot class

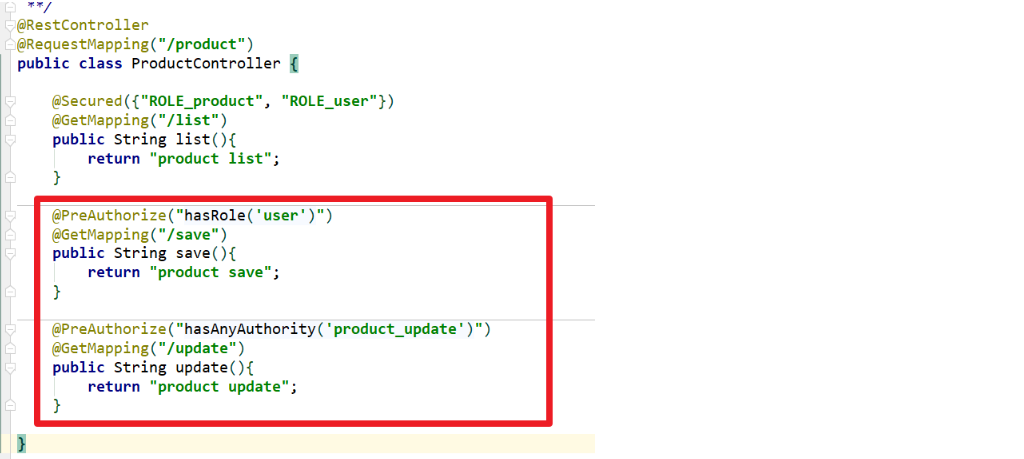
4.2.2 @PreAuthorize
Specify roles or permissions based on API to control whether you have permission to access the target method [control before method]
-
Processor annotation
-
Enable annotation to take effect
Boot class

4.2.3 @PostAuthorize
You can access the target processor, but you must have the corresponding roles or permissions to get the returned results

5. Expression writing
https://docs.spring.io/spring-security/site/docs/5.3.4.RELEASE/reference/html5/#el-access
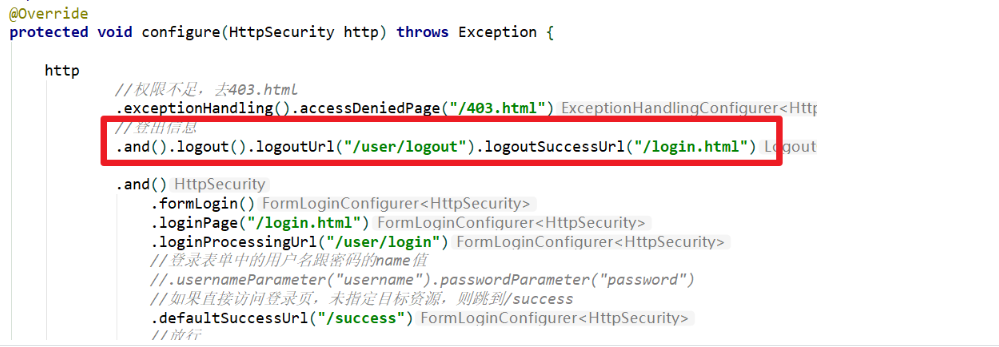
6. Logout
Default logout URL: / logout
- Security configuration class
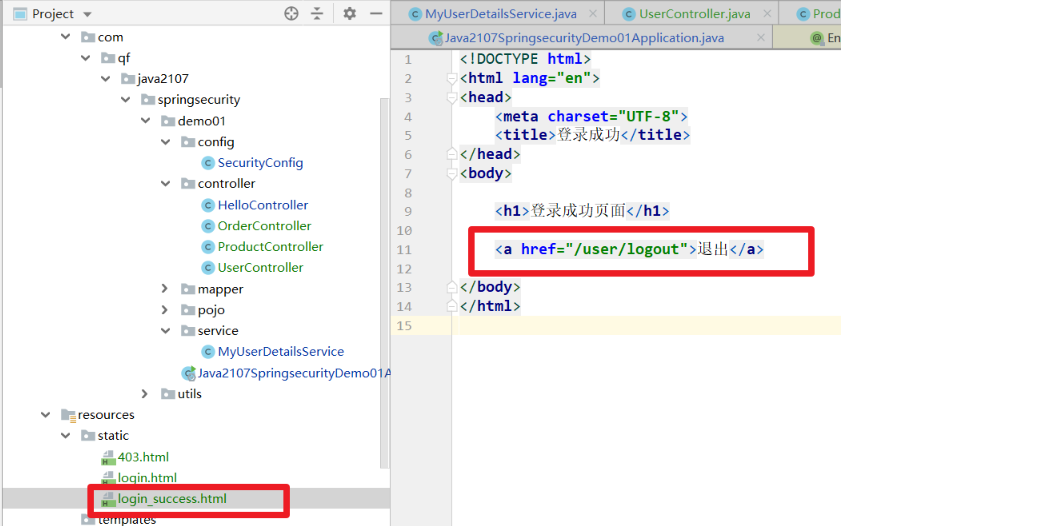
.and().logout().logoutUrl("/user/logout").logoutSuccessUrl("/login.html")
- Make a login success page and let it exit
6, Working principle
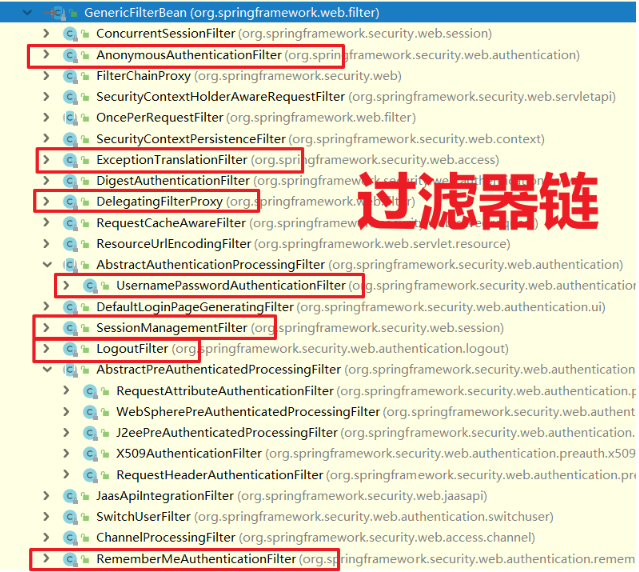
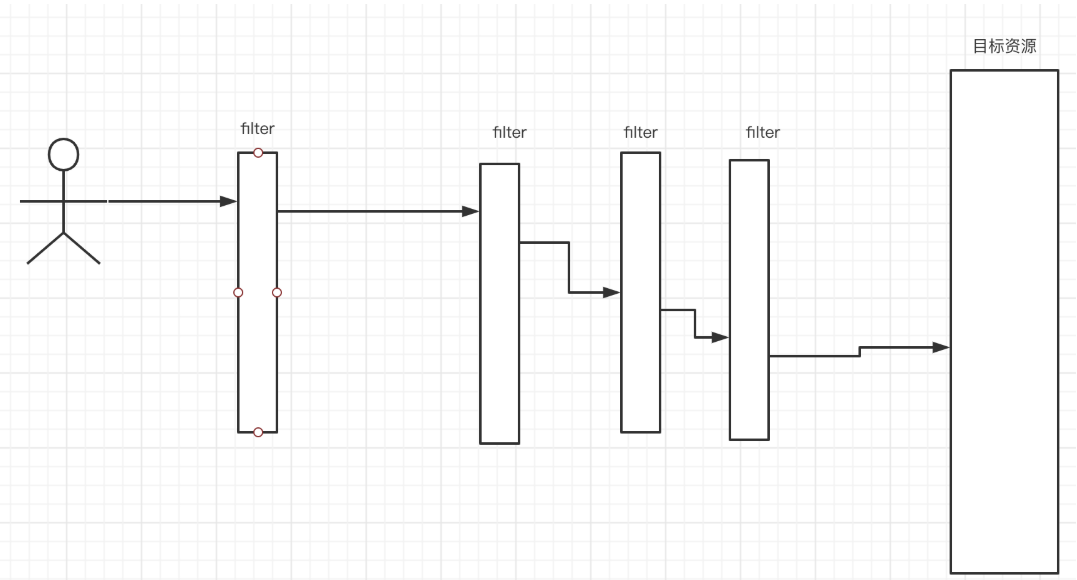
When the client requests resources from the server, it actually goes through a filter chain encapsulated by spring security to finally reach the directory resources. After obtaining the directory resources, execute the filter chain, and then respond to the client
- Filter chain: a filter chain is composed of N filters, and spring security completes authentication and authorization through these filters.
- You will find the corresponding filter to work on what kind of operation to perform
