1 spring 5 source code download
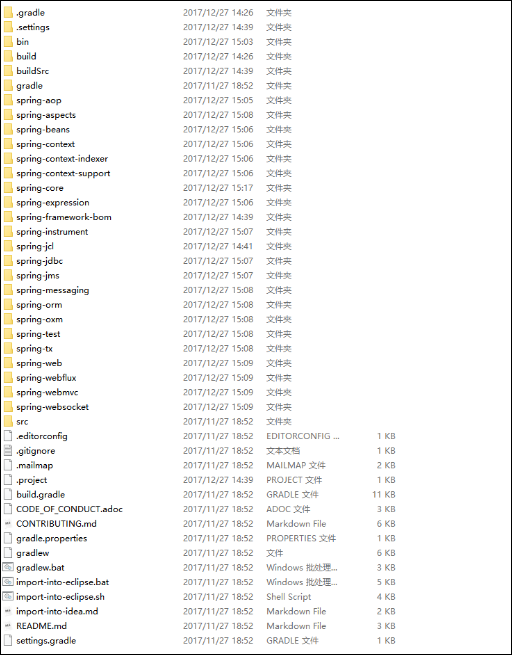
First of all, your JDK needs to be upgraded to version 1.8 or above. Starting from Spring 3.0, the Spring source code is hosted by GitHub, and the official website download link is no longer provided. I won't go into too much detail here. You can go to GitHub website to download by yourself. The download link of the version I use is https://github.com/spring-projects/spring-framework/archive/v5.0.2.RELEASE.zip , after downloading, unzip the source package and you will see the file directory shown in the figure below.
2. Building skills of source code based on Gradle
Since spirit 5 has been compiled with gradle, you need to install gradle before building the source code. Gradle download address is https://gradle.org/releases , I am using Gradle 4.0, which is officially recommended by Spring 5. The download link is https://gradle.org/next-steps/?version=4.0&format=bin , after downloading, follow the steps below. Take the Windows operating system as an example.
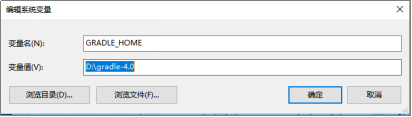
Step 1: configure environment variables, as shown in the following figure.
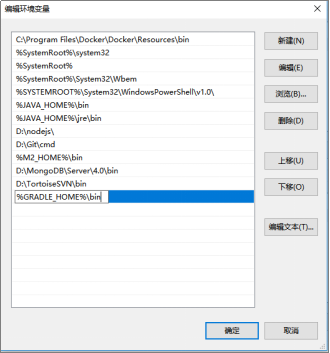
Step 2: add the environment variable "% grade_home% \ bin", as shown in the following figure.
Step 3: check the environment and enter the gradle -v command to get the results shown in the figure below.
----------------------------------------------------------------------
Gradle 4.0
----------------------------------------------------------------------

Build time:2017-06-14 15:11:08 UTC
Revision: 316546a5fcb4e2dfe1d6aaÜb73a4e09e8cecb5a5

Groovy:2. 4. 11
Ant:Apache Ant THD version 1. 9.6 compiled on June 29 2015
JVM:1.8.0_ 131 (Oracle Corporation 25.131-b11)
OS:Windows 10 10. 0 amd64
Step 4: compile the source code and switch cmd to spring-framework-5.0 2. Release directory, run gradlew Bat, as shown in the figure below.
Starting a Gradle Daemon (subeequent builds wi11 be faster)

> Task :he1p

We1come to Gradle 4.3.1.

To run a build, run gradlew <task> ...

To see a list of available tasks, run gradlew tasks

To see a list of command-line options, run gradlew –help

To see more detail about a task, run gradlew help --task <task>

DUILD SUCCESSPUL in 8s
1 actionable task: 1 executed
Step 5: convert to an Eclipse project and execute import into Eclipse Bat command, please ensure that the network is in good condition before building, and press any key to continue:
----------------------------------------------------------------------
Spring Framework - Eclipse/STS project impart guide

This script will guide you through the process of importing the Spring
Framerork projects into Ec1ipse or the Spring Tool Suite STS) It is
recommended that you have a recent version of Eclipse or STS. As a bare
minimum you wi11 need Eclipse with full Java 8 support, the AspectJ
Development Tools (AJDT), and the Groovy Compiler.

If you need to download and install Eclipse or STS, please do that now
by visiting one of the following sites:

- Eclipse dommloads: http://dowload.eclipse.org/eclipse/dowloads
- STS dowmloads: http://spring.io/too1s/sts/a11
- STS nightly builds:http://dist.springsource.com/snapshot/STS/night1y-distributions.html
- ADJT: http://www.eclipse.org/ajdt/downloads/
- Groovy Eclipse: https://github.com/groovy/groovy-eclipse/wiki

Otheryise. prgss enter and we'11 begin.
Please press any key to continue. . .

----------------------------------------------------------------------
STEP 1: Generate subproject Eclipse metadata

The first step wil1 be to generate Eclipse project metadata for each
of the spring-* subprojects. This happens via the built-in
"Gradle wrapper" script (./gradlew in this directory). If this is your
first time using the Gradle wrapper, this step may take a fewr minutes
while a Gradle distribution is downloaded for you.
Step 6: wait until the build is successful (if an error occurs in the middle, it is mostly caused by network interruption. Generally, the problem can be solved by trying again). After the build is successful, the following information will appear:
BUILD SUOCESSFUL in 6s
6 actionable tasks: 6 executed

----------------------------------------------------------------------
STEP 4: Import root project into Ec1ipse/STS

Follow the project inport steps listed in step 2 above to inport the
root project.

Press. enter, when complete, and move on to the final step.
Please press any key to continue. . .

----------------------------------------------------------------------
STEP 5: Enable Git support for all projects

- In the Ec1ipse/STS Package Exp1orer, se1ect al1 spring* projects.
- Right-click to cpen the context menu and select Team > Share Project...
- In the Share Project dialog that appears, select Git and press Next
- Check "Use or create repository in parent folder of project"
- C1ick Finish

When complete, you' 11 have Git support enabled for all projects.

You' re ready to code! Goodbye!
At this point, you are ready to import the project into Eclipse. The IDEA we recommend is also intelligent and can be directly compatible with Eclipse projects. Next, continue to look at the following steps.
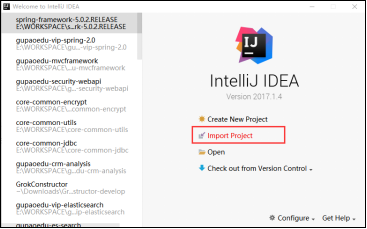
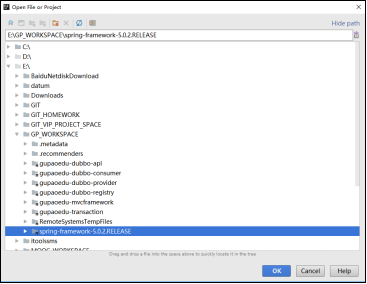
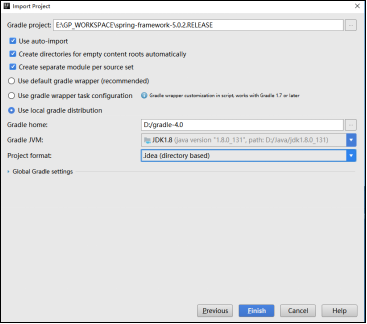
Step 7: import IDEA. Open IntelliJ IDEA, click Import Project, and select spring-framework-5.0 in the pop-up interface 2. Release folder, click "OK" and then click "Finish", as shown in the following three figures.
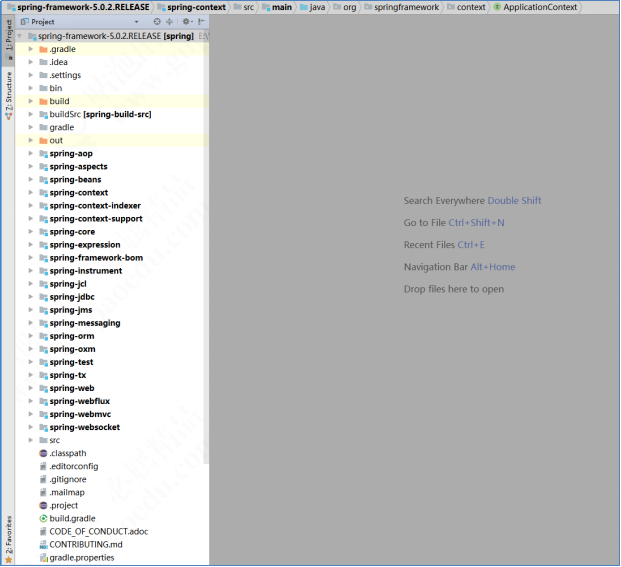
Step 8: wait for the construction to be completed. When the network is good, it will take about 10 minutes to complete the automatic construction. You will see the interface shown in the figure below.
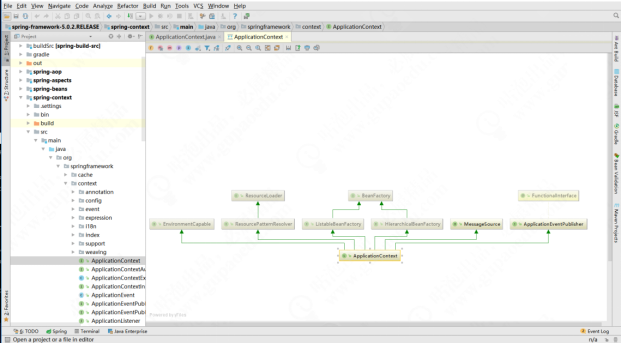
Step 9: in the IDEA, if the ApplicationContext class can be found, press Ctrl+Shift+Alt+U to display the class diagram interface as shown in the following figure, indicating that the construction is successful.
3 pit during gradle construction
If the project environment cannot be built successfully and the class diagram cannot be generated automatically, you must have stepped into a pit.
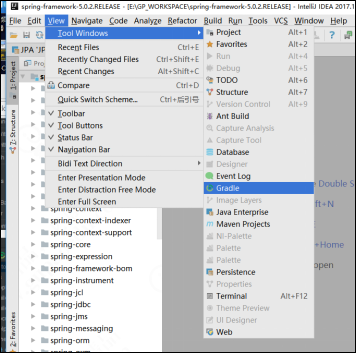
First, click View → windows tool → Gradle, as shown in the following figure.
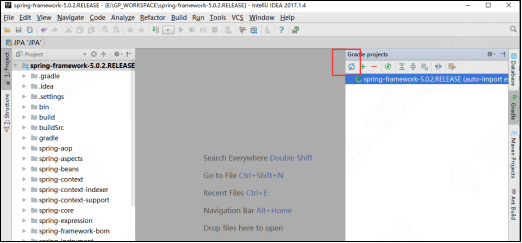
Second, click the refresh button in the Gradle view, as shown in the following figure.
An error as shown in the following figure will appear.
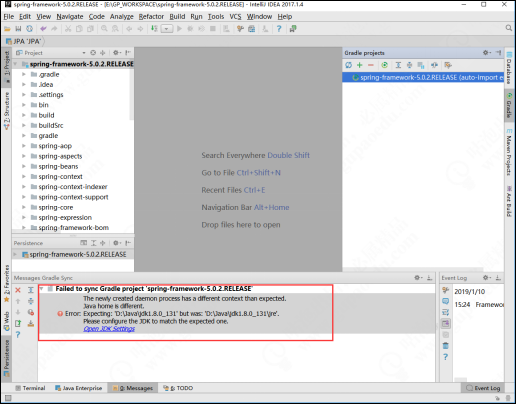
Step 3: the error obviously has nothing to do with Gradle. The solution is:
(1) Close IDEA, open Task Manager, and end all processes related to Java.
(2) Find the JAVA_HOME → jre → lib directory and rename tools.jar to tools.jar.bak.
(3) Restart the IDEA, click the refresh button again, and wait for the build to complete.
Pay attention to WeChat official account Tom bomb structure and reply to "Spring" to get the complete source code.
This article is the original of "Tom bomb architecture". Please indicate the source for reprint. Technology lies in sharing, I share my happiness! If you have any suggestions, you can also leave comments or private letters. Your support is the driving force for me to adhere to my creation. Focus on WeChat official account Tom structure, get more dry cargo!
It's not easy to be original. It's cool to insist. I've seen it here. Little partners remember to like, collect and watch it. Pay attention to it three times a button! If you think the content is too dry, you can share and forward it to your friends!