preface
In the last blog post, we focused on how SpringBoot integrates technologies such as Mybatis and JPA to access our relational database. In this blog post, we introduced how SpringBoot integrates Redis to access non relational database. It will take you to deeply understand the automatic principle of Redis, carry out practical operation in combination with specific cases, and share all the source code.
Why Spring Data Redis
Spring Data Redis is the most important member of the Spring Data family. It provides the function of easily configuring and accessing Redis from spring applications. It provides low-level and high-level abstractions for interacting with storage, freeing users from infrastructure concerns.
The Spring Framework is the leading full stack Java/JEE application framework. It provides a lightweight container and a non intrusive programming model by using dependency injection, AOP and portable service abstraction.
Spring Data Redis (SDR) framework eliminates redundant tasks and template code required for interaction with storage through spring's excellent infrastructure support, so that spring applications using Redis key value storage can be easily written.
Spring Boot integrates Redis
Import dependencies
 <dependency>
 		<groupId>org.springframework.boot</groupId>
 		<artifactId>spring-boot-starter-data-redis</artifactId>
 </dependency>
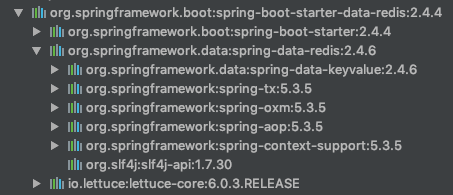
Automatically imported dependencies, as shown in the figure:

Automatic configuration principle
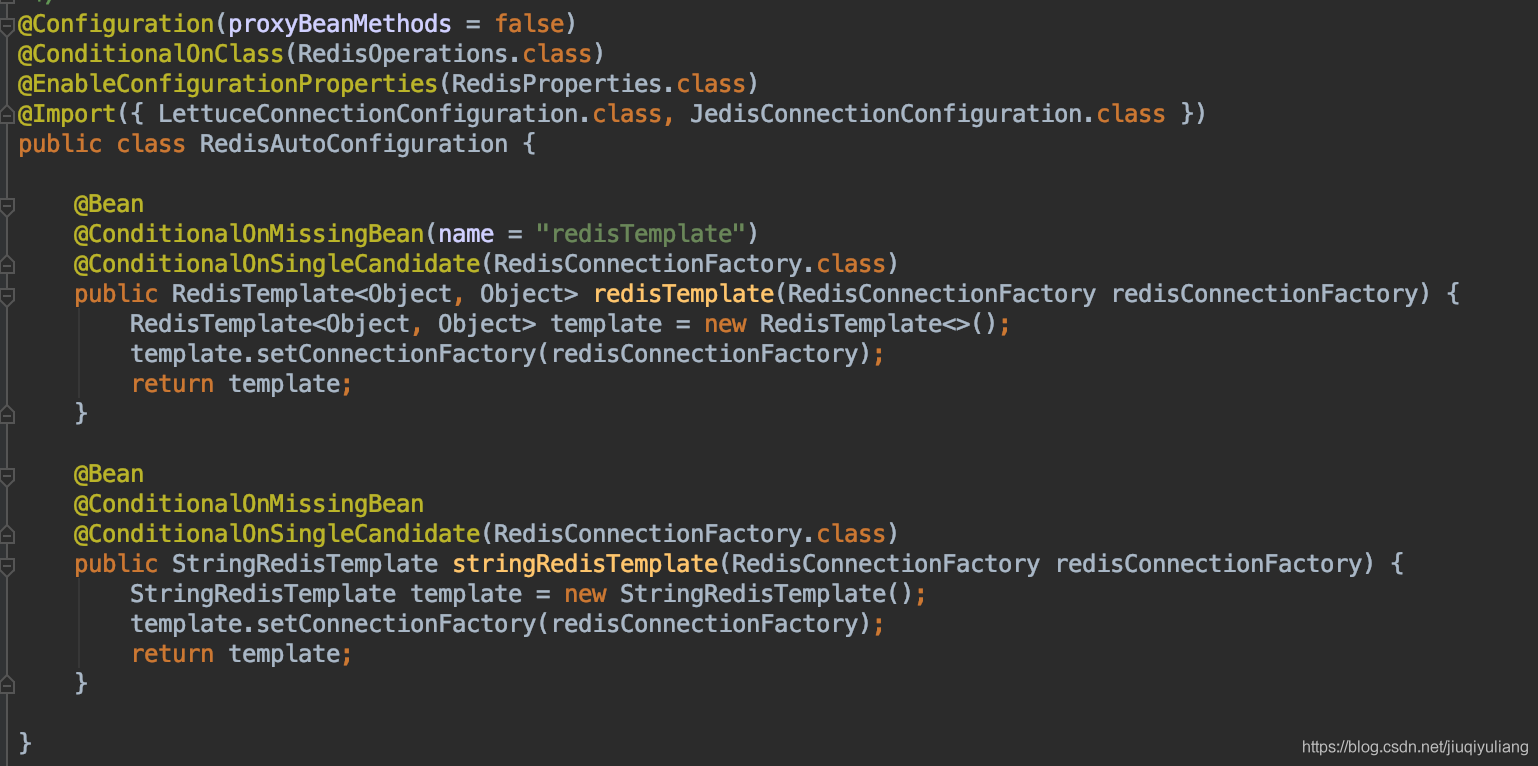
Automatic configuration class RedisAutoConfiguration

- RedisProperties property class is used to configure the basic properties of Redis
- Letticeconnectionconfiguration, JedisConnectionConfiguration, Redis client type, in which connection factory, connection pool, etc. are configured. The default is Lettice. The bottom layer introduces the Lettice client jar package
- Redistemplate * * < object, * * Object >: xxxTemplate is automatically injected; String redistemplate is automatically injected; k: v are all strings
At the bottom layer, we can operate redis as long as we use StringRedisTemplate and RedisTemplate
Default consolidation lettue
Add configuration
server:
  port: 8083

spring:
  application:
    name: springboot-redis
  redis:
    # Redis server address
    host: localhost
    # Redis server connection port
    port: 6379
    # Redis server connection password (blank by default)
    password:
    # Redis database index (0 by default)
    database: 0
  # Connection timeout (MS)
    timeout : 300
    client-type: lettuce #Switch the jedis client to jedis
    lettuce: #Switch the jedis client to jedis
      pool:
        # Maximum number of connections in the connection pool (negative value indicates no limit)
        max-active: 8
        # Maximum blocking wait time of connection pool (negative value indicates no limit)
        max-wait: -1
        # Maximum free connections in the connection pool
        max-idle: 8
        # Minimum free connections in connection pool
        min-idle: 0
Switch to Jedis
Import jar
<!--Import jedis-->
<dependency>
	<groupId>redis.clients</groupId>
	<artifactId>jedis</artifactId>
</dependency>
Note: the configuration is basically the same as above. You only need to replace lettuce with jedis.
Configure serialization mode
The default serialization method of RedisTemplate is JdkSerializationRedisSerializer, which will store the object serialization in Redis (binary form). The default serialization method of StringRedisTemplate is StringRedisSerializer. In most cases, it is not recommended to use JdkSerializationRedisSerializer for serialization, mainly because it is inconvenient to manually check the data. So we need to switch the serialization mode.
The bottom layer of Spring Data implements seven different serialization methods for us. You can choose according to your needs, as shown in the figure below:

We take Jackson2JsonRedisSerializer as an example to show how to switch the serialization mode.
@Configuration
public class RedisConfig {


    /**
     * The default is the JDK serialization policy. The redisTemplate configured here adopts the serialization policy of Jackson2JsonRedisSerializer
     * @param redisConnectionFactory
     * @return
     */
    @Bean
    public RedisTemplate<String,Object> redisTemplate(RedisConnectionFactory redisConnectionFactory){
        //Use Jackson2JsonRedisSerializer to serialize and deserialize the value of redis (the JDK serialization method is used by default)
        Jackson2JsonRedisSerializer<Object> jackson2JsonRedisSerializer = new Jackson2JsonRedisSerializer<>(Object.class);
        RedisTemplate<String, Object> redisTemplate = new RedisTemplate<>();
        // Configure connection factory
        redisTemplate.setConnectionFactory(redisConnectionFactory);
        //Use StringRedisSerializer to serialize and deserialize the key value of redis
        //redisTemplate.setKeySerializer(new StringRedisSerializer());
        redisTemplate.setKeySerializer(jackson2JsonRedisSerializer);
        // Values are serialized in json
        redisTemplate.setValueSerializer(jackson2JsonRedisSerializer);
        redisTemplate.setHashKeySerializer(jackson2JsonRedisSerializer);
        redisTemplate.setHashValueSerializer(jackson2JsonRedisSerializer);
        redisTemplate.afterPropertiesSet();
        return redisTemplate;
    }

    /***
     * stringRedisTemplate String serialization strategy is adopted by default
     * @param redisConnectionFactory
     * @return
     */
    @Bean
    public StringRedisTemplate stringRedisTemplate(RedisConnectionFactory redisConnectionFactory){
        StringRedisTemplate stringRedisTemplate = new StringRedisTemplate();
        stringRedisTemplate.setConnectionFactory(redisConnectionFactory);
        return stringRedisTemplate;
    }

}
Code example
I have provided detailed use cases for the majority of fans in order to better learn Redis. Only part of the code is shown. For more detailed code, you can view it through the source code address.
@SpringBootTest
public class RedisApplicationTests {


    @Autowired
    private RedisTemplate redisTemplate;

    @Autowired
    private StringRedisTemplate stringRedisTemplate;

    @Test
    void testRedis(){
        ValueOperations<String, String> operations = redisTemplate.opsForValue();

        operations.set("hello","world");

        String hello = operations.get("hello");
        System.out.println(hello);
    }

    /**
     * Operation string
     */
    @Test
    public void testString() {
        //Set value
        stringRedisTemplate.opsForValue().set("String", "Mao");
        //Get value
        String string = stringRedisTemplate.opsForValue().get("String");
        System.out.println(string);

        //Set the value and set the timeout
        stringRedisTemplate.opsForValue().set("Middle", "Yu", 3, TimeUnit.MINUTES);
        String middle = stringRedisTemplate.opsForValue().get("Middle");
        System.out.println(middle);

        //Delete data
        Boolean isDelete = stringRedisTemplate.delete("String");
        Assert.isTrue(isDelete, "Deletion failed");
    }

    /**
     * Action list
     */
    @Test
    public void testList() {
        ListOperations listOp = redisTemplate.opsForList();
        //Insert an element to the left of the List
        listOp.leftPush("nameList", "mike");
        listOp.leftPush("nameList", "kim");
        //Insert an element to the right of the List
        listOp.rightPush("nameList", "jimmy");
        listOp.rightPush("nameList", "chuck");
        //List size
        Long size = listOp.size("nameList");
        //Traverse the entire List
        List nameList1 = listOp.range("nameList", 0, size);
        System.out.println(JSON.toJSONString(nameList1));
        //Traverse the entire List, - 1 means the penultimate and last
        List nameList = listOp.range("nameList", 0, -1);
        System.out.println(JSON.toJSONString(nameList));
        //Take the first element from the left side of the List and remove it
        Object name1 = listOp.leftPop("nameList", 200, TimeUnit.MILLISECONDS);
        System.out.println("is kim:" + name1.equals("kim"));
        //Take the first element from the right side of the List and remove it
        Object name2 = listOp.rightPop("nameList");
        System.out.println("is chuck:" + name2.equals("chuck"));
    }

    . . . . . . There is also content in the open source project......

}
The sample readers of this article can view the items in the following warehouse as follows:
<module>springboot-redis</module>
- CodeChina: https://codechina.csdn.net/jiuqiyuliang/springboot-learning
Author: program ape Xiaoliang