First, build a simple test environment
- Build a springboot project
- Dependency is introduced, mainly web starter shiro (security authentication) and thymeleaf (simple page construction). There is no data layer query, so database related is not introduced.
 <dependencies>

        <dependency>
            <groupId>org.springframework.boot</groupId>
            <artifactId>spring-boot-starter-web</artifactId>
        </dependency>

        <dependency>
            <groupId>org.springframework.boot</groupId>
            <artifactId>spring-boot-starter-test</artifactId>
            <scope>test</scope>
        </dependency>

        <dependency>
            <groupId>org.springframework.boot</groupId>
            <artifactId>spring-boot-starter-thymeleaf</artifactId>
        </dependency>

        <!--introduce shrio-->
        <dependency>
            <groupId>org.apache.shiro</groupId>
            <artifactId>shiro-spring-boot-starter</artifactId>
            <version>1.5.3</version>
        </dependency>

    </dependencies>
- The construction directory of the page is as follows:
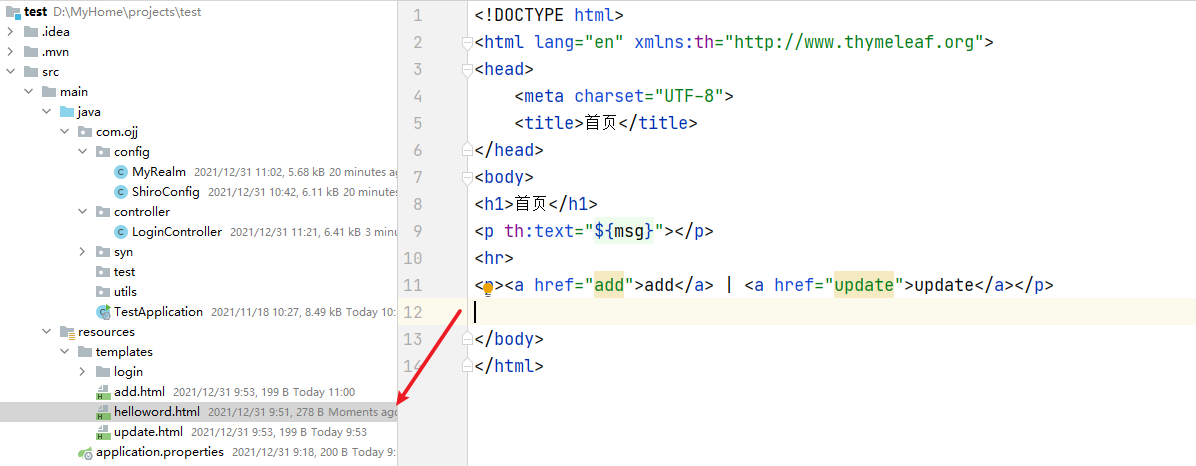
Home page entry
helloword.html
<!DOCTYPE html>
<html lang="en" xmlns:th="http://www.thymeleaf.org">
<head>
    <meta charset="UTF-8">
    <title>home page</title>
</head>
<body>
<h1>home page</h1>
<p th:text="${msg}"></p>
<hr>
<p><a href="add">add</a> | <a href="update">update</a></p>

</body>
</html>
Click the call of the add/update interface to add authentication to the two interfaces
add.html
<!DOCTYPE html>
<html lang="en" xmlns:th="http://www.thymeleaf.org">
<head>
    <meta charset="UTF-8">
    <title>add to</title>
</head>
<body>
    <h1 th:text="${msg}"></h1>
</body>
</html>
update.html
<!DOCTYPE html>
<html lang="en" xmlns:th="http://www.thymeleaf.org">
<head>
    <meta charset="UTF-8">
    <title>to update</title>
</head>
<body>
    <h1 th:text="${msg}"></h1>
</body>
</html>
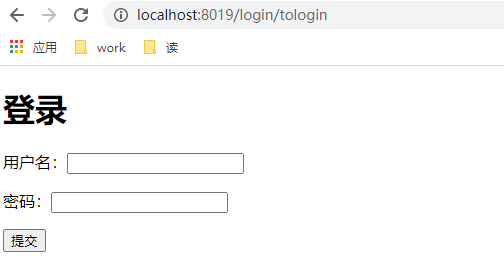
Click the interface. If there is no login, you will jump to the login page
login/loginuser.html
<!DOCTYPE html>
<html lang="en" xmlns:th="http://www.thymeleaf.org">
<head>
    <meta charset="UTF-8">
    <title>Sign in</title>
</head>
<body>
    <h1>Sign in</h1>
    <p style="color: red" th:text="${msg}"></p>
    <form action="/login/loginInfo">
        <p>user name:<input type="text" name="username"></p>
        <p>password:<input type="text" name="password"></p>
        <input type="submit">
    </form>
</body>
</html>
- Write a controller to provide an interface to the page
@Controller
@RequestMapping("/login")
public class LoginController {
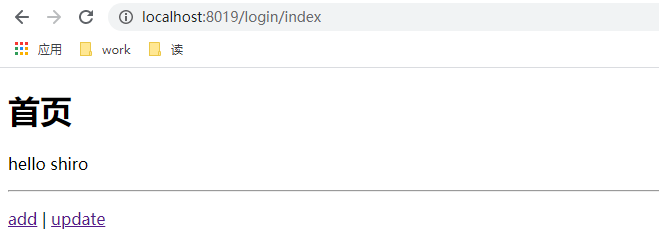
@GetMapping("/index")
public String gotoIndex(Model model) {
model.addAttribute("msg","hello shiro");
return "helloword";
}
@GetMapping("/add")
public String add(Model model, HttpServletRequest request) {
model.addAttribute("msg","Added successfully!!!");
HttpSession session = request.getSession();
Object user_session = session.getAttribute("USER_SESSION");
return "add";
}
@GetMapping("/update")
public String update(Model model) {
model.addAttribute("msg","Update succeeded!!!");
return "update";
}
@GetMapping("/tologin")
public String tologin(Model model) {
return "login/loginuser";
}
}
shiro explain
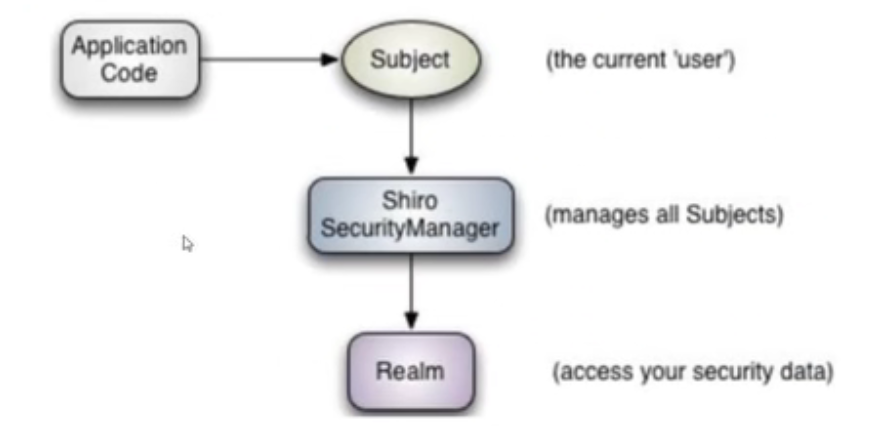
At the conceptual level, Shiro architecture includes three main concepts: Subject,SecurityManager and Realm. The following figure shows how these components interact, which we will describe in turn below.
-
Subject: current user, subject
It can be a person, but it can also be a third-party service, daemon account, clock daemon task, or any other event currently interacting with the software. -
SecurityManager: manages all subjects. SecurityManager is Shiro
The core of the architecture, together with internal security components, forms a security umbrella. Realms: used to verify permission information. We implement it ourselves. Realm is essentially a specific security -
Realm: it encapsulates the details of the connection with the data source to obtain the relevant data required by Shiro. Configuring Shiro in
You must specify at least one Realm to implement authentication and / or authorization.
Write Shiro configuration class
First, there should be a configuration class ShiroConfig, which provides some beans, ShiroFilterFactoryBean, DefaultWebSecurityManager and Realm; Let's build a Realm first. This class is mainly used for authentication and authorization
/**
 * @author ojj
 * @title: MyRealm
 * @projectName test
 * @description:
 * @date 2021/12/31 10:17
 */
public class MyRealm extends AuthorizingRealm {

    /**
     * Authorization role
     * @param principalCollection
     * @return
     */
    @Override
    protected AuthorizationInfo doGetAuthorizationInfo(PrincipalCollection principalCollection) {
        System.out.println("Authorization executed");
        return null;
    }

    /**
     * Authentication login
     * @param authenticationToken
     * @return
     * @throws AuthenticationException
     */
    @Override
    protected AuthenticationInfo doGetAuthenticationInfo(AuthenticationToken authenticationToken) throws AuthenticationException {

        System.out.println("Certification performed");
        String name = (String)authenticationToken.getPrincipal();
        System.out.println("User:"+name);
        //Simulate obtaining user login information from the database
        String username = "sb";
        String password = "123456";

        if (!username.equals(name)){
            return null;
        }

        return new SimpleAuthenticationInfo(name,password,"");
    }
}
ShiroConfig
@Configuration
public class ShiroConfig {

    //ShiroFilterFactoryBean
    @Bean()
    public ShiroFilterFactoryBean getShiroFilterFactoryBean(@Qualifier("securityManager") DefaultWebSecurityManager defaultWebSecurityManager){

        ShiroFilterFactoryBean shiroFilterFactoryBean = new ShiroFilterFactoryBean();
        shiroFilterFactoryBean.setSecurityManager(defaultWebSecurityManager);

        Map<String, String> filterChainDefinitionMap = new LinkedHashMap<String, String>();
        //Non intercepted interface
        filterChainDefinitionMap.put("login/loginInfo","anon");
        filterChainDefinitionMap.put("login/index","anon");
        //Interfaces requiring authentication
        filterChainDefinitionMap.put("/login/add","authc");
        filterChainDefinitionMap.put("/login/update","authc");

        shiroFilterFactoryBean.setFilterChainDefinitionMap(filterChainDefinitionMap);
        //Authentication failed, jump to login page
        shiroFilterFactoryBean.setLoginUrl("/login/tologin");

        return shiroFilterFactoryBean;
    }

        //DefaultWebSecurityManager
    @Bean("securityManager")
    public DefaultWebSecurityManager getDefaultWebSecurityManager(@Qualifier("realm") Realm realm){
        DefaultWebSecurityManager defaultWebSecurityManager = new DefaultWebSecurityManager();

        defaultWebSecurityManager.setRealm(realm);
        return defaultWebSecurityManager;
    }

    //ShiroRealm
    @Bean("realm")
    public Realm getRealm(){
        return new MyRealm();
    }

}
Add a login interface in the Controller
 @GetMapping("/loginInfo")
    public String login(String username, String password,Model model) {

        UsernamePasswordToken token = new UsernamePasswordToken(username, password);
        Subject subject = SecurityUtils.getSubject();
        try {
            //Sign in
            subject.login(token);
            return "helloword";

        }catch (UnknownAccountException e) {

            model.addAttribute("msg","user does not exist");
            return "login/loginuser";
        } catch (IncorrectCredentialsException e) {

            model.addAttribute("msg","Password error");
            return "login/loginuser";
        }


    }
test
Click add. If you do not log in, you will jump to the login page
After successful login, a session will be returned, and then click add/update to access it normally
Add role permissions
For example, an interface can only be used at the manager level. At this time, another method doGetAuthorizationInfo in real needs to be modified.
/**
 * @author ojj
 * @title: MyRealm
 * @projectName test
 * @description:
 * @date 2021/12/31 10:17
 */
public class MyRealm extends AuthorizingRealm {

    /**
     * Authorization role
     * @param principalCollection
     * @return
     */
    @Override
    protected AuthorizationInfo doGetAuthorizationInfo(PrincipalCollection principalCollection) {
        System.out.println("Authorization executed");
        //Get user name
        String name = (String) principalCollection.getPrimaryPrincipal();
        //Use name to obtain user roles and permissions from the database
        String role = "admin";
        String permission = "test";
        //Add role permissions
        SimpleAuthorizationInfo simpleAuthorizationInfo = new SimpleAuthorizationInfo();
        simpleAuthorizationInfo.addRole(role);
        simpleAuthorizationInfo.addStringPermission(permission);


        return simpleAuthorizationInfo;
    }

    /**
     * Authentication login
     * @param authenticationToken
     * @return
     * @throws AuthenticationException
     */
    @Override
    protected AuthenticationInfo doGetAuthenticationInfo(AuthenticationToken authenticationToken) throws AuthenticationException {

        System.out.println("Certification performed");
        String name = (String)authenticationToken.getPrincipal();
        System.out.println("User:"+name);
        //Simulate obtaining user login information from the database
        String username = "sb";
        String password = "123456";

        if (!username.equals(name)){
            return null;
        }
        //name can be obtained through the authorization method above
        //password is used to compare passwords
        //realmName
        return new SimpleAuthenticationInfo(name,password,"");
    }
}
Then annotate the interfaces that need roles or permissions with @ RequiresRoles @RequiresPermissions, and shiro will automatically compare whether they meet the access requirements. As follows, @ RequiresRoles("admin2") is unsuccessful because the user binds admin (pseudo code is written dead). You can use @ RequiresPermissions("test:update") to set multiple permissions.
@RequiresRoles("admin2")
    @GetMapping("/add")
    public String add(Model model, HttpServletRequest request) {
        model.addAttribute("msg","Added successfully!!!");
        HttpSession session = request.getSession();
        Object user_session = session.getAttribute("USER_SESSION");
        return "add";
    }

    @RequiresPermissions("test")
    @GetMapping("/update")
    public String update(Model model) {
        model.addAttribute("msg","Update succeeded!!!");
        return "update";
    }