@[TOC]SpringBoot learning (I) -- create a SpringBoot project through an empty project
IDEA creating an introductory project
I create an empty project, and then create multiple modules in it. In this way, multiple projects only open one window
Creation method
Mode 1
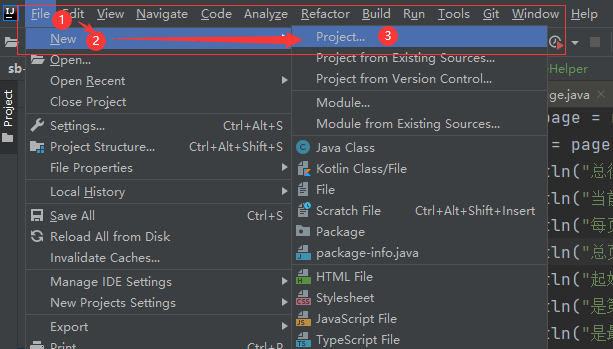
① If you have opened a project in the IDEA, you need to enter the project creation through file -- > New -- > project, as shown in the following figure:
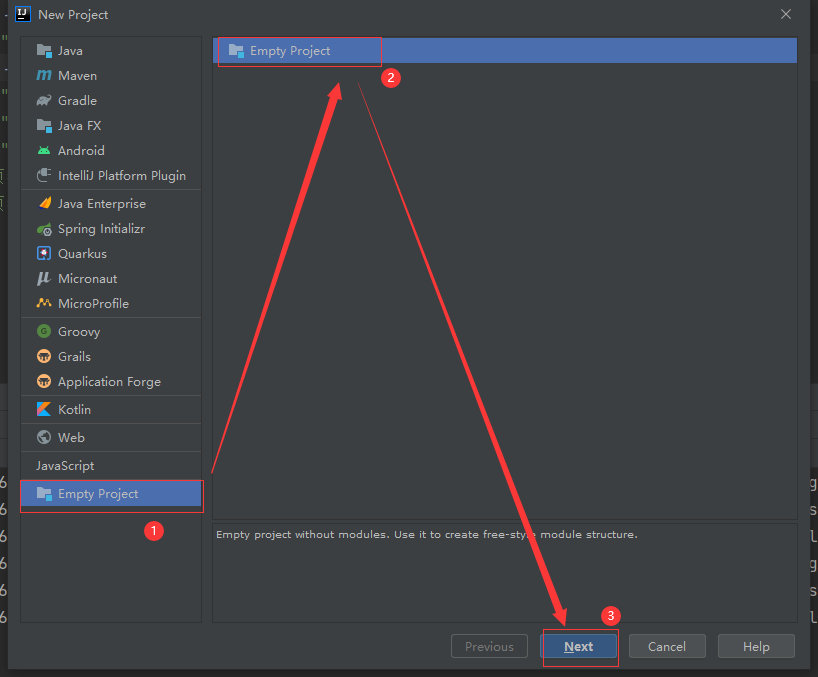
② Select Empty Project in the pop-up box of "New Project", as follows:
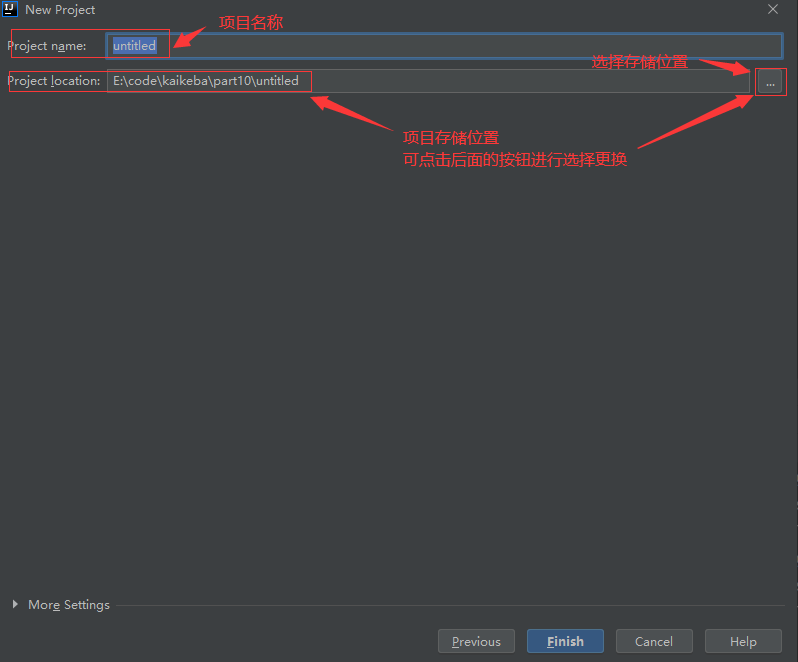
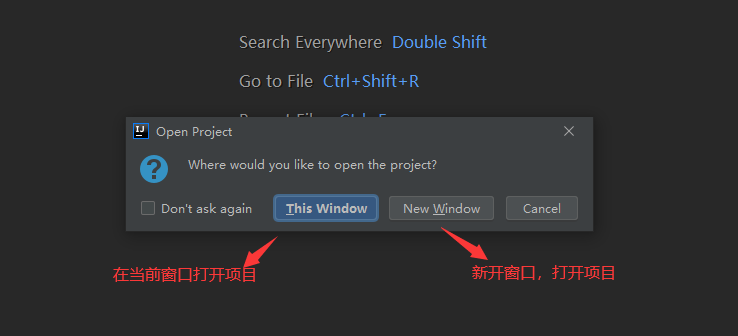
③ Fill in the project name, select the storage location of the project, and click Finish after completion; Then there will be a pop-up box for you to choose whether to open the project in the current window (just created) or in a new window. It is generally selected to open in a new window; Cancel exit, that is, do not open the project
④ After opening the project, create a model Module in the order of file -- > New -- > Module;
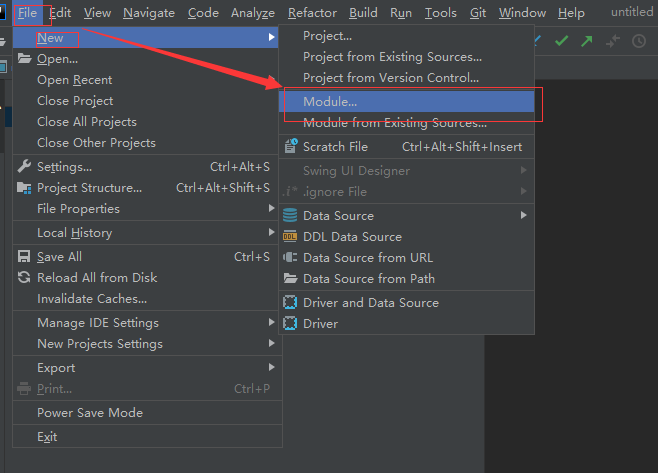
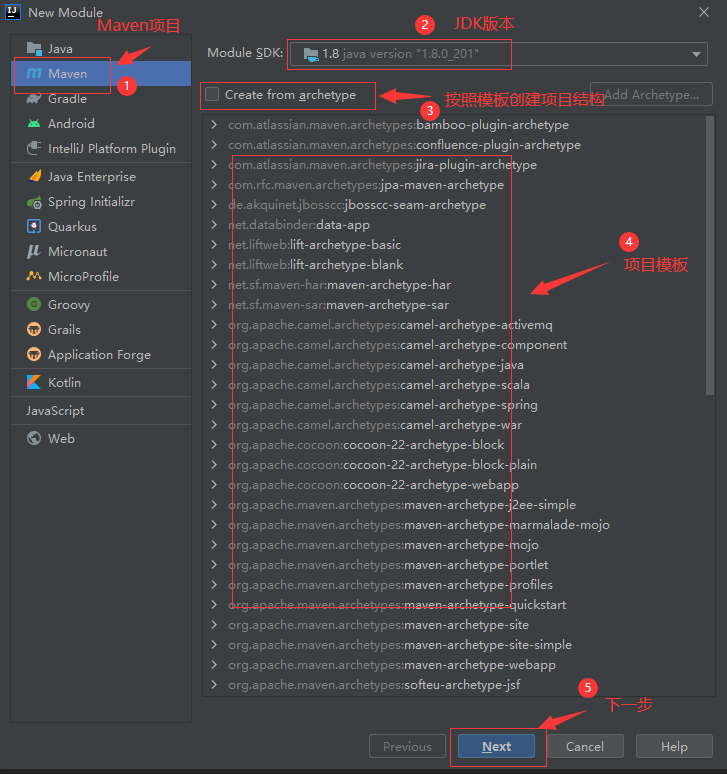
⑤ After selection, there will be the following pop-up box. We select the Maven project on the left and create a Module according to the sequence in the figure. Steps ③ and ④ are optional. Identify to create a Module according to the project template provided by IDEA. If you want to use ④, you must check ③. I am used to creating an empty Module, and then build the whole project;
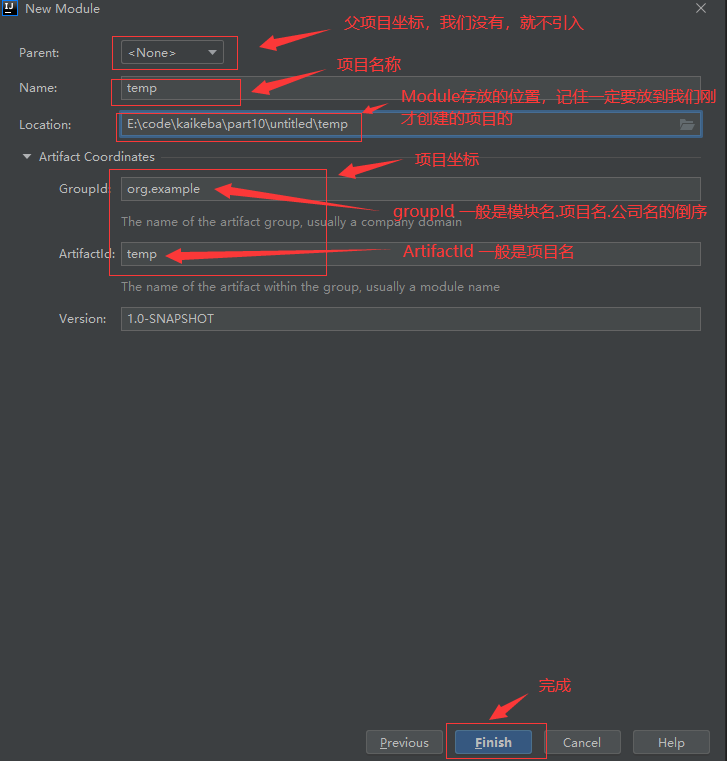
⑥ Jump to the setting box of the Module and explain each part, as shown in the figure below, and then click finish;
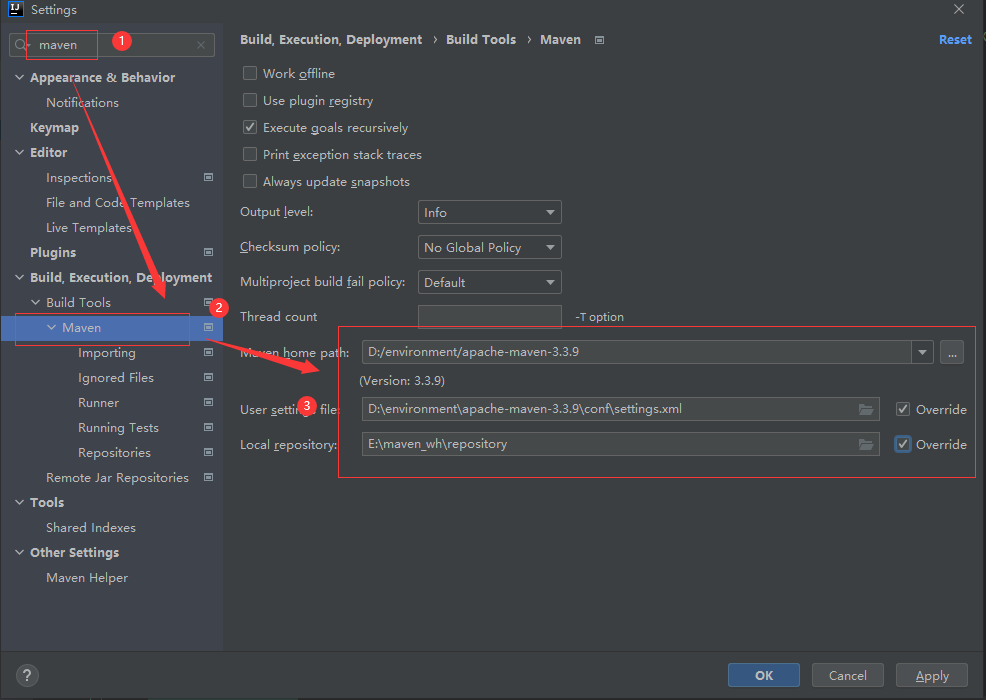
⑦ You'd better check the Maven configuration of the project, as shown in the figure below. The Maven of idea is used by default. It's better to replace the Maven and configuration files installed on our computer.
⑧ Then our Maven project is created. The created project structure is shown in the figure below. Java stores java files, resources stores our resource files and configuration files, and test stores test classes;
⑨ We introduce the dependent coordinates of the response to the pom file and transform it into a SpringBoot project. The code is as follows
<?xml version="1.0" encoding="UTF-8"?>
<project xmlns="http://maven.apache.org/POM/4.0.0"
         xmlns:xsi="http://www.w3.org/2001/XMLSchema-instance"
         xsi:schemaLocation="http://maven.apache.org/POM/4.0.0 http://maven.apache.org/xsd/maven-4.0.0.xsd">
    <modelVersion>4.0.0</modelVersion>

    <groupId>org.example</groupId>
    <artifactId>temp</artifactId>
    <version>1.0-SNAPSHOT</version>

    <!-- springboot introduce  -->
    <parent>
        <artifactId>spring-boot-starter-parent</artifactId>
        <groupId>org.springframework.boot</groupId>
        <version>2.3.6.RELEASE</version>
    </parent>

    <!-- jdk edition -->
    <properties>
        <java.version>1.8</java.version>
    </properties>

    <dependencies>
        <!-- web Project launcher -->
        <dependency>
            <groupId>org.springframework.boot</groupId>
            <artifactId>spring-boot-starter-web</artifactId>
        </dependency>
    </dependencies>

</project>
⑩ Add the corresponding Controller, yml configuration file and startup class file,
Controller
package com.kaikeba.controller;

import org.springframework.web.bind.annotation.GetMapping;
import org.springframework.web.bind.annotation.RestController;

/**
 * @author sunyang
 * @date 2021/5/28 9:16
 */
@RestController
public class HelloController {
    @GetMapping("/hello")
    public String hello() {
        return "Hello Spring Boot !!!";
    }
}
Startup class: the class name of the startup class doesn't matter. You can call it anything, but there must be @ SpringBootApplication annotation, and there is only one annotation within the scope of Zhenge Module;
package com.kaikeba;

import org.springframework.boot.SpringApplication;
import org.springframework.boot.autoconfigure.SpringBootApplication;

/**
 * @desc Startup class: it doesn't matter what it's called. It's important to have @ SpringBootApplication annotation
 * @author sunyang
 * @date 2021/6/1 13:03
 */
@SpringBootApplication
public class TempApplitation {
    public static void main(String[] args) {
        SpringApplication.run(TempApplitation.class);
    }
}
YML file
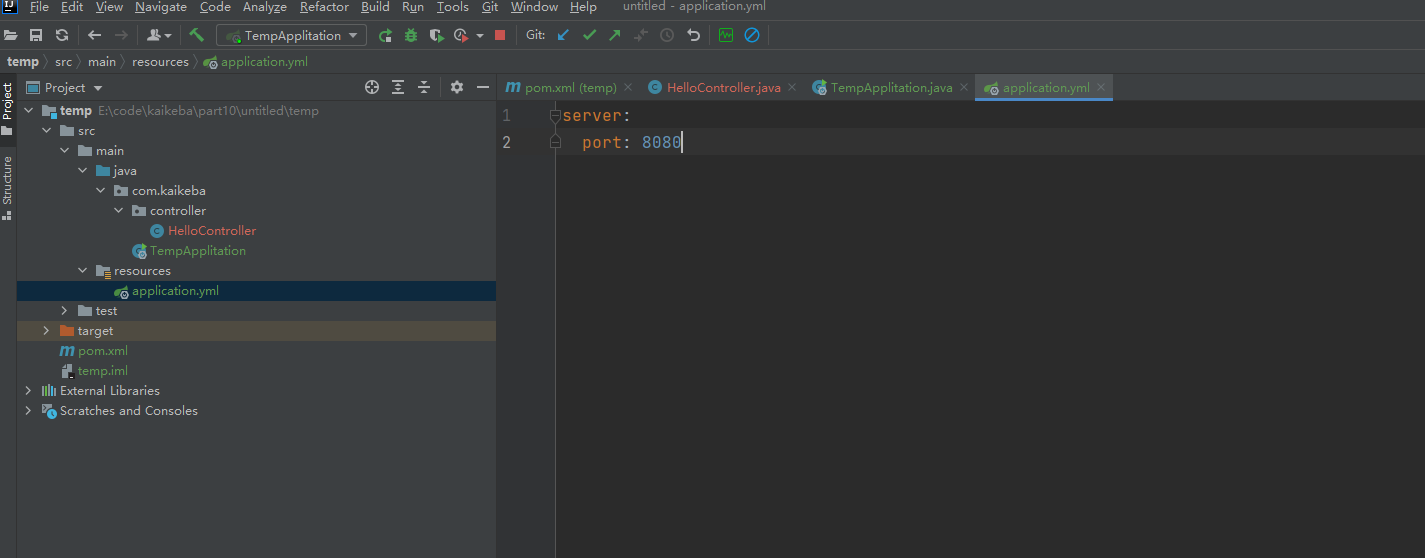
# For demonstration purposes, only ports are configured. There are other configurations, which will be added later
server:
  port: 8080
⑪ Effect display

At this point, a sprigboot project is created