(3) Page internationalization
1. Unified property code
First, uniformly set the code of properties to UTF-8 in the IDEA

2. Prepare i18n international resource documents
The naming method is a combination of underscores: file name_ Language_ country. properties;
Named in this way, IDEA will help us identify that this is an international configuration package, which is automatically bound together and converted into the following mode: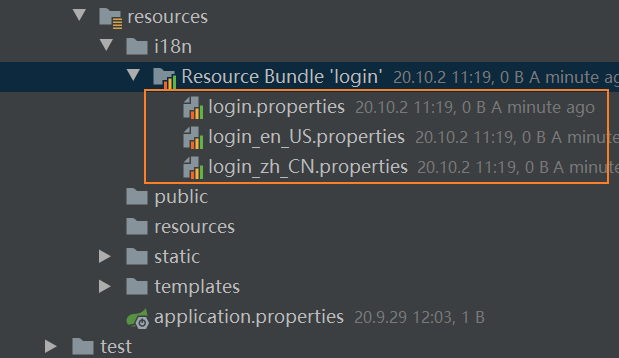
After binding together, if we want to add more language configuration, we just need to right-click the large resource package to add it to the binding configuration file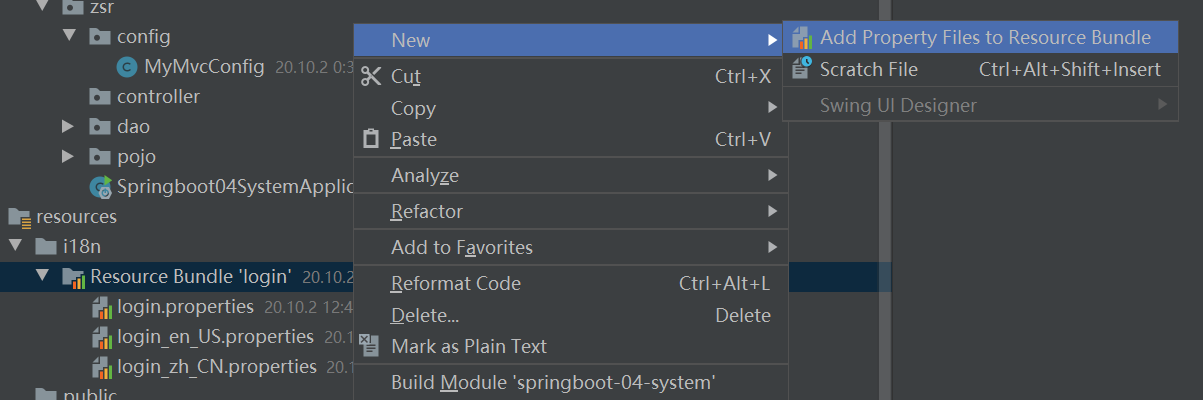
At this time, you only need to enter the area name to create it successfully, for example, enter en_US, it will be automatically recognized
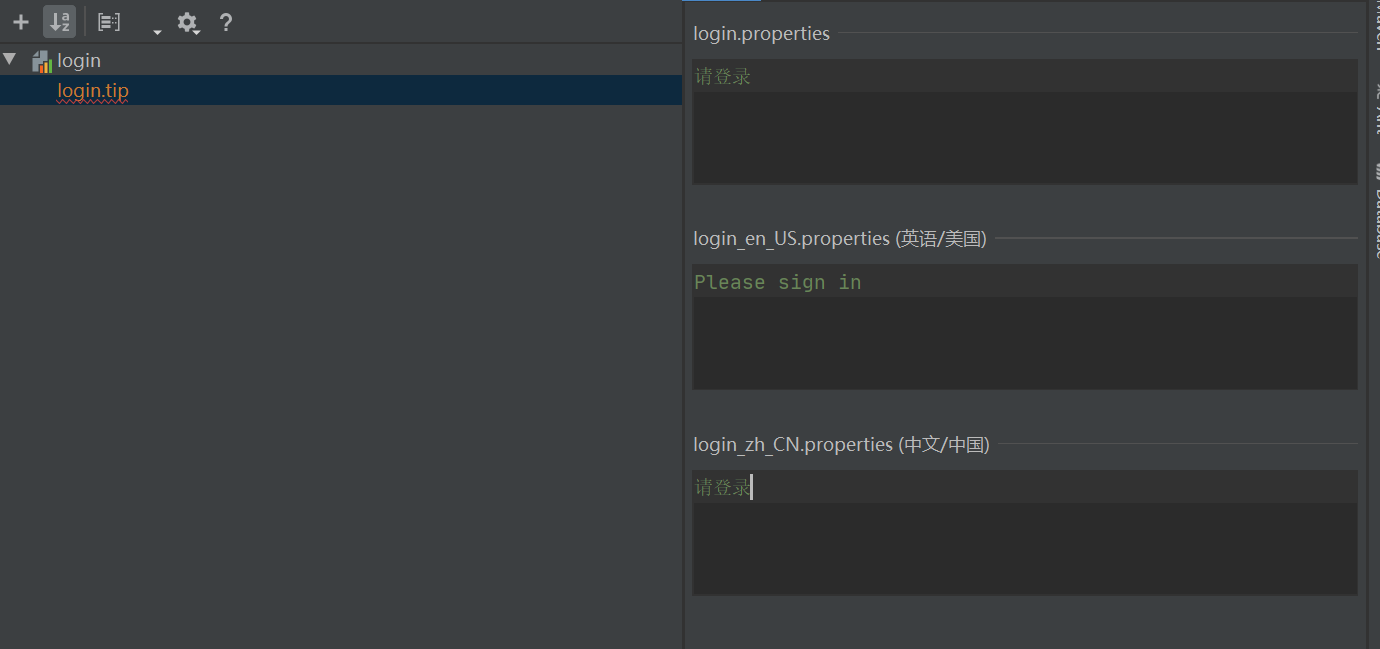
Then open the configuration file in English or Chinese, and click Resource Bundle to enter the visual editing page
After entering the visual editing page, click the plus sign to add attributes. First, create a new login Tip stands for the prompt in the home page
Then, configure the language of the prompt in three cases respectively, and enter it in the three corresponding input boxes (Note: IDEA2020.1 may not be saved, so it is recommended to write it directly in the configuration file)
Next, configure all variables of the language to be converted (Note: IDEA2020.1 may not be saved, and it is recommended to write it directly in the configuration file)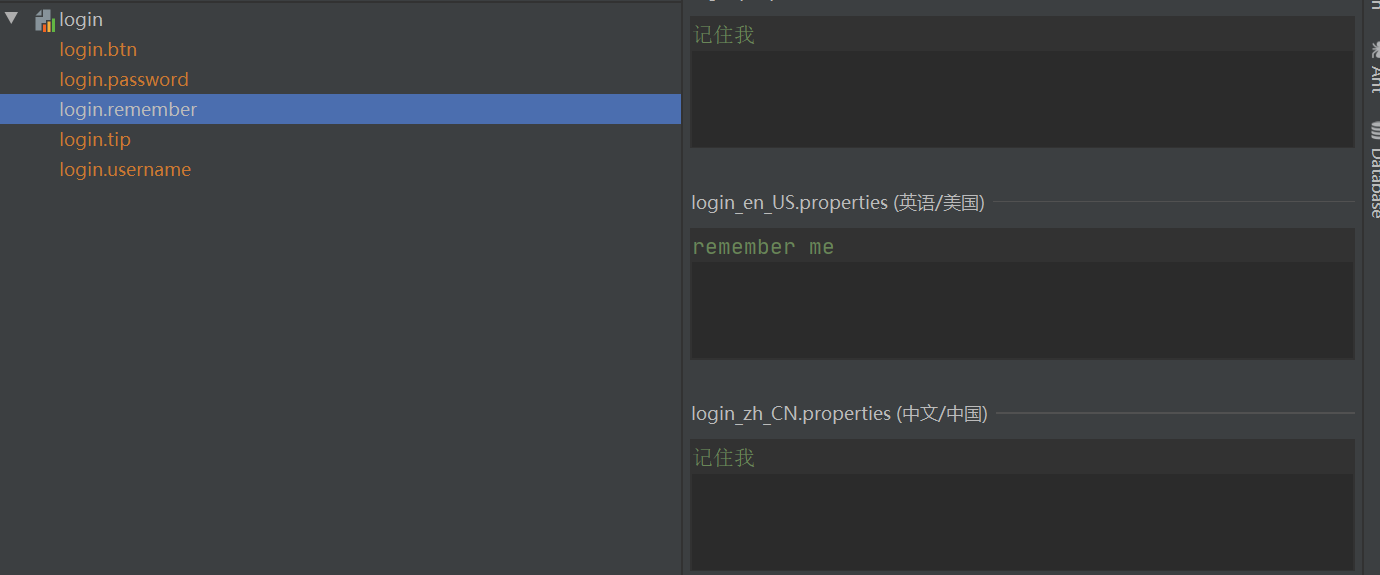
Then open the of the three configuration files and view the text content. You can see that all the configurations have been made
login.properties
login.tip=Please login
login.password=password
login.remember=Remember me
login.btn=Sign in
login.username=user name
login_en_US.properties
login.tip=Please sign in
login.password=password
login.remember=remember me
login.btn=login
login.username=username
login_zh_CN.properties
login.tip=Please login
login.password=password
login.remember=Remember me
login.btn=Sign in
login.username=user name
3. Configure internationalization resource file name
In Spring programs, internationalization is mainly realized through the ResourceBundleMessageSource class
Spring Boot automatically configures the components for managing internationalization resource files for us through MessageSourceAutoConfiguration
Let's look at the following MessageSourceAutoConfiguration class in the IDEA
@Configuration(proxyBeanMethods = false)
@ConditionalOnMissingBean(name = AbstractApplicationContext.MESSAGE_SOURCE_BEAN_NAME, search = SearchStrategy.CURRENT)
@AutoConfigureOrder(Ordered.HIGHEST_PRECEDENCE)
@Conditional(ResourceBundleCondition.class)
@EnableConfigurationProperties
public class MessageSourceAutoConfiguration {

    private static final Resource[] NO_RESOURCES = {};

    @Bean
    @ConfigurationProperties(prefix = "spring.messages")
    public MessageSourceProperties messageSourceProperties() {
        return new MessageSourceProperties();
    }

    @Bean
    public MessageSource messageSource(MessageSourceProperties properties) {
        ResourceBundleMessageSource messageSource = new ResourceBundleMessageSource();
        if (StringUtils.hasText(properties.getBasename())) {
            messageSource.setBasenames(StringUtils
                    .commaDelimitedListToStringArray(StringUtils.trimAllWhitespace(properties.getBasename())));
        }
        if (properties.getEncoding() != null) {
            messageSource.setDefaultEncoding(properties.getEncoding().name());
        }
        messageSource.setFallbackToSystemLocale(properties.isFallbackToSystemLocale());
        Duration cacheDuration = properties.getCacheDuration();
        if (cacheDuration != null) {
            messageSource.setCacheMillis(cacheDuration.toMillis());
        }
        messageSource.setAlwaysUseMessageFormat(properties.isAlwaysUseMessageFormat());
        messageSource.setUseCodeAsDefaultMessage(properties.isUseCodeAsDefaultMessage());
        return messageSource;
    }
    //......
}
Mainly understand the messageSource() method:
public MessageSource messageSource(MessageSourceProperties properties);
As you can see, its parameter is the MessageSourceProperties object. Let's take a look at this class
public class MessageSourceProperties {

    /**
     * Comma-separated list of basenames (essentially a fully-qualified classpath
     * location), each following the ResourceBundle convention with relaxed support for
     * slash based locations. If it doesn't contain a package qualifier (such as
     * "org.mypackage"), it will be resolved from the classpath root.
     */
    private String basename = "messages";

    /**
     * Message bundles encoding.
     */
    private Charset encoding = StandardCharsets.UTF_8;
Class first declares an attribute basename, and the default value is messages;
We translate its notes:
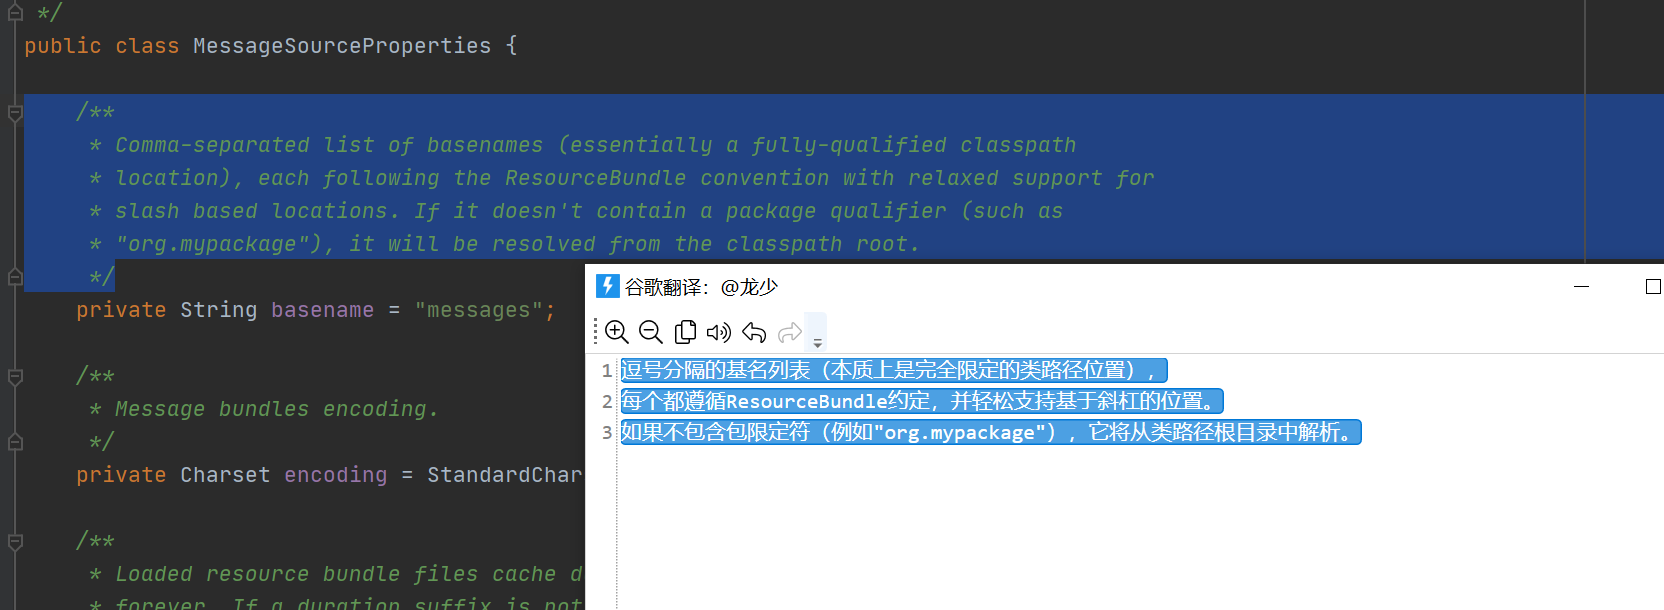
-Comma separated list of base names (essentially fully qualified classpath locations)
-Each follows the ResourceBundle Convention and easily supports the position of slashes
-If the package qualifier is not included (for example, "org.mypackage"), it will be resolved from the root directory of the classpath
intend:
If you don't specify in the springboot configuration file Separated internationalized resource file names
By default, it will look for messages under the classpath Properties as internationalization resource file
Here, we have customized the internationalization resource file, so we need to configure the application. Config file in SpringBoot Add the following configuration in properties to specify the name of our configuration file
spring.messages.basename=i18n.login
Where i18n is the name of the folder where the resource is stored, and login is the basic name of the resource file.
4. Get and display the internationalization value on the home page
Use #{...} Message expression, go to the home page index HTML get internationalized values
Restart the project and visit the home page. You can find that it has been automatically recognized as Chinese

5. Configure internationalization components to switch between Chinese and English
1. Add Chinese and English switching label link
The above implementation shows that the login home page is displayed in Chinese, and we are in index You can see two tags in the HTML page
<a class="btn btn-sm">chinese</a>
<a class="btn btn-sm">English</a>
Which corresponds to the
So how can we switch between Chinese and English through these two tags?
First, add a jump link to the two tags and bring the corresponding parameters
<!--The parameters passed in here do not need to be used?use key=value-->
<a class="btn btn-sm" th:href="@{/index.html(l='zh_CN')}">chinese</a>
<a class="btn btn-sm" th:href="@{/index.html(l='en_US')}">English</a>
2. Custom region parser component
How to implement our custom locale parser? Let's first analyze a wave of source code
In Spring, there are two classes about Internationalization:
Locale: represents a region. Each locale object represents a specific geographical, political and cultural region
Locale resolver: locale resolver
First search webmvcoautoconfiguration, where you can find information about a method, localeResolver()
@Bean
@ConditionalOnMissingBean
@ConditionalOnProperty(prefix = "spring.mvc", name = "locale")
public LocaleResolver localeResolver() {
    //If configured by the user, the user configured is used
   if (this.mvcProperties.getLocaleResolver() == WebMvcProperties.LocaleResolver.FIXED) {
      return new FixedLocaleResolver(this.mvcProperties.getLocale());
   }
    //If the user has no configuration, the default configuration is used
   AcceptHeaderLocaleResolver localeResolver = new AcceptHeaderLocaleResolver();
   localeResolver.setDefaultLocale(this.mvcProperties.getLocale());
   return localeResolver;
}
This method is to obtain the locale resolver object parser:
If the user is configured, the user configured regional parser is used;
If the user does not configure it, the default locale parser is used
We can see that the default locale parser is the AcceptHeaderLocaleResolver object. Click this class to view the source code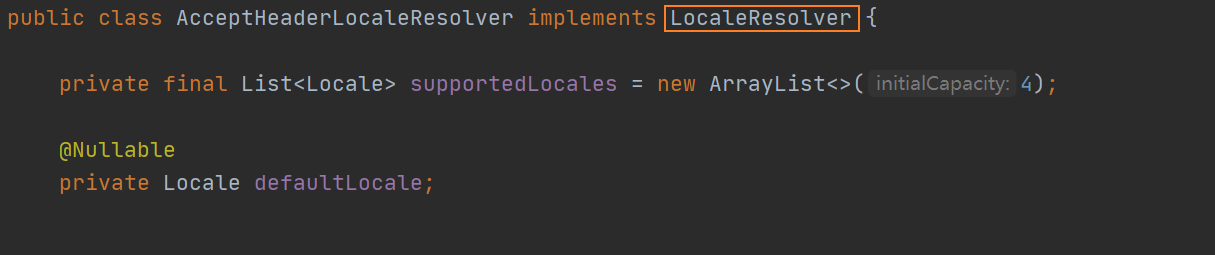
It can be found that it inherits the LocaleResolver interface and implements region resolution
Therefore, if we want to realize the effectiveness of the above customized international resources, we only need to write our own regional parser, inherit the LocaleResolver interface and rewrite its methods
We create a new MyLocaleResolver under the config package as our own international parser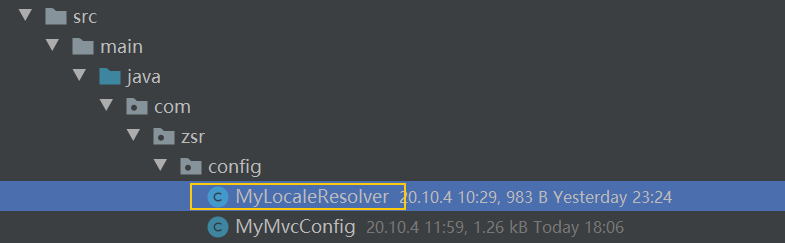
We're at index HTML, the corresponding request jump is written
If you click the Chinese button, you will jump to / index HTML (L ='zh_cn ') page
If you click the English button, you will jump to / index HTML (L ='en_us') page
Therefore, we need to handle these two link requests with parameters in our custom locale resolver, MyLocaleResolver
package com.zsr.config;

import org.springframework.cglib.core.Local;
import org.springframework.util.StringUtils;
import org.springframework.web.servlet.LocaleResolver;

import javax.servl et.http.HttpServletRequest;
import javax.servlet.http.HttpServletResponse;
import java.util.Locale;

public class MyLocaleResolver implements LocaleResolver {
    //Parse request
    @Override
    public Locale resolveLocale(HttpServletRequest request) {
        //Gets the internationalization parameter in the request
        String language = request.getParameter("l");
        //Default region
        Locale locale = Locale.getDefault();
        //If the requested link parameter is not empty, the internationalization parameter is carried
        if (!StringUtils.isEmpty(language)) {
            String[] split = language.split("_");//zh_ CN (language region)
            locale = new Locale(split[0], split[1]);
        }
        return locale;
    }

    @Override
    public void setLocale(HttpServletRequest request, HttpServletResponse response, Locale locale) {

    }
}
//The customized internationalization component takes effect
@Bean
public LocaleResolver localeResolver() {
    return new MyLocaleResolver();
}
In order for our regionalization information to take effect, we need to configure this component again! Add bean s under your mvcconfig configuration class;
We restart the project and visit it. We found that clicking the button can achieve successful switching!
Click the Chinese button to jump to http://localhost:8080/index.html?l=zh_CN , displayed in Chinese
Click the English button to jump to http://localhost:8080/index.html?l=en_US , displayed in English