brief introduction
Front and rear end separation
Vue+SpringBoot
Back end era: the front end only manages static pages; HTML = = > back end. Template engine JSP = > the back end is the main force
Era of front and rear end separation
- Front end - > front end control layer, view layer
- Forge back-end data, json. It already exists. The front-end engineering team can still run without a back-end
- Backend - > backend control layer, service layer and data access layer
- The front and back end interact through API
- The front and rear ends are relatively independent and loosely coupled
Problems arising
- The front-end and back-end integration and joint commissioning, the front-end or back-end can not achieve "timely negotiation and early solution", which eventually leads to the centralized outbreak of problems
Solution
- First, define the schema [outline of the plan] and track the latest API in real time to reduce the integration risk;
- Previous years: specify the word plan document;
- Front and rear end separation:
- Front end test back end interface: postman
- The back-end provides an interface, which needs to update the latest messages and changes in real time
detailed
- It is known as the most popular API framework in the world
- Restful Api document online automatic generator = > API document and API definition are updated synchronously
- Direct run, online test API
- Support multiple languages (such as Java, PHP, etc.)
- Official website: https://swagger.io/
Quick start
Requirement: jdk 1.8 + otherwise swagger2 cannot run
be careful:
If yes, the following code error is reported
Failed to start bean 'documentationPluginsBootstrapper'; nested exception is java.lang.NullPointerException
- Fallback spring boot to 2.5 6 can start normally
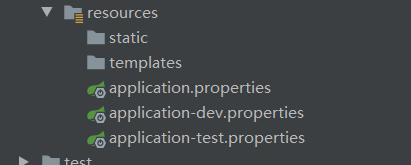
- Or in application Properties add spring mvc. pathmatch. matching-strategy= ANT_ PATH_ MATCHER
reason:
This is because the path matching used by spring fox is based on AntPathMatcher, while spring boot 2.6 X uses a PathPatternMatcher.
Steps:
1. Create a new springboot web project
2. Add Maven dependency (Note: before version 2.9.2, not after version 2.9.2)
        <!-- https://mvnrepository.com/artifact/io.springfox/springfox-swagger2 -->
        <dependency>
            <groupId>io.springfox</groupId>
            <artifactId>springfox-swagger2</artifactId>
            <version>2.9.2</version>
        </dependency>
        <!-- https://mvnrepository.com/artifact/io.springfox/springfox-swagger-ui -->
        <dependency>
            <groupId>io.springfox</groupId>
            <artifactId>springfox-swagger-ui</artifactId>
            <version>2.9.2</version>
        </dependency>
3. Write HelloController and test to ensure successful operation
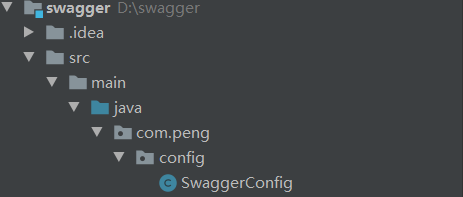
4. To use Swagger, we need to write a configuration class SwaggerConfig to configure Swagger
@Configuration //Configuration class
@EnableSwagger2// Turn on automatic configuration of Swagger2
public class SwaggerConfig {
}
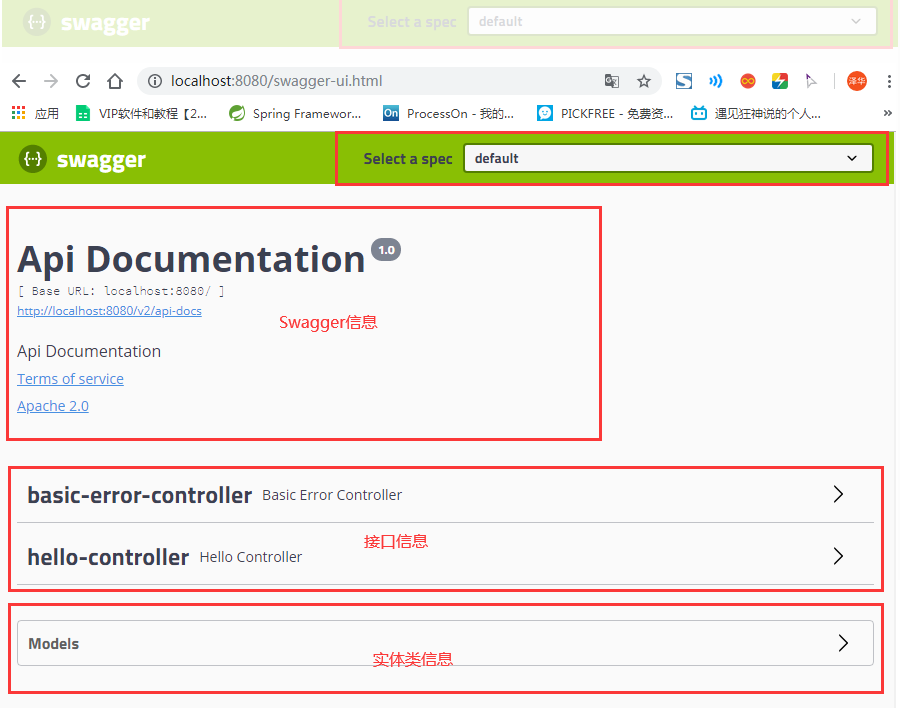
5. Access test: http://localhost:8080/swagger-ui.html, you can see the interface of swagger
Configure Swagger
1. The Swagger instance Bean is a Docket, so configure Swagger by configuring the Docket instance
@Bean //Configure the docket to configure Swagger specific parameters
public Docket docket() {
   return new Docket(DocumentationType.SWAGGER_2);
}
2. You can configure the document information through the apiInfo() property
    //Configure swagger information = apiInfo
    private ApiInfo apiInfo() {
        Contact contact = new Contact("Contact name", "www.baidu.com", "Contact email");
        return new ApiInfo(
                "Swagger study", // title
                "Learn to demonstrate how to configure Swagger", // describe
                "v1.0", // edition
                "www.baidu.com", // Organization links
                contact, // contact information
                "Apach 2.0 permit", // permit
                "License link", // License connection
                new ArrayList<>()// extend
        );
    }
3. apiInfo() on Docket instance Association
@Bean
public Docket docket() {
   return new Docket(DocumentationType.SWAGGER_2).apiInfo(apiInfo());
}
4. Restart the project and access the test http://localhost:8080/swagger-ui.html to see the effect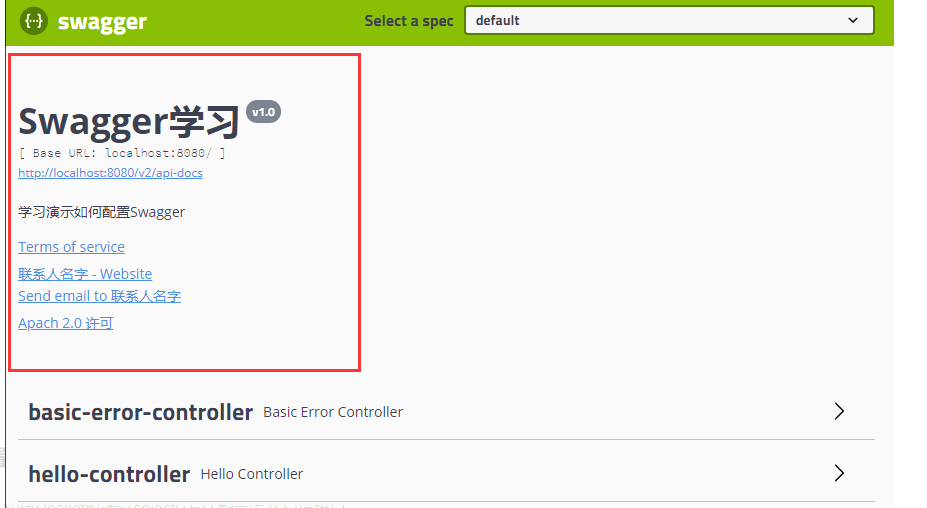
Configure scan interface
1. When building a Docket, configure how to scan the interface through the select() method
@Bean
public Docket docket() {
   return new Docket(DocumentationType.SWAGGER_2)
      .apiInfo(apiInfo())
      .select()// Pass select() method to configure the scanning interface. RequestHandlerSelectors configure how to scan the interface
      .apis(RequestHandlerSelectors.basePackage("com.peng.controller"))
      .build();
}
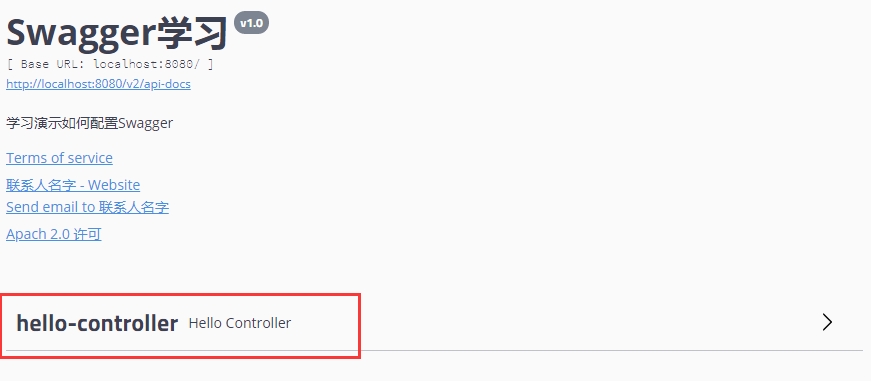
2. Restart the project test. Since we configured to scan the interface according to the path of the package, we can only see one class
 3. In addition to configuring the scanning interface through the package path, you can also configure other methods to scan the interface. Here are all the configuration methods
basePackage(final String basePackage) // Scan interface according to packet path
any() // All interfaces in the project will be scanned
none() // Do not scan interfaces
// Scan the annotation on the method, such as withMethodAnnotation(GetMapping.class), and only scan the get request
withMethodAnnotation(final Class<? extends Annotation> annotation)
// Scan through annotations on classes, such as withClassAnnotation(Controller.class) only scans interfaces in classes with controller annotations
withClassAnnotation(final Class<? extends Annotation> annotation)
4. In addition, we can also configure interface scanning filtering
@Bean
public Docket docket() {
   return new Docket(DocumentationType.SWAGGER_2)
      .apiInfo(apiInfo())
      .select()
      .apis(RequestHandlerSelectors.basePackage("com.peng.controller"))
       // Configure how to filter through path, that is, only the interfaces whose requests start with / ss are scanned here
      .paths(PathSelectors.ant("/ss/**"))
      .build();
}
5. The optional values here are
any() // Scan any request
none() // No requests are scanned
regex(final String pathRegex) // Regular expression control
ant(final String antPattern) // Controlled by ant()
Configure Swagger switch
1. Configure whether swagger is enabled through the enable() method
@Bean
public Docket docket() {
   return new Docket(DocumentationType.SWAGGER_2)
      .apiInfo(apiInfo())
      .enable(false) //Configure whether Swagger is enabled. If false, it will not be accessible in the browser
      .select()
      .apis(RequestHandlerSelectors.basePackage("com.peng.controller"))
      .paths(PathSelectors.ant("/ss/**"))
      .build();
}
2. How to dynamically configure that swagger is displayed when the project is in test and dev environment, but not when it is in prod environment
    @Bean
    public Docket docket(Environment environment) {
        // Set the environment in which you want to display swagger
        Profiles of = Profiles.of("dev", "test");
        // Judge whether you are currently in this environment
        // Receive this parameter through enable() to determine whether to display
        boolean b = environment.acceptsProfiles(of);

        return new Docket(DocumentationType.SWAGGER_2)
                .apiInfo(apiInfo())
                .groupName("Liu Bei")
                .enable(b) //Whether to enable swagger. If false, swagger cannot be accessed in the browser
                .select()
                .apis(RequestHandlerSelectors.basePackage("com.peng.controller"))
              //.paths(PathSelectors.ant("/peng/**"))
                .build();
    }


Pay attention to the configured IP address
Configure API grouping
1. If grouping is not configured, the default is default. Grouping can be configured through the groupName() method
@Bean
public Docket docket(Environment environment) {
   return new Docket(DocumentationType.SWAGGER_2).apiInfo(apiInfo())
      .groupName("Liu Bei") // Configure grouping
}
2. How to configure multiple groups? To configure multiple groups, you only need to configure multiple docks
@Bean
public Docket docket1(){
   return new Docket(DocumentationType.SWAGGER_2).groupName("group1");
}
@Bean
public Docket docket2(){
   return new Docket(DocumentationType.SWAGGER_2).groupName("group2");
}
@Bean
public Docket docket3(){
   return new Docket(DocumentationType.SWAGGER_2).groupName("group3");
}
Entity configuration
1. Create a new entity class
//@Api("notes")
@ApiModel("User entity")
public class User {

    @ApiModelProperty("user name")
    private String username;
    @ApiModelProperty("password")
    private String password;

    public String getUsername() {
        return username;
    }

    public void setUsername(String username) {
        this.username = username;
    }

    public String getPassword() {
        return password;
    }

    public void setPassword(String password) {
        this.password = password;
    }
}
2. As long as the entity is on the return value of the request interface (even generic), it can be mapped to the entity item
@RestController
public class HelloController {

    //   /Error default error request
    @GetMapping("/hello")
    public String hello() {
        return "hello";
    }

    //As long as there is an entity class in the return value in our interface, it will be scanned into Swagger
    @PostMapping("/user")
    public User user() {
        return new User();
    }
}
3. Restart view test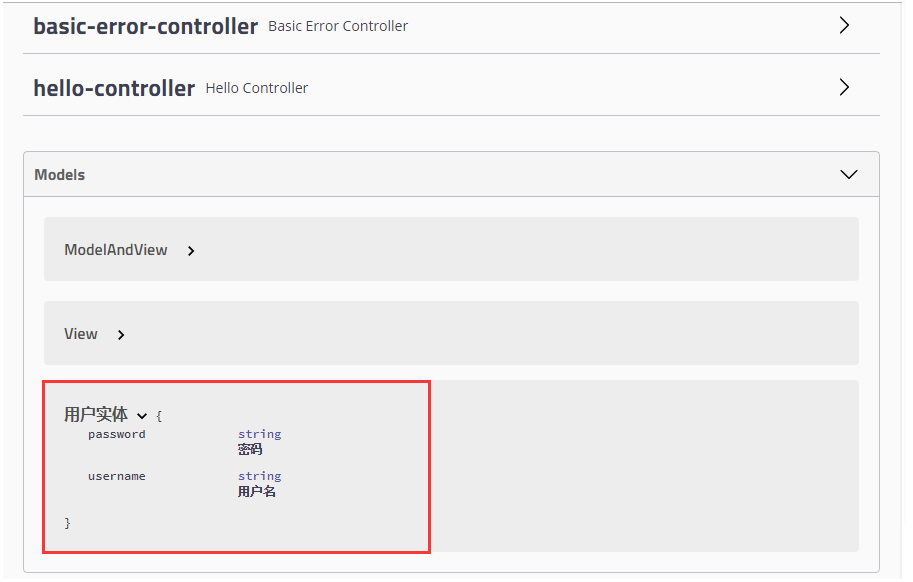
Note: it is not because the @ ApiModel annotation makes the entity displayed here, but as long as the entity that appears on the return value of the interface method will be displayed here, and the @ ApiModel and @ ApiModelProperty annotations only add annotations to the entity.
-
@ApiModel adds comments to the class
-
@ApiModelProperty adds comments for class properties
Summary:
- We can add annotation information to some difficult interfaces or attributes through Swagger
- Real time update of interface documents
- It can be tested online
Swagger is an excellent tool, which is used by almost all large companies
[note]: close Swagger during official release!!!
- For safety reasons
- And save memory
Common notes
All annotations of Swagger are defined in io Swagger. Annotations package
Some frequently used are listed below, and those not listed can be consulted separately:
| Swagger annotation | Brief description |
|---|---|
| @Api(tags = "xxx module description") | Act on module classes |
| @ApiOperation("xxx interface description") | Act on interface methods |
| @ApiModel("xxxPOJO description") | Act on model classes: such as VO and BO |
| @ApiModelProperty(value = "xxx property description", hidden = true) | It acts on class methods and attributes. Setting hidden to true can hide the attribute |
| @ApiParam("xxx parameter description") | It acts on parameters, methods and fields, similar to @ ApiModelProperty |
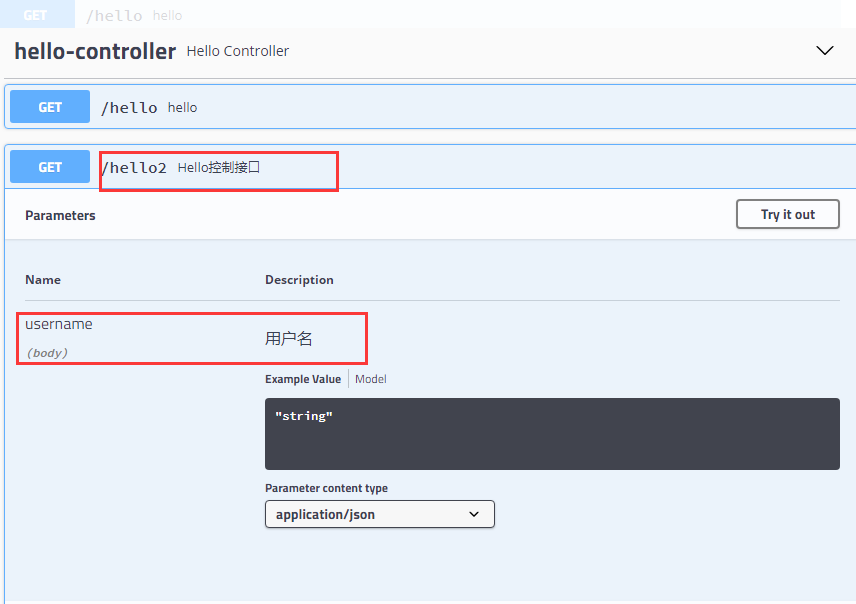
We can also configure some comments for the requested interface
1. Add an api interface annotation to the interface in the HelloController control class
@RestController
public class HelloController {

     //Error default error request
     @ApiOperation("Hello control interface ")
     @GetMapping("/hello")
     public String hello(@ApiParam("user name") String username) {
         return "hello";
     }

     //As long as there is an entity class in the return value in our interface, it will be scanned into Swagger
     @ApiOperation("get test")
     @GetMapping("/user")
     public User user(@ApiParam("user") User user) {
         return new User();
     }

}
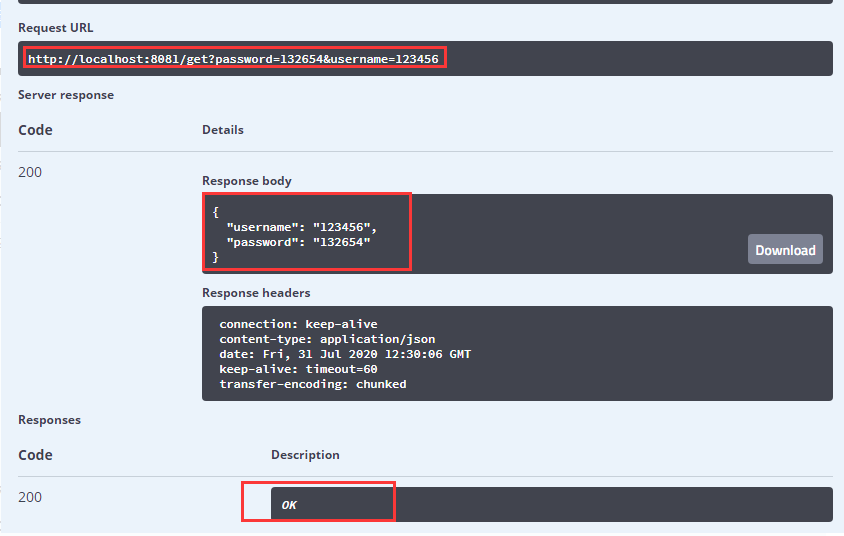
2. try it out
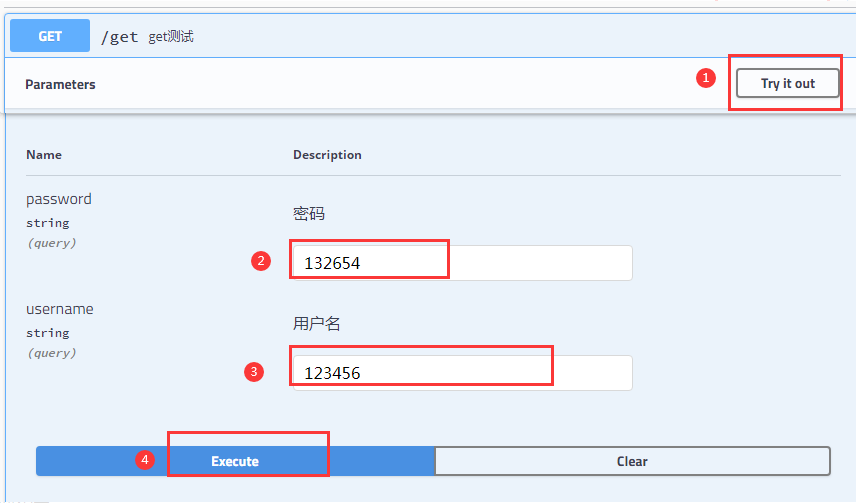
3. Test results
New version VS old version
The differences between the new version and the old version are mainly reflected in the following four aspects:
- The addition of dependencies is different: only one item needs to be added in the new version, while two items need to be added in the old version;
- The annotation for starting Swagger is different: the new version uses @ enableopapi, while the old version uses @ EnableSwagger2;
- The file type configuration of Docket (document summary information) is different: the new version is configured with OAS_3, while the old version is configured with SWAGGER_2;
- Swagger UI access address is different: the access address of the new version is“ http://localhost:8080/swagger-ui /, and the access address of the old version is“ http://localhost:8080/ swagger-ui.html".
- As for the difference, you can see brother Hu Lei's answer: What kind of tool is swagger- Know
Summary:
-
In this way, you can add some configuration information to some difficult attributes or interfaces to make it easier for people to read!
-
Compared with the traditional Postman or Curl test interface, using swagger is a fool's operation. It does not need additional description documents (well written documents are themselves documents) and is less prone to errors. It only needs to enter data and click Execute. If it is combined with the automation frame, it can be said that there is basically no need for human operation.
-
Swagger is an excellent tool. At present, many small and medium-sized Internet companies in China are using it. Compared with the traditional way of first outputting Word interface documents and then testing, it is obviously more in line with the current rapid iterative development market. Of course, I would like to remind you to turn off swagger in the formal environment. First, for security reasons, and second, you can save runtime memory.
-
The new version of Swagger has two impressive advantages: first, the configuration has become simpler, for example, the dependency configuration has been reduced by 50%. Second, the page design style of the new version of Swagger has changed a lot. The new version of the page makes people feel more modern and more scientific and technological. Generally speaking, it is much more beautiful.
-
It is worth mentioning that the whole upgrade process of Swagger is very smooth. Upgrading from the old version to the new version only requires simple configuration. The annotations used to describe the interface continue the usage of the old version, so that you can successfully get to the latest version without modifying most of the main code.