1, Squid overview

1. Working mechanism of agency

2. Type of Squid agent

2, Install squid
Link: Squid package
Extraction code: ug49
systemctl stop firewalld
systemctl disable firewalld
setenforce 0

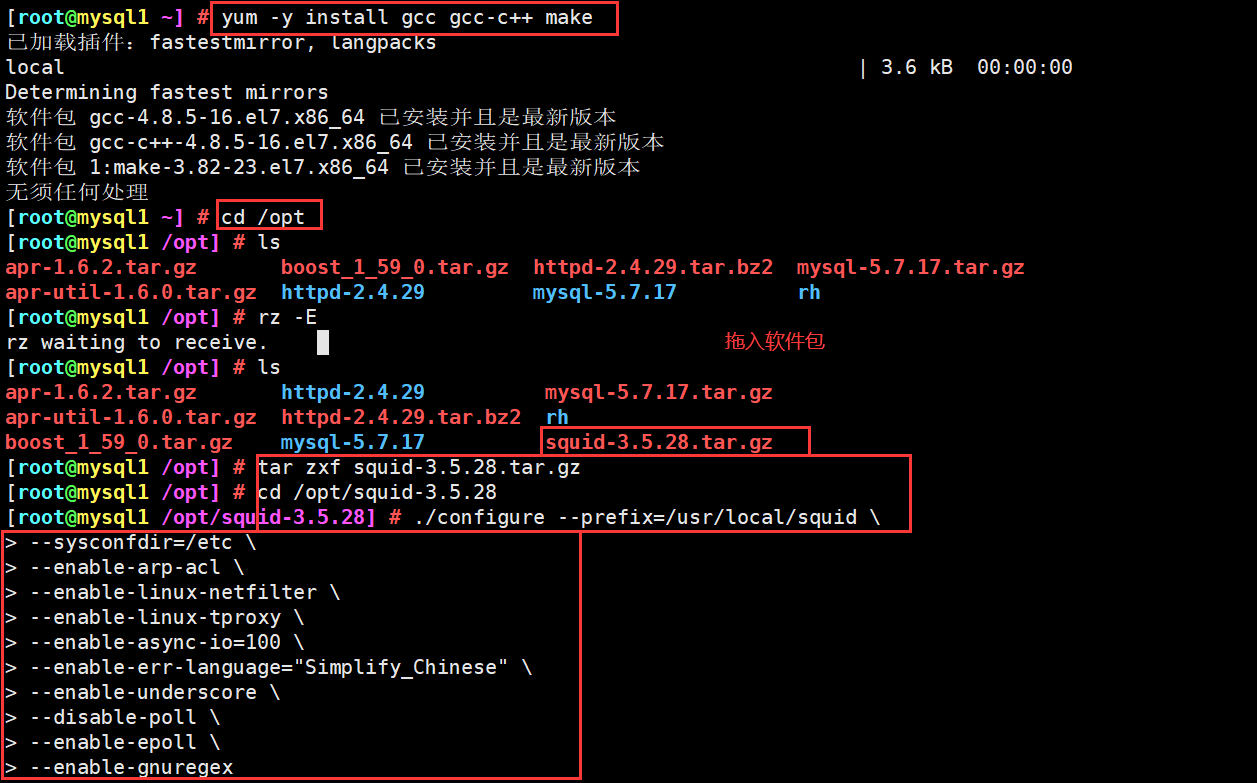
1. Compile and install Squid
yum -y install gcc gcc-c++ make
cd /opt
tar zxvf squid-3.5.28.tar.gz
cd /opt/squid-3.5.28

./configure --prefix=/usr/local/squid \
--sysconfdir=/etc \
--enable-arp-acl \
--enable-linux-netfilter \
--enable-linux-tproxy \
--enable-async-io=100 \
--enable-err-language="Simplify_Chinese" \
--enable-underscore \
--disable-poll \
--enable-epoll \
--enable-gnuregex

make && make install

#--------Module interpretation--------------------------------------------------
--prefix=/usr/local/squid                  #Specify the installation directory path
--sysconfdir=/etc                          #Specify the configuration file path
--enable-arp-acl                           #MAC address control to prevent clients from using ip spoofing
--enable-linux-netfilter                   #Using kernel filtering
--enable-linux-tproxy                      #Support transparent mode
--enable-async-io=100                      #Asynchronous 1o to improve storage performance
--enable-err-language="Simplify_Chinese"   #Display language of error message
--enable-underscore                        #Allow underscores in URL s
--disable-poll \                           #Turn off the poll mode used by default
--enable-epoll \                           #Enable epoll mode to improve performance
--enable-gnuregex                          #Using GNU regular expressions
#----------------------------------------------------------------

ln -s /usr/local/squid/sbin/* /usr/local/sbin/
useradd -M -s /sbin/nologin squid
chown -R squid:squid /usr/local/squid/var/
#/usr/local/squid/var / this directory is used to store cache files

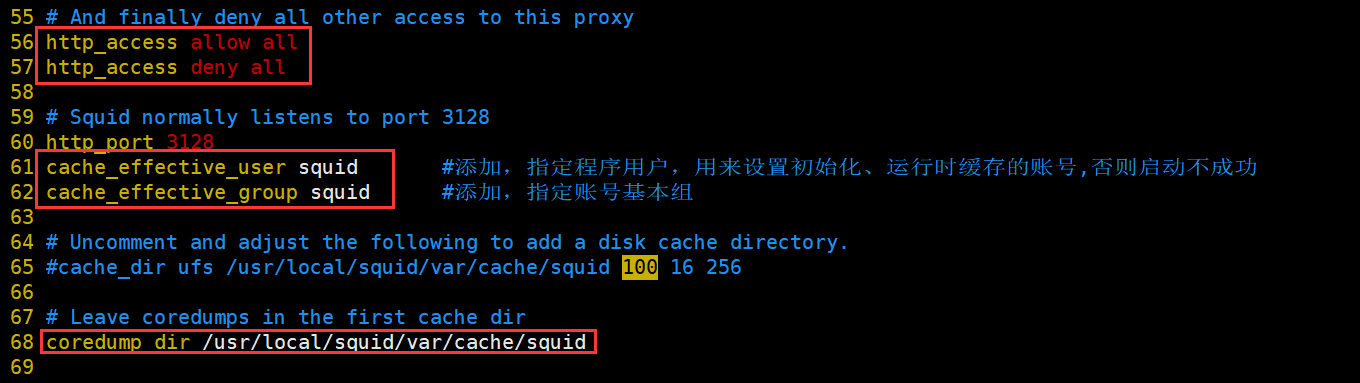
2. Modify Squid's configuration file
vim /etc/squid.conf
......
#---------Line 56, insert----------------
http_access allow all   #Put on HTTP_ Before access deny all, any client is allowed to use the proxy service to control the top-down matching of rules
http_access deny all
http_port 3128          #Used to specify the address and port that the proxy service listens to (the default port number is 3128)
#---------61 line insertion-----------------
cache_effective_user squid	 #Add, specify the program user, which is used to set the account of initialization and runtime cache. Otherwise, the startup will not succeed
cache_effective_group squid	 #Add, specify account basic group

coredump_dir /usr/local/squid/var/cache/squid	#Specify cache file directory
3. Squid operation control
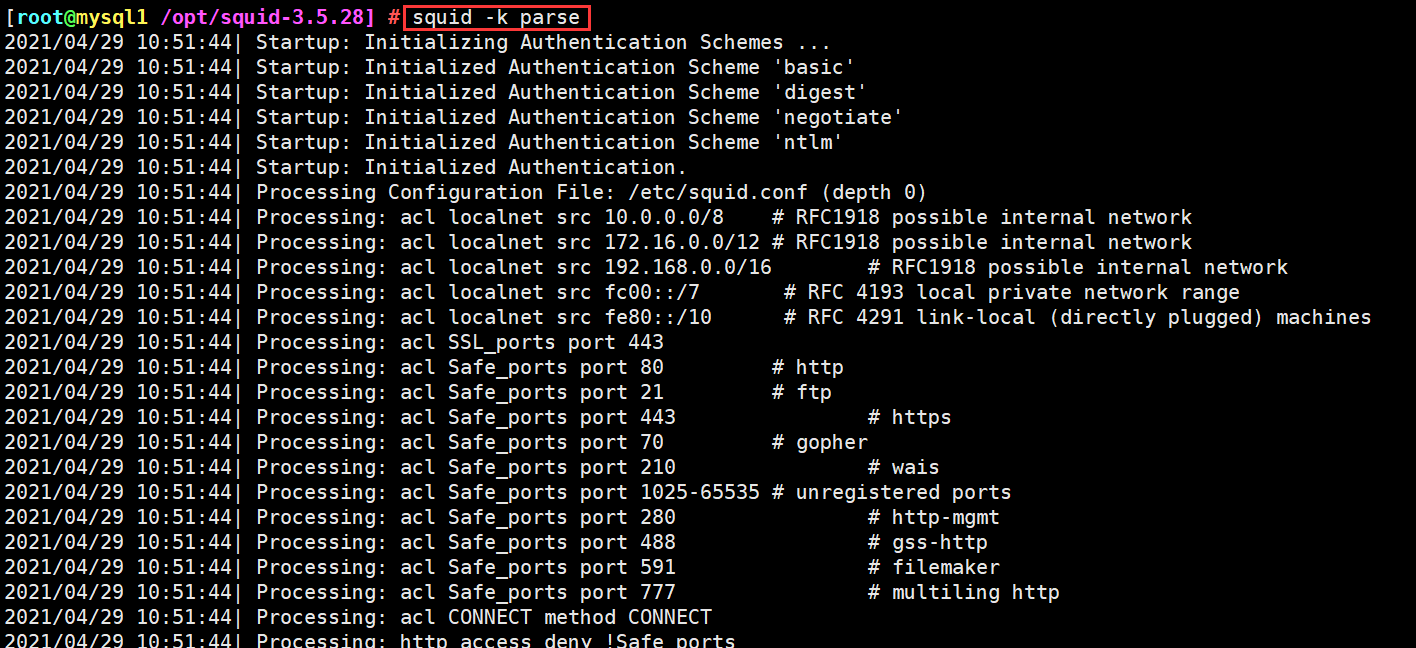
Check whether the configuration file syntax is correct
squid -k parse
 start-up Squid,First start squid The cache directory is automatically initialized when the service is
squid -z 					#-The z option is used to initialize the cache directory
squid						#Start squid service
netstat -anpt | grep "squid"

4. Create Squid service script
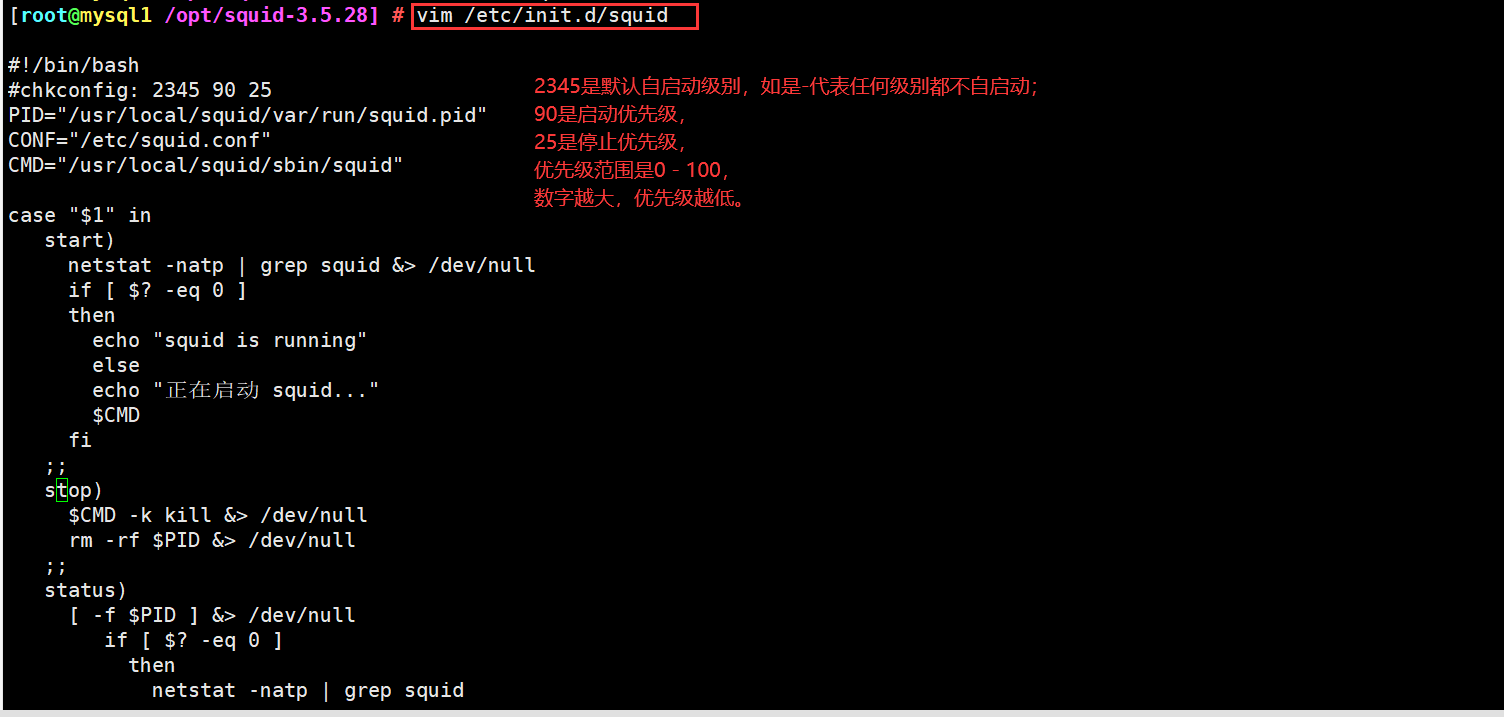
vim /etc/init.d/squid
#!/bin/bash
#chkconfig: 2345 90 25
PID="/usr/local/squid/var/run/squid.pid"
CONF="/etc/squid.conf"
CMD="/usr/local/squid/sbin/squid"
case "$1" in
start)
netstat -natp | grep squid &> /dev/null
if [ $? -eq 0 ]
then
echo "squid is running"
else
echo "Starting squid..."
$CMD
fi
;;
stop)
$CMD -k kill &> /dev/null
rm -rf $PID &> /dev/null
;;
status)
[ -f $PID ] &> /dev/null
if [ $? -eq 0 ]
then
netstat -natp | grep squid
else
echo "squid is not running"
fi
;;
restart)
$0 stop &> /dev/null
echo "Closing squid..."
$0 start &> /dev/null
echo "Starting squid..."
;;
reload)
$CMD -k reconfigure
;;
check)
$CMD -k parse
;;
*)
echo "Usage: $0{start|stop|status|reload|check|restart}"
;;
esac
2345 Is the default self start level, if yes-It means that no level will start automatically; 90 is the start priority, 25 is the stop priority, and the priority range is 0-100,The higher the number, the lower the priority.
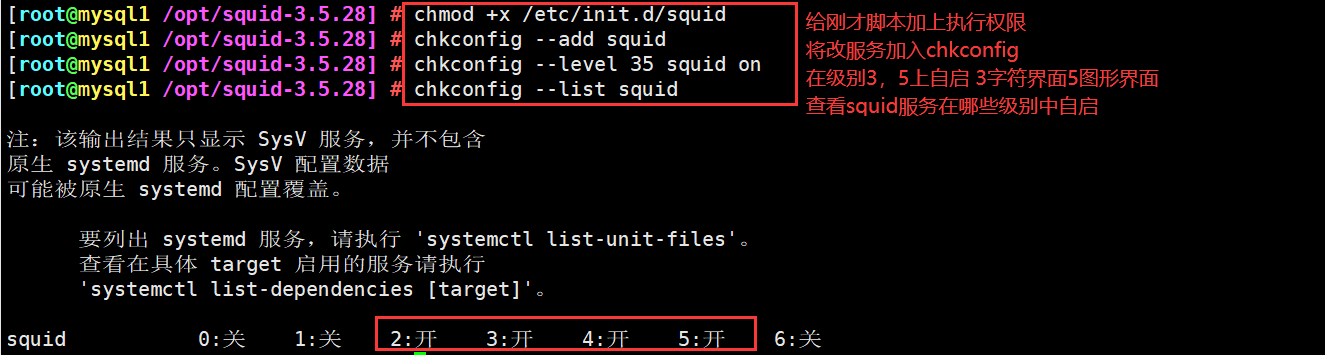
chmod +x /etc/init.d/squid
chkconfig --add squid
chkconfig --level 35 squid on
chkconfig --list squid
3, Building traditional proxy server
Squid-Server 192.168.221.20
Web-Server 192.168.221.30
Client 192.168.221.88
1. First compile and install squid, and then modify the configuration file
vim /etc/squid.conf
......
http_access allow all
http_access deny all
http_port 3128
cache_effective_user squid
cache_effective_group squid
#---------63 line insertion-----------------------------------------------
cache_mem 64 MB
reply_body_max_size 10 MB
maximum_object_size 4096 KB

#---------Add content explanation------------------------------------------
cache_mem 64 MB				 #Specify the size of the memory space used by the cache function to maintain the frequently accessed WEB objects. The capacity is preferably a multiple of 4, and the unit is MB. It is recommended to set it to 1 / 4 of the physical memory
reply_body_max_size 10 MB	 #The maximum file size that users are allowed to download, in bytes. When downloading a Web object that exceeds the specified size, a prompt of "request or access too large" will appear on the error page of the browser. The default setting is 0, which means no restriction
maximum_object_size 4096 KB	 #The maximum object size allowed to be saved to the cache space, in kilobytes. Files exceeding the size limit will not be cached, but will be forwarded directly to the user
#-------------------------------------------------------------------

service squid restart
#Or systemctl restart squid


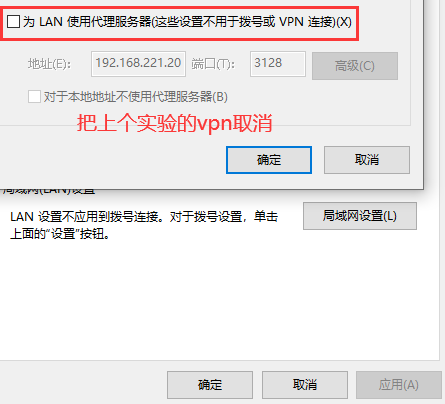
2. Firewall rules also need to be modified in the production environment
iptables -F
iptables -I INPUT -p tcp --dport 3128 -j ACCEPT
iptables -L INPUT

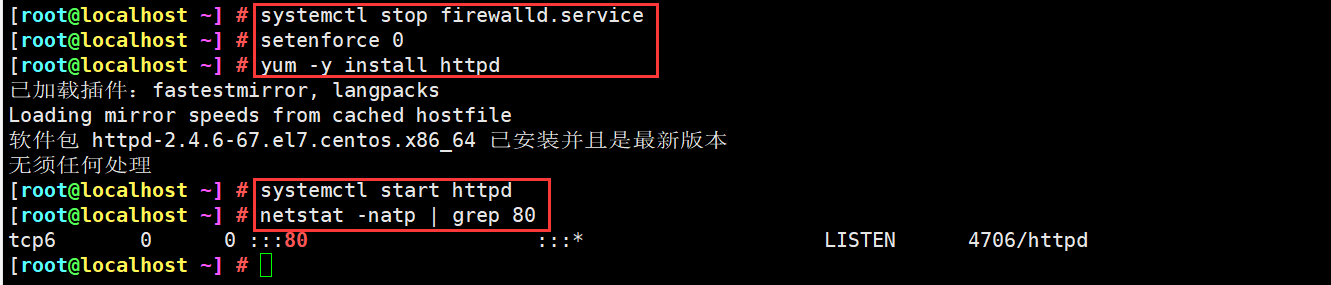
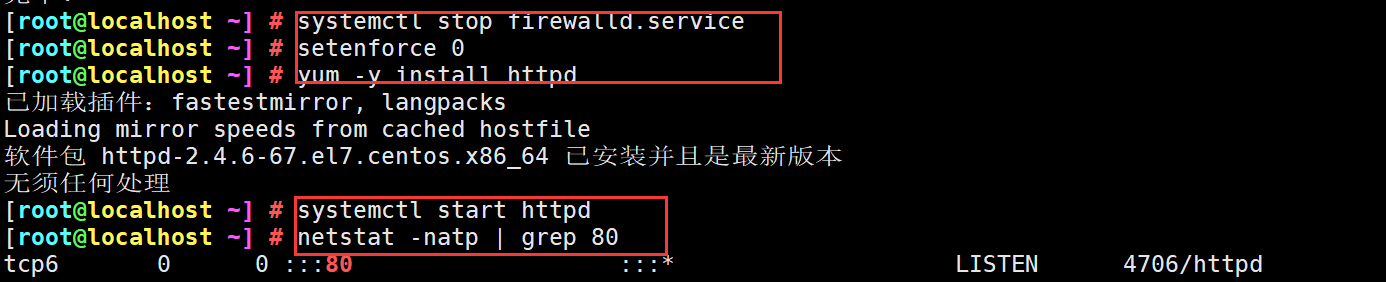
3. Turn on the Web Server http service
systemctl stop firewalld.service
setenforce 0
yum -y install httpd
systemctl start httpd
netstat -natp | grep 80
4. Verify
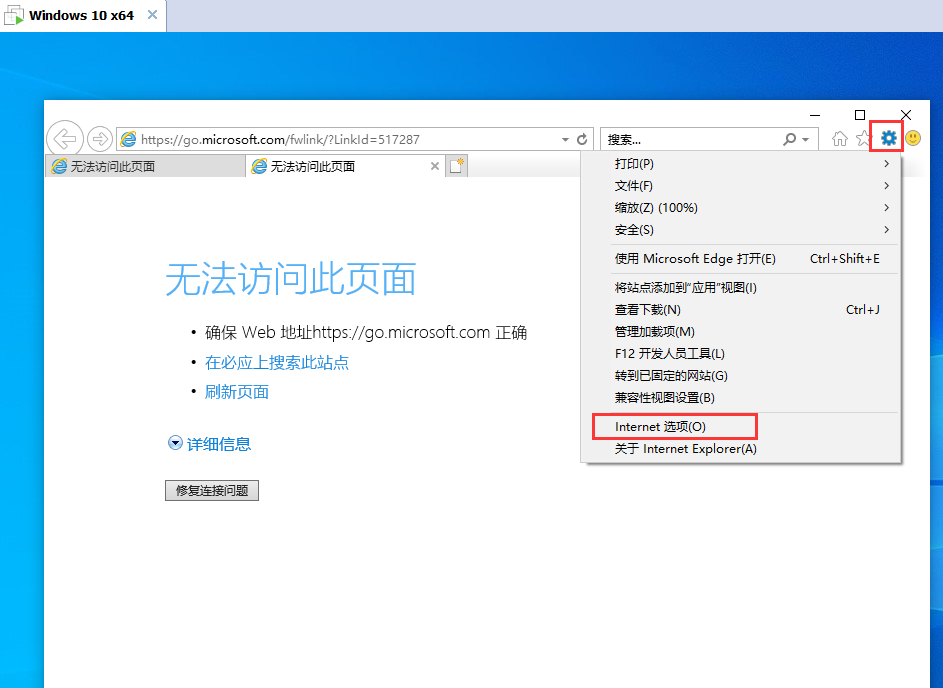
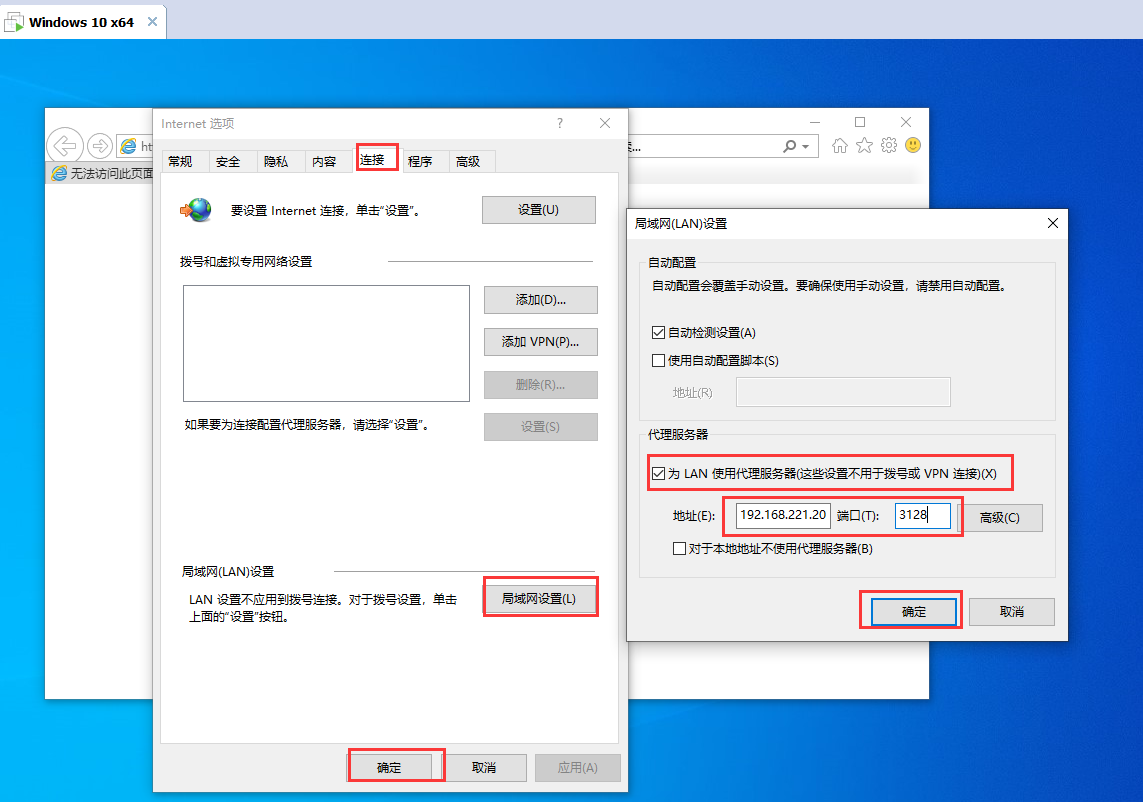
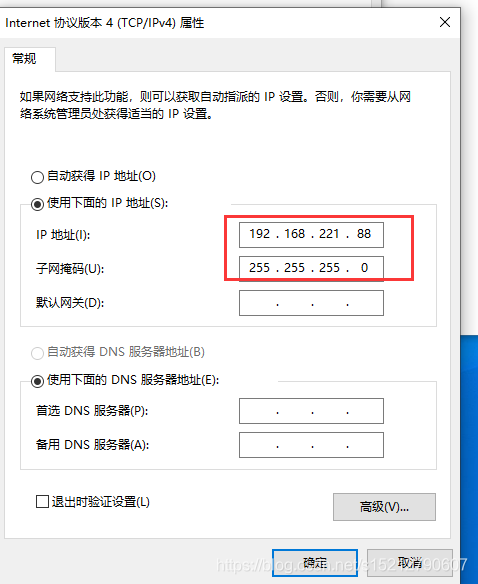
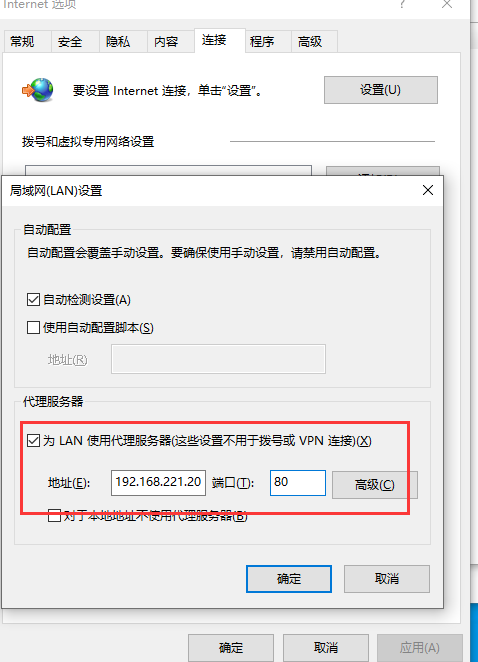
Client (192).168.221.88)
(1)Configure the client first IP address

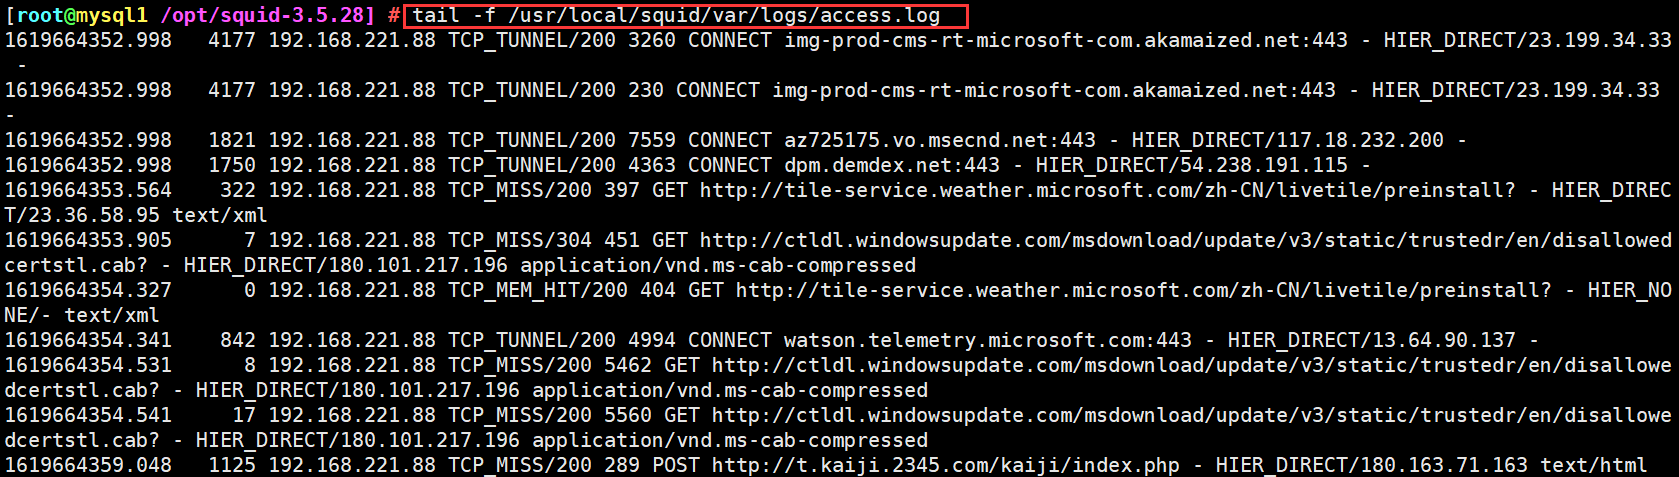
Squid-Server(192.168.221.20)
(2)see squid New record of access log
tail -f /usr/local/squid/var/logs/access.log
Web(192.168.221.30)
(3)see Web1 New record of access log
tail -f /var/log/httpd/access_log

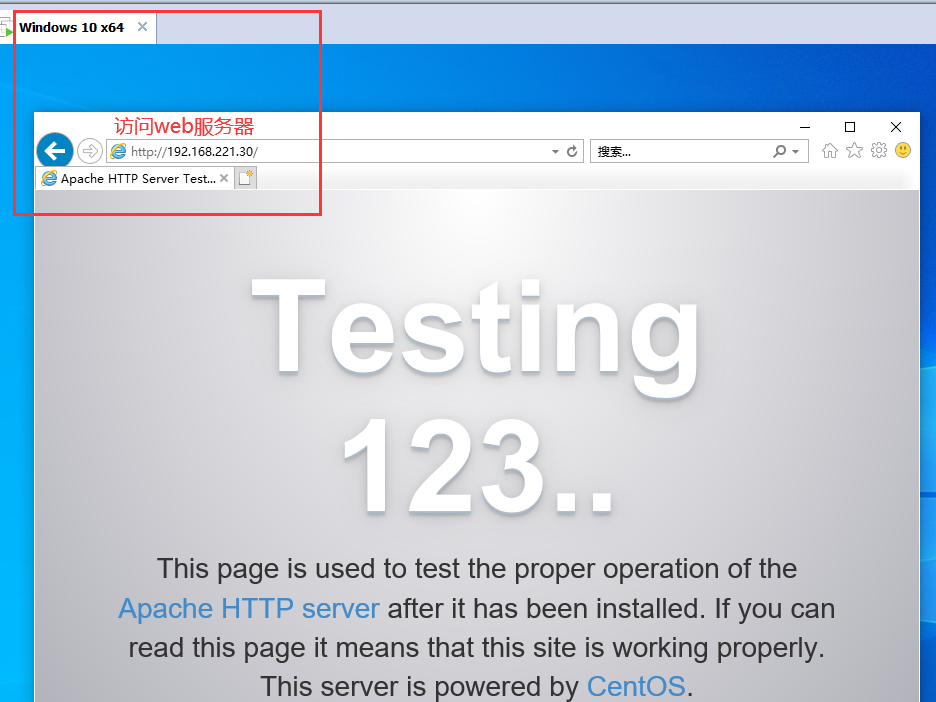
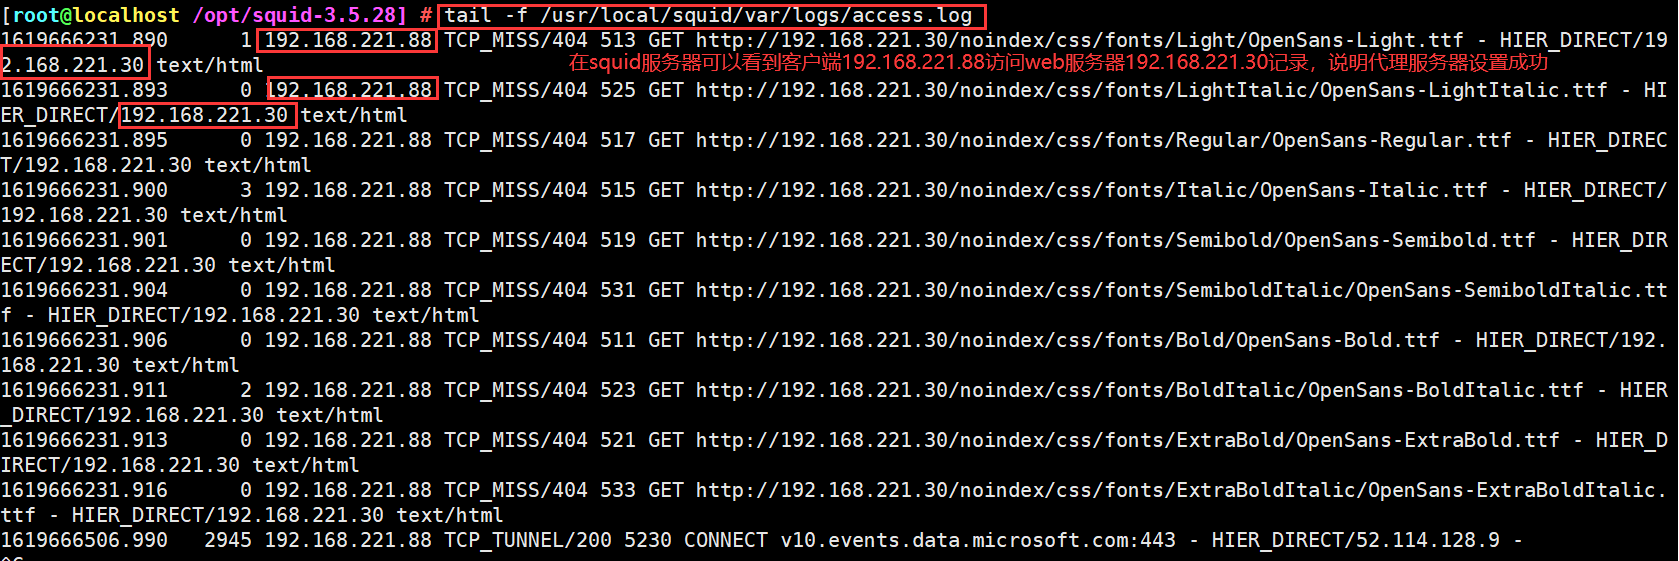
Client (192).168.221.88)
(4)visit web The server
http://192.168.221.30

View again squid New record of access log
tail -f /usr/local/squid/var/logs/access.log
 View again web The new record of the server access log can be viewed at this time
tail -f /var/log/httpd/access_log

4, Build transparent proxy server
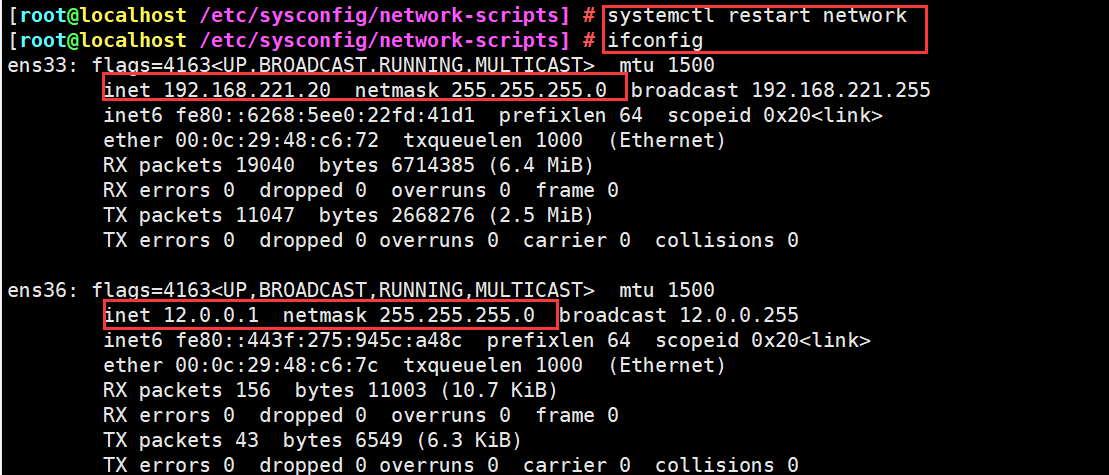
Squid-Server ens33: 192.168.221.20
ens36: 12.0.0.1
Web1 12.0.0.18
Client 192.168.221.88
1. Shut down and add a network card. Note that the two network cards are set on different virtual network cards
Squid server configuration (ens33:192.168.221.20, ens36:12.0.0.1)

2. Then configure the dual network card with the corresponding IP address and subnet mask
cd /etc/sysconfig/network-scripts/
cp ifcfg-ens33 ifcfg-ens36 -p
 Modify the next configuration

systemctl restart network
ifconfig

3. The configuration file has been modified
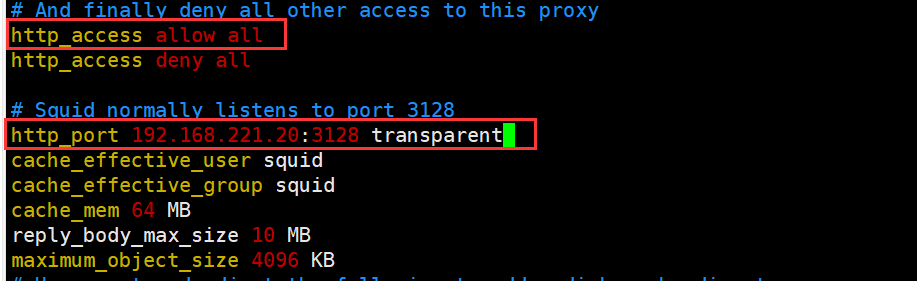
vim /etc/squid.conf
......
http_access allow all
http_access deny all
#------In line 60, modify and add the IP address that provides intranet services, and support the transparent proxy option transparent
http_port 192.168.221.20:3128 transparent

systemctl restart squid
netstat -natp | grep 3128

4. Turn on routing forwarding to realize address forwarding of different network segments in the machine
echo 'net.ipv4.ip_forward = 1' >> /etc/sysctl.conf
sysctl -p

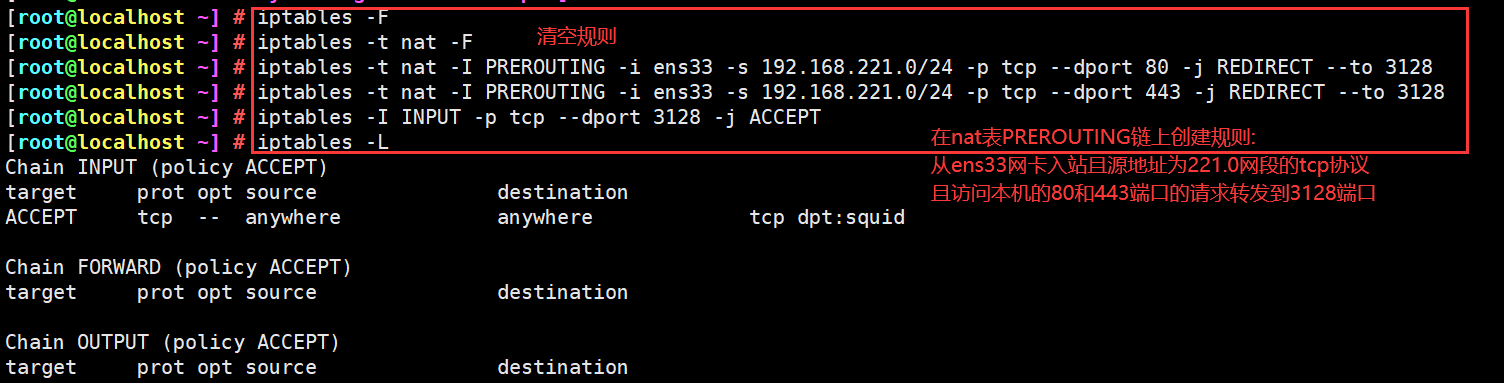
5. Modify firewall rules
iptables -F
iptables -t nat -F
iptables -t nat -I PREROUTING -i ens33 -s 192.168.221.0/24 -p tcp --dport 80 -j REDIRECT --to 3128
iptables -t nat -I PREROUTING -i ens33 -s 192.168.221.0/24 -p tcp --dport 443 -j REDIRECT --to 3128
iptables -I INPUT -p tcp --dport 3128 -j ACCEPT
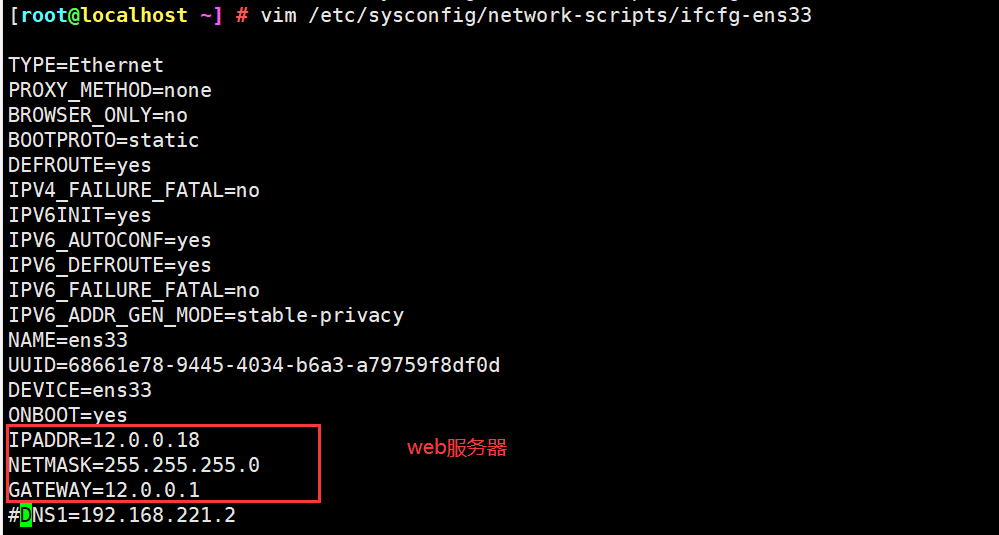
6. Modify Web (12.0.0.18)
systemctl stop firewalld.service
setenforce 0
vim /etc/sysconfig/network-scripts/ifcfg-ens33
systemctl restart network
ifconfig

yum -y install httpd
systemctl restart httpd.service
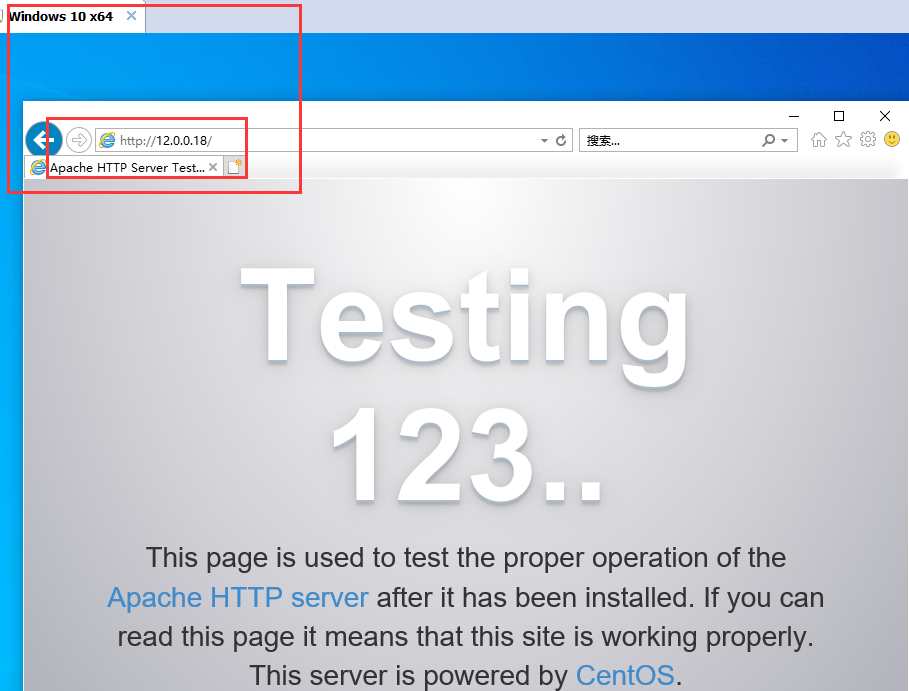
7. Verify
Client 192.168.221.88
 to configure ip,visit http://12.0.0.18

see Squid New record of access log
tail -f /usr/local/squid/var/logs/access.log
#The log on Squid proxy server can detect the client ip and the target website ip visited
 see Web The new record of the access log shows that the external network port of the proxy server replaces the access of the client

tail -f /var/log/httpd/access_log
#It can be seen from the log content that the proxy server external network port 12.0.0.1 accesses the web server 12.0.0.18


5, ACL access control
In the configuration file squid In conf, ACL access control is realized through the following two steps:
Step 1: use acl configuration item to define the conditions to be controlled;
Step 2: via http_ The access configuration item controls "allow" or "deny" access to the defined list.
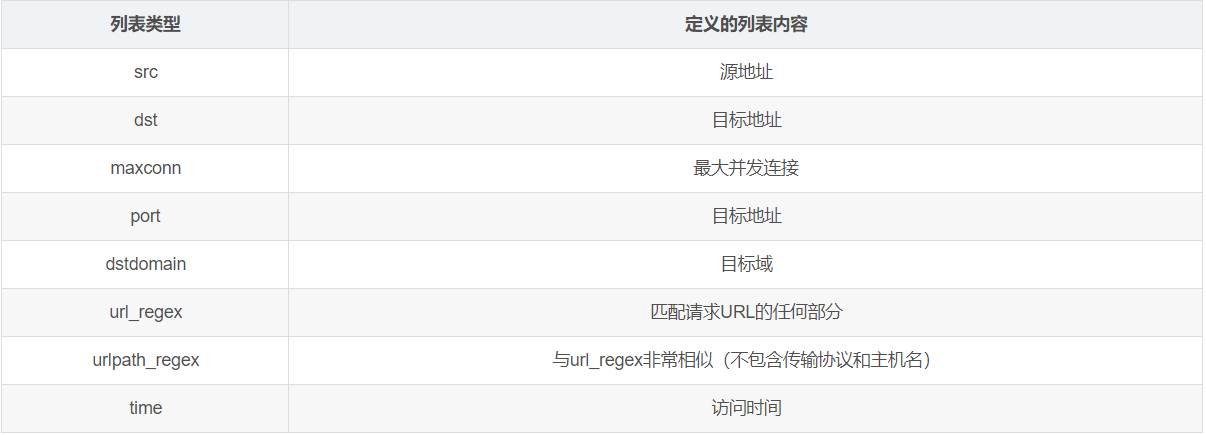
1. Access control list format
Format: acl list name list type list content

experiment
Environment configuration (just use the example of the previous experiment directly)
Squid-Server ens33: 192.168.221.20
ens36: 12.0.0.1
Web-Server 12.0.0.18
Client 192.168.221.88
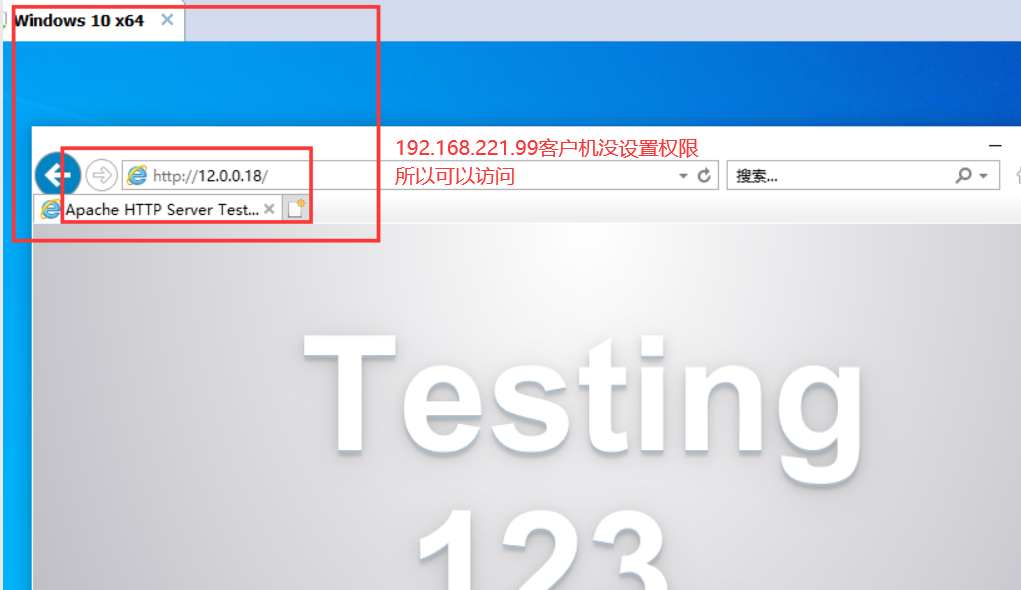
Client 192.168.221.99
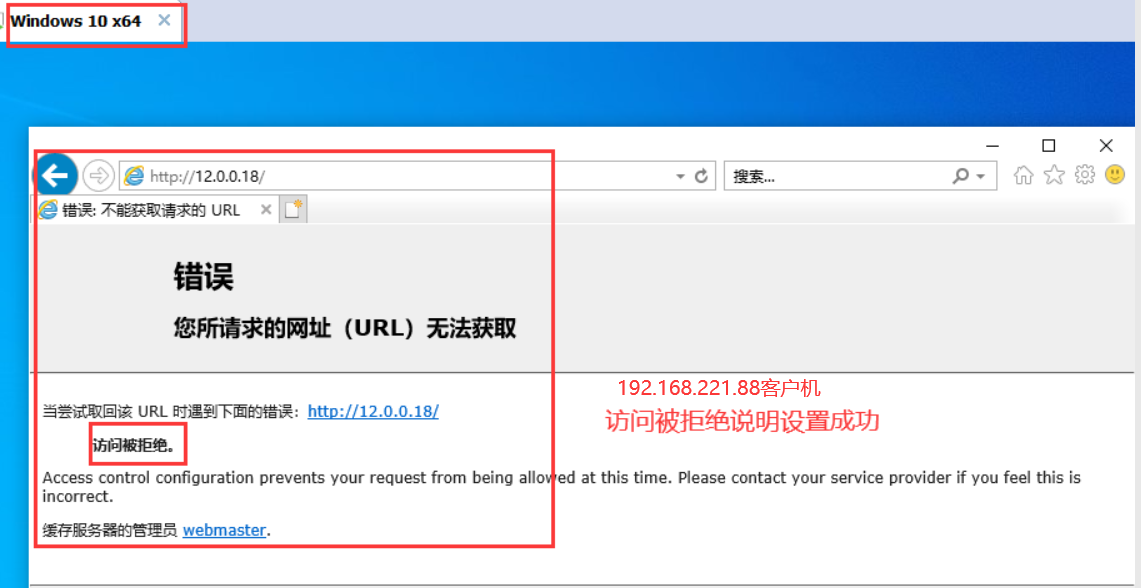
Squid-Server(192.168.221.20)

vim /etc/local.list
192.168.221.88

vim /etc/squid.conf
......
acl localhosttest src  "/etc/local.list"			#Call the contents of the list in the specified file
......
http_access deny localhosttest				#Note that if it is a rejection list, it needs to be placed in http_access allow all

systemctl restart squid
netstat -natp |grep squid


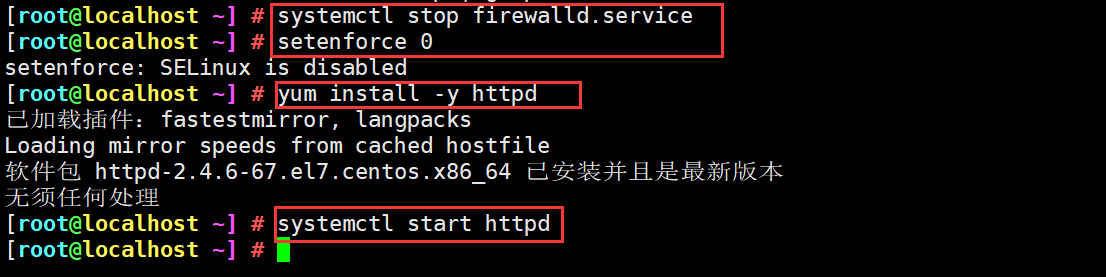
Web-Server(12.0.0.18)
The previous experiment has been installed, so it won't be installed here

systemctl stop firewalld.service
setenforce 0
yum -y install httpd
systemctl start httpd
browser(192.168.221.88)visit Web The server http://12.0.0.18
 browser(192.168.221.99)visit Web The server http://12.0.0.18
6, Squid log analysis
Link: Sarg package
Extraction code: q1mm
1. Install image processing software package
If an error is reported, the dns And gateway are modified back to the original
 Install online source
yum install -y pcre-devel gd gd-devel

mkdir /usr/local/sarg
tar zxvf sarg-2.3.7.tar.gz -C /opt/

cd /opt/sarg-2.3.7

./configure --prefix=/usr/local/sarg --sysconfdir=/etc/sarg --enable-extraprotection

make && make install

#---------./ Module interpretation in configure---------------------------------------
--prefix=/usr/local/sarg
--sysconfdir=/etc/sarg   #The configuration file directory is / usr/local/etc by default
--enable-extraprotection #Additional safety protection

2. Modify profile
vim /etc/sarg/sarg.conf
#---------Line 7, uncomment---------------------------------------------
access_log /usr/local/squid/var/logs/access.log		#Specify access log file
#---------Line 25, uncomment--------------------------------------------
title "Squid User Access Reports"					#Page title
#---------Line 120, uncomment-------------------------------------------
output_dir /var/www/html/squid-reports				#Report output directory
#---------Line 178, uncomment-------------------------------------------
user_ip no											#Display with user name
#---------Line 184, uncomment, modify--------------------------------------
topuser_sort_field connect reverse					#In top sorting, the specified connection times are arranged in descending order, and the ascending order is normal
#---------Line 190, uncomment, modify--------------------------------------
user_sort_field connect reverse						#For user access records, the number of connections is sorted in descending order
#---------Line 206, uncomment, modify--------------------------------------
exclude_hosts /usr/local/sarg/noreport				#Specifies files that are not included in the sorted site list
#---------Line 257, uncomment-------------------------------------------
overwrite_report no									#Overwrite logs with the same name and date
#---------Line 289, uncomment, modify--------------------------------------
mail_utility mailq.postfix							#Send mail report command
#---------Line 434 uncomment and modify---------------------------------------
charset UTF-8										#Specifies the character set UTF-8
#---------Line 518, uncomment-------------------------------------------
weekdays 0-6										#Week cycle of top ranking
#---------Line 525, uncomment-------------------------------------------
hours 0-23											#Time period of top ranking
#---------Line 633, uncomment--------------------------------------------
www_document_root /var/www/html						#Specify page root
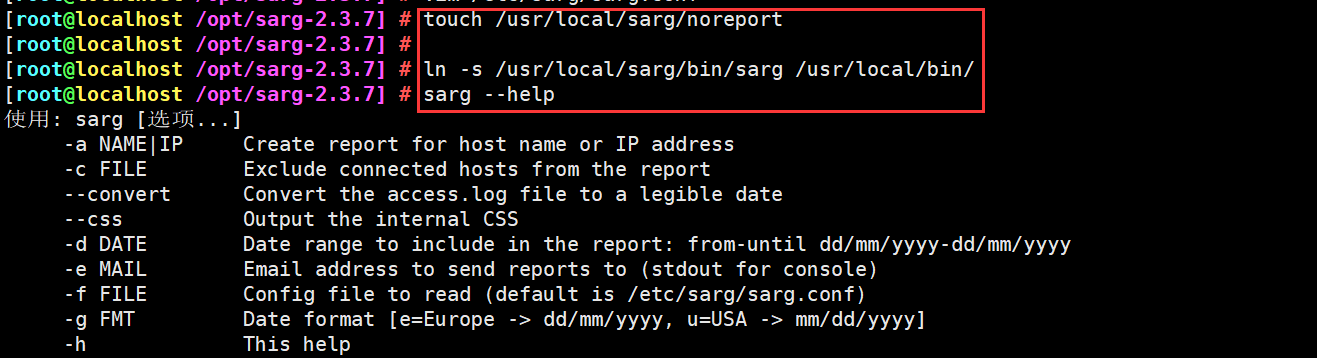
3. Add is not included in the site file, and the added domain name will not be displayed in the sorting
touch /usr/local/sarg/noreport

ln -s /usr/local/sarg/bin/sarg /usr/local/bin/
sarg --help
4. Run and verify
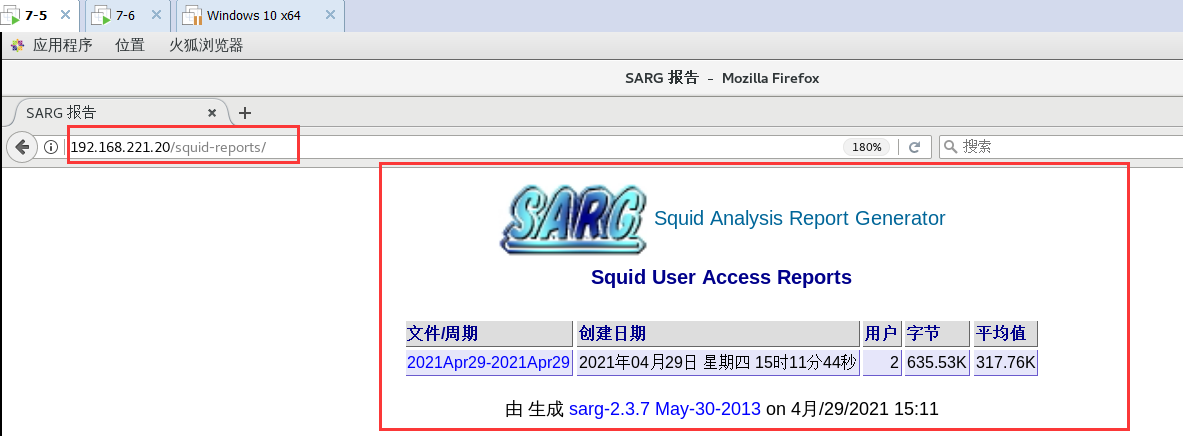
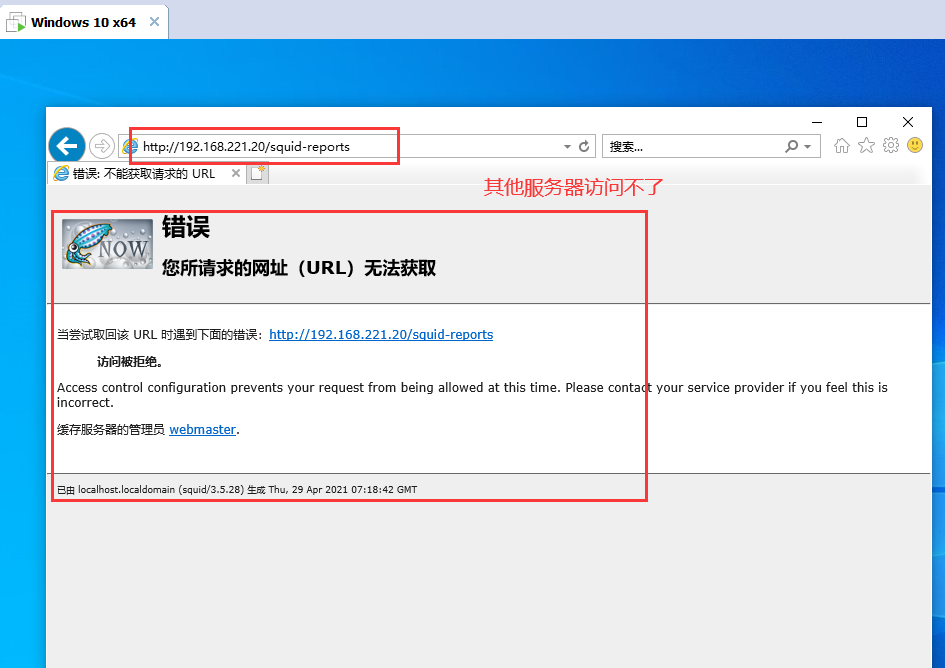
sarg				#Start a record

Install at this time web Server in squid On the server, other client machines cannot access the tested page
yum install httpd -y
systemctl start httpd
 Browser access http://192.168.221.20/squid reports, check the sarg report page


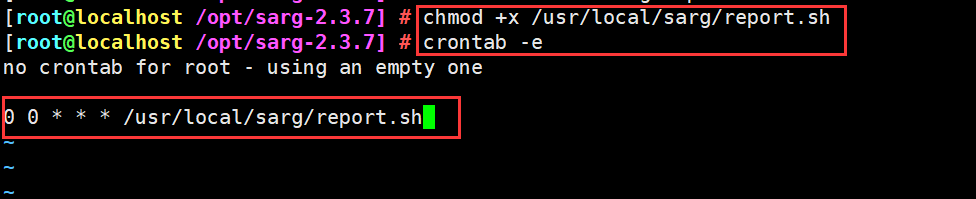
5. Add scheduled tasks, execute and generate reports every day
vim /usr/local/sarg/report.sh
#/bin/bash
#Get current date
TODAY=$(date +%d/%m/%Y)
#Get one week ago today
YESTERDAY=$(date -d "1 day ago" +%d/%m/%Y)
/usr/local/sarg/bin/sarg -l /usr/local/squid/var/logs/access.log -o /var/www/html/squid-reports -z -d $YESTERDAY-$TODAY &> /dev/null
exit 0

chmod +x /usr/local/sarg/report.sh

crontab -e
0 0 * * * /usr/local/sarg/report.sh

7, Squid reverse proxy

experiment
Environment configuration
Squid-Server 192.168.221.20
Web1-Server 192.168.221.100
Web2-Server 192.168.221.110
Client 192.168.221.88
1. Modify profile
Squid-Server(192.168.221.20)

vim /etc/squid.conf
......
#---------Line 60, modify, insert-------------------------------------------
http_port 192.168.221.20:80 accel vhost vport
cache_peer 192.168.221.100 parent 80 0 no-query originserver round-robin max_conn=30 weight=1 name=web1
cache_peer 192.168.221.110 parent 80 0 no-query originserver round-robin max_conn=30 weight=1 name=web2
cache_peer_domain web1 web2 www.test.com


systemctl stop httpd
systemctl restart squid
#---------Explain-----------------------------------------------------
http_port 80 accel vhost vport
#Squid has changed from a cache to a web server, using the acceleration mode. At this time, squid listens to requests on port 80 and binds to the request port (vhost vport) of the web server. When a request arrives at squid, squid does not need to forward the request, but directly takes data from the cache or directly requests data from the bound port.
accel: Reverse proxy acceleration mode
vhost: Support domain name or host name to represent proxy node
vport: support ip And port to represent the proxy node

parent: Represents the parent node
80: HTTP_PORT
0: ICP_PORT
no-query: Do not query, directly obtain data
originserver: Specify source server
round-robin: appoint squid The request is distributed to one of the parent nodes by polling
max_conn: Specify the maximum number of connections
weight: Specify weights
name: Set alias

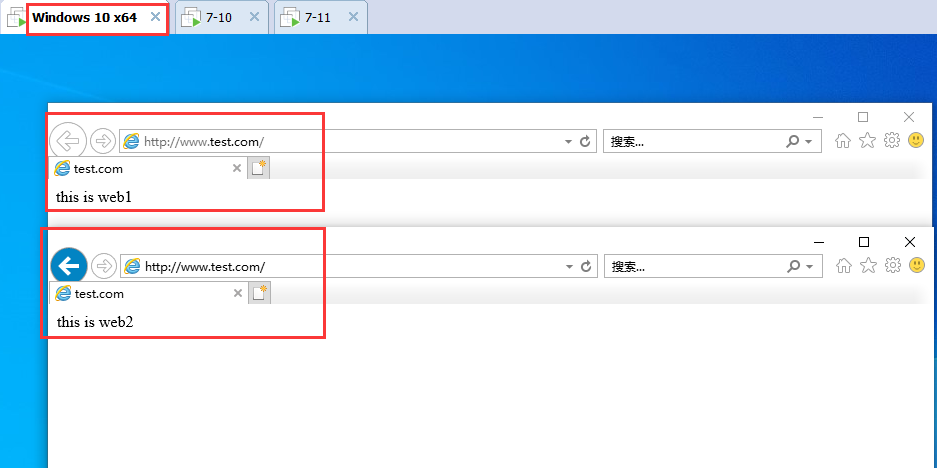
2. Edit web1, 2 page content
web1,web2
systemctl stop firewalld.service
setenforce 0
yum install -y httpd
systemctl start httpd

web1(192.168.221.100)
echo "this is web1" >> /var/www/html/index.html

web1(192.168.221.110)
echo "this is web2" >> /var/www/html/index.html

3. Verify
Client (192).168.221.88)
Modify the domain name mapping of the client
 If the prompt permission is insufficient, it needs to be modified hosts file right
 Right click hosts Files, properties–>security–>edit–>In group or user name( Users)–>Select allow permissions–>OK, the figure is below

#Modify the C:\Windows\System32\drivers\etc\hosts file
192.168.221.20 www.test.com
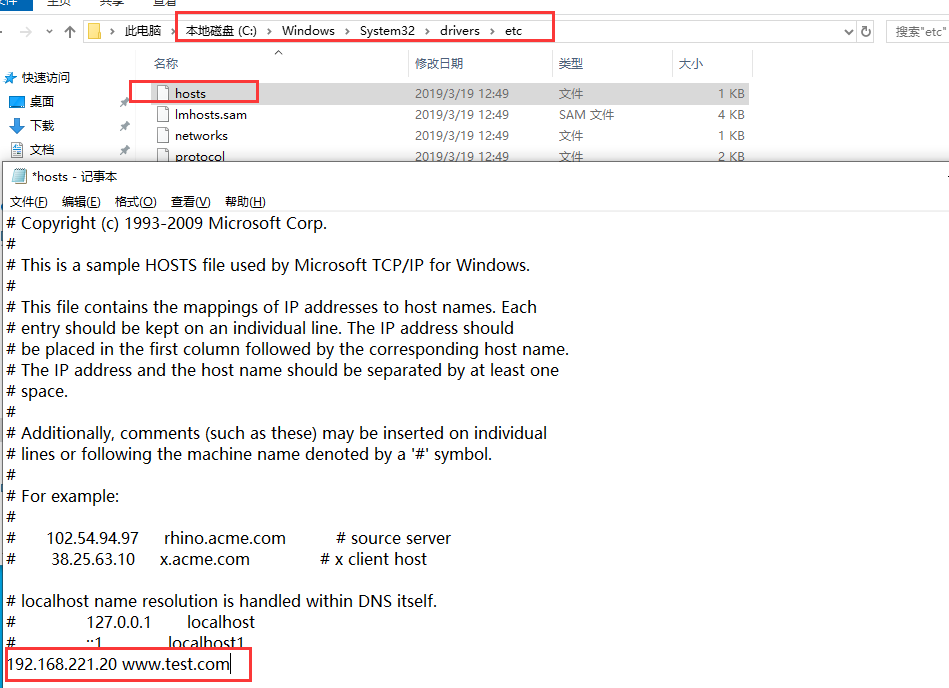

3. Browser access http://www.test.com