Start using OpenCV
1. Compile OpenCV
1.1 configure OpenCV using the command line
OpenCV official website tutorial
The OpenCV official website tutorial is configured by using the command line. It is written in detail. Generally, it can be successful if you operate according to the tutorial. Because the domestic access to GitHub is unstable, it is recommended to use wget to obtain the OpenCV source code compression package, which is faster.
- Predefined variables of CMAKE of OpenCV
cmake
-DOPENCV_EXTRA_MODULES_PATH=../opencv_contrib-master/modules
-DBUILD_NEW_PYTHON_SUPPORT=ON
-DHAVE_opencv_python3=ON
-DPYTHON_DEFAULT_EXECUTABLE=/usr/bin/python3.8

...
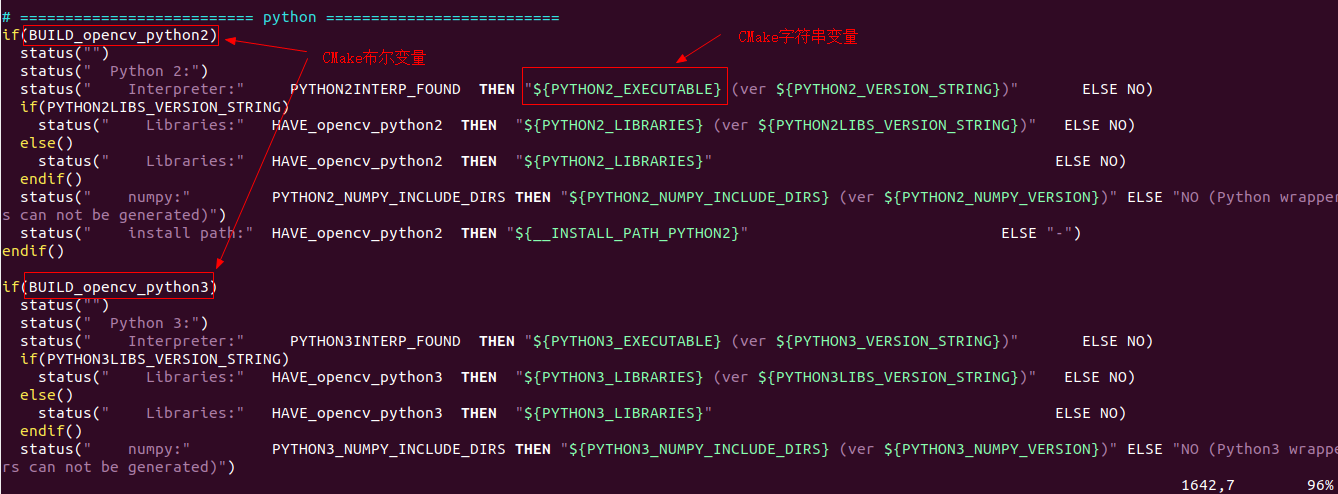
In order to assist OpenCV project compilation, the CMAKE system predefines many variables, as shown above, which are a small part of the predefined variables.
These variables affect the compilation of OpenCV (affect the generated Makefile file). You can find the names and functions of these variables in CMakeLists.txt under the root directory of OpenCV source code. The following are the relevant definition parameters of Python 3:
cmake -DOPENCV_EXTRA_MODULES_PATH=../opencv_contrib-master/modules ../opencv-master
To configure OpenCV from the command line, you can change the value of the cmake variable or add a new cmake variable while executing the cmake command.
For example, we can configure the path value of the numpy module of Python 3 and set Python 3 as the default Python interpreter:
cmake -DBUILD_opencv_python2=OFF -DPYTHON_DEFAULT_EXECUTABLE=/usr/bin/python3.8 -DPYTHON3_NUMPY_INCLUDE_DIRS=/home/fhc/.local/lib/python3.8/site-packages/numpy/core/include -DOPENCV_EXTRA_MODULES_PATH=../opencv_contrib-master/modules ../opencv-master
# Don't compile Python 2 interface
-DBUILD_opencv_python2=OFF
# Set the default Python interpreter to Python 3
-DPYTHON_DEFAULT_EXECUTABLE=/usr/bin/python3.8
# Set the path to the numpy header file of Python 3
-DPYTHON3_NUMPY_INCLUDE_DIRS=/home/fhc/.local/lib/python3.8/site-packages/numpy/core/include
After executing the cmake command, the cmake system will configure the OpenCV compilation options and finally generate a Makefile.
1.2 configuring OpenCV using CMAKE graphical interface
- Start cmake GUI
$ mkdir build && cd build
$ cmake-gui
After executing the cmake GUI command, the following configuration window will pop up:
[the external chain picture transfer fails. The source station may have an anti-theft chain mechanism. It is recommended to save the picture and upload it directly (img-nMSQSfWf-1628413931493)(./img/opencv_cmake_gui.png)]
After configuration, as shown in the following figure:
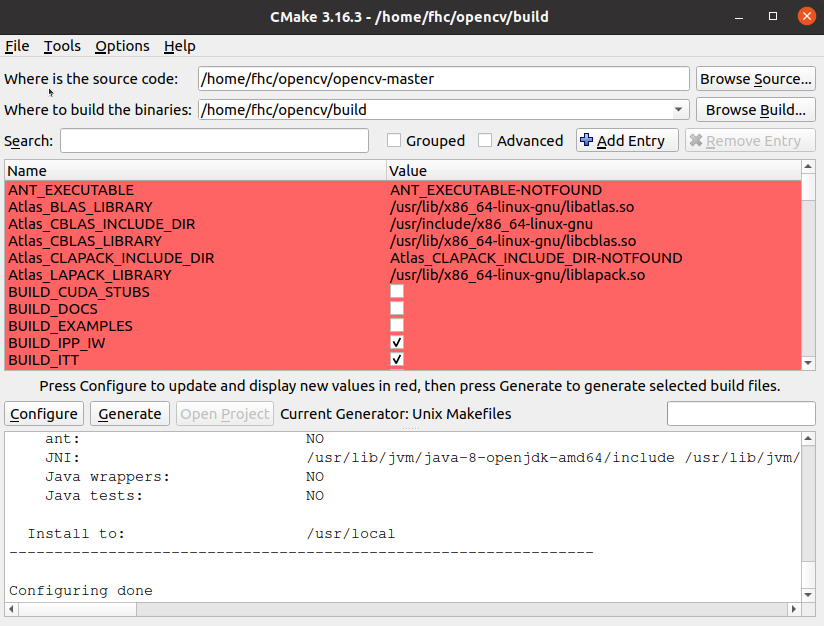
The information in the above interface is cmake GUI. You can read cmakelists in the root directory of OpenCV source code Txt file. Cmakelists is listed here Txt file.
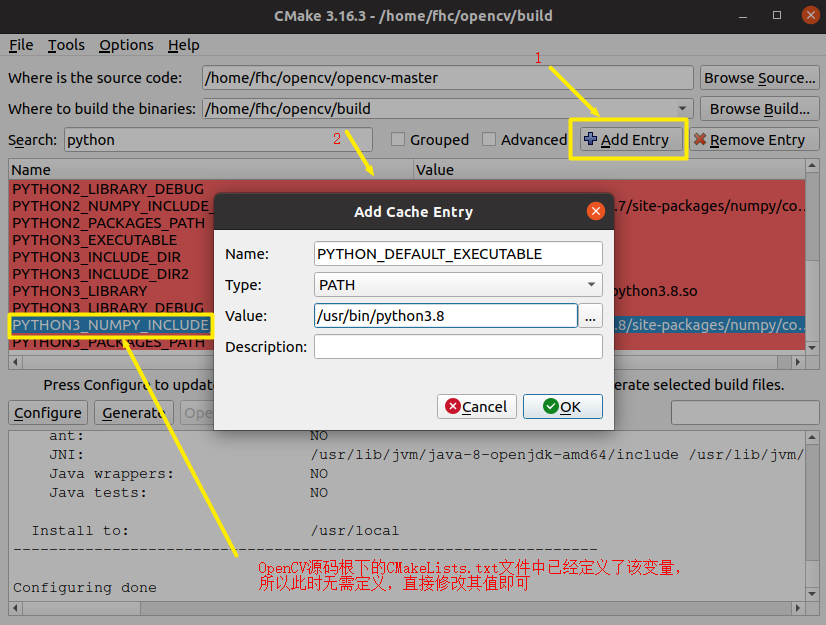
CMakeLists.txt file also refers to other variables, but they are not defined. To use them, we need to add them ourselves.
The red color displayed here is not an error, but a new CMAKE variable after CAMKE configuration. You can see a line of words below the red area:
Press Configure to update and display new values in red
Here, you can modify the variable value of CMAKE, or click the Add Entry button (at the top right of the red area) to add a new CMAKE variable. For example, we can configure the path value of the numpy module of Python 3 and set Python 3 as the default Python interpreter:
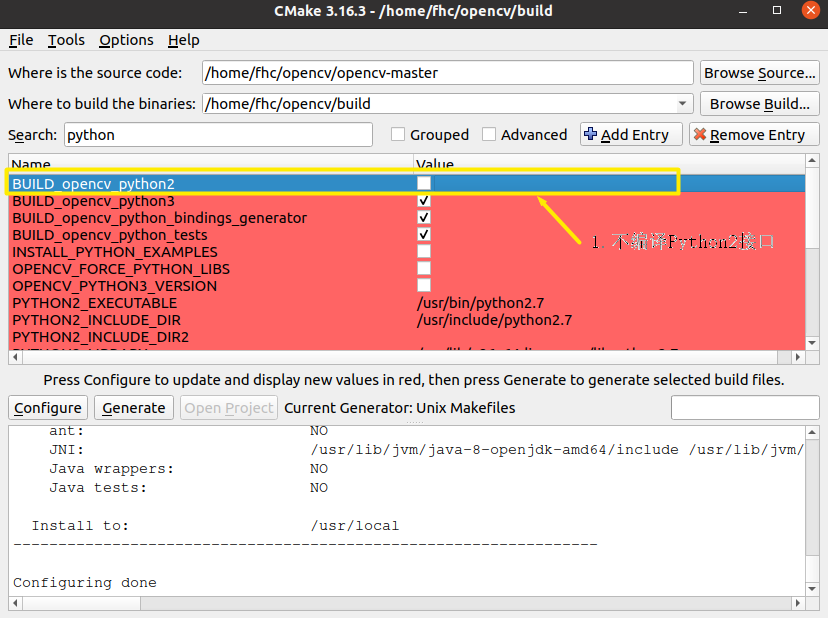
- Don't compile Python 2 interface
Cancel build_ opencv_ The python2 option is selected as shown in the following figure:
- Configure the default Python interpreter to Python 3, and set the numpy path of Python 3
After configuration, click Generate to Generate the Makefile file
1.3 why can the python 3 interface be configured in the above way?
CMAKE is a tool for building OpenCV source code, so how to configure OpenCV source code is, of course, from the analysis of cmakelists Txt file start.
Let's analyze the process of configuring the python 3 interface.
- The root directory of OpenCV source code is cmakelists Txt file
# ========================== python ==========================
if(BUILD_opencv_python2)
  status("")
  status("  Python 2:")

  ...(N lines are omitted here)

endif()

if(BUILD_opencv_python3)
  status("")
  status("  Python 3:")

  ...(N lines are omitted here)

endif()

status("")
status("  Python (for build):"  PYTHON_DEFAULT_AVAILABLE THEN "${PYTHON_DEFAULT_EXECUTABLE}" ELSE NO)
It can be seen that
BUILD_opencv_python2
and
BUILD_opencv_python3
These two CMAKE variables determine whether the Python interface is compiled. When these two variables are true, the corresponding interface will be compiled, otherwise it will not be compiled.
PYTHON_DEFAULT_EXECUTABLE
This CMAKE variable determines the default Python interpreter.
- cmake/OpenCVDetectPython.cmake
if(PYTHON_DEFAULT_EXECUTABLE)
    set(PYTHON_DEFAULT_AVAILABLE "TRUE")
elseif(PYTHON2_EXECUTABLE AND PYTHON2INTERP_FOUND)
    # Use Python 2 as default Python interpreter
    set(PYTHON_DEFAULT_AVAILABLE "TRUE")
    set(PYTHON_DEFAULT_EXECUTABLE "${PYTHON2_EXECUTABLE}")
elseif(PYTHON3_EXECUTABLE AND PYTHON3INTERP_FOUND)
    # Use Python 3 as fallback Python interpreter (if there is no Python 2)
    set(PYTHON_DEFAULT_AVAILABLE "TRUE")
    set(PYTHON_DEFAULT_EXECUTABLE "${PYTHON3_EXECUTABLE}")
endif()
As can be seen from the above, when Python_ DEFAULT_ When executable is not defined, python 2 will take precedence.
1.4 compiling and installing OpenCV
- compile
make -j4
- install
make install
The compilation process is long
2. OpenCV programming
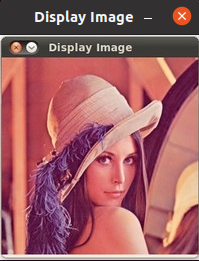
2.1 first OpenCV program
OpenCV official website first routine
Just follow the description on the official website. The source code is posted below to facilitate the experiment:
- DisplayImage.cpp
#include <stdio.h>
#include <opencv2/opencv.hpp>
using namespace cv;
int main(int argc, char** argv )
{
    if ( argc != 2 )
    {
        printf("usage: DisplayImage.out <Image_Path>\n");
        return -1;
    }
    Mat image;
    image = imread( argv[1], 1 );
    if ( !image.data )
    {
        printf("No image data \n");
        return -1;
    }
    namedWindow("Display Image", WINDOW_AUTOSIZE );
    imshow("Display Image", image);
    waitKey(0);
    return 0;
}
- CMakeLists.txt
cmake_minimum_required(VERSION 2.8)
project( DisplayImage )
find_package( OpenCV REQUIRED )
include_directories( ${OpenCV_INCLUDE_DIRS} )
add_executable( DisplayImage DisplayImage.cpp )
target_link_libraries( DisplayImage ${OpenCV_LIBS} )
- Compilation execution
$ mkdir build && cd build
$ cmake ..
$ make
$ wget https://docs.opencv.org/master/GCC_CMake_Example_Tutorial.jpg
$ ./DisplayImage GCC_CMake_Example_Tutorial.jpg
2.2 CMakeLists.txt interpretation
# cmake needs this line
cmake_minimum_required(VERSION 2.8)

# Define project name
project(opencvTest)

# Find OpenCV, you may need to set OpenCV_DIR variable
# to the absolute path to the directory containing OpenCVConfig.cmake file
# via the command line or GUI
find_package(OpenCV REQUIRED)

# If the package has been found, several variables will
# be set, you can find the full list with descriptions
# in the OpenCVConfig.cmake file.
# Print some message showing some of them
message(STATUS "OpenCV library status:")
message(STATUS "version: ${OpenCV_VERSION}")
message(STATUS "libraries: ${OpenCV_LIBS}")
message(STATUS "include path: ${OpenCV_INCLUDE_DIRS}")

# Add OpenCV headers location to your include paths
include_directories(${OpenCV_INCLUDE_DIRS})

# Declare the executable target built from your sources
add_executable(main main.cpp)

# Link your application with OpenCV libraries
target_link_libraries(main ${OpenCV_LIBS})
More interesting content, please pay attention to WeChat official account edge Intelligence Laboratory.