1. Parent child project creation and aggregation project
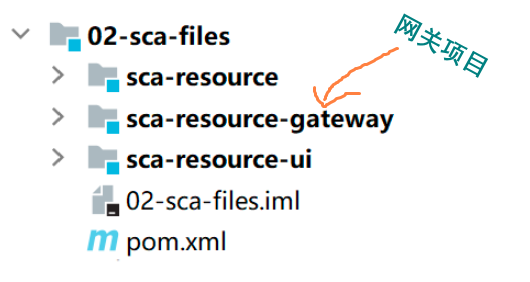
1.1 engineering structure
Function: simulate the connection test of front and rear ends through parent-child projects
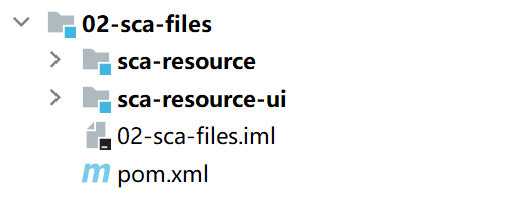
Note: SCA resource project stores back-end files, and SCA resource UI project stores front-end files
1.2 parent child aggregation project
1.2. 1. Create parent project

1.2. 2. Configuration dependency
 <dependencyManagement>
        <dependencies>
            <dependency>
                <groupId>org.springframework.boot</groupId>
                <artifactId>spring-boot-dependencies</artifactId>
                <version>2.3.2.RELEASE</version>
                <type>pom</type>
                <scope>import</scope>
            </dependency>
            <dependency>
                <groupId>org.springframework.cloud</groupId>
                <artifactId>spring-cloud-dependencies</artifactId>
                <version>Hoxton.SR9</version>
                <type>pom</type>
                <scope>import</scope>
            </dependency>
            <dependency>
                <groupId>com.alibaba.cloud</groupId>
                <artifactId>spring-cloud-alibaba-dependencies</artifactId>
                <version>2.2.6.RELEASE</version>
                <type>pom</type>
                <scope>import</scope>
            </dependency>
        </dependencies>
    </dependencyManagement>
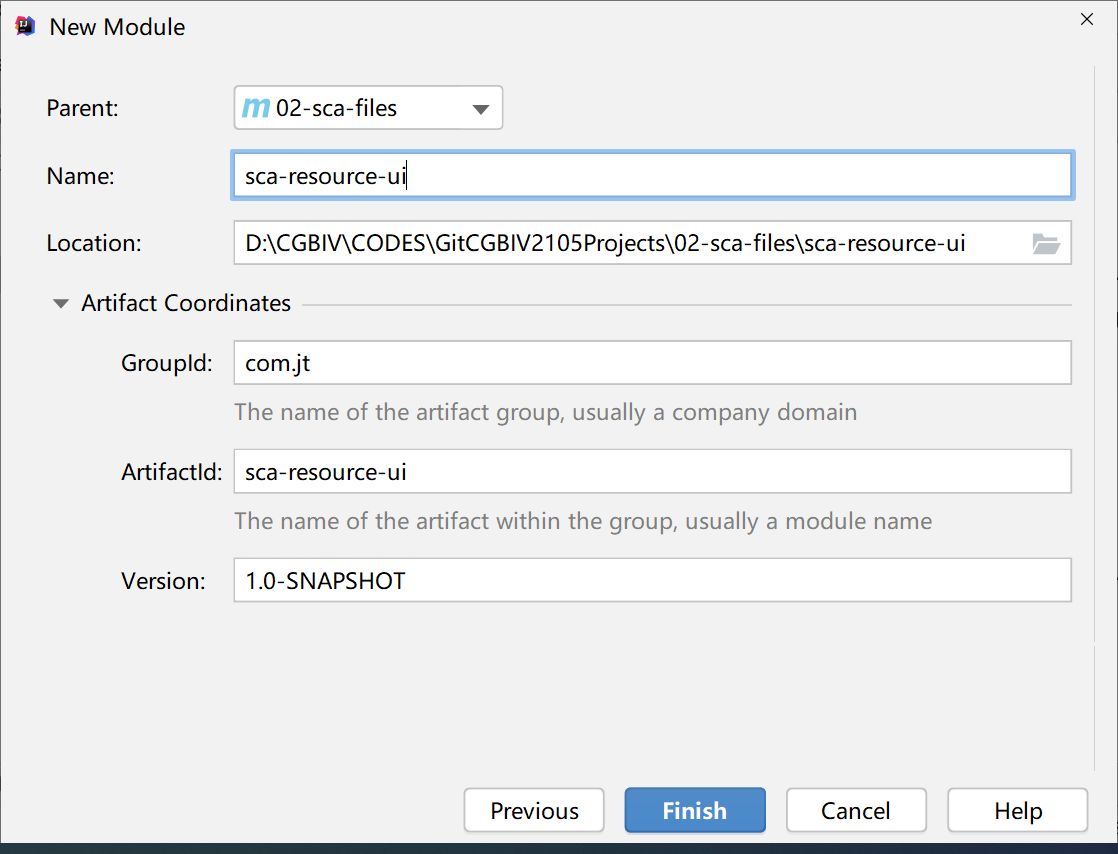
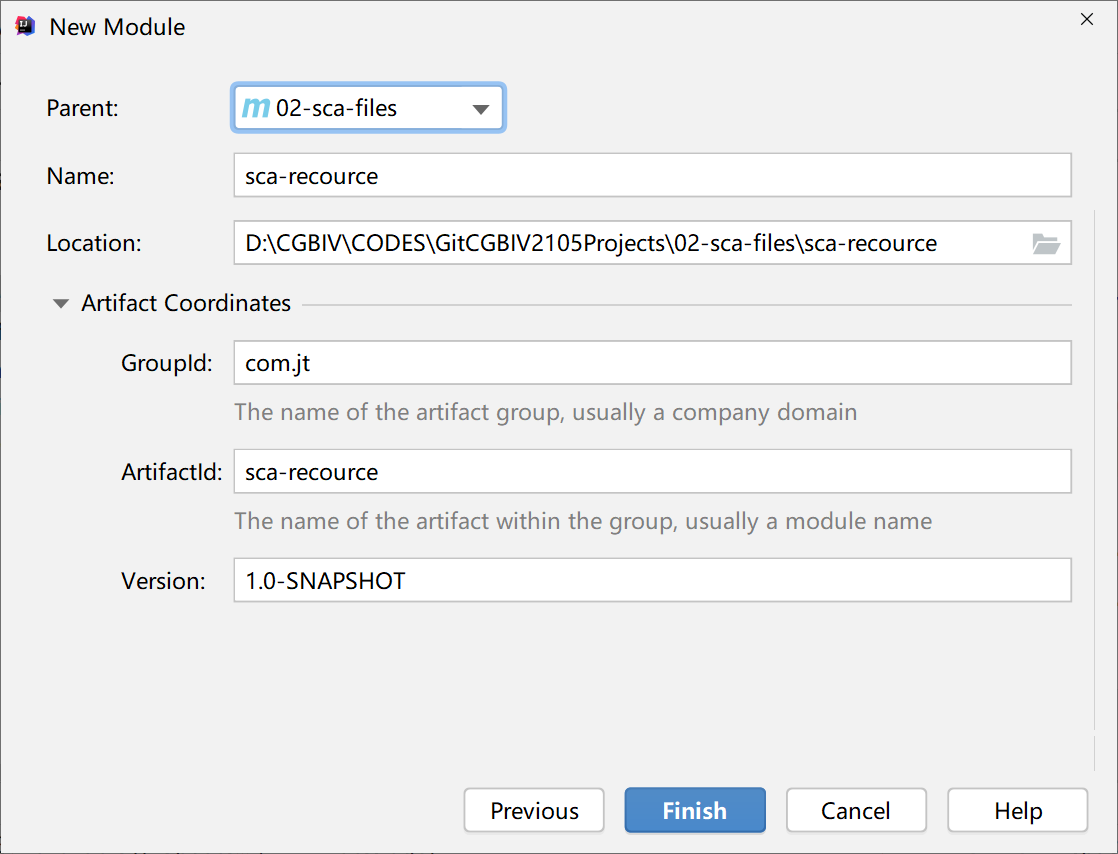
1.2. 3. Create sub project
Front end analog Ui
Back end simulation SSM
1.2. 4. Configuration dependency
Front end (client) configuration dependency
<dependency>
    <groupId>org.springframework.boot</groupId>
    <artifactId>spring-boot-starter-web</artifactId>
</dependency>
Backend (resource side) configuration dependency
       <!--Spring Boot Web (service-built-in tomcat)-->
        <dependency>
            <groupId>org.springframework.boot</groupId>
            <artifactId>spring-boot-starter-web</artifactId>
        </dependency>
        <!--Nacos Discovery (Service registration discovery)-->
        <dependency>
            <groupId>com.alibaba.cloud</groupId>
            <artifactId>spring-cloud-starter-alibaba-nacos-discovery</artifactId>
        </dependency>
        <!--Nacos Config (Configuration center)-->
        <dependency>
            <groupId>com.alibaba.cloud</groupId>
            <artifactId>spring-cloud-starter-alibaba-nacos-config</artifactId>
        </dependency>
        <!--Sentinel (Traffic guard-Current limiting and fusing)-->
        <dependency>
            <groupId>com.alibaba.cloud</groupId>
            <artifactId>spring-cloud-starter-alibaba-sentinel</artifactId>
        </dependency>
        <!--Spring Boot monitor-->
        <dependency>
            <groupId>org.springframework.boot</groupId>
            <artifactId>spring-boot-starter-actuator</artifactId>
        </dependency>
        <!--lombok-->
        <dependency>
            <groupId>org.projectlombok</groupId>
            <artifactId>lombok</artifactId>
            <version>1.18.20</version>
            <scope>provided</scope>
        </dependency>
version control
<properties>
        <maven.compiler.source>8</maven.compiler.source>
        <maven.compiler.target>8</maven.compiler.target>
</properties>
Note: after adding this annotation, the compiled version of idea becomes jdk8
1.2. 5. Write resource file
1. Service initialization configuration (backend configuration, configuration file upload path)
server:
  port: 8881
spring:
  application:
    name: sca-resource
  resources: #Define the path to the uploaded resource
    static-locations: file:d:/uploads  #Static resource path (resources originally stored in the resources/static directory can be stored in this directory)
  cloud:
    nacos:
      discovery:
        server-addr: localhost:8848
      config:
        server-addr: localhost:8848
jt:
  resource:
      path: d:/uploads  #The root directory where the design upload file is stored (to be written to the configuration file later)
      host: http://localhost:8881 / # define the access server corresponding to the uploaded file
2. Startup class
Back end file upload
@SpringBootApplication
public class FileApplication {
    public static void main(String[] args) {
        SpringApplication.run(FileApplication.class, args);
    }
}
Front end startup resources
@SpringBootApplication
public class ClientApplication {
    public static void main(String[] args) {
        SpringApplication.run(ClientApplication .class, args);
    }
}
1.3 knowledge points related to aggregation Engineering
1.3. 1. Concept of aggregation
It is generally used for sub module development, and finally packaged and released as a whole
Maven Project runs independently
Maven Module cannot run independently
1.3. 2. Polymerization engineering development steps
1. The root project is a pom project.
2. Sub module: Maven Module
3. The corresponding resources are written in the sub module, such as the three-tier architecture of web pages in ui resources and back-end resources
Note: when aggregating and packaging (install), select the parent project for aggregation
Publish to the Tomcat runtime (tomcat7:run), and select the web project to publish and run
1.3. 3. Difference between engineering aggregation and inheritance
Aggregation is to facilitate rapid component projects. For the aggregation module, it knows which modules are aggregated, but those modules do not know the existence of the aggregation module
Inheritance is to eliminate duplicate configurations. For the parent POM of inheritance relationship, it does not know which sub modules inherit from it, but the sub module must know what its parent POM is
2. Resource items and configuration files
2.1 front end resources
<!DOCTYPE html>
<html lang="en">
<head>
    <meta charset="UTF-8">
    <title>File upload demo</title>
    <script src="https://unpkg.com/axios/dist/axios.min.js"></script>
</head>
<body>
<form id="fileForm" method="post" enctype="multipart/form-data" onsubmit="return doUpload()">
    <div>
        <label>Upload file
            <input id="uploadFile" type="file" name="uploadFile">
        </label>
    </div>
    <button type="submit">Upload file</button>
</form>
</body>
<script>
    //Form submission event for jquery code
    function doUpload(){
        //Get all pictures selected by the user (get array)
        let files=document.getElementById("uploadFile").files;
        if(files.length>0){
            //Get the unique picture selected by the user (take it out of the array)
            let file=files[0];
            //Start uploading this picture
            //Since there are many uploaded codes, you do not want to interfere with other codes here, so define a method call
            upload(file);
        }
        //Block form submission effect
        return false;
    };
    // Method of uploading file to server
    function upload(file){
        //Define a form
        let form=new FormData();
        //Add file to form
        form.append("uploadFile",file);
        //Asynchronous commit
        let url="http://localhost:8881/resource/upload/";
        axios.post(url,form)
             .then(function (response){
                 alert("upload ok")
                 console.log(response.data);
             })
             .catch(function (e){//Execute catch code block on failure
                 console.log(e);
         })
    }
</script>
</html>
2.2 back end resources
2.2. 1. Control layer
@Slf4j
@RestController
@RequestMapping("/resource/")
public class ResourceController {
      //When @ Slf4J is added to the class, you don't have to create the following log objects yourself
//    private static final Logger log=
//            LoggerFactory.getLogger(ResourceController.class);

     @Value("${jt.resource.path}")
     private String resourcePath;//="d:/uploads/";
     @Value("${jt.resource.host}")
     private String resourceHost;//="http://localhost:8881/";

     @PostMapping("/upload/")
     public String uploadFile(MultipartFile uploadFile) throws IOException {
         //1. Create file storage directory (create by time - yyyy/MM/dd)
         //1.1 get a directory of the current time
         String dateDir = DateTimeFormatter.ofPattern("yyyy/MM/dd")
                 .format(LocalDate.now());
         //1.2 build directory file object
         File uploadFileDir=new File(resourcePath,dateDir);
         if(!uploadFileDir.exists())uploadFileDir.mkdirs();
         //2. Name the document (try not to repeat it)
         //2.1 obtain the suffix of the original document
         String originalFilename=uploadFile.getOriginalFilename();
         String ext = originalFilename.substring(
                 originalFilename.lastIndexOf("."));
         //2.2 build a new file name
         String newFilePrefix=UUID.randomUUID().toString();
         String newFileName=newFilePrefix+ext;
         //3. Start file upload
         //3.1 build a new file object and point to the final address of the actually uploaded file
         File file=new File(uploadFileDir,newFileName);
         //3.2 upload files (write file data to the designated service location)
         uploadFile.transferTo(file);
         String fileRealPath=resourceHost+dateDir+"/"+newFileName;
         log.debug("fileRealPath {}",fileRealPath);
         //Can I write the uploaded file information to the database later?
         return fileRealPath;
     }
}
Note: the control layer writes the file upload business, specifies the file upload path, and constructs a new file name
2.2. 2 cross domain configuration implementation
When accessing the file upload service through the client project, we need to conduct cross domain configuration, such as:
@Configuration
public class CorsFilterConfig {
    @Bean
    public FilterRegistrationBean<CorsFilter> filterFilterRegistrationBean(){
        //1. Configure this filter (cross domain settings - url,method)
        UrlBasedCorsConfigurationSource configSource=new UrlBasedCorsConfigurationSource();
        CorsConfiguration config=new CorsConfiguration();
         //Which request headers are allowed to cross domains
        config.addAllowedHeader("*");
        //Which method types are allowed to cross domain get post delete put
        config.addAllowedMethod("*");
        // Which request sources (IP: ports) are allowed to cross domains
        config.addAllowedOrigin("*");
        //Whether to allow carrying cookie s across domains
        config.setAllowCredentials(true);
        //2. Register the filter and set its priority
        configSource.registerCorsConfiguration("/**", config);
        FilterRegistrationBean<CorsFilter> fBean= new FilterRegistrationBean(new CorsFilter(configSource));
        fBean.setOrder(Ordered.HIGHEST_PRECEDENCE);
        return fBean;
    }
Note: this item can also be configured in yml
3. Document item test
3.1 specific process
Step 1: start nacos
Step 2: start the SCA resource service
Step 3: start the SCA resource UI service
Step 4: open the browser for access test, for example:
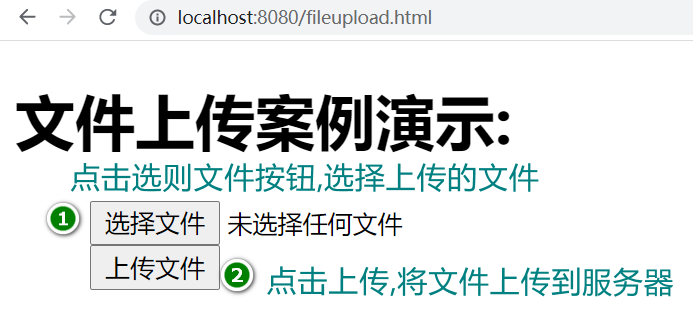
3.2 possible errors in file upload
3.3 process call summary
4.API gateway engineering practice
4.1 General
API gateway is the entrance for external resources to access the internal resources of the service, so the file upload request should first request the gateway service, and then be forwarded by the gateway service to the specific resource service.
4.2 service invocation architecture

4.3 project structure design
4.4. Create Gateway project and initialize
Step 1: create an SCA resource Gateway project,
Step 2: add project dependencies,
 <dependency>
        <groupId>org.springframework.cloud</groupId>
        <artifactId>spring-cloud-starter-gateway</artifactId>
    </dependency>
    <dependency>
        <groupId>com.alibaba.cloud</groupId>
        <artifactId>spring-cloud-starter-alibaba-nacos-discovery</artifactId>
    </dependency>
    <dependency>
        <groupId>com.alibaba.cloud</groupId>
        <artifactId>spring-cloud-starter-alibaba-nacos-config</artifactId>
    </dependency>
Step 3: create the configuration file bootstrap XML, and then initial configuration
server:
  port: 9000
spring:
  application:
    name: sca-resource-gateway
  cloud:
    nacos:
      discovery:
        server-addr: localhost:8848
      config:
        server-addr: localhost:8848
        file-extension: yml
    gateway:
      discovery:
        locator:
          enabled: true
      routes:
        - id: router01
          uri: lb://sca-resource
          predicates:
            - Path=/sca/resource/upload/**
          filters:
            - StripPrefix=1
Step 4: build the project startup class and start the service to check whether it is correct
4.5 gateway cross domain configuration
1.java file implementation
//@Configuration
public class CorsFilterConfig {
    @Bean
    public CorsWebFilter corsWebFilter(){
        //1. Build a cross domain configuration based on url
        UrlBasedCorsConfigurationSource source= new UrlBasedCorsConfigurationSource();
        //2. Cross domain configuration
        CorsConfiguration config=new CorsConfiguration();
        //2.1 allow all IP: ports to cross domain
        config.addAllowedOrigin("*");
        //2.2 allow all request headers to cross domains
        config.addAllowedHeader("*");
        //2.3 allow all request methods to cross domains: get,post
        config.addAllowedMethod("*");
        //2.4 it is allowed to carry valid cookie s across domains
        config.setAllowCredentials(true);
        source.registerCorsConfiguration("/**",config);
        return new CorsWebFilter(source);
    }
}
2. Configuration file implementation
spring:
  cloud:
    gateway:
      globalcors: #Cross domain configuration
        corsConfigurations:
          '[/**]':
            allowedOrigins: "*"
            allowedHeaders: "*"
            allowedMethods: "*"
            allowCredentials: true
4.6 start the project for service access
First open the gateway, resource server, client engineering service (UI), and then modify fileUpload The url to access the resource server in the HTML file, for example
let url="http://localhost:9999/nacos/resource/upload/";
Next, perform an access test, for example:
