1. First, introduce some common geometric elements
The CGGeometry class defines the structure of geometric elements and functions that manipulate them.
- CGFloat: basic type of floating point value
- CGPoint: represents a point in a 2D coordinate system
- CGSize: indicates the width and height of a rectangle
- CGRect: indicates the position and size of a rectangle
typedef float CGFloat;// 32-bit
typedef double CGFloat;// 64-bit

struct CGPoint {
    CGFloat x;
    CGFloat y;
};
typedef struct CGPoint CGPoint;

struct CGSize {
    CGFloat width;
    CGFloat height;
};
typedef struct CGSize CGSize;

struct CGRect {
    CGPoint origin;
    CGSize size;
};
typedef struct CGRect CGRect;
Note: the height and width of the CGRect data structure can be negative. For example, the origin of a rectangle is [0.0, 0.0], and the size is [10.0, 10.0]. This rectangle is exactly the same as a rectangle whose origin is [10.0, 10.0] and size is [- 10.0, - 10.0].
- CGPointMake
- CGRectMake
- CGSizeMake
CGPoint CGPointMake (
   CGFloat x,
   CGFloat y
);

CGSize CGSizeMake (
   CGFloat width,
   CGFloat height
);

CGRect CGRectMake (
   CGFloat x,
   CGFloat y,
   CGFloat width,
   CGFloat height
);
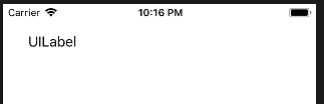
2. Use CGRect to declare a UILabel
The operation results are as follows:override func viewDidLoad() { super.viewDidLoad() //Set label x coordinate: 30, y coordinate: 30, length: 100, width: 30 let label = UILabel(frame: CGRect(x: 30, y: 30, width: 100, height: 30)) //Set the text of the label label.text = "UILabel" //Set the color of the text label.textColor = UIColor.black //Add a label to the subview of the view self.view.addSubview(label) }
Define UILabel
- Set text color, background color, and font
label.textColor = UIColor.white//Set the color of the text
label.backgroundColor = UIColor.blue//Set background color
label.font = UIFont(name:"Zapfino", size:10)//Set font
4. Set text alignment
label.textAlignment = .left//Align left
label.textAlignment = .right//Align right
label.textAlignment = .center//Align Center
label.textAlignment = .justified//Align the last line naturally
label.textAlignment = .natural//Default alignment script
5. Set text shadow
label.shadowColor = UIColor.gray  //Gray shadow
label.shadowOffset = CGSize(width:1.5, height:1.5)  //Shadow offset
6. Omitting when the text is too long
label.lineBreakMode = .byTruncatingTail  //Hide tail and show ellipsis
label.lineBreakMode = .byTruncatingMiddle  //Hide middle section and show ellipsis
label.lineBreakMode = .byTruncatingHead  //Hide the head and show ellipsis
label.lineBreakMode = .byClipping  //Don't show ellipsis if extra parts are cut off
7. Set text size adaptive label width
//When the text exceeds the label width, the text is automatically resized so that it is not truncated
label.adjustsFontSizeToFitWidth = true
8. Set label to display multiple lines
//Display two lines of text (only one line is displayed by default, set to 0 to indicate no line limit)
label.numberOfLines = 2
9. Set text highlight and highlight color
label.isHighlighted = true//Set text highlighting
label.highlightedTextColor = UIColor.red//Set text highlight color
10. Use of rich text
//Rich text settings
let attributeString = NSMutableAttributedString(string:"welcome to swift")
//6 characters from text 0 Helvetica Neue bold, 16
attributeString.addAttribute(NSAttributedStringKey.font, value: UIFont(name: "HelveticaNeue-Bold", size: 16)!, range: NSMakeRange(0,6))
//Set font color
attributeString.addAttribute(NSAttributedStringKey.foregroundColor, value: UIColor.blue, range: NSMakeRange(0, 3))
//Set text background color
attributeString.addAttribute(NSAttributedStringKey.backgroundColor, value: UIColor.green, range: NSMakeRange(3,3))
        label.attributedText = attributeString

Rich text