1, Foreword
- This article will explore TimelineView in detail, starting with the most common usage. However, I think the greatest potential lies in the combination of TimelineView and the existing animation we already know. With a little creativity, this combination will let us finally make the animation of "key frame class".

2, Components of TimelineView
- TimelineView is a container view that re evaluates its contents according to the frequency determined by the relevant scheduler. TimelineView receives a scheduler as a parameter. Use a scheduler that triggers every half second as follows:
TimelineView(.periodic(from: .now, by: 0.5)) { timeline in

    ViewToEvaluatePeriodically()

}
- Another parameter is to receive the content closure of TimelineView. The context parameter looks like this:
struct Context {
    let cadence: Cadence
    let date: Date

    enum Cadence: Comparable {
        case live
        case seconds
        case minutes
    }
}
- Cadence is an enum, which can be used to determine what content is displayed in the view. The values can be live, seconds, minutes, etc. As a reminder, avoid displaying information unrelated to rhythm. A typical example is to avoid displaying milliseconds on the clock of a scheduler with a rhythm of seconds or minutes.
- Note that Cadence is not something that can be changed, but something that reflects the state of the device. For example, on watchOS, the rhythm will slow down when the wrist drops.
3, How TimelineView works
- As shown below, there are two randomly varying emoticons. The only difference between them is that one is written in the content closure and the other is placed in a separate view to improve readability:
struct ManyFaces: View {
    static let emoji = ["😀", "😬", "😄", "🙂", "😗", "🤓", "😏", "😕", "😟", "😎", "😜", "😍", "🤪"]

    var body: some View {
        TimelineView(.periodic(from: .now, by: 0.2)) { timeline in

            HStack(spacing: 120) {

                let randomEmoji = ManyFaces.emoji.randomElement() ?? ""

                Text(randomEmoji)
                    .font(.largeTitle)
                    .scaleEffect(4.0)

                SubView()

            }
        }
    }

    struct SubView: View {
        var body: some View {
            let randomEmoji = ManyFaces.emoji.randomElement() ?? ""

            Text(randomEmoji)
                .font(.largeTitle)
                .scaleEffect(4.0)
        }
    }
}
- When running the code, the effect is as follows:
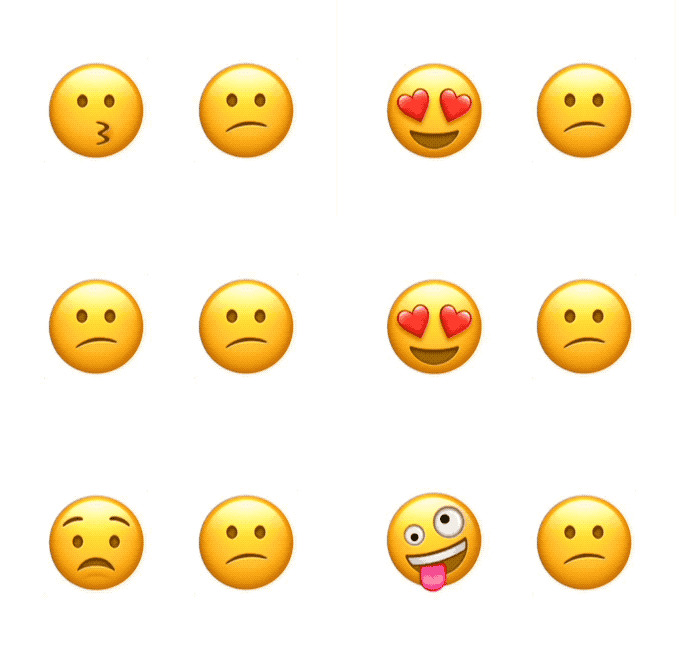
- Why has the expression on the left changed, while the other expression has always been a sad expression? In fact, SubView does not receive any changed parameters, which means that it has no dependencies. SwiftUI has no reason to recalculate the body of the view. In last year's WWDC Demystify SwiftUI A great speech is to unveil the mystery of SwiftUI, which explains view identification, lifetime and dependencies, all of which are very important to understand the behavior of the timeline.
- To solve this problem, you can change the SubView view view to add a parameter, which will change with each update of the timeline. Note that we do not need to use parameters, it just must exist:
struct SubView: View {
    let date: Date // just by declaring it, the view will now be recomputed apropriately.

    var body: some View {

        let randomEmoji = ManyFaces.emoji.randomElement() ?? ""

        Text(randomEmoji)
            .font(.largeTitle)
            .scaleEffect(4.0)
    }
}
- The SubView is now created as follows:
SubView(date: timeline.date)
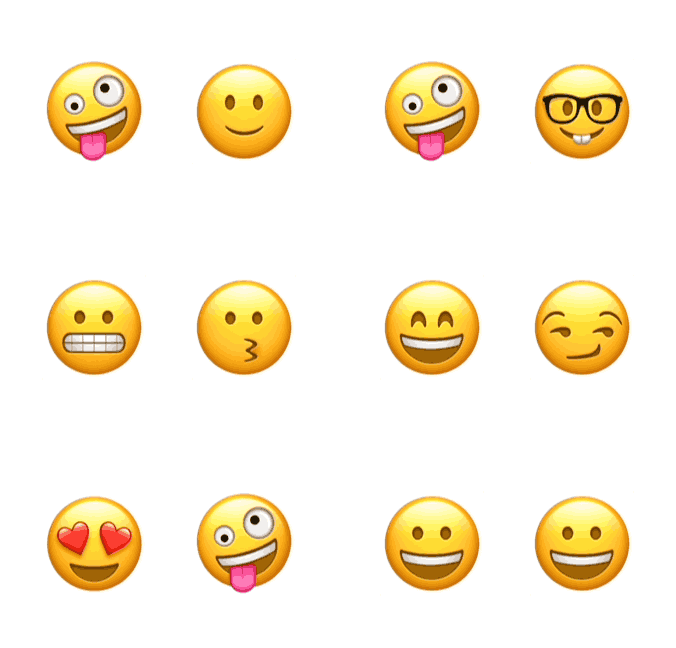
- Finally, emoticons can experience emotional whirlwinds:
4, Apply to Timeline
- Most examples of TimelineView (at the time of writing) are usually about drawing clocks, which makes sense. After all, the data provided by the timeline is a date.
- The simplest TimelineView clock is as follows:
TimelineView(.periodic(from: .now, by: 1.0)) { timeline in

    Text("\(timeline.date)")

}
- Clocks may become more sophisticated, such as using an analog clock with a shape, or drawing a clock with a new Canvas view. However, TimelineView is not only used for clocks. In many cases, we want the view to do something every time the timeline updates the view. The best place to place these codes is the onChange(of:perform) closure.
- In the following example, we use this technique to update the model every 3 seconds:
struct ExampleView: View {
    var body: some View {
        TimelineView(.periodic(from: .now, by: 3.0)) { timeline in
            QuipView(date: timeline.date)
        }
    }

    struct QuipView: View {
        @StateObject var quips = QuipDatabase()
        let date: Date

        var body: some View {
            Text("_\(quips.sentence)_")
                .onChange(of: date) { _ in
                    quips.advance()
                }
        }
    }
}

class QuipDatabase: ObservableObject {
    static var sentences = [
        "There are two types of people, those who can extrapolate from incomplete data",
        "After all is said and done, more is said than done.",
        "Haikus are easy. But sometimes they don't make sense. Refrigerator.",
        "Confidence is the feeling you have before you really understand the problem."
    ]

    @Published var sentence: String = QuipDatabase.sentences[0]

    var idx = 0

    func advance() {
        idx = (idx + 1) % QuipDatabase.sentences.count

        sentence = QuipDatabase.sentences[idx]
    }
}
- It should be noted that the QuipView will be refreshed twice every time the timeline is updated, that is, when the timeline is updated once, it will be updated again, because by calling quips Advance() will affect the @ Published value of quips, change and trigger view update.
5, TimelineView combined with traditional animation
- The new TimelineView brings many new uses. Combining it with Canvas is a good addition, but it puts the task of writing all the code for each frame of animation on us. Updating the animation view from one timeline to the next with animations you already know and like will eventually allow you to create keyframe like animations entirely in SwiftUI.
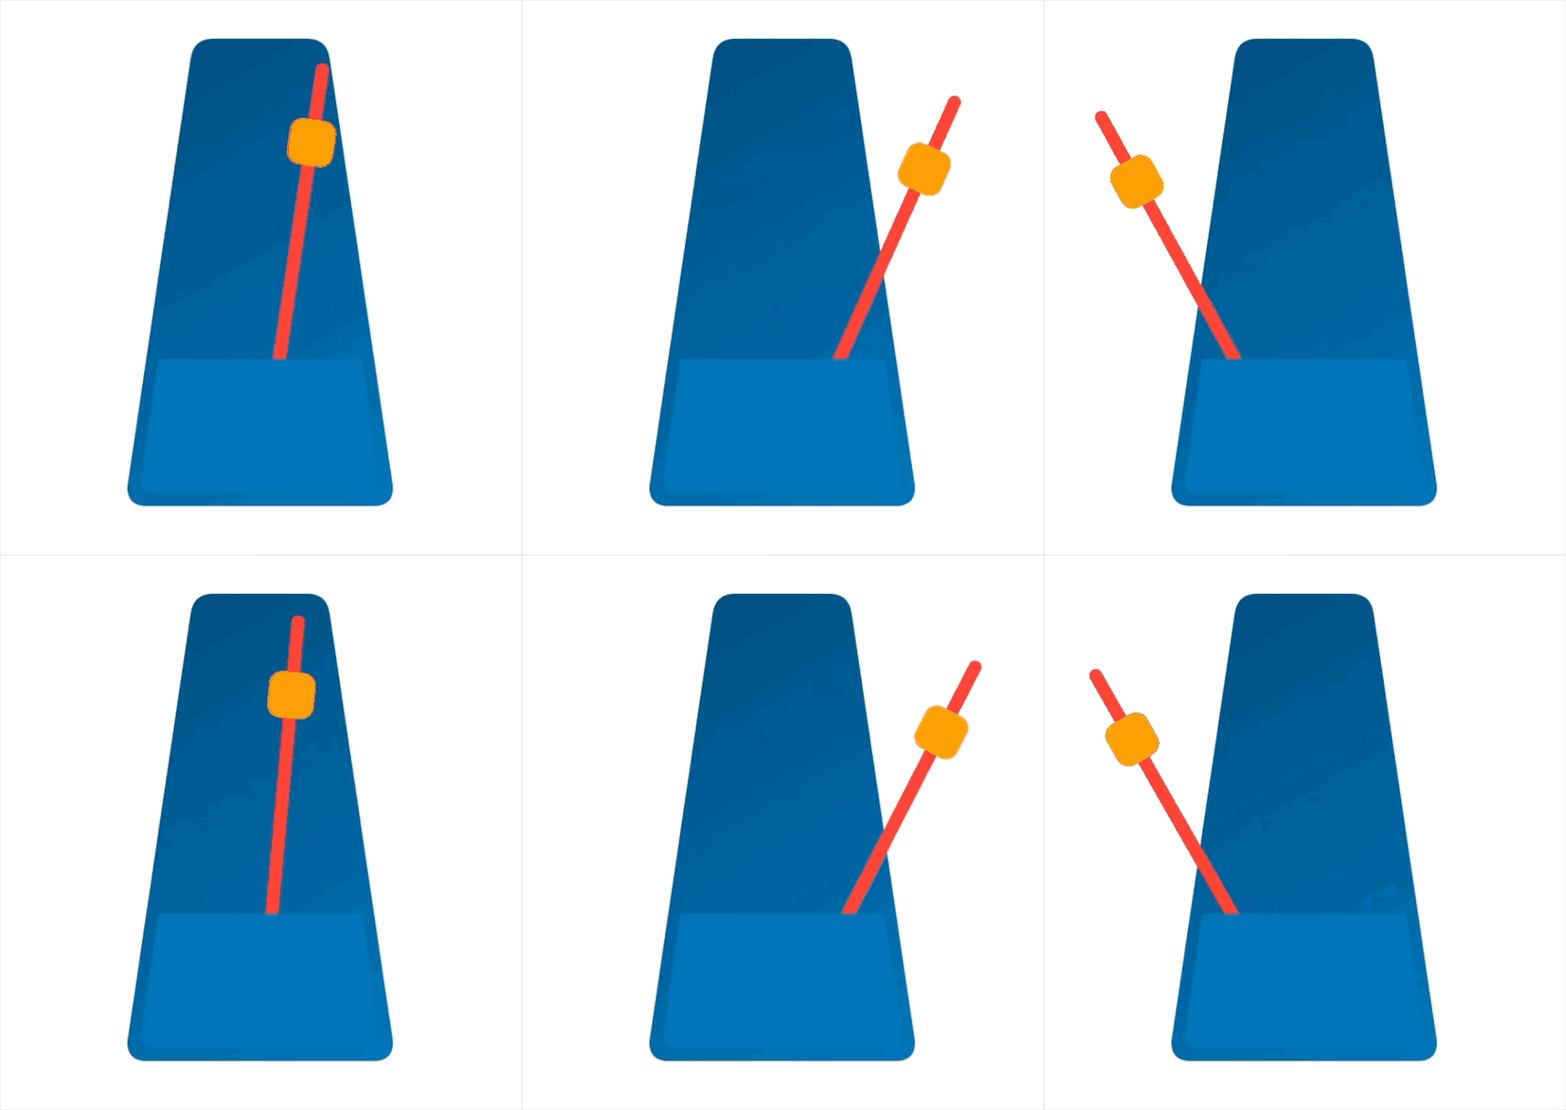
- With the metronome shown below, turn up the volume, play the video, and enjoy how the sound of the beat is synchronized with the pendulum. Like the metronome, a bell rings every few beats:
- First, let's look at the timeline:
struct Metronome: View {
    let bpm: Double = 60 // beats per minute

    var body: some View {
        TimelineView(.periodic(from: .now, by: 60 / bpm)) { timeline in
            MetronomeBack()
                .overlay(MetronomePendulum(bpm: bpm, date: timeline.date))
                .overlay(MetronomeFront(), alignment: .bottom)
        }
    }
}
- The speed of metronome is usually expressed in bpm. The above example uses a cycle scheduler, which repeats every 60/bpm seconds, bpm = 60, so the scheduler triggers every 1 second, that is, 60 times per minute.
- Metronome view consists of three layers: MetronomeBack, MetronomePendulum and MetronomeFront. They are superimposed in this order. The only view that needs to be refreshed every time the timeline is updated is MetronomePendulum, which will swing from one side to the other, and other views will not be refreshed because they have no dependencies.
- The code of MetronomeBack and MetronomeFront is very concise. They use a custom shape called rounded trapezoid:
struct MetronomeBack: View {
    let c1 = Color(red: 0, green: 0.3, blue: 0.5, opacity: 1)
    let c2 = Color(red: 0, green: 0.46, blue: 0.73, opacity: 1)

    var body: some View {
        let gradient = LinearGradient(colors: [c1, c2],
                                      startPoint: .topLeading,
                                      endPoint: .bottomTrailing)

        RoundedTrapezoid(pct: 0.5, cornerSizes: [CGSize(width: 15, height: 15)])
            .foregroundStyle(gradient)
            .frame(width: 200, height: 350)
    }
}

struct MetronomeFront: View {
    var body: some View {
        RoundedTrapezoid(pct: 0.85, cornerSizes: [.zero, CGSize(width: 10, height: 10)])
            .foregroundStyle(Color(red: 0, green: 0.46, blue: 0.73, opacity: 1))
            .frame(width: 180, height: 100).padding(10)
    }
}
struct RoundedTrapezoid: Shape {
    let pct: CGFloat
    let cornerSizes: [CGSize]

    func path(in rect: CGRect) -> Path {
        return Path { path in
            let (cs1, cs2, cs3, cs4) = decodeCornerSize()

            // Start of path
            let start = CGPoint(x: rect.midX, y: 0)

            // width base and top
            let wb = rect.size.width
            let wt = wb * pct

            // angles
            let angle: CGFloat = atan(Double(rect.height / ((wb - wt) / 2.0)))

            // Control points
            let c1 = CGPoint(x: (wb - wt) / 2.0, y: 0)
            let c2 = CGPoint(x: c1.x + wt, y: 0)
            let c3 = CGPoint(x: wb, y: rect.maxY)
            let c4 = CGPoint(x: 0, y: rect.maxY)

            // Points a and b
            let pa2 = CGPoint(x: c2.x - cs2.width, y: 0)
            let pb2 = CGPoint(x: c2.x + CGFloat(cs2.height * tan((.pi/2) - angle)), y: cs2.height)

            let pb3 = CGPoint(x: c3.x - cs3.width, y: rect.height)
            let pa3 = CGPoint(x: c3.x - (cs3.height != 0 ? CGFloat(tan(angle) / cs3.height) : 0.0), y: rect.height - cs3.height)

            let pa4 = CGPoint(x: c4.x + cs4.width, y: rect.height)
            let pb4 = CGPoint(x: c4.x + (cs4.height != 0 ? CGFloat(tan(angle) / cs4.height) : 0.0), y: rect.height - cs4.height)

            let pb1 = CGPoint(x: c1.x + cs1.width, y: 0)
            let pa1 = CGPoint(x: c1.x - CGFloat(cs1.height * tan((.pi/2) - angle)), y: cs1.height)

            path.move(to: start)

            path.addLine(to: pa2)
            path.addQuadCurve(to: pb2, control: c2)

            path.addLine(to: pa3)
            path.addQuadCurve(to: pb3, control: c3)

            path.addLine(to: pa4)
            path.addQuadCurve(to: pb4, control: c4)

            path.addLine(to: pa1)
            path.addQuadCurve(to: pb1, control: c1)

            path.closeSubpath()
        }
    }

    func decodeCornerSize() -> (CGSize, CGSize, CGSize, CGSize) {
        if cornerSizes.count == 1 {
            // If only one corner size is provided, use it for all corners
            return (cornerSizes[0], cornerSizes[0], cornerSizes[0], cornerSizes[0])
        } else if cornerSizes.count == 2 {
            // If only two corner sizes are provided, use one for the two top corners,
            // and the other for the two bottom corners
            return (cornerSizes[0], cornerSizes[0], cornerSizes[1], cornerSizes[1])
        } else if cornerSizes.count == 4 {
            // If four corners are provided, use one for each corner
            return (cornerSizes[0], cornerSizes[1], cornerSizes[2], cornerSizes[3])
        } else {
            // In any other case, do not round corners
            return (.zero, .zero, .zero, .zero)
        }
    }
}
- In the MetronomePendulum view:
struct MetronomePendulum: View {
    @State var pendulumOnLeft: Bool = false
    @State var bellCounter = 0 // sound bell every 4 beats

    let bpm: Double
    let date: Date

    var body: some View {
        Pendulum(angle: pendulumOnLeft ? -30 : 30)
            .animation(.easeInOut(duration: 60 / bpm), value: pendulumOnLeft)
            .onChange(of: date) { _ in beat() }
            .onAppear { beat() }
    }

    func beat() {
        pendulumOnLeft.toggle() // triggers the animation
        bellCounter = (bellCounter + 1) % 4 // keeps count of beats, to sound bell every 4th

        // sound bell or beat?
        if bellCounter == 0 {
            bellSound?.play()
        } else {
            beatSound?.play()
        }
    }

    struct Pendulum: View {
        let angle: Double

        var body: some View {
            return Capsule()
                .fill(.red)
                .frame(width: 10, height: 320)
                .overlay(weight)
                .rotationEffect(Angle.degrees(angle), anchor: .bottom)
        }

        var weight: some View {
            RoundedRectangle(cornerRadius: 10)
                .fill(.orange)
                .frame(width: 35, height: 35)
                .padding(.bottom, 200)
        }
    }
}
- The view needs to track the position in the animation, which can be called the animation stage. Because these stages need to be tracked, the @ State variable will be used:
-
- pendulumOnLeft: keep the track of pendulum swing;
-
- bellCounter: it records the number of beats to determine whether beats or ringing tones should be heard.
- This example uses The animation (: Value:) modifier in this version applies animation when the specified value changes. Note that explicit animation can also be used. Just switch the pendulumOnLeft variable in the withAnimation closure instead of calling animation().
- In order to make the view move forward in the animation phase, we use the onChange(of:perform) modifier to monitor the change of date. In addition to advancing the animation phase every time the date value changes, we also do this in the onAppear closure, otherwise there will be a pause at the beginning.
- Finally, create an NSSound instance. To avoid the complexity of the example, create two global variables:
let bellSound: NSSound? = {
    guard let url = Bundle.main.url(forResource: "bell", withExtension: "mp3") else { return nil }
    return NSSound(contentsOf: url, byReference: true)
}()

let beatSound: NSSound? = {
    guard let url = Bundle.main.url(forResource: "beat", withExtension: "mp3") else { return nil }
    return NSSound(contentsOf: url, byReference: true)
}()
- If you need a sound file, you can https://freesound.org/ A large database was found on. An example is as follows:
-
-
6, Timer scheduler
- TimelineView needs a TimelineScheduler to decide when to update its content. SwiftUI provides some predefined schedulers, but you can also create your own custom scheduler.
- Timeline scheduler is basically a structure using TimelineScheduler protocol. The existing types are:
-
- AnimationTimelineSchedule: update as quickly as possible to give you the opportunity to draw each frame of the animation. Its parameters allow you to limit the frequency of updates and pause updates. This is very useful when combining TimelineView and the new Canvas view;
-
- Everyminutetimeline schedule: as the name suggests, it is updated every minute at the beginning of every minute;
-
- Explicit timelineschedule: you can provide an array containing all the times you want the timeline to be updated;
-
- PeriodicTimelineSchedule: you can provide a start time and the frequency of updates.
- You can create a timeline as follows:
Timeline(EveryMinuteTimelineSchedule()) { timeline in
    ...
}
- Since Swift 5.5 and SE-0299 The introduction of supports enum like syntax, which makes the code more readable and improves the automatic completion function. You can use the following:
TimelineView(.everyMinute) { timeline in
    ...
}
- For each existing scheduler, there may be multiple enum like options, as shown below. Create a scheduler of AnimationTimelineSchedule type in two lines of code:
TimelineView(.animation) { ... }

TimelineView(.animation(minimumInterval: 0.3, paused: false)) { ... }
- You can even create your own (don't forget static keywords):
extension TimelineSchedule where Self == PeriodicTimelineSchedule {
    static var everyFiveSeconds: PeriodicTimelineSchedule {
        get { .init(from: .now, by: 5.0) }
    }
}

struct ContentView: View {
    var body: some View {
        TimelineView(.everyFiveSeconds) { timeline in
            ...
        }
    }
}
7, Customize TimelineScheduler
- If none of the existing schedulers fit your needs, you can create your own. The animation is as follows:

- In this animation, we have a heart-shaped emoticon, which changes its size at irregular intervals and irregular amplitudes: it starts from 1.0, increases to 1.6 after 0.2 seconds, increases to 2.0 after 0.2 seconds, then shrinks to 1.0, stays for 0.4 seconds, and then starts again. In other words:
-
- Zoom change: 1.0 → 1.6 → 2.0 → restart;
-
- Change interval: 0.2 → 0.2 → 0.4 → restart.
- We can create a HeartTimelineSchedule, which is completely updated according to the requirements of the heart. However, in the name of reusability, let's do something more general and reusable in the future. The new scheduler will be called: CyclicTimelineSchedule, and will receive an array of time offsets. Each offset value will be relative to the previous value in the array. When the scheduler runs out of offsets, it will cycle back to the beginning of the array and start again:
struct CyclicTimelineSchedule: TimelineSchedule {
    let timeOffsets: [TimeInterval]

    func entries(from startDate: Date, mode: TimelineScheduleMode) -> Entries {
        Entries(last: startDate, offsets: timeOffsets)
    }

    struct Entries: Sequence, IteratorProtocol {
        var last: Date
        let offsets: [TimeInterval]

        var idx: Int = -1

        mutating func next() -> Date? {
            idx = (idx + 1) % offsets.count

            last = last.addingTimeInterval(offsets[idx])

            return last
        }
    }
}
- There are several requirements for implementing TimelineSchedule:
-
- Provide the entries(from:mode:) function;
-
- The type of Entries matches the sequence: Entries Element == Date;
- There are several methods that conform to Sequence. This example implements IteratorProtocol and declares the consistency with Sequence and IteratorProtocol. You can refer to Sequence.
- In order for Entries to implement IteratorProtocol, you must write the next() function, which generates the date in the timeline. The scheduler remembers the last date and adds an appropriate offset. When there are no more offsets, it loops back to the first offset in the array. Finally, the scheduler is to create an initializer similar to enum:
extension TimelineSchedule where Self == CyclicTimelineSchedule {
    static func cyclic(timeOffsets: [TimeInterval]) -> CyclicTimelineSchedule {
            .init(timeOffsets: timeOffsets)
    }
}
- Now that the TimelineSchedue type is ready, continue to add:
struct BeatingHeart: View {
    var body: some View {
        TimelineView(.cyclic(timeOffsets: [0.2, 0.2, 0.4])) { timeline in
            Heart(date: timeline.date)
        }
    }
}

struct Heart: View {
    @State private var phase = 0
    let scales: [CGFloat] = [1.0, 1.6, 2.0]

    let date: Date

    var body: some View {
        HStack {
            Text("❤️")
                .font(.largeTitle)
                .scaleEffect(scales[phase])
                .animation(.spring(response: 0.10,
                                   dampingFraction: 0.24,
                                   blendDuration: 0.2),
                           value: phase)
                .onChange(of: date) { _ in
                    advanceAnimationPhase()
                }
                .onAppear {
                    advanceAnimationPhase()
                }
        }
    }

    func advanceAnimationPhase() {
        phase = (phase + 1) % scales.count
    }
}
- Now you should be familiar with this mode. It is the same mode as the metronome. Use onChange and onAppear to advance the animation, use @ State variable to track the animation, and set an animation to transition the view from one timeline update to the next spring animation, give it a good dithering effect.
8, KeyFrame Animations
- To some extent, the above example is a key frame animation. Several key points are defined in the whole animation. On these key points, we change the parameters of the view and let SwiftUI animate the transition between these key points. The following example can fully explain this kind of processing:
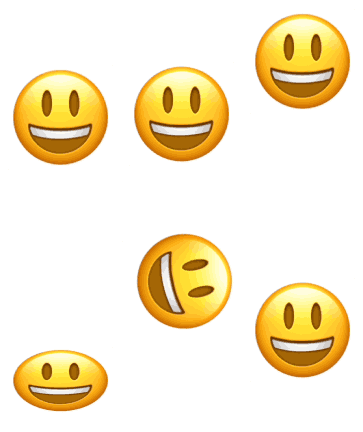
- If you carefully observe the animation, you will find that many parameters of the emoticon have changed at different time points. These parameters are y-offset, rotation and y-scale. It is also important that different parts of the animation have different animation types (linear, easeIn and easeOut). Because these are parameters to be changed, it is best to put them in an array:
struct KeyFrame {
    let offset: TimeInterval
    let rotation: Double
    let yScale: Double
    let y: CGFloat
    let animation: Animation?
}

let keyframes = [
    // Initial state, will be used once. Its offset is useless and will be ignored
    KeyFrame(offset: 0.0, rotation: 0, yScale: 1.0, y: 0, animation: nil),

    // Animation keyframes
    KeyFrame(offset: 0.2, rotation:   0, yScale: 0.5, y:  20, animation: .linear(duration: 0.2)),
    KeyFrame(offset: 0.4, rotation:   0, yScale: 1.0, y: -20, animation: .linear(duration: 0.4)),
    KeyFrame(offset: 0.5, rotation: 360, yScale: 1.0, y: -80, animation: .easeOut(duration: 0.5)),
    KeyFrame(offset: 0.4, rotation: 360, yScale: 1.0, y: -20, animation: .easeIn(duration: 0.4)),
    KeyFrame(offset: 0.2, rotation: 360, yScale: 0.5, y:  20, animation: .easeOut(duration: 0.2)),
    KeyFrame(offset: 0.4, rotation: 360, yScale: 1.0, y: -20, animation: .linear(duration: 0.4)),
    KeyFrame(offset: 0.5, rotation:   0, yScale: 1.0, y: -80, animation: .easeOut(duration: 0.5)),
    KeyFrame(offset: 0.4, rotation:   0, yScale: 1.0, y: -20, animation: .easeIn(duration: 0.4)),
]
- When TimelineView appears, it will draw the view, even if there is no plan to update, or if they are in the future, they need to use the first key frame to represent the state of the view, but when looping, this frame will be ignored. Take a look at the timeline:
struct JumpingEmoji: View {
    // Use all offset, minus the first
    let offsets = Array(keyframes.map { $0.offset }.dropFirst())

    var body: some View {
        TimelineView(.cyclic(timeOffsets: offsets)) { timeline in
            HappyEmoji(date: timeline.date)
        }
    }
}
- We have benefited from the work done in the previous example and the reuse of the CyclicTimelineScheduler. As mentioned earlier, the offset of the first key frame is not required, so we discard it as follows:
struct HappyEmoji: View {
    // current keyframe number
    @State var idx: Int = 0

    // timeline update
    let date: Date

    var body: some View {
        Text("😃")
            .font(.largeTitle)
            .scaleEffect(4.0)
            .modifier(Effects(keyframe: keyframes[idx]))
            .animation(keyframes[idx].animation, value: idx)
            .onChange(of: date) { _ in advanceKeyFrame() }
            .onAppear { advanceKeyFrame()}
    }

    func advanceKeyFrame() {
        // advance to next keyframe
        idx = (idx + 1) % keyframes.count

        // skip first frame for animation, which we
        // only used as the initial state.
        if idx == 0 { idx = 1 }
    }

    struct Effects: ViewModifier {
        let keyframe: KeyFrame

        func body(content: Content) -> some View {
            content
                .scaleEffect(CGSize(width: 1.0, height: keyframe.yScale))
                .rotationEffect(Angle(degrees: keyframe.rotation))
                .offset(y: keyframe.y)
        }
    }
}
- For better readability, you can put all the changed parameters in a modifier called Effects. As you can see, this is the same mode again: use onChange and onAppear to advance the animation and add an animation for each keyframe clip.
- This error may be encountered in the path where TimelineView is found:
Action Tried to Update Multiple Times Per Frame
- Let's look at an example of generating this error:
struct ExampleView: View {
    @State private var flag = false

    var body: some View {

        TimelineView(.periodic(from: .now, by: 2.0)) { timeline in

            Text("Hello")
                .foregroundStyle(flag ? .red : .blue)
                .onChange(of: timeline.date) { (date: Date) in
                    flag.toggle()
                }

        }
    }
}
- This code looks harmless. It should change the text color every two seconds, alternating between red and blue. So what's going on? We know that the first update of the timeline is when it first appears, and then it follows the scheduler rules to trigger the following updates. Therefore, the TimelineView content is generated at least once even if the scheduler does not generate an update. In this particular example, we monitor the timeline in the timeline Date value. When it changes, switch the flag variable, which will produce a color change.
- TimelineView will appear first, and after two seconds, the timeline will be updated (for example, due to the first scheduler update), triggering the onChange closure, which in turn changes the flag variable. Now, because TimelineView depends on it, it will need to refresh immediately, trigger the switching of another tag variable, force another TimelineView to refresh, and update multiple times per frame.
- So how to solve this problem? In this example, we simply encapsulate the content and move the flag variable to the encapsulated view. Now TimelineView no longer depends on it:
struct ExampleView: View {
    var body: some View {

        TimelineView(.periodic(from: .now, by: 1.0)) { timeline in
            SubView(date: timeline.date)
        }

    }
}

struct SubView: View {
    @State private var flag = false
    let date: Date

    var body: some View {
        Text("Hello")
            .foregroundStyle(flag ? .red : .blue)
            .onChange(of: date) { (date: Date) in
                flag.toggle()
            }
    }
}
9, Explore new ideas
- Refresh every time the timeline is updated: as mentioned earlier, this mode allows our views to calculate their bodies twice every time they are updated: the first time when the timeline is updated, and then when advancing the animation state value. In this type of animation, key points are separated in time.
- In the animation, the time point is too close. Maybe you need to avoid this situation. If you need to change a stored value, but avoid view refresh... There is a trick to do. Use @ StateObject instead of @ State. Make sure you don't use @ Published. If you need to tell the view to refresh at some time, you can call objectwillchange send().
- Match Animation duration and offset: in the example of keyframes, use a different Animation for each Animation clip. To do this, store the value of Animation in an array. If you look closely, you can see that in our example, the offset and Animation duration match, so you can define an enum with Animation type instead of using Animation value in the array. Later in the view, you will create Animation values based on the Animation type, but instantiate them using the duration from the offset value, as follows:
enum KeyFrameAnimation {
    case none
    case linear
    case easeOut
    case easeIn
}

struct KeyFrame {
    let offset: TimeInterval
    let rotation: Double
    let yScale: Double
    let y: CGFloat
    let animationKind: KeyFrameAnimation

    var animation: Animation? {
        switch animationKind {
        case .none: return nil
        case .linear: return .linear(duration: offset)
        case .easeIn: return .easeIn(duration: offset)
        case .easeOut: return .easeOut(duration: offset)
        }
    }
}

let keyframes = [
    // Initial state, will be used once. Its offset is useless and will be ignored
    KeyFrame(offset: 0.0, rotation: 0, yScale: 1.0, y: 0, animationKind: .none),

    // Animation keyframes
    KeyFrame(offset: 0.2, rotation:   0, yScale: 0.5, y:  20, animationKind: .linear),
    KeyFrame(offset: 0.4, rotation:   0, yScale: 1.0, y: -20, animationKind: .linear),
    KeyFrame(offset: 0.5, rotation: 360, yScale: 1.0, y: -80, animationKind: .easeOut),
    KeyFrame(offset: 0.4, rotation: 360, yScale: 1.0, y: -20, animationKind: .easeIn),
    KeyFrame(offset: 0.2, rotation: 360, yScale: 0.5, y:  20, animationKind: .easeOut),
    KeyFrame(offset: 0.4, rotation: 360, yScale: 1.0, y: -20, animationKind: .linear),
    KeyFrame(offset: 0.5, rotation:   0, yScale: 1.0, y: -80, animationKind: .easeOut),
    KeyFrame(offset: 0.4, rotation:   0, yScale: 1.0, y: -20, animationKind: .easeIn),
]
- If you want to know why I didn't do this at first, I just want to tell you that both methods are possible. The first case is more flexible but more lengthy. That is, you need to force the duration of each animation, but it's more flexible because you're free to use a duration that doesn't match the offset. However, when using this new method, it is easy to add a customizable factor that can slow or speed up the animation without touching the keys.
- Nested TimelineViews: nothing can prevent you from nesting one TimelineView into another. Now there is a JumpingEmoji. You can place three JumpingEmoji views in the TimelineView, one at a time, with delays:
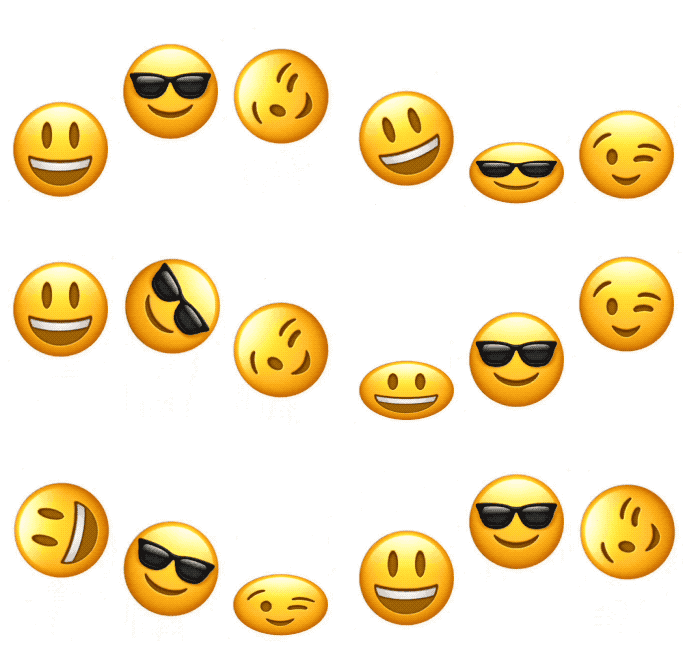
- The complete example of emoji wave is as follows:
import SwiftUI

struct CyclicTimelineSchedule: TimelineSchedule {
    let timeOffsets: [TimeInterval]

    func entries(from startDate: Date, mode: TimelineScheduleMode) -> Entries {
        Entries(last: startDate, offsets: timeOffsets)
    }

    struct Entries: Sequence, IteratorProtocol {
        var last: Date
        let offsets: [TimeInterval]

        var idx: Int = -1

        mutating func next() -> Date? {
            idx = (idx + 1) % offsets.count

            last = last.addingTimeInterval(offsets[idx])

            return last
        }
    }
}

extension TimelineSchedule where Self == CyclicTimelineSchedule {
    static func cyclic(timeOffsets: [TimeInterval]) -> CyclicTimelineSchedule {
            .init(timeOffsets: timeOffsets)
    }
}

enum KeyFrameAnimation {
    case none
    case linear
    case easeOut
    case easeIn
}

struct KeyFrame {
    let offset: TimeInterval
    let rotation: Double
    let yScale: Double
    let y: CGFloat
    let animationKind: KeyFrameAnimation

    var animation: Animation? {
        switch animationKind {
        case .none: return nil
        case .linear: return .linear(duration: offset)
        case .easeIn: return .easeIn(duration: offset)
        case .easeOut: return .easeOut(duration: offset)
        }
    }
}

let keyframes = [
    // Initial state, will be used once. Its offset is useless and will be ignored
    KeyFrame(offset: 0.0, rotation: 0, yScale: 1.0, y: 0, animationKind: .none),

    // Animation keyframes
    KeyFrame(offset: 0.2, rotation:   0, yScale: 0.5, y:  20, animationKind: .linear),
    KeyFrame(offset: 0.4, rotation:   0, yScale: 1.0, y: -20, animationKind: .linear),
    KeyFrame(offset: 0.5, rotation: 360, yScale: 1.0, y: -80, animationKind: .easeOut),
    KeyFrame(offset: 0.4, rotation: 360, yScale: 1.0, y: -20, animationKind: .easeIn),
    KeyFrame(offset: 0.2, rotation: 360, yScale: 0.5, y:  20, animationKind: .easeOut),
    KeyFrame(offset: 0.4, rotation: 360, yScale: 1.0, y: -20, animationKind: .linear),
    KeyFrame(offset: 0.5, rotation:   0, yScale: 1.0, y: -80, animationKind: .easeOut),
    KeyFrame(offset: 0.4, rotation:   0, yScale: 1.0, y: -20, animationKind: .easeIn),
]

struct ManyEmojis: View {
    @State var emojiCount = 0
    let dates: [Date] = [.now.addingTimeInterval(0.3), .now.addingTimeInterval(0.6), .now.addingTimeInterval(0.9)]

    var body: some View {
        TimelineView(.explicit(dates)) { timeline in
            HStack(spacing: 80) {
                if emojiCount > 0 {
                    JumpingEmoji(emoji: "😃")
                }

                if emojiCount > 1 {

                    JumpingEmoji(emoji: "😎")

                }

                if emojiCount > 2 {
                    JumpingEmoji(emoji: "😉")
                }

                Spacer()
            }
            .onChange(of: timeline.date) { (date: Date) in
                emojiCount += 1
            }
            .frame(width: 400)
        }
    }
}

struct JumpingEmoji: View {
    let emoji: String

    // Use all offset, minus the first
    let offsets = Array(keyframes.map { $0.offset }.dropFirst())

    var body: some View {
        TimelineView(.cyclic(timeOffsets: offsets)) { timeline in
            HappyEmoji(emoji: emoji, date: timeline.date)
        }
    }
}

struct HappyEmoji: View {
    let emoji: String
    // current keyframe number
    @State var idx: Int = 0

    // timeline update
    let date: Date

    var body: some View {
        Text(emoji)
            .font(.largeTitle)
            .scaleEffect(4.0)
            .modifier(Effects(keyframe: keyframes[idx]))
            .animation(keyframes[idx].animation, value: idx)
            .onChange(of: date) { _ in advanceKeyFrame() }
            .onAppear { advanceKeyFrame()}
    }

    func advanceKeyFrame() {
        // advance to next keyframe
        idx = (idx + 1) % keyframes.count

        // skip first frame for animation, which we
        // only used as the initial state.
        if idx == 0 { idx = 1 }
    }

    struct Effects: ViewModifier {
        let keyframe: KeyFrame

        func body(content: Content) -> some View {
            content
                .scaleEffect(CGSize(width: 1.0, height: keyframe.yScale))
                .rotationEffect(Angle(degrees: keyframe.rotation))
                .offset(y: keyframe.y)
        }
    }
}
10, GifImage example
- Use TimelineView to realize gif animation:
import SwiftUI

// Sample usage
struct ContentView: View {
    var body: some View {
        VStack {
            GifImage(url: URL(string: "https://media.giphy.com/media/YAlhwn67KT76E/giphy.gif?cid=790b7611b26260b2ad23535a70e343e67443ff80ef623844&rid=giphy.gif&ct=g")!)
                .padding(10)
                .overlay {
                    RoundedRectangle(cornerRadius: 8)
                        .stroke(.green)
                }
        }
        .frame(maxWidth: .infinity, maxHeight: .infinity)
    }
}

// ObservableObject that holds the data and logic to get all frames in the gif image.
class GifData: ObservableObject {
    var loopCount: Int = 0
    var width: CGFloat = 0
    var height: CGFloat = 0

    var capInsets: EdgeInsets?
    var resizingMode: Image.ResizingMode

    struct ImageFrame {
        let image: Image
        let delay: TimeInterval
    }

    var frames: [ImageFrame] = []

    init(url: URL, capInsets: EdgeInsets?, resizingMode: Image.ResizingMode) {
        self.capInsets = capInsets
        self.resizingMode = resizingMode

        let label = url.deletingPathExtension().lastPathComponent

        Task {
            guard let (data, _) = try? await URLSession.shared.data(from: url) else { return }

            guard let source = CGImageSourceCreateWithData(data as CFData, nil) else { return }

            let imageCount = CGImageSourceGetCount(source)

            guard let imgProperties = CGImageSourceCopyProperties(source, nil) as? Dictionary<String, Any> else { return }

            guard let gifProperties = imgProperties[kCGImagePropertyGIFDictionary as String] as? Dictionary<String, Any> else { return }

            loopCount = gifProperties[kCGImagePropertyGIFLoopCount as String] as? Int ?? 0
            width = gifProperties[kCGImagePropertyGIFCanvasPixelWidth as String] as? CGFloat ?? 0
            height = gifProperties[kCGImagePropertyGIFCanvasPixelHeight as String] as? CGFloat ?? 0

            let frameInfo = gifProperties[kCGImagePropertyGIFFrameInfoArray as String] as? [Dictionary<String, TimeInterval>] ?? []

            for i in 0 ..< min(imageCount, frameInfo.count) {
                if let image = CGImageSourceCreateImageAtIndex(source, i, nil) {

                    var img = Image(image, scale: 1.0, label: Text(label))

                    if let insets = capInsets {
                        img = img.resizable(capInsets: insets, resizingMode: resizingMode)
                    }

                    frames.append(
                        ImageFrame(image: img,
                                   delay: frameInfo[i][kCGImagePropertyGIFDelayTime as String] ?? 0.05)
                    )
                }
            }

            DispatchQueue.main.async { self.objectWillChange.send() }
        }
    }
}

// The GifImage view
struct GifImage: View {
    @StateObject var gifData: GifData

    /// Create an animated Gif Image
    /// - Parameters:
    ///   - url: the url holding the animated gif file
    ///   - capInsets: if nil, image is not resizable. Otherwise, the capInsets for image resizing (same as the standard image .resizable() modifier).
    ///   - resizingMode: ignored if capInsets is nil, otherwise, equivalent to the standard image .resizable() modifier parameter)
    init(url: URL, capInsets: EdgeInsets? = nil, resizingMode: Image.ResizingMode = .stretch) {
        _gifData = StateObject(wrappedValue: GifData(url: url, capInsets: capInsets, resizingMode: resizingMode))
    }

    var body: some View {
        Group {
            if gifData.frames.count == 0 {
                Color.clear
            } else {
                VStack {
                    TimelineView(.cyclic(loopCount: gifData.loopCount, timeOffsets: gifData.frames.map { $0.delay })) { timeline in
                        ImageFrame(gifData: gifData, date: timeline.date)
                    }
                }
            }
        }
    }

    struct ImageFrame: View {
        @State private var frame = 0
        let gifData: GifData
        let date: Date

        var body: some View {
            gifData.frames[frame].image
                .onChange(of: date) { _ in
                    frame = (frame + 1) % gifData.frames.count
                }
        }
    }
}

// A cyclic TimelineSchedule
struct CyclicTimelineSchedule: TimelineSchedule {
    let loopCount: Int // loopCount == 0 means inifinite loops.
    let timeOffsets: [TimeInterval]

    func entries(from startDate: Date, mode: TimelineScheduleMode) -> Entries {
        Entries(loopCount: loopCount, last: startDate, offsets: timeOffsets)
    }

    struct Entries: Sequence, IteratorProtocol {
        let loopCount: Int
        var loops = 0
        var last: Date
        let offsets: [TimeInterval]

        var idx: Int = -1

        mutating func next() -> Date? {
            idx = (idx + 1) % offsets.count

            if idx == 0 { loops += 1 }

            if loopCount != 0 && loops >= loopCount { return nil }

            last = last.addingTimeInterval(offsets[idx])

            return last
        }
    }
}

extension TimelineSchedule where Self == CyclicTimelineSchedule {
    static func cyclic(loopCount: Int, timeOffsets: [TimeInterval]) -> CyclicTimelineSchedule {
        .init(loopCount: loopCount, timeOffsets: timeOffsets)
    }
}


