Plugin plug in
In the whole process of webpack, loader enables webpack to process more file resources. The plugin exists in the whole packaging process of webpack. The processed content can be processed when the hook exposed by the webpack is triggered. So we can use plugin to process the files in process.
index.html file processing
Before, we were about index html is to copy it to the dist folder. If index html needs some dynamic changes, which is not a good treatment. We can generate our packaged html file through a plug-in HtmlWebpackPlugin to process the project file.
project
  webpack-demo
  |- package.json
  |- package-lock.json
  |- /dist
    |- main.js
    |- main.js.LICENSE.txt
-   |- index.html
  |- /src
    |- icon.png
    |- index.less
    |- index.js
  |- webpack.config.js
  |- postcss.config.js
  |- .browserslistrc
+ |- index.html
webpack.config.js
+ const HtmlWebpackPlugin = require("html-webpack-plugin");

module.exports = {
  ...
+  plugins: [
+    new HtmlWebpackPlugin({
+      template: path.join(__dirname, "./index.html"),  // ./index.html is used as a template to generate dist / index html
+    }),
+  ],
  ...
};
index.html
<!DOCTYPE html>
<html>
  <head>
    <meta charset="utf-8" />
    <title>Getting Started</title>
  </head>
  <body></body>
</html>
Re execute npm run build and check dist / index HTML file.
<!doctype html><html><head><meta charset="utf-8"/><title>Getting Started</title><script defer="defer" src="main.js"></script></head><body></body></html>
You can see main The JS file is inserted through the script tag. This is the HTML webpack plugin in dist / index HTML. Of course, this plug-in also has some interesting dynamic generation index HTML method, which is left to readers to explore by themselves.
Hot update configuration
Every time we change the source code, webpack needs to repackage the file, and then refresh the browser to see the effect, which is a terrible experience for developers. We can use hot updates to improve the development experience. When we change the source code, hot update can make our changes to the source code quickly reflected in the browser. Webpack provides three ways to realize hot update. Here, we currently use webpack dev server, and other methods can be clicked here.
Installation dependency
npm install --save --dev webpack-dev-server cross-env
Install the dependency of webpack dev server and cross env. Webpack dev server is used to provide heating update service, while cross env is used in package It is convenient to inject variables into the command line of JSON.
webpack.config.js
module.exports = {
  output: {
    ...
  },
+ target: "web",
+ mode: "development",
+ devtool: "inline-source-map",
+ devServer: {
+   contentBase: path.resolve(__dirname, "dist"),
+   hot: "localhost",
+   compress: true,
+   port: 3002,
+  },
  module: {
   ...
  },
};
- mode : configuration environment, including development and production modes. If it is not set, it defaults to production mode.
- devtool : control whether source map is generated. With source map, we can effectively debug in the browser in the development environment, but in the production environment, it is recommended to close it.
- devServer : development environment configuration. The specific configuration can be queried on the official website.
package.json
"scripts": {
    "test": "echo \"Error: no test specified\" && exit 1",
    "build": "webpack",
+   "dev": "cross-env NODE_ENV=development webpack serve --progress --hot --config webpack.config.js"
  },
Create a new command line configuration for dev, node after cross env_ Env = parameter, which can be set as the environment variable when webpack runs in node. – config is followed by the specified webpack configuration file.
Run the command line npm run dev in the terminal. After successful operation, the terminal displays.
Project is running at http://localhost:3002/
ℹ 「wds」: webpack output is served from /
ℹ 「wds」: Content not from webpack is served from /Users/liwangping/Desktop/study/webpack-demo/dist
The above lines of output show that the project is running on http://localhost:3002/ , click open.
Then try to change the code in the source file.
src/index.js
function component() {
  ...
  // Lodash, currently included via a script, is required for this line to work
- element.innerHTML = _.join(["Hello", "webpack"], " ");
+ element.innerHTML = _.join(["Hello1", "webpack"], " ");

  ...
}

document.body.appendChild(component());
Save the file after the change, and then observe the browser and find.
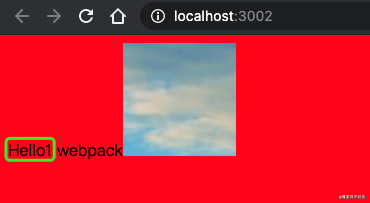
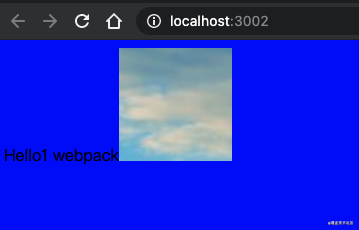
At this time, the hot update is successful, and changing the properties in the less file is the same.
src/index.less
body {
- background-color: red;
+ background-color: blue;
  transition: background-color .4s;
}
Page display
Webpack configuration file separation
In today's webpack config. JS configuration, we have implemented the configuration of dev development environment, but for the development and production environment, it should not be the same configuration. For example, source map should not appear in the production environment. Webpack dev server should not appear in the production environment. But at the same time, the production environment and the development environment have some same configurations, so we can divide the webpack configuration file into three files. A common configuration file and two different environment configuration files are written. When using, combining the same configuration file with the development environment configuration file is the complete development environment configuration. The production environment is the same. In this process, we need to use the webpack merge plug-in that merges the webpack configuration files.
Install dependencies for merging different webpack profiles
npm install --save --dev webpack-merge
project
  webpack-demo
  |- package.json
  |- package-lock.json
  |- /dist
    |- main.js
    |- main.js.LICENSE.txt
  |- /src
    |- icon.png
    |- index.less
    |- index.js
  |- postcss.config.js
  |- .browserslistrc
  |- index.html
- |- webpack.config.js
+ |- webpack.common.js
+ |- webpack.dev.js
+ |- webpack.build.js
webpack.common.js
const path = require("path");
const HtmlWebpackPlugin = require("html-webpack-plugin");

module.exports = {
  entry: "./src/index.js", // Package the entry of the file, and webpack will analyze the dependency structure of the whole project from this file
  output: {
    filename: "main.js", // Output file name
    path: path.resolve(__dirname, "dist"), // Output folder
  },
  module: {
    rules: [
      {
        test: /\.(css|less)$/i,
        use: [
          {
            loader: "style-loader",
          },
          {
            loader: "css-loader",
          },
          {
            loader: "postcss-loader",
          },
          {
            loader: "less-loader",
          },
        ],
      },
      {
        test: /\.(png|svg|jpg|jpeg|gif)$/i,
        type: "asset/resource",
      },
      {
        test: /\.(png|svg|jpg|gif)$/i,
        type: "asset/resource",
      },
      {
        test: /\.(woff|woff2|eot|ttf|otf)$/i,
        type: "asset/resource",
      },
      {
        test: /\.(csv|tsv)$/i,
        use: ["csv-loader"],
      },
      {
        test: /\.xml$/i,
        use: ["xml-loader"],
      },
    ],
  },
  plugins: [
    new HtmlWebpackPlugin({
      template: path.join(__dirname, "./index.html"), // ./index.html is used as a template to generate dist / index html
    }),
  ],
};
webpack.dev.js
const { merge } = require("webpack-merge");
const path = require("path");
const common = require("./webpack.common");

module.exports = merge(common, {
  target: "web",
  mode: "development",
  devtool: "inline-source-map",
  devServer: {
    contentBase: path.resolve(__dirname, "dist"),
    hot: "localhost",
    compress: true,
    port: 3045,
  },
});
webpack.build.js
const { merge } = require("webpack-merge");
const common = require("./webpack.common");

module.exports = merge(common, {
  mode: "production",
});
package.json
"scripts": {
    "test": "echo \"Error: no test specified\" && exit 1",
-   "build": "webpack",
+   "build": "cross-env NODE_ENV=production webpack --progress --config webpack.build.js",
-   "dev": "cross-env NODE_ENV=development webpack serve --progress --hot --config webpack.config.js"
+   "dev": "cross-env NODE_ENV=development webpack serve --progress --hot --config webpack.dev.js"
  },
Run npm run dev and npm run build respectively, and the performance is normal.
babel configuration
babel is used to make the latest js syntax we write get the greatest support on different browsers. Because different browser manufacturers have different support for es syntax standards, the existence of babel smoothes the differences at the bottom, so that we can use some new syntax in the project without worrying about compatibility.
Let's install babel for the webpack project.
At present, we only need the intelligent preset set of the smallest set. So use @babel/preset-env At present, it is enough. More configurations can be clicked babel official website Configure.
Installation dependency
npm install --save-dev babel-loader @babel/core
webpack.common.js
module.exports = {
  ...
  module: {
    rules: [
      ...
      {
        test: /\.xml$/i,
        use: ["xml-loader"],
      },
 +    {
 +      test: /\.js$/,
 +      exclude: /node_modules/,
 +      use: {
 +        loader: "babel-loader",
 +      },
 +    },
    ],
  },
  plugins: [
    new HtmlWebpackPlugin({
      template: path.join(__dirname, "./index.html"), // ./index.html is used as a template to generate dist / index html
    }),
  ],
};
Install @ Babel / preset env dependency
npm install @babel/preset-env --save-dev
Create Babel config. JSON file
{
  "presets": ["@babel/preset-env"]
}
Then run npm run dev to start writing code with the new syntax.
react support
After configuring babel, it is not troublesome to configure react, because babel has the ability to convert jsx syntax into js. Therefore, we only need to install the core library of react and modify the entry file, and then modify the configuration of babel to support jsx syntax, so we can write react in the project.
Project structure change
  webpack-demo
  |- package.json
  |- package-lock.json
  |- /dist
    |- main.js
    |- main.js.LICENSE.txt
  |- /src
    |- icon.png
    |- index.less
-   |- index.js
+   |- index.jsx
  |- postcss.config.js
  |- .browserslistrc
  |- index.html
  |- webpack.common.js
  |- webpack.dev.js
  |- webpack.build.js
Install react dependencies
npm install --save react react-dom
src/index.jsx
import React from 'react';
import ReactDOM from 'react-dom';
import './index.less';

const App = () => {
  return <div>App134</div>;
};

ReactDOM.render(<App />, document.getElementById("root"));
index.html adds the root node, which enables the dom generated by react to be mounted on the div with the id of root.
<!DOCTYPE html>
<html>
  <head>
    <meta charset="utf-8" />
    <title>Getting Started</title>
  </head>
  <body>
+    <div id="root"></div>
  </body>
</html>
Install the babel plug-in so that the jsx file of react can be processed
npm install --save-dev @babel/preset-react
babel.config.json, add the preset set @ Babel / preset react of react.
{
-  "presets": ["@babel/preset-env"]
+  "presets": ["@babel/preset-env", "@babel/preset-react"]
}
webpack.common.js, modify the entry and the file format matched by the loader.
module.exports = {
-  entry: "./src/index.js", // Package the entry of the file, and webpack will analyze the dependency structure of the whole project from this file
+  entry: "./src/index.jsx", // Package the entry of the file, and webpack will analyze the dependency structure of the whole project from this file
  ...
  module: {
    rules: [
      ...
      {
-       test: /\.js$/,
+       test: /\.(js|jsx)$/,
        exclude: /node_modules/,
        use: {
          loader: "babel-loader",
        },
      },
    ],
  },
  ...
};
Then run npm run dev, and the jsx file is successfully parsed.
Support ts
The idea of supporting TS is also very simple, because ts can be transformed into js through babel, and so can tsx. Therefore, we only need to support ts/tsx on the existing babel settings, so we can write ts/tsx files.
peoject, index. Under src The JSX file was renamed index Tsx is enough.
  webpack-demo
  |- package.json
  |- package-lock.json
  |- /dist
    |- main.js
    |- main.js.LICENSE.txt
  |- /src
    |- icon.png
    |- index.less
-   |- index.jsx
+   |- index.tsx
  |- postcss.config.js
  |- .browserslistrc
  |- index.html
  |- webpack.common.js
  |- webpack.dev.js
  |- webpack.build.js
Installation dependency
npm install --save-dev @babel/preset-typescript
webpack.common.js
module.exports = {
  output: {
    filename: "main.js", // Output file name
    path: path.resolve(__dirname, "dist"), // Output folder
  },
+  resolve: {
+    extensions: [".ts", ".tsx", ".js", ".json"],
+  },
  module: {
    rules: [
      ...
      {
        test: /\.xml$/i,
        use: ["xml-loader"],
      },
      {
-       test: /\.(js|jsx)$/,
+       test: /\.(ts|tsx)$/,
        exclude: /node_modules/,
        use: {
          loader: "babel-loader",
        },
      },
    ],
  },
  ...
};
Add the tsconfig configuration file. If you need more configurations, you can refer to this.
{
  "compilerOptions": {
      "outDir": "./dist/",
      "sourceMap": true,
      "noImplicitAny": true,
      "esModuleInterop": true,
      "module": "commonjs",
      "target": "es5",
      "noUnusedLocals": true,
      "jsx": "react"
  },
  "include": [
      "./src/**/*"
  ]
}
Note: the editor opens Src / index You can see an error in the TSX file.
Could not find a declaration file for module 'react'. '/Users/*********/Desktop/study/webpack-demo/node_modules/react/index.js' implicitly has an 'any' type.
  Try `npm i --save-dev @types/react` if it exists or add a new declaration (.d.ts) file containing `declare module 'react';`ts(7016)
Here is the declaration file that prompts you to install the react library, that is @ types/react. We just need to install it according to the above declaration. Execute NPM I -- save dev @ types/react in the terminal. Other similar error reports are handled in the same way.
So far, the support environment of ts has been configured. Run it and try it.
By now, a simple webpack environment has been configured. Of course, this is far from enough. There are still some configurations to continue, such as:
- Construction of jest unit test environment
- Alias alias unification
- eslint,stylelint syntax configuration
- . pretierrc style configuration
- husky triggers the repair and verification of submitted files in the lint staged period
- mock.js environment construction
- webpack performance optimization part (construction, development, output, etc.)
wait
We will continue to improve these in the future. I hope you can comment directly on questions you don't understand, or it's better to mention issue. All submitted records will be placed on git. Follow the whole construction process. I hope I can help you. Welcome to star, comment.