This article is shared from Huawei cloud community< vue realizes uploading pictures and previewing effects >The night of the northern lights.
I I don't have much to say. Let's see the effect first:
Hello, (๑╹◡╹) ノ "this is the effect of uploading pictures when I visited station b. I thought I could make one myself, because the original author was written in native js, so I might as well write it in vue. Of course, it's a small thing. It's good to directly reference vue in HTML files. The detailed steps are as follows~
II Detailed implementation steps:
1. Define the basic label first:
Regardless of the vue instruction in the tag, define the basic HTML tag first.
 <div id="app">
         <div class="upload">
           <input type="file" id="file" multiple @change="upload">
         </div>
        <ul class="view">
            <li>
                <img src="./img/52.jpg">
                <div class="delect" title="Can't delete me" @click="noDelect">×</div>
            </li>
            <li v-for="(item,index) in list" :key="index" >
                <img :src="item">
                <div class="delect" @click="delect(index)">×</div>
            </li>
        </ul>
    </div>
. upload is the upload picture box, in which there is a label with input type of file;
. view is a large box for pictures. Each small li is a picture. By default, there is a picture, and another small li is for v-for rendering;
Delete is the delete picture button;
2. Start defining basic css styles:
This is a global and underlying box style.
 *{
            margin: 0;
            padding: 0;
            box-sizing: border-box;
        }
        #app{
            width: 900px;
            background-color: rgb(241, 241, 241);
            margin: 50px auto;
        }
3. .view style:
   .view{
           display: flex;
           justify-content: space-around;
           flex-wrap: wrap;
           align-items: space-around;
        }
display: flex; flex layout;
justify-content: space-around; The spindle is aligned with each sub item interval.
flex-warp: warp; Line feed.
Align items: space around: align every sub item of the cross axis.
4. Picture Style:
 .view > li{
            width: 200px;
            height: 120px;
            background-color: rgba(54, 194, 35,0.1);
            list-style: none;
            margin: 20px;
            position: relative;
        }
        .view > li > img{
            width: 100%;
            height: 100%;
            object-fit: cover;
        }
object-fit: cover; The picture maintains its original scale and does not stretch.
5. . Style of deldect button:
 .delect{
            position: absolute;
            right: 0;
            top: 0;
             width: 20px;
             height: 20px;
             text-align: center;
             line-height: 20px;
             font-size: 15px;
             background-color: rgba(255, 255, 255,0.5);
             user-select: none;
             cursor: pointer;
             opacity: 0;
        }
        .delect:hover{

            background-color: rgba(31, 31, 31, 0.5);
             color: white;
        }
        .view>li:hover .delect{
            opacity: 1;
        }
user-select: none; Text cannot be selected;
opacity: 0; Transparency;
6. Change the style of the input tag:
Put a div on the input tag, make the input tag transparent, and then set the desired style for the Div. You can set a double pseudo class element for div, filled with text and style.
 .upload{
            width: 80px;
            height: 20px;
            background-color: rgba(135, 206, 235,0.2);
            border: 1px dashed black;
            border-radius: 5px;
            position: relative;

        }
        .upload:hover{
            background-color: rgba(135, 206, 235,1);
        }
        .upload::before{
            position: absolute;
            top: 0;
            left: 0;
            right: 0;
            bottom: 0;
            content: 'Upload pictures';
            font-size: 13px;
            text-align: center;
            font-family: 'fangsong';
            line-height: 20px;
            user-select: none;
        }
        #file{
            width: 100%;
            height: 100%;
            opacity: 0;
        }
7. Introduce vue and declare vue instance objects to our single page:
 <script src="https://cdn.jsdelivr.net/npm/vue/dist/vue.js"></script>
    <script>
          var app = new Vue({
              el:"#app",
              data: {},
              methods: {}
          })
    </script>
8. Bind a change event to the input tag and declare a list array:
The list array will store the address of each graph.
<input type="file" id="file" multiple @change="upload">
data: {
            list:[]
        },
9. Define the upload method to store all the selected picture addresses in the list array:
The upload function is declared in methods: {}.
upload(e){
//e.target refers to the element in the area clicked by the mouse when the event is executed, so it is the label of input,
// You can output e.target Files. The files object holds the information of all the selected pictures.
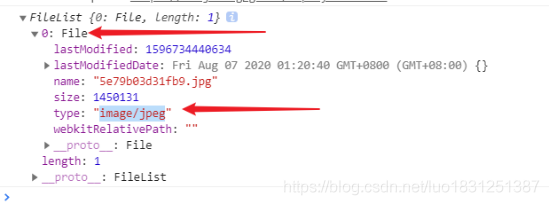
console.log(e.target.files)
//------------------------------------------------------
// In that case, loop the files object and use the for of loop,
for(let item of e.target.files){
//Regular expression to judge whether the type attribute of each element is in the form of a picture, as shown in the figure
if (!/image\/\w+/.test(item.type)) {
// Tips can only be pictures, return
alert("Only pictures can be selected");
return;
}
// Save the current this, which is the vue instance
var _this = this;
// Create a FileReader() object with a readAsDataURL method inside
let reader = new FileReader();
// The readAsDataURL method can convert the uploaded image format to base64, and then store it in the image path,
//In this way, you can upload pictures anywhere on the computer
reader.readAsDataURL(item);
//Triggered when the file read completes successfully
reader.addEventListener('load',function(){
// reader.result returns the contents of the file.
//This property is valid only after the read operation is completed. The format of the returned data depends on which read method is used to perform the read operation.
//Add this file to the array, that is, the content of the image
_this.list.push(this.result)
})
}
//------------------------------------------------------------
},
10. The page displays each picture of the array:
           <li v-for="(item,index) in list" :key="index" >
                <img :src="item">
                <div class="delect" @click="delect(index)">×</div>
            </li>
Bind a v-for loop and a list array to the small li. Each element is actually an address, which is bound to the src attribute of the picture.
Index is to set an index value for each element of the array. It can be understood as an array subscript.
11. Define the method of deleting pictures:
First bind a click event to the box to be deleted, and pass in the index value to know which picture is clicked:
<div class="delect" @click="delect(index)">×</div>
Use the splice method to delete the corresponding data in the list array.
       delect(index){
                     console.log(index);
                     this.list.splice(index,1);
                 },
                 // This is the default picture method. The pop-up default picture cannot be deleted
                 noDelect(){
                     alert('The default picture cannot be deleted.')
                 }
              }
III Source code sharing:
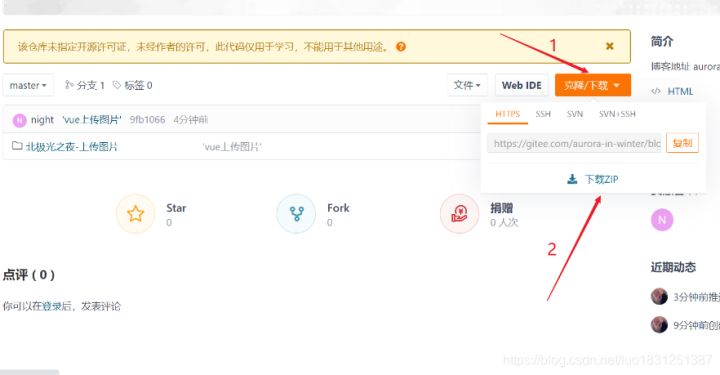
The download address is as follows: https://gitee.com/aurora-in-winter/blog/tree/master/
Click follow to learn about Huawei's new cloud technology for the first time~