catalogue
- Download Anaconda
- install
- Using Anaconda
- Configure jupyter to support remote access
- Configure jupyter to use password access
- Running jupyter in the background
preface
More than three people have reported to me that there is a problem with using the online tutorial Anaconda. Some can't install it, and some can't install it directly. Their yum commands can't be used, and the linux server is charged. To this end, I write you a simple installation tutorial to avoid the pit you may step on.
1. Download Anaconda
Tsinghua source: https://mirrors.tuna.tsinghua.edu.cn/anaconda/archive
Official website: https://repo.anaconda.com/archive/
After countless times of practice, it has been proved that Python 3.6 is the most stable. In addition, my linux server is 64 bit. In order to achieve faster performance, I chose to download 64 bit, so I finally downloaded it directly on the linux server through the following command:
wget https://mirrors.tuna.tsinghua.edu.cn/anaconda/archive/Anaconda3-5.2.0-Linux-x86_64.sh
2. Installation
Execution:
sh Anaconda3-5.2.0-Linux-x86_64.sh
 Please, press ENTER to continue
[root@VM_0_9_centos ~]# sh Anaconda3-5.2.0-Linux-x86_64.sh

Welcome to Anaconda3 5.2.0

In order to continue the installation process, please review the license
agreement.
Please, press ENTER to continue
>>>
===================================
Anaconda End User License Agreement
===================================
...
Enter directly, then press q.
Ask whether you agree to the agreement and fill in yes.
Do you accept the license terms? [yes|no]
[no] >>> yes
Select the installation location and press enter to install it in the current path. I choose to install it in / opt/anaconda3 directory.
Anaconda3 will now be installed into this location:
/root/anaconda3

  - Press ENTER to confirm the location
  - Press CTRL-C to abort the installation
  - Or specify a different location below

[/root/anaconda3] >>> /opt/anaconda3
PREFIX=/opt/anaconda3

installing: python-3.6.5-hc3d631a_2 ...
Python 3.6.5 :: Anaconda, Inc.
installing: blas-1.0-mkl ...
installing: ca-certificates-2018.03.07-0 ...
installing: conda-env-2.6.0-h36134e3_1 ...
installing: intel-openmp-2018.0.0-8 ...
...
installing: seaborn-0.8.1-py36hfad7ec4_0 ...
installing: anaconda-5.2.0-py36_3 ...
installation finished.
After a few minutes of waiting, the main program installation is completed. Ask whether to add Anaconda3 to the environment variable. Press enter directly to indicate no and do not add it.
Do you wish the installer to prepend the Anaconda3 install location
to PATH in your /root/.bashrc ? [yes|no]
[no] >>>
You may wish to edit your .bashrc to prepend the Anaconda3 install location to PATH:

export PATH=/opt/anaconda3/bin:$PATH

Thank you for installing Anaconda3!
Then ask whether VSCode is installed, fill in no and enter, indicating that it is not installed.
Do you wish to proceed with the installation of Microsoft VSCode? [yes|no]
>>> no
At this point, the installer has finished, and then we execute:
echo ". /opt/anaconda3/etc/profile.d/conda.sh" >> ~/.bashrc
sudo ln -s /opt/anaconda3/etc/profile.d/conda.sh /etc/profile.d/conda.sh
Note: / opt/anaconda3 change to the location you installed.
3. Use Anaconda
After exiting the shell, log in again, and then you can use anaconda.
Access environment: conda activate
 Exit environment: conda deactivate
[root@VM_0_9_centos ~]# conda activate
(base) [root@VM_0_9_centos ~]# python
Python 3.6.5 |Anaconda, Inc.| (default, Apr 29 2018, 16:14:56)
[GCC 7.2.0] on linux
Type "help", "copyright", "credits" or "license" for more information.
>>> exit()
(base) [root@VM_0_9_centos ~]# conda deactivate
[root@VM_0_9_centos ~]# python
Python 2.7.5 (default, Jun 20 2019, 20:27:34)
[GCC 4.8.5 20150623 (Red Hat 4.8.5-36)] on linux2
Type "help", "copyright", "credits" or "license" for more information.
>>> exit()
[root@VM_0_9_centos ~]#
4. Configure jupyter to support remote access
Generate jupyter default configuration:
jupyter notebook --generate-config

(base) [root@VM_0_9_centos ipython]# jupyter notebook --generate-config
Writing default config to: /root/.jupyter/jupyter_notebook_config.py
Modify configuration:
(base) [root@VM_0_9_centos ipython]# vi ~/.jupyter/jupyter_notebook_config.py
Uncomment c.NotebookApp.ip='localhost '. And change it to c.NotebookApp.ip = '*'.
Run jupyter:
jupyter notebook --allow-root
The effects are as follows:
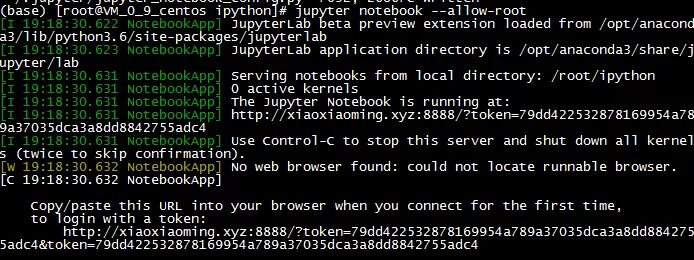
Then successfully access the jupyter on the remote host locally:
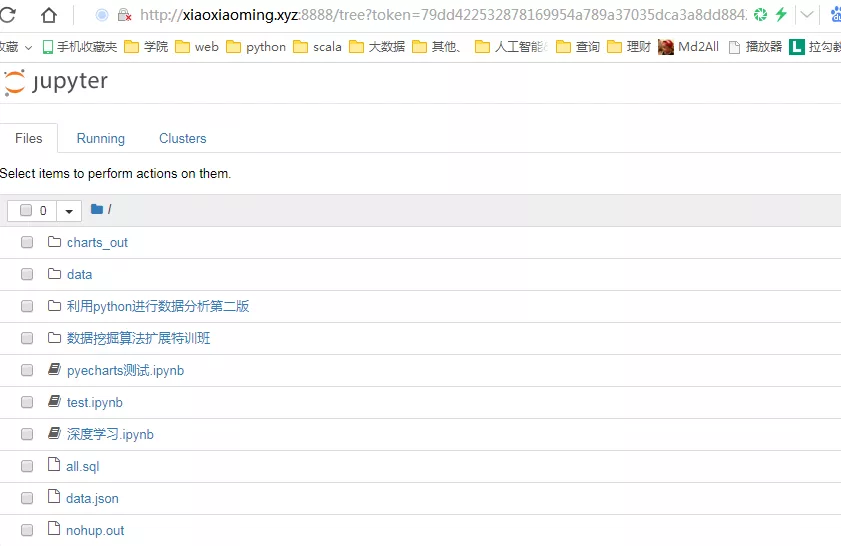
The current target of jupyter depends on the directory in which the command is executed.
5. Configure jupyter to access with password
The password to be configured is processed using the passwd function.
(base) [root@VM_0_9_centos bak]# python
Python 3.6.5 |Anaconda, Inc.| (default, Apr 29 2018, 16:14:56)
[GCC 7.2.0] on linux
Type "help", "copyright", "credits" or "license" for more information.
>>> from notebook.auth import passwd
>>> passwd()
Enter password:
Verify password:
'sha1:13c0e9e600be:b1caae19615389900ba30f072caf1c5f4dd388b1'
>>>
The above input of Enter password and Verify password will not be recalled. Enter the password you need to configure twice and press enter to get sha1 code.
For example, if my configured password is 123456, the sha1 code is:
sha1:13c0e9e600be:b1caae19615389900ba30f072caf1c5f4dd388b1
Edit the next jupyter configuration:
vi ~/.jupyter/jupyter_notebook_config.py
Uncomment c.NotebookApp.password = ''. Replace with:
c.NotebookApp.password = 'sha1:13c0e9e600be:b1caae19615389900ba30f072caf1c5f4dd388b1'
Other configurations:
c.NotebookApp.allow_root = True : root You do not need to add--allow-root parameter

c.NotebookApp.open_browser = False : Starting does not open the browser by default
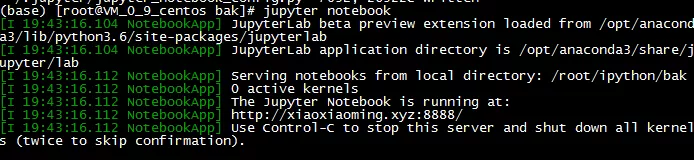
Run jupyter again:
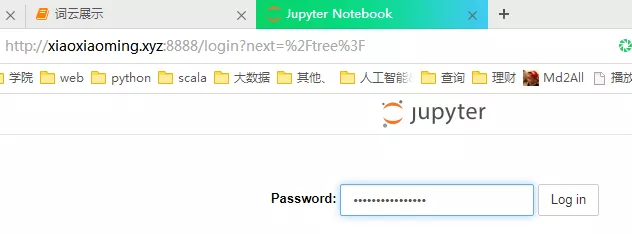
To access jupyter again, you need to enter the password:
6. Run jupyter in the background
Let jupyter run in the background even if the shell is closed.
nohup jupyter notebook > jupyter.log 2>&1 &
Close the jupyter running in the background.
(base) [root@VM_0_9_centos bak]# ps -ef|grep jupyter
root      3646 28946  1 19:47 pts/1    00:00:00 /opt/anaconda3/bin/python /opt/anaconda3/bin/jupyter-notebook
root      3771 28946  0 19:48 pts/1    00:00:00 grep --color=auto jupyter
(base) [root@VM_0_9_centos bak]# kill 3646
(base) [root@VM_0_9_centos bak]# ps -ef|grep jupyter
root      3861 28946  0 19:48 pts/1    00:00:00 grep --color=auto jupyter