Local deployment project tutorial
However, many small partners will not deploy the program to the server and arrange:
For details, see the video tutorial:
https://www.bilibili.com/video/BV1Jr4y1P7pf?spm_id_from=333.999.0.0

1, Import centos7 virtual machine:
Open VMWare, click "open virtual machine", select centos7.ova, and then select the storage path:

Click Import:
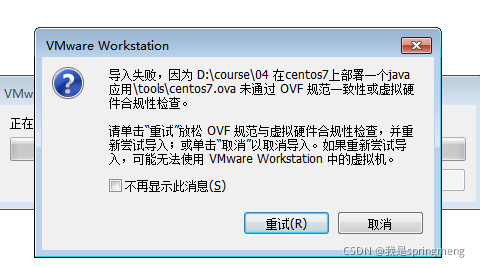
Select "don't show this message again" and click the "retry" button:
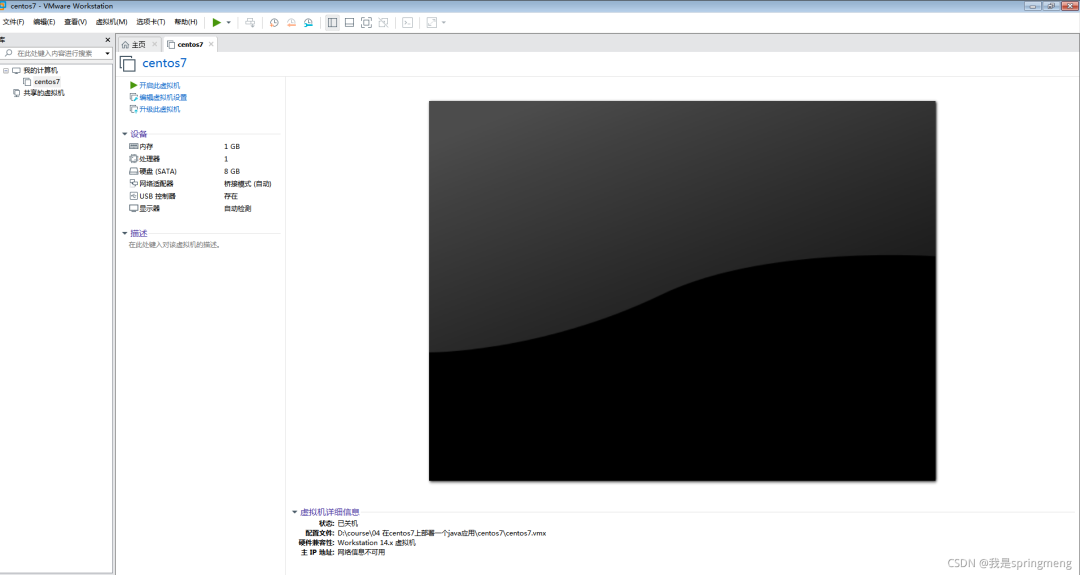
Click "Edit virtual machine settings", modify processor, memory, hard disk and other information, and start.
Press Ctrl+Alt to switch to windows.
After successful startup, enter the account root password 123456 to log in.
2, Configure IP address:
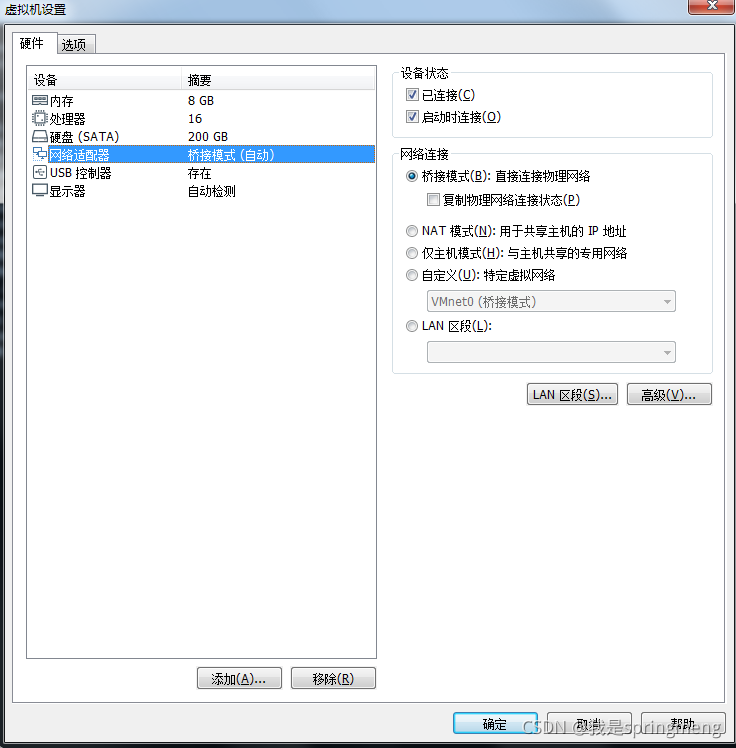
First set the network connection mode in VMWare as bridge mode:
There are two main methods for CentOS 7 to obtain IP addresses: 1. Dynamically obtain IP addresses; 2: Set the static IP address.
1. Get ip dynamically (if your router has DHCP enabled)
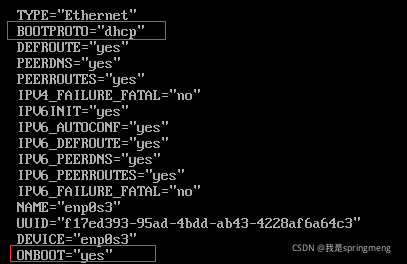
Modify the network card configuration file VI / etc / sysconfig / network scripts / ifcfg-enp0s3 (the last one is the network card name)

To dynamically obtain the IP address, you need to modify two places
(1)bootproto="dhcp"
(2)onboot="yes"
After modification, restart the network service to systemctl restart network
[root@mini ~]# systemctl restart network[root@mini ~]#
In this way, the IP address can be set dynamically. At this time, check the ip addr to see that the IP address has been obtained and you can surf the Internet (ping Baidu)
2. Set fixed ip
BOOTPROTO="static"
IPADDR = "192.168.0.121" # the fixed IP you want to set can theoretically be between 192.168.1.4 and 192.168.1.253. Please verify by yourself;
NETMASK = "255.255.255.0" # subnet mask, which does not need to be modified;
GATEWAY = "192.168.0.1" # GATEWAY. Here is the IP address of VMware GATEWAY. The IP you want to record earlier.
DNS1 = "114.114.114.114" # this is the domestic DNS address, which is fixed;
3, Various pits:
1. systemctl restart network error
Job for network.service failed. See 'systemctl status network.service' and 'journalctl -xn' for details.
2. ping failed Baidu
4, Solution:
1. Exclude ip conflicts
ping the ip address of the host to see if it already exists.
2. Delete redundant network card profile
Delete the redundant network card configuration file beginning with ifcfg-e
rm -f /etc/sysconfig/network-scripts/ifcfg-eXXX
3. HWADDR error, found the correct HWADDR
Enter ip addr to find HWADDR
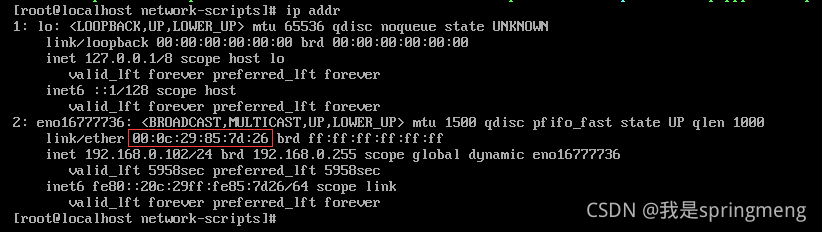
Enter the CD / etc / sysconfig / network scripts directory, edit the corresponding VIM ifcfg ensxx, set HWADDR correctly, and restart service network restart
Or delete HWADDR.
00:0c:29:ad:24:51
4. Comment out or delete the DEVICE line in IFC ethxx
5. Change the NAME in ifcfg XXX to be consistent with the file NAME
5. Delete UUID of network card
6. Stop NetworkManager.service
Stop network management service
[root@localhost Desktop]# systemctl stop NetworkManager.service[root@localhost Desktop]# systemctl disable NetworkManager.serviceRemoved symlink /etc/systemd/system/multi-user.target.wants/NetworkManager.service.Removed symlink /etc/systemd/system/dbus-org.freedesktop.NetworkManager.service.Removed symlink /etc/systemd/system/dbus-org.freedesktop.nm-dispatcher.service.
Restart the network service
[root@localhost network-scripts]# service network restart

Restarting network (via systemctl): [ OK ]
7. Delete device rule profile
With or without this document, just delete it
rm -f /etc/udev/rules.d/70-persistent-net.rules
8. Open the virtual machine service for VMWare

9. Check whether the network adapter in the lower right corner of VMWare is connected. If not, connect it
10. Restart Dafa
If the above problems are not solved, there is one last move - restart to see if there are miracles!
5, Not anyway:
1. Using NAT mode
2. First, get the ip address dynamically
3. View current DNS
cat /etc/resolv.conf
4. Change to static ip
5. After updating the required software, you can change back to bridge mode again
6, Install JDK1.8 under CentOS7:
1. Check that the jdk is installed
Type the command java -version to view.
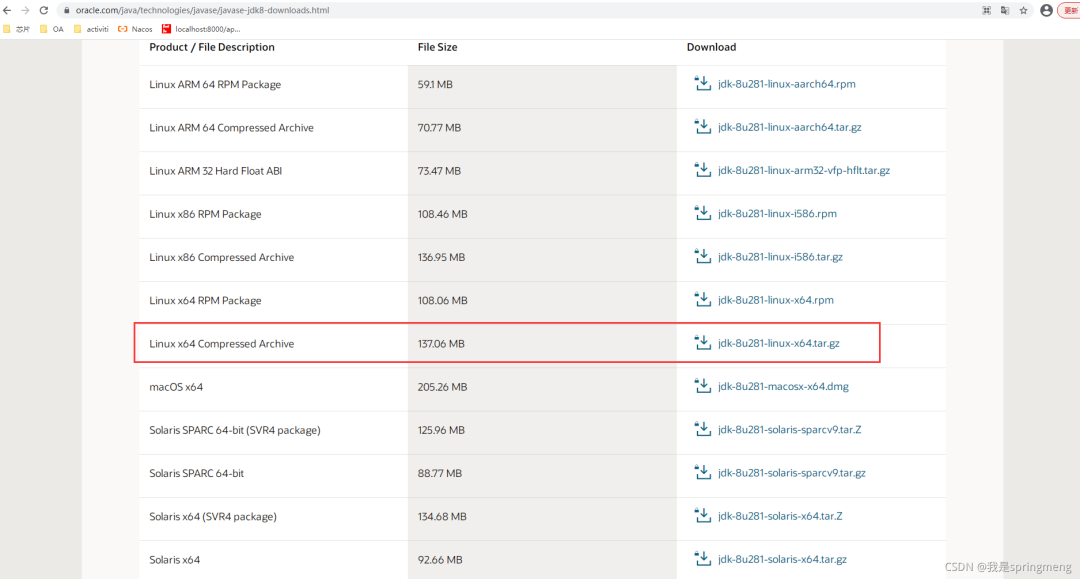
2. Download JDK
Download address https://www.oracle.com/java/technologies/javase/javase-jdk8-downloads.html
Pull down
3. Upload to centos
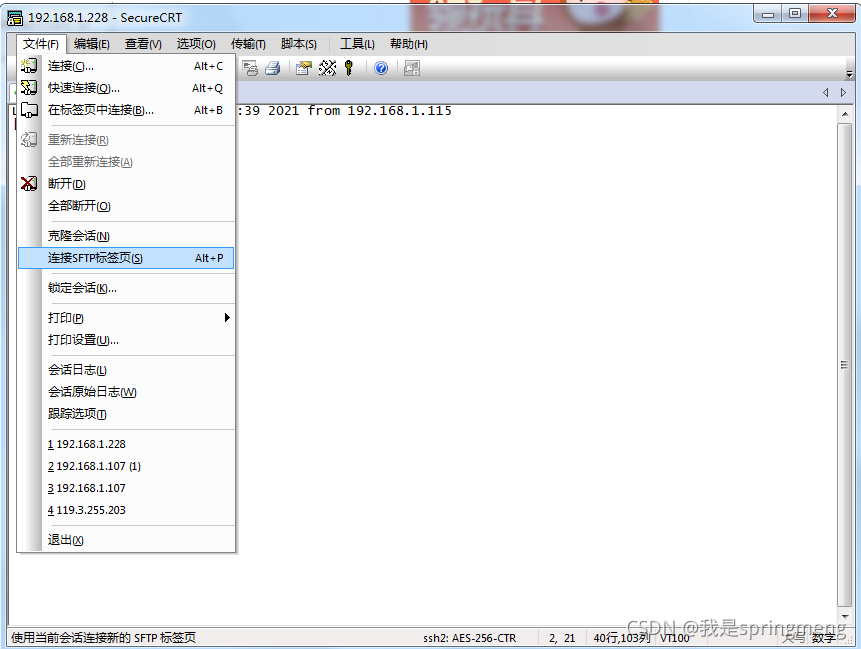
Upload the local d:/tmp/jdk-8u281-linux-x64.tar.gz to / usr and rename it java1.8:
Switch local directory to d:/tmp1
sftp>lcd d:/tmp1
Switch centos directory to / usr
sftp>cd /usr
View local directory
sftp> lpwdd:/tmp
View centos directory
sftp> pwd/usr
upload
sftp> put jdk-8u281-linux-x64.tar.gz
rename
sftp> mv jdk-8u281-linux-x64.tar.gz java1.8
4. Unzip and install JDK
Type the command cd /usr to the copied file, type the command tar -zxvf java1.8 to extract it, and extract a folder jdk1.8.0_281, enter the folder

5. Configure JDK environment variables
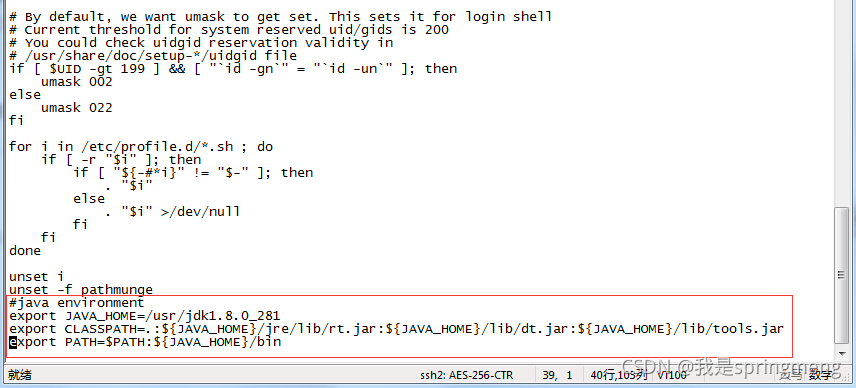
Type the command vi /etc/profile to modify the configuration file. Remember to modify it under root permission
Enter i to enter the editing state, then move the cursor to the last line and paste the following content, JAVA_HOME=/usr/jdk1.8.0_281 set it according to your own decompression directory
#java environmentexport JAVA_HOME=/usr/jdk1.8.0_281export CLASSPATH=.:J A V A H O M E / j r e / l i b / r t . j a r : {JAVA_HOME}/jre/lib/rt.jar:JAVAHOME/jre/lib/rt.jar:{JAVA_HOME}/lib/dt.jar:J A V A H O M E / l i b / t o o l s . j a r e x p o r t P A T H = {JAVA_HOME}/lib/tools.jar export PATH=JAVAHOME/lib/tools.jarexportPATH=PATH:${JAVA_HOME}/bin
The effects are as follows:
Click esc to enter the command mode and enter: wq save the modification information
Then type the command source /etc/profile to make the configuration file effective.
6. Test for successful installation
Type the command java -version to view.

7, To install mysql5.7 under CentOS 7:
1. Install wget
yum -y install wget
2. Download rpm package
sudo wget http://repo.mysql.com/yum/mysql-5.7-community/el/7/x86_64/mysql57-community-release-el7-10.noarch.rpmsudo rpm -ivh mysql57-community-release-el7-10.noarch.rpm
3. Install MySQL community server using yum or up2date
sudo yum -y install mysql-community-server
This step is time-consuming
4. Start mysql
sudo systemctl start mysqld
5. Set startup
sudo systemctl enable mysqld
6. Find initial password
Find the initial password in the / var/log/mysqld.log file
cat /var/log/mysqld.log
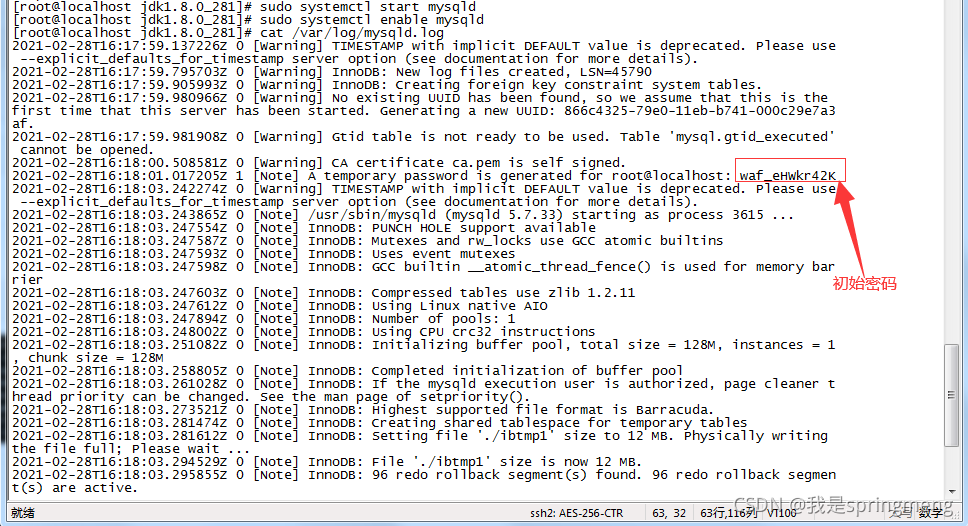
The initial password here is: waf_eHWkr42K
7. Log in to mysql
sudo mysql -uroot -p
Enter initial password: waf_eHWkr42K
8. Change password
ALTER USER 'root'@'localhost' IDENTIFIED BY '1qaz!QAZ';
The default rule of password strength is (at least 8 digits in length, including upper and lower case letters, numbers and special characters)
9. Set allow remote login
1. Execute authorization order
GRANT ALL PRIVILEGES ON *.* TO 'root'@'%' IDENTIFIED BY '1qaz!QAZ' WITH GRANT OPTION;
2. Exit the mysql console
exit
3. Open 3306 port
Turn on the firewall
sudo systemctl start firewalld.service
Permanently open 3306 ports
sudo firewall-cmd --add-port=3306/tcp --permanent
Reload
sudo firewall-cmd --reload
Turn off firewall
sudo systemctl stop firewalld.service
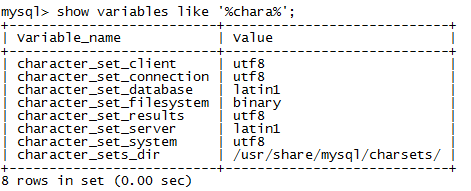
10. Set the default encoding to utf8
View the mysql code before modification
show variables like '%chara%';
1
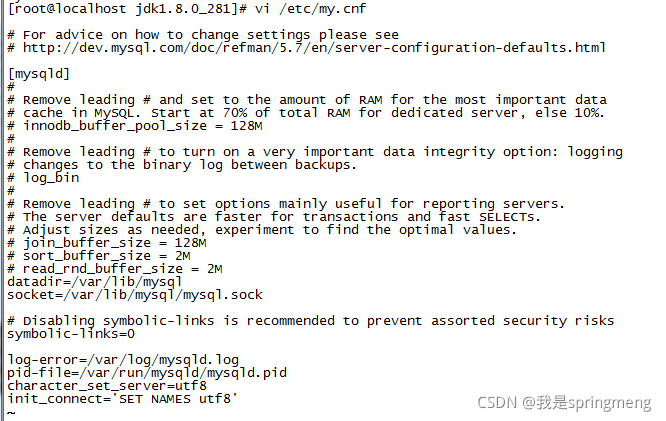
Modify the / etc/my.cnf file and add the following two lines
sudo vi /etc/my.cnf
character_set_server=utf8
init_connect='SET NAMES utf8'
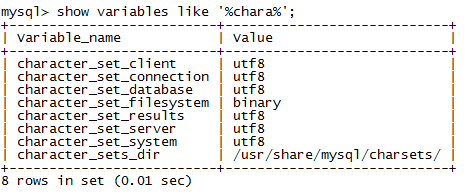
After modification, restart mysql
sudo systemctl restart mysqld
View the modified mysql code
11. Testing
Using navicat to connect to mysql
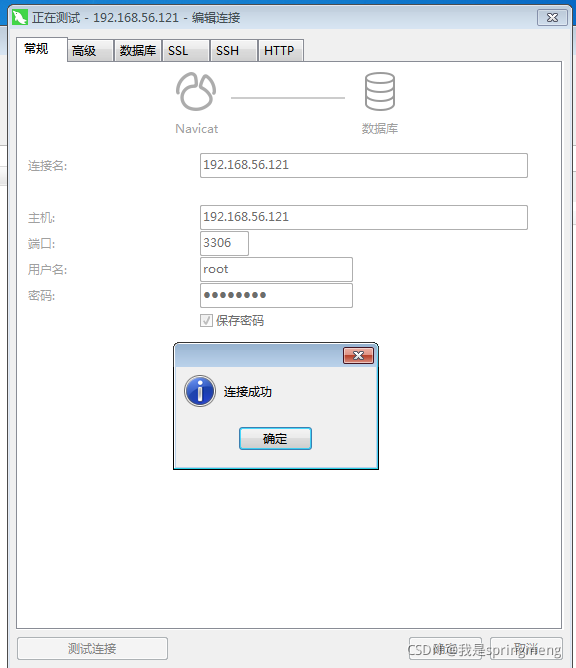
Data file location:/var/lib/mysql

Profile location:/etc/my.cnf

Log file location:/var/log/mysqld.log
8, centos7 enables the springboot project to start automatically:
1. Import database
Import mysql database.
2. Upload the packaged jar package file
Upload the jar package to / usr/local/project /.
Run java -jar springboot.jar
3. New service file
Edit a file with service as the suffix under the / etc/systemd/system / Directory:
cd /etc/systemd/systemvi java.service
The contents of the document are as follows:
[Unit]Description=javaAfter=syslog.target[Service]Type=simpleExecStart=/usr/jdk1.8.0_281/bin/java -jar /usr/local/project/springboot.jar[Install]WantedBy=multi-user.target
Where: / usr/jdk1.8.0_281 is the JDK installation path, and / usr/local/project/springboot.jar is the packaged jar package file.
4. Add execution permission
chmod +x /etc/systemd/system/java.service
5. Reload service
systemctl daemon-reload
6. Start the service and join the startup self startup
systemctl start java
systemctl enable java
ps -ef | grep "java"| grep -v grep
systemctl status java.service -l
9, Install Tomcat 8.5 under CentOS 7:
1. Download Tomcat 8.5
https://tomcat.apache.org/download-80.cgi
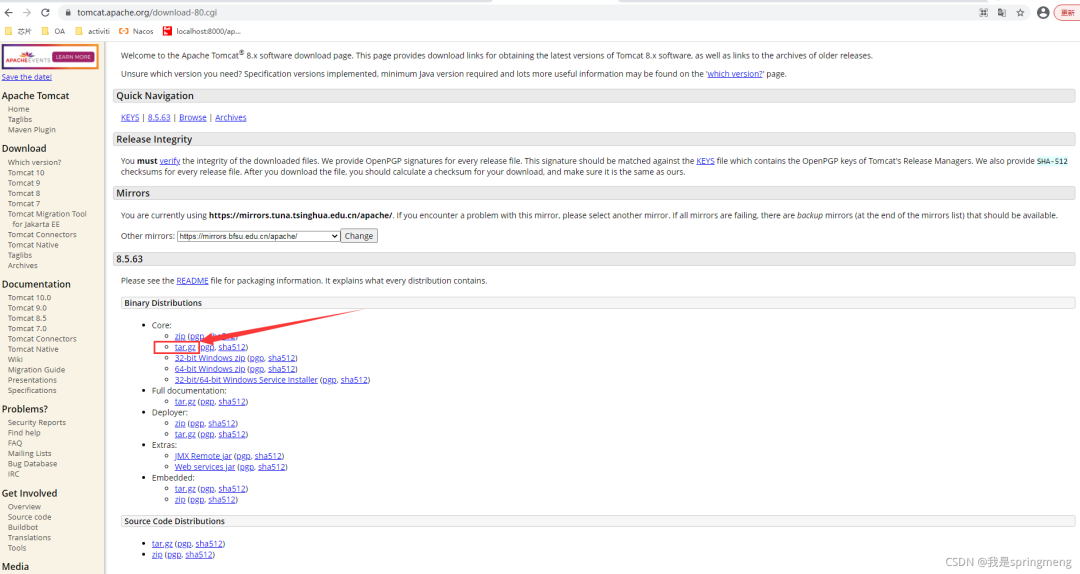
2. Upload the packaged jar package file and unzip it
Upload to / usr /.
tar -zxvf apache-tomcat-8.5.63.tar.gz
3. Add startup parameters to tomcat
A PID file tomcat.pid needs to be added in the root directory of Tomcat.
touch tomcat.pid
Under the tomcat/bin directory, add setenv.sh configuration, which will be called when catalina.sh starts, and configure Java memory parameters.
export CATALINA_HOME=/usr/apache-tomcat-8.5.63export CATALINA_BASE=/usr/apache-tomcat-8.5.63#add tomcat pidCATALINA_PID="$CATALINA_BASE/tomcat.pid"#add java optsJAVA_OPTS="-server -XX:PermSize=256M -XX:MaxPermSize=1024m -Xms512M -Xmx1024M -XX:MaxNewSize=256m"
4. New service file
Edit a file with service as the suffix under the / etc/systemd/system / Directory:
vi /etc/systemd/system/tomcat.service
The contents of the document are as follows:
[Unit]Description=TomcatAfter=syslog.target network.target remote-fs.target nss-lookup.target [Service]Type=forkingEnvironment="JAVA_HOME=/usr/jdk1.8.0_281"PIDFile=/usr/apache-tomcat-8.5.63/tomcat.pidExecStart=/usr/apache-tomcat-8.5.63/bin/startup.shExecReload=/bin/kill -s HUP $MAINPIDExecStop=/bin/kill -s QUIT $MAINPIDPrivateTmp=true [Install]WantedBy=multi-user.target
5. Add execution permission
chmod +x /etc/systemd/system/tomcat.service
6. Reload service
systemctl daemon-reload
7. Start the service and join the startup self startup
Direct start
systemctl start tomcat
chkconfig mysqld on
systemctl enable tomcat
View startup status
systemctl status tomcat.service
Out of Service
systemctl stop tomcat
Query tomcat process
ps -ef | grep "tomcat"| grep -v grep
If there are multiple Tomcats, copy them to different directories and use different ports. The tomcat.service file name can be different.
For example: tomcat1.service tomcat2.service tomcat3.service
8. Restart the server
Restart and try to access it.