I am xuetianyu, an FPGA enthusiast. My research direction is FPGA Architecture Exploration and SOC design.
Focus on official account [integrated circuit design course], pull you into "IC design exchange group".
1. Preface
It took nearly a week to realize a two-dimensional code recognition alone. In this article, I will introduce in detail the pit I have gone through during this period. The code is attached at the end of the article. If you are in urgent need, you can turn to the end directly
2. linux configuration
In order to realize this project, we should first solve the following three key points, which also wastes a lot of time
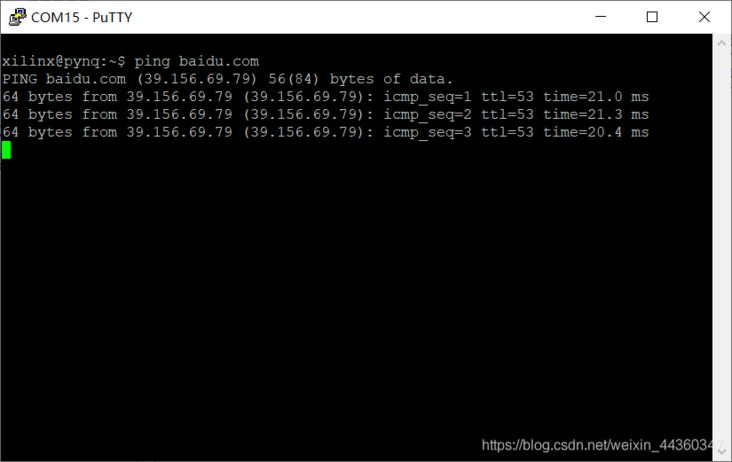
2.1 solving pynq networking
There are many online tutorials on pynq networking, but I've been doing it for a long time.
First, at home, I use
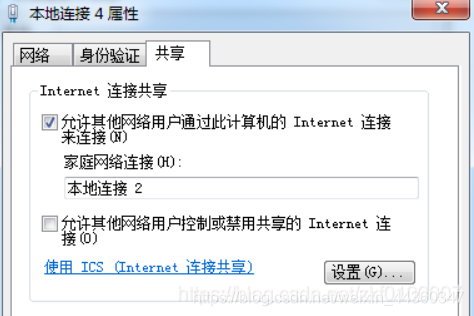
And then successfully ping the Internet
In school, this method can't be solved. I tried many methods on the Internet that can't be solved (maybe I'm too delicious). Finally, after re burning the image for several times, I found that connecting the network cable directly to the router in the dormitory is connected to the external network
For details on how to change the download source into an image source, please refer to other blogs
2.2 solution pyzbar Library Download
Download this recommended Library
pip3 install pyzbar
Pay attention to the installation path of this library. Enter it on the command line
pip3 show pyzbar
My is here:
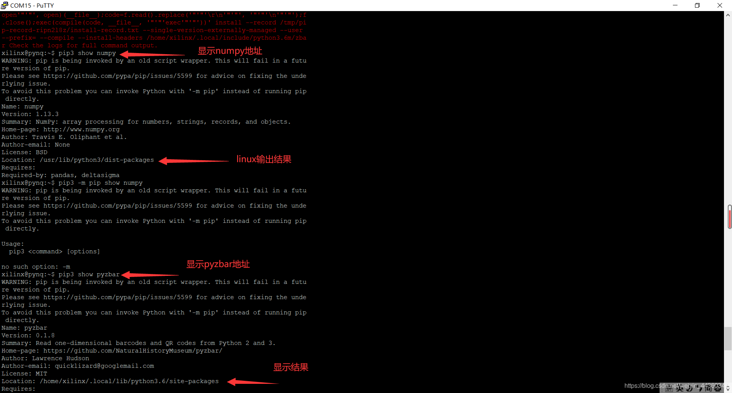
< center > figure 2.2.1 Location of pyzbar < / center >
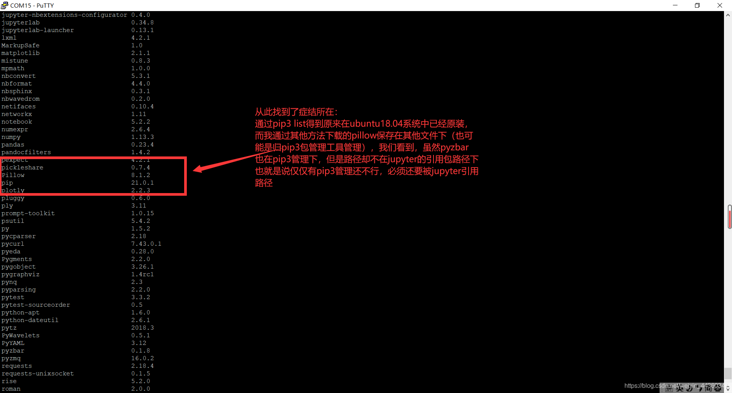
By the way, I use the following zbar package
sudo apt-get install python-zbar
Get it, why not use pip3, because the error is always reported when downloading pip3, even if it is
pip3 upgrade
No, it's not the pip3 version.
My linux image is v2 Version 3. I don't know if you use v2 Would it be better to be 5 or higher
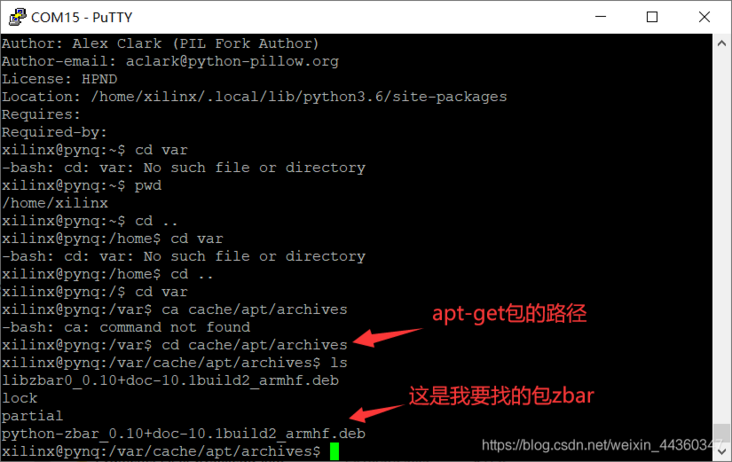
< center > figure 2.2.2 Location of ZBar < / center >
2.3 solve jupyter import library
2.3.1 first, explain the origin of the problem
I found that using
pip3 install pillow
PIL can be imported under jupyter, but pyzbar cannot be imported
It is also found that after inputting python3 on the command line, you can import pyzbar, but you can't import zbar
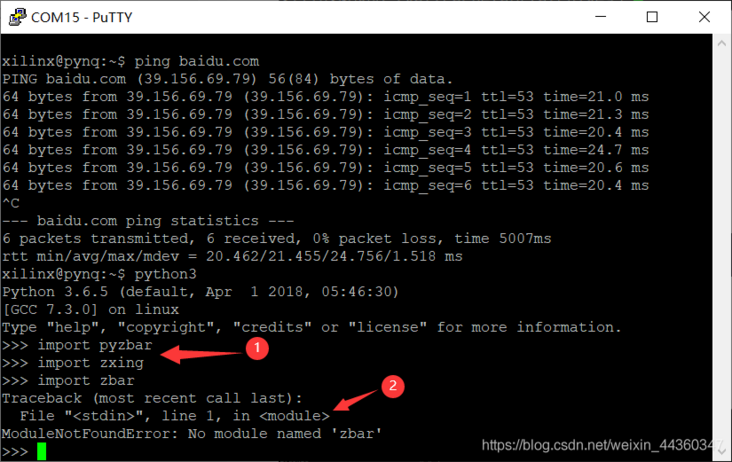
< center > figure 2.3.1 Python3 successfully imported pyzbar, but failed to import zbar < / center >
I found that I can't import pyzbar under the pyhton interpreter on the command line, but I can import zbar
This attracted my attention. Finally, I found that the original pyzbar from pip3 has a separate storage path. The same is true for apt get
As for why Python and python 3 cannot introduce the same package
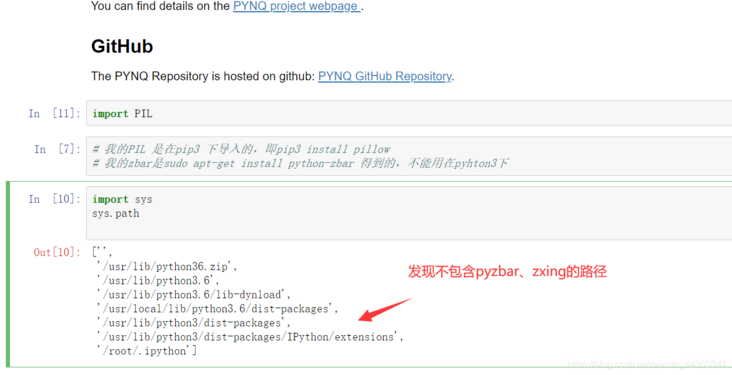
Then you have to
import sys
sys.path
Using statements to observe, it is found that the reference paths are inconsistent. I think I know the Crux:
< center > figure 2.3.2 A less smooth explanation < / center >
$\ color{#FF3030} {scarlet letter} $is not very smooth. The translation of adult words is:
jupyter is set to support the path to reference the storage pyzbar package
2.3.2 method 1:
< center > Modify environment variable < / center >
Description, the following is a reference:
Article source address:
https://blog.csdn.net/c20081052/article/details/79715132
There are three ways to set environment variables under Linux: one for the current terminal, one for the current user, and one for all users:
1: For current terminal:
In the current terminal, enter: export path = $path: < your path to join >
However, the above method is only applicable to the current terminal. Once the current terminal is closed or in another terminal, it is invalid.
export NDK_ROOT=/home/jiang/soft/Android-ndk-r8e
It can only be used in the current terminal.
2: For current user:
There is one in the user's home directory bashrc hidden file. You can add PATH settings to this file as follows:
$ gedit ~/.bashrc
Add:
export PATH=<Your path to join>:$PATH
If you want to join multiple paths, just:
export PATH=<Path 1 you want to join>:<Path 2 you want to join>: ...... :$PATH
Each path should be separated by a colon.
This will take effect every time you log in
The same is true for adding PYTHONPATH, which is shown in Add in bashrc
export PYTHONPATH=/home/zhao/setup/caffemaster/python:/home/zhao/setup/mypy:$PYTHONPATH
After saving, enter $source ~ / Bashrc makes environment variables take effect immediately
3: For all users:
$ sudo gedit /etc/profile
Add:
export PATH=<The path you want to join>:$PATH
That's it.
Terminal input: echo $PATH to view environment variables
Note that after modifying the environment variable, the first method will take effect immediately, and the second and third methods will take effect immediately. You can use source ~ / Bashrc or log out and log in again!
End of reference
Method ii.3:
< center > add the statement < / center > to the code
import sys
sys.path
sys.path.append('/home/xilinx/.local/lib/python3.6/site-packages')
sys.path is the search path to check the library of jupyter. You can check whether your jupyter includes the path of your package
Generally speaking, the failure of Library import is due to this reason - jupyter library path
This is the way to set the extra reference path:
sys.path.append('')Refer to this article:
https://www.cnblogs.com/mandy-study/p/7735801.html
3. Provide code
# Key identification code
barcodes = decode(image)
def decode (image,barcodes):

    # loop over the detected barcodes

    for barcode in barcodes:

        # extract the bounding box location of the barcode and draw the
        # bounding boxr surrounding the barcode on the image

        (x, y, w, h) = barcode.rect

        cv2.rectangle(image, (x, y),(x + w,y + h), (255, 0, 0), 5)

        # the barcode data is a bytes object so if we want to draw it on
        # our output image wre need to convert it to a string first
        barcodeData = barcode.data.decode("utf-8")

        barcodeType = barcode.type

        # draw the barcode data and barcode type on the image

        text ="{} ({})". format(barcodeData,barcodeType)

        cv2.putText(image,text,(x, y - 10), cv2.FONT_HERSHEY_SIMPLEX,.8, (255, 0, 0), 2)

        # print the barcode type and data to the terminal

        print("[INFO] Found {} barcode: {}".format(barcodeType,barcodeData))

    plt.figure(figsize=(10,10))

    plt.imshow(image)

    plt.show()

# Decoding barcodes

decode(image,barcodes)
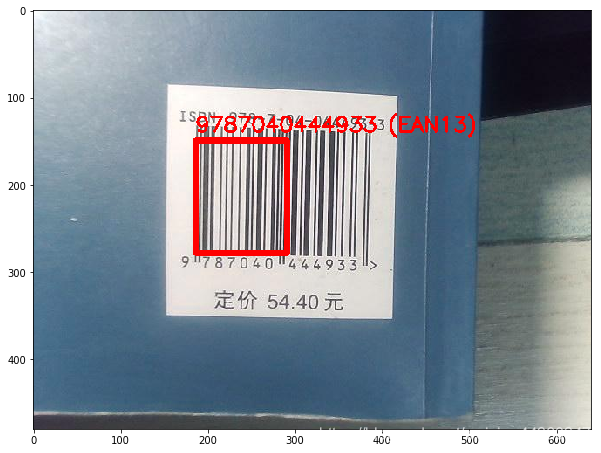
In the end, it was found that the frame didn't fit very well, which may be the problem of photos. But the recognition result is completely correct
See connection for complete code:
https://download.csdn.net/download/weixin_44360347/15816188
Open yes ipynb format.
- For more technical articles and learning materials, please pay attention to my official account: integrated circuit design course.
- Unified across the platform: [snowy fish]